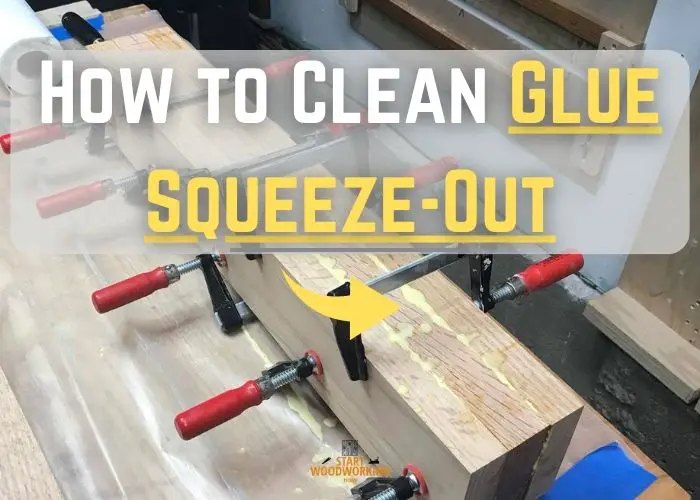
Clean Glue Squeeze Out Efficiently & Effortless
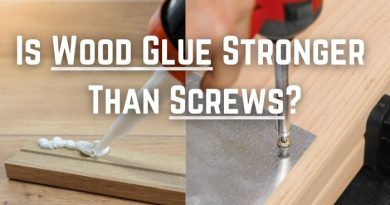
When working with wood glue in my projects, I often encounter the challenge of glue squeeze-out. This excess glue can mar the surface if not properly addressed, potentially ruining the aesthetic of a meticulously crafted piece. Understanding how to clean this effectively is essential for any woodworker looking to achieve a clean, professional finish.
Materials Needed:
- Sharp chisel (1/2″ or 1″ width recommended)
- Mallet or wood block
- Damp rag
- Denatured alcohol
Steps:
- Wait for Partial Setting: Allow the glue to partially set until it’s rubbery but not hard, which typically takes about 15-30 minutes depending on the type of glue and environmental conditions.
- Select the Right Chisel: Use a sharp woodworking chisel that is slightly wider than the glue bead to ensure clean removal.
- Position the Chisel: Hold the chisel flat against the wood surface with the bevel side facing up, angled slightly away from the wood to avoid digging into the surface.
- Controlled Pressure: Gently push the chisel forward using hand pressure only (no mallet) to slice off the glue bead. Work in sections if the bead is long.
- Clean the Chisel Blade: Frequently wipe the chisel blade on a damp cloth to remove glue residue and prevent it from spreading.
- Final Touches: After removing the bulk of the glue, if there’s any residue, gently scrape it off with the edge of the chisel or use fine-grit sandpaper to smooth the area.
- Inspect the Surface: Check the wood surface to ensure all glue has been removed and the area is clean.
- Finish as Desired: Proceed with any additional sanding, staining, or finishing as planned for your woodworking project.
Remove Wet Glue Squeeze-Out
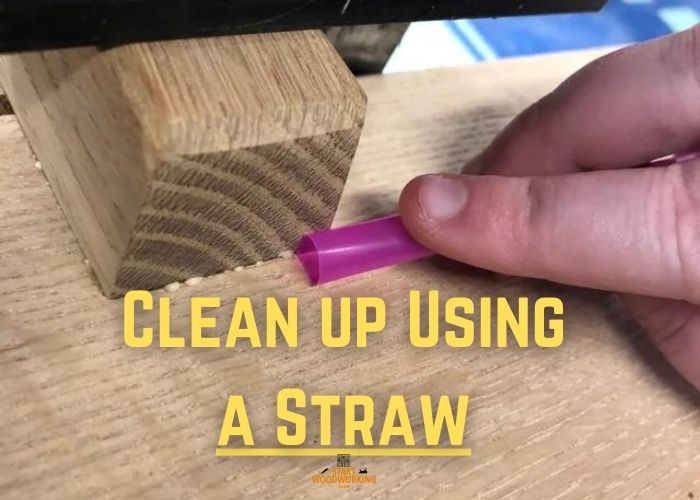
1. Plastic Straw
Step 1: Assess the Glue Squeeze-Out
Before starting, I take a moment to assess the amount and location of the glue squeeze-out. If it’s along a joint or in a corner, a plastic straw can be particularly effective due to its flexibility.
Step 2: Prepare the Straw
I select a standard plastic drinking straw, ensuring it’s clean and free of any bends or damage. For larger beads of glue, a wider straw like those used for bubble tea or smoothies can be more effective due to their larger diameter.
Step 3: Position the Straw
I press the end of the straw against the bead of squeeze-out, aligning it so that it’s slightly angled towards the glue. This helps scoop the glue into the straw rather than pushing it along the surface.
Step 4: Apply Pressure and Scrape
With gentle but firm pressure, I run the straw along the length of the glue bead. The straw’s edge cuts through the wet glue, capturing it inside the hollow of the straw. I find this method particularly useful for continuous beads of glue, as the straw can collect a significant amount before needing to be cleaned.
Step 5: Clean the Straw
After each pass, I inspect the straw and remove any accumulated glue. This can be done by pinching the straw and running my fingers along its length, pushing the glue out of the end. Alternatively, I can cut off the glue-filled section of the straw to reveal a clean edge for continued use.
Step 6: Repeat as Necessary
I repeat steps 3 through 5, working in sections if needed, until all the fresh glue squeeze-out has been removed. The straw conforms to the shape of the joint or corner, making it an ideal tool for this purpose.
Step 7: Final Cleanup
Once the majority of the glue is removed with the straw, I follow up with a damp cloth to wipe away any remaining residue. This ensures a clean, glue-free surface that’s ready for finishing.
Step 8: Dispose of the Straw Responsibly
After the cleanup is complete, I make sure to dispose of the used straw properly. Since plastic straws are not biodegradable, I consider environmental responsibility and opt for proper disposal. If the straw is still in good condition, I clean it thoroughly for potential reuse in future projects. Otherwise, I discard it in accordance with local recycling regulations, being mindful of the impact on the environment.
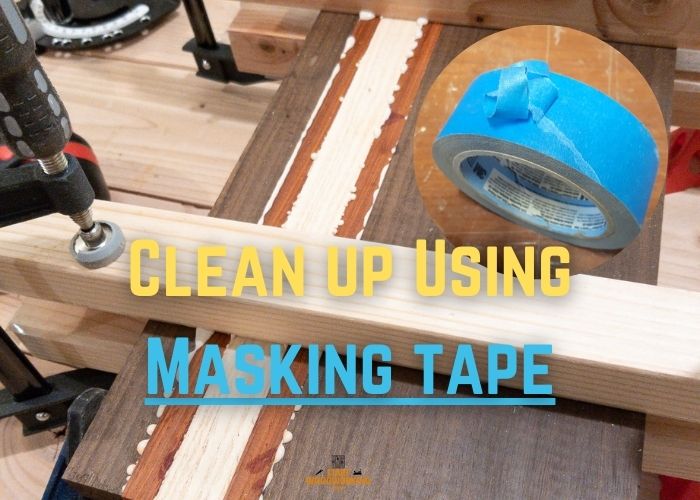
2. Masking tape
Step 1: Select the Right Masking Tape
I choose a masking tape that is easy to remove and doesn’t leave any residue. Painter’s tape is often ideal because it’s designed to peel away cleanly.
Step 2: Prepare the Wood Surfaces
Before applying the glue, I ensure the wood surfaces are clean and dust-free. Any debris under the tape could affect adhesion and make the tape less effective.
Step 3: Apply Tape to the Joint Area
I carefully apply strips of masking tape along the edges where the two pieces of wood will join. I overlap the edge slightly, covering the area where any squeeze-out is likely to occur. The tape should be pressed down firmly to prevent any glue from seeping underneath.
Step 4: Mark the Joint
If necessary, I mark the exact location of the joint on the tape with a pencil. This gives me a visual guide when applying glue and helps to ensure precision in the joinery.
Step 5: Apply the Glue
I apply glue to the joint as usual, being mindful not to over-apply, as this will reduce the amount of squeeze-out. However, I make sure there’s enough glue for a strong bond.
Step 6: Clamp the Pieces Together
After joining the wood pieces, I clamp them as required for the project. I wipe away any glue that squeezes out immediately with a clean, dry cloth.
Step 7: Wait for the Glue to Set
I let the glue set slightly but not fully dry. The timing can vary depending on the type of glue, but generally, I wait until the glue is tacky to the touch.
Step 8: Remove the Tape
Once the glue is tacky, I carefully peel away the tape from the wood. The squeezed-out glue should come off with the tape, leaving a clean edge. If the glue is too dry, it can tear and leave residues, so timing is key.
Step 9: Clean Up Any Residue
If any glue remains after removing the tape, I use a chisel or scraper to gently remove it. I’m always careful not to damage the wood surface.
Step 10: Inspect the Joint
After the tape is removed and any remaining glue is cleaned up, I take a close look at the joint to make sure it’s completely clean. I check for any glue residue that might have been left behind or any areas where the tape might not have sealed properly.
Step 11: Touch-Up if Necessary
If I find any spots where glue has seeped under the tape or if there’s a slight residue, I address these immediately. For any small amounts of residue, I might use a damp cloth if the glue is still a bit tacky, or I’ll use a cabinet scraper or sandpaper for dried glue, being cautious to avoid scratching the wood.
Step 12: Allow the Glue to Cure
I let the glue fully cure according to the manufacturer’s instructions. This ensures the joint is strong and stable before moving on to finishing steps.
Step 13: Final Inspection and Sanding
Once the glue is fully cured, I do a final inspection of the joint. If everything looks good, I proceed with sanding the area to ensure it’s ready for finishing. I sand with progressively finer grits to achieve a smooth, even surface.
Step 14: Apply Finish
With the wood surface clean and prepared, I apply the desired finish to the project. The clean joints ensure that the finish will be even and professional-looking.
Remove Dried Glue Squeeze-Out
1. Card Scraper

Step 1: Wait for the Right Moment
I wait until the glue becomes rubbery but isn’t fully cured. This is typically when it’s partially set and can be easily rolled or peeled away without smearing into the wood grain.
Step 2: Choose the Right Card Scraper
I select a card scraper that’s appropriate for the workpiece. The scraper should have a smooth, refined edge to avoid damaging the wood surface. I usually have a couple of scrapers on hand, each prepared with a slightly different edge profile to suit various tasks.
For cleaning small joints, I may use a 1-2 inch scraper. For larger surfaces, I’ll select a 4 inch scraper or larger. I prefer a scraper with a comfortable handle and a perfectly squared 90-degree edge.
Step 3: Prepare the Scraper’s Edge
Before using it, I hone and burnish the edge of the card scraper to create a burr. This sharp cutting edge helps slice through the glue cleanly. I use a fine file and burnisher tool to prepare the edge properly.
Step 4: Position and Angle the Card Scraper
I position the card scraper so the sharpened edge is tilted slightly toward the glue squeeze-out. Typically around 15-20 degrees works well. Angling it allows me to apply even pressure as I scrape.
Step 5: Apply Medium Pressure to Scrape
With the scraper held at an angle, I apply gentle but firm downward pressure as I push and pull it along the length of the glue bead. I let the sharp edge of the tool do the work in slicing through the glue.
Step 6: Clear the Scraper Frequently
I frequently stop to wipe away any glue that accumulates on the edge of the scraper. Allowing too much glue to build up reduces the scraper’s effectiveness. I wipe it on a rag to keep the edge clear.
Step 7: Clean From Multiple Angles
To ensure I remove all the squeeze-out, I repeat the scraping from different angles. I work across the wood grain, diagonal to the joint, and along the joint itself. The various angles allow me to see and scrape any glue remnants.
I scrape in a direction that’s either perpendicular or slightly skewed to the glue line. This helps to lift the glue effectively without marring the wood.
Step 8: Clear the Scraper Regularly
As I work, glue builds up on the scraper’s edge. I regularly clean it off with a cloth or by using a scrap of wood to avoid transferring old glue back onto the wood surface.
Step 9: Wipe Away Debris
When done, I wipe the joint with a clean, damp cloth to remove any fine wood particles or dust left from scraping. This inspection allows me to see if I got all the glue off.
Step 10: Lightly Sand if Needed
If small amounts of dried glue persist, I do very light sanding with fine sandpaper. This is just to smooth the area, not remove material. I’m cautious to avoid rounding over the joint.
Step 11: Clean the Workpiece
After sanding, I thoroughly clean the workpiece with a tack cloth or vacuum to remove all dust and debris. This is an important step to prepare the surface for a flawless finish.
Step 12: Apply Finish
With the surface clean and smooth, I can now apply the finish of choice to the wood. The absence of glue residue ensures that the finish will adhere properly and look even and attractive.
2. Paint Scraper
Step 1: Select the Right Bahco Scraper
Firstly, I choose the right Bahco scraper for the job. They offer a range of sizes and styles, so I pick one that is comfortable to hold and appropriate for the size of the glue squeeze-out. The 2.5″ carbide scraper is a great choice due to its durability and ability to be resharpened.
Step 2: Assess the Glue Consistency
I check the consistency of the glue squeeze-out before I begin. The best time to scrape is when the glue is partially set—firm enough to not smear but still soft enough to remove easily. This is usually 20-30 minutes after application, depending on the type of glue.
Step 3: Position the Scraper
I hold the Bahco scraper with a firm grip, positioning it at a low angle to the wood surface, almost parallel. This allows the blade to get under the glue without digging into the wood.
Step 4: Apply Even Pressure
With controlled, even pressure, I start to push or pull the scraper over the glue line. I use two hands to guide the scraper—one hand at the front to steer and one at the back to apply pressure.
Step 5: Scrape in the Correct Direction
I carefully scrape in a direction away from me or toward me, depending on what feels most comfortable and effective. I make sure to keep the scraper’s blade flat against the wood to avoid gouging.
Step 6: Clear the Blade Regularly
As I remove the glue, I regularly wipe the blade on a cloth or piece of scrap wood to keep it clean. This prevents any accumulated glue from being redistributed onto the clean wood surface.
Step 7: Adjust the Pressure as Needed
If I encounter any tough spots, I adjust the pressure I’m applying to the scraper. I increase pressure slightly to remove the stubborn glue, but I’m always cautious not to damage the wood.
Step 8: Inspect and Repeat if Necessary
After each pass with the scraper, I inspect the area to ensure all the glue has been removed. If I spot any remaining glue, I repeat the scraping process, focusing on those areas.
Step 9: Switch to Fine Scraping
If the initial scraping has removed the bulk of the glue but left some residue, I’ll switch to a finer scraping technique. I’ll use lighter pressure and a shallower angle to delicately shave off the remaining bits without damaging the wood surface.
Step 10: Check for Any Missed Spots
I take a moment to look over the workpiece from different angles, making sure that I haven’t missed any spots. Good lighting is essential for this step, as it can reveal glue residue that might otherwise go unnoticed.
Step 11: Use Sandpaper for Final Cleanup
If the scraper has left any slight imperfections or if there’s a bit of residue that’s proving stubborn, I’ll use fine-grit sandpaper to smooth the area. I sand gently, with the grain, to blend the scraped area with the surrounding wood.
Step 12: Clean the Surface
Once I’m satisfied with the scraping and sanding, I clean the surface thoroughly. I use a vacuum to remove all dust and then wipe down the wood with a tack cloth to ensure a dust-free surface for finishing.
3. Putty knife
Step 1: Choose the Right Putty Knife
I select a putty knife that is appropriate for the size of the glue line. A flexible putty knife is preferable because it allows for a gentle yet effective scraping action. The blade should be clean and free of any old material or rust.
Step 2: Timing the Cleanup
I wait for the glue to reach the right consistency before attempting to remove it. The glue should be tacky but not completely dry, often about 15-30 minutes after application, depending on the type of glue used. This state allows the glue to be removed cleanly without smearing.
Step 3: Prepare the Work Area
Before I begin, I ensure the work area is well-lit and that I have a clear view of the glue line. Good lighting helps me to see the glue clearly and avoid missing any spots.
Step 4: Position the Putty Knife
I position the putty knife at a low angle to the wood surface to avoid gouging or scratching the wood. The blade should be almost parallel to the surface.
Step 5: Apply Gentle Pressure
Using a steady hand, I apply gentle pressure to the putty knife and begin to push it along the glue line. The goal is to lift the glue off the wood rather than push it into the grain.
Step 6: Scrape Along the Grain
Whenever possible, I scrape in the direction of the wood grain. This helps to prevent any potential scratching or marring of the wood surface.
Step 7: Clean the Blade
After each pass, I wipe the blade on a damp cloth or piece of scrap wood to remove the accumulated glue. Keeping the blade clean ensures that I don’t reapply glue to the cleaned areas.
Step 8: Inspect and Repeat if Necessary
I inspect the area after each pass to ensure all the glue has been removed. If there’s still glue remaining, I repeat the scraping process, focusing on those areas until they’re clean.
Step 9: Address Stubborn Spots
For any stubborn spots of glue that won’t come off easily, I may allow the glue to dry a little longer or use a slightly increased angle with the putty knife, applying a bit more pressure to remove the residue. However, I’m always cautious to avoid damaging the wood.
Step 10: Clean Up Residue
If there is any minor glue residue left after scraping, I might dampen a clean cloth with mineral spirits (for oil-based glues) or water (for water-based glues) and gently rub the area. This can help dissolve the remaining glue without harming the wood.
Step 11: Final Inspection
Once I believe I’ve removed all the glue, I conduct a final inspection. I run my fingers over the surface to feel for any spots I might have missed and look at the wood from various angles to catch any remaining glue under different light conditions.
Step 12: Light Sanding
After the glue is completely removed and the area is dry, I lightly sand the surface with fine-grit sandpaper. This smooths out any potential scraper marks and prepares the surface for finishing. I always sand in the direction of the wood grain to maintain a consistent finish.
Step 13: Clean the Surface
I then clean the wood surface thoroughly to remove all dust from sanding. A tack cloth or a soft brush can be used to pick up the fine particles, ensuring the area is ready for the next steps.
Step 14: Apply Finish
With the surface prepared, I apply the finish according to the project’s requirements. The clean, glue-free surface allows for an even application and a professional-looking final product.
Step 15: Maintain the Putty Knife
After the project, I clean my putty knife with a solvent appropriate for the type of glue I’ve been working with. I dry it thoroughly to prevent rust and store it in a place where the blade will stay sharp and ready for the next use.
Preventing Wood Glue Squeeze-Out
Tip 1: Use the Correct Amount of Glue A common cause of squeeze-out is simply using too much glue. A thin, even coat of glue is often sufficient for a strong bond. FineWoodworking recommends not over-applying the glue, as this will reduce the chances of excessive squeeze-out.
Tip 2: Apply Glue Precisely Using a glue brush or a small applicator can help you spread the glue more precisely, thereby preventing excessive glue from spilling out of the joints.
Tip 3: Tape the Joints Before applying glue, place painter’s tape along the edges of the joints. This way, any glue that does squeeze out will land on the tape instead of the wood. Once the glue sets slightly, you can remove the tape and the excess glue with it. I suggest taping off the joints to prevent squeeze-out issues.
Tip 4: Use a Caul or Clamping Jig A caul or clamping jig helps distribute pressure evenly when clamping, which can minimize the amount of glue that gets squeezed out.
Tip 5: Consider the Glue’s Open Time Be aware of the glue’s open time and set time. The longer the glue remains wet, the more it can be squeezed out. Work efficiently to clamp your pieces before excessive glue starts to seep out.
Tip 6: Dry Fit Before Gluing Always dry fit your pieces before applying glue to ensure everything fits snugly. A good fit means less room for glue to escape.
Tip 7: Prefinish the Wood Applying a light coat of finish to the wood before assembly can make it easier to remove any glue that does squeeze out. The glue will be less likely to stick to the finished surface. Sawmill Creek discusses the benefits of prefinishing parts prior to glue-up to simplify cleanup.
To avoid glue squeeze-out, I use a fine-tipped applicator to apply the glue sparingly along the joint and ensure even pressure when clamping. It’s also handy to do a dry fit before gluing.
Using a planer to remove glue squeeze-out is not recommended, as it could dull the blades. Instead, I wait for the glue to partially dry and then carefully remove it with a chisel, ensuring not to gouge the wood in the process.
Yes, innovative techniques often include the use of everyday household items. A cut plastic straw, for instance, can effectively remove glue from hard-to-reach inner corners, while a homemade sanding stick can help sand away any remaining dried glue for a clean finish.
For hardened glue, shop-made tools like a heavy-duty paint scraper with a sharp, four-sided blade can remove tough beads without damaging the surface. Additionally, for corners, I employ corner scrapers which are specifically effective at tackling dried glue without causing harm to the wood.