How to Prepare Wood for Staining: Species Protocol, End Grain Treatment, Water-Popping, and Post-Stripping Preparation
Preparing wood for staining is not a universal process — it is determined first by wood species, then adjusted by stain type, and finally modified by whether the surface is new or previously stripped.
If the species-specific absorption behavior is not handled correctly before staining, defects like blotching, uneven color, or excessive darkening cannot be corrected afterward.
This guide provides a decision-based preparation system: identify the wood, select the correct stain type, and apply the matching surface preparation protocol before any stain touches the surface.
How Do You Prepare Wood for Staining?
- Confirm the surface is clean and neutral (post-stripping) or clean and dust-free (new wood). Post-stripping: water drop test must pass (absorbs in under 30 seconds) before any sanding. Any stripper residue still in pores blocks stain as unevenly as the original finish. New wood: wipe with mineral spirits to remove oils, release agents, and machining residue.
-
Choose stain type before sanding — it changes the grit sequence:
- If using oil-based stain: Sand to 120–150 grit depending on species. (150 for most hardwoods, 120 for blotch-prone woods to maximise absorption).
- If using water-based stain: Sand to 180–220 grit → water-pop → re-sand 220 after drying. Water-based stain raises grain aggressively; pre-wetting is mandatory.
-
Identify the species and apply the correct blotch prevention method:
- If the species is blotch-prone (pine, birch, poplar, alder): Apply pre-stain conditioner (24h) or use gel stain. 24h cure gives significantly better grain penetration than the 15 minutes suggested on most labels.
- If the species is maple or cherry: Use dye stain or gel stain instead of standard pigment stain.
- Oak, walnut, mahogany, ash: No pre-treatment needed — open-grain ring-porous structure accepts stain evenly.
- Treat end grain separately — it absorbs 3–5× faster than face grain. Sand end grain to a higher grit than face grain (220 vs 180), or apply stain diluted 50% to end grain first and let dry. Without treatment, cross-cut surfaces appear dramatically darker than the face.
- Test the complete protocol on an inconspicuous area of the actual piece — not on a separate scrap. Post-stripping, the wood surface has a different absorption profile than fresh scrap. The test area should be in a location that will be hidden or covered.
This guide covers the complete pre-stain preparation workflow for both new and freshly stripped wood, the anatomical explanation of why specific species blotch and which prevention method applies to each, the grit-to-darkness relationship in final sanding, end grain treatment as a separate protocol, the water-popping technique with correct timing, and the post-stripping preparation sequence that differs from new wood preparation.
→ Before this: How to Strip Wood Furniture — complete stripping project guide
→ Before this: How to Refinish Wood After Stripping — neutralisation and post-strip sequence
→ After this: How to Refinish Furniture — full finishing guide
→ Hub: How to Remove Wood Finishes — Complete Hub
How to Prepare New Wood for Staining (Complete Workflow)
📝On a stripped maple cabinet, a dye stain tested on a separate scrap piece of maple showed even colour and no blotching, so I expected a straightforward application. However, when I tested the same dye on the inside face of the actual cabinet door, the absorption was noticeably uneven — areas that had held the previous finish longer reacted differently despite appearing fully stripped. This changed the approach: I applied a light washcoat (dewaxed shellac) before the dye on the actual piece, which evened out absorption and prevented the blotching that the scrap test had failed to reveal.
How to Prepare Wood After Stripping (Post-Stripping Workflow)
Water must absorb fully in under 30 seconds everywhere. Any beading indicates stripper residue blocking pores. Additional mineral spirits wipe, allow 24 hours, re-test. Do not proceed until the water drop test passes.
2. Check for oil finish residue — barrier coat if needed
If the previous finish was danish oil, linseed oil, tung oil, or any penetrating oil: apply two thin coats of dewaxed shellac (e.g., Zinsser SealCoat or equivalent) before staining. Residual polymerised oil in pores causes stain to sit on the surface rather than absorb, creating dark sticky areas. SealCoat seals the oil residue and provides a consistent base for stain.
3. Sand starting at 80–120 grit (solid wood only — never on veneer) — not directly at 150
Chemical strippers raise grain unevenly and leave micro-ridges that are harder than the surrounding wood. Sand starting at 80 grit if grain is significantly raised, 120 grit if moderately raised. Then progress 150 → 180 → final grit per species protocol.
4. Species and stain type protocol then applies normally
New timber from lumber yards and pre-cut furniture blanks often have machining oil, wax, or handling residue on the surface. Wipe with mineral spirits, allow 2 hours to evaporate, before any sanding.
2. Fill defects before staining, not after
Nail holes, gaps, and cracks: fill with stainable wood filler matched to the target stain colour. Sand flush when dry. Clear fillers stain differently than surrounding wood — use coloured filler. Glue squeeze-out: cut away dry, sand completely. Any glue on the surface blocks stain entirely and shows as a pale spot.
3. Sand progressively — starting grit determined by surface condition
Machine-planed smooth surfaces: start at 120 grit. Rough-sawn or hand-planed: start at 80 grit. Progress through grits to the final grit for the stain type and species (see below).
4. Species and stain type protocol then applies normally
New Wood vs. Stripped Wood — When to Use Each Workflow
This distinction must be made before any sanding or stain selection — post-stripping wood behaves differently from new wood even when the species is the same.
If any of these apply: chemical stripper used, piece was previously oiled, you’re not sure of the previous finish → use post-stripping workflow.
Use the new wood workflow if the surface is unfinished and has no previous coatings.
Use the post-stripping workflow if:
- a chemical stripper was used
- the piece had an oil finish
- the previous finish is unknown
Post-stripped wood behaves differently because of residual chemistry and altered grain structure, which affects stain absorption.
Why Do Specific Species Blotch? The Anatomical Explanation
Blotching occurs because different parts of the wood structure absorb stain at different rates — earlywood absorbs quickly, while latewood resists it.
In species like pine, birch, and maple, this difference is strong enough that stain appears uneven unless the surface is prepared to control absorption.
Staining Protocol by Species
What Are the Key Specifications for Preparing Wood for Staining?
| Variable | Attribute | Value and Detail |
|---|---|---|
| Pre-stain conditioner — cure time | 15 minutes vs. 24 hours | Label instructions (15 minutes) are the minimum time for the conditioner to reach the surface pores. At 24 hours, the conditioner has penetrated into deeper pores throughout the wood structure and equilibrated. In workshop practice, 24-hour cure produces noticeably more grain prominence and more even colour than 15 minutes — the conditioner at 15 min acts primarily at the surface— the conditioner at 15 min is partially effective at the surface only. Trade-off: conditioner at any cure time reduces final stain colour intensity by 30–40% compared to unconditioned wood. Always test conditioner + chosen stain on the actual piece in a hidden location before full application to confirm final colour. |
| Final sanding grit — effect on stain darkness | Relationship between grit and colour depth | The final sanding grit before staining directly determines how dark the stain will appear. Coarser grit (80–120) leaves larger scratch channels and more open pores → stain absorbs deeper → darker result. Finer grit (180–220) closes pores partially → stain absorbs less deeply → lighter result. Practical implication: if a species is difficult to stain dark (maple, cherry), finish at 120–150 grit rather than 180–220 to maximise absorption. If a species absorbs too much (pine end grain), finish at 180–220 grit to moderate absorption. Never stop stain-prep sanding above 220 grit for any application — finer grits burnish the wood surface and prevent meaningful stain absorption. |
| Water-popping technique | Mechanism and exact timing | Wetting wood with water causes hygroscopic swelling of cell walls — pore openings expand as moisture is absorbed. When wood dries, it retains more uniform pore distribution than after sanding alone (sanding partially closes and burnishes pores). Application: wet the sanded surface uniformly with a damp cloth or sponge, ensuring complete coverage without puddles. Timing: apply stain when the surface appears completely dry to the eye (no wet spots visible) but within 2 hours of wetting. Earlier than visual dryness: moisture blocks stain. Later than 2 hours: pores have returned to post-sanding state, effect is lost. Missing spots create pale areas — these are more visible than blotching. |
| End grain absorption | Rate comparison and treatment | End grain (cross-cut surfaces — table aprons, chair leg ends, panel edges) absorbs stain 3–5× faster than face grain because exposed cell ends form open channels rather than cell sides. Without treatment: end grain appears 2–3 shades darker than face grain. Treatment options: (1) Sand end grain to one grit finer than face grain (if face grain finishes at 150, sand end grain to 180); (2) Apply stain diluted 50% to end grain only, allow to dry, then apply full-strength stain to everything — the diluted first coat partially seals end grain; (3) Apply shellac wash coat (SealCoat diluted 1:3 with alcohol) to end grain only and allow to dry before staining — most controlled method for very porous end grain (pine, alder). |
| Glue and squeeze-out removal | Effect on staining and removal method | PVA glue (yellow carpenter’s glue) cures as a water-resistant film that is completely impermeable to stain. Even a thin smear of glue that dries clear on the wood surface produces a pale, stain-free area that shows through the finish as a blotch or streak. Removal: dried PVA must be cut away with a sharp chisel or scraped with a cabinet scraper — sanding merely spreads the glue over a larger area without removing it. After mechanical removal: sand the area 80→120→150 grit to ensure the wood below the glue line is at the same surface condition as the surrounding wood. |
| Water-based stain — grain raising | Why re-sanding is mandatory | Water-based stains contain water that penetrates wood fibres and causes hygroscopic swelling of the cell walls — the same mechanism as water-popping but without the benefit of controlled timing. The swelling lifts wood fibre ends (torn fibres from sanding) that were flat before application. Without re-sanding after grain raising, the stained surface feels rough and the topcoat applied over it amplifies rather than smooths the texture. Protocol: apply water-based stain, allow to dry completely, sand lightly with 220 grit (remove raised fibres without removing stain from deeper pores), remove dust with tack cloth, proceed to topcoat. Re-sanding 220 grit removes only the raised fibres — it does not remove the stain from the pores if pressure is light. |
| Tack cloth vs. vacuum for final dust removal | Correct method and sequence | Compressed air or vacuum removes large dust particles. Tack cloth removes the finest dust that settles after vacuuming. The correct sequence: (1) vacuum the surface and surrounding area, (2) allow 5–10 minutes for disturbed dust to settle, (3) tack cloth in one direction (not back-and-forth — this lifts and re-deposits dust). Tack cloth leaves a very thin wax residue — use only immediately before staining. On water-based stain applications: standard tack cloth may cause adhesion issues due to wax residue. Use water-dampened cloth instead for dust removal before water-based stain. |
| Staining after stripping vs. new wood — absorption differences | Why post-stripping wood stains differently | Chemically stripped wood does not absorb stain identically to freshly sanded new wood of the same species. Chemical strippers open the grain differently than a belt sander, and residual chemistry (even after full neutralisation) alters surface pH and pore chemistry. Additionally, years of previous finish film partially sealed pore openings — these areas may absorb more stain than areas that were never sealed, producing subtle uneven areas. The only reliable test is: apply stain to a hidden area of the actual piece after full preparation, assess the result, and adjust protocol before committing to the visible surfaces. |
| Dewaxed shellac wash coat (SealCoat 1 lb cut) | When to use vs. pre-stain conditioner | Wash coat = universal sealer, consistent reduction for all species and all pore types. Conditioner = selective reduction, works better on softwoods and open-grain species. Wash coat on maple: more predictable than conditioner because it seals uniformly regardless of ray tissue vs. fibre differential. Trade-off: wash coat reduces stain colour more aggressively than conditioner (50–60% vs. 30–40%) — colour testing mandatory. |
| Surface burnishing from over-sanding | How to identify and correct | Surface burnished if: appears slightly shiny under raking light after final sanding; water drop beads rather than absorbing slowly on bare wood. Correction: re-sand with fresh 180-grit paper — dull paper burnishes rather than cuts. One pass with sharp 180-grit on burnished surface opens pores sufficiently. |
How Does Final Sanding Grit Affect Stain Colour? The Darkness Scale
The relationship between final sanding grit and stain darkness is direct and linear — coarser grit leaves deeper scratch channels and larger open pores that absorb more stain per unit area. Understanding this allows you to dial in the stain darkness by adjusting the final grit rather than changing the stain product or application time.
| Wood Species | Desired Stain Color | Gril Recommandation |
|---|---|---|
| Pine | Dark | 120 grit + conditioner 24h |
| Pine | Light | 150 grit + conditioner 24h |
| Maple | Any depth | 150 grit max + dye stain |
| Oak | Dark | 120–150 grit, no conditioner |
| Oak | Light | 150–180 grit |
| Cherry | Any | 150 grit + water-pop + dye stain |
Practical application: if you want a darker result with the stain you have chosen, stop at 150 grit instead of 180. If the stain is going on darker than desired, add a 220 grit pass to reduce pore openness. Do not go above 220 grit for stain preparation — above 220, the wood surface is partially burnished (compressed and glazed by fine abrasive) and stain absorption becomes unpredictable and minimal.
End Grain Treatment — The Protocol Most Guides Skip
End grain is any surface where the wood has been cut across the grain direction — the apron ends on a table, the cut ends of table legs, the edges of boards, and the face of any panel where the grain runs perpendicular to the surface. On these surfaces, the cell cavities are exposed as open tubes running directly into the wood rather than as cell sides. Stain enters through these open ends much faster and in much greater volume than on the face grain.
The result without treatment: a dining table where the apron end grain is two shades darker than the tabletop, a chair where the leg cuts are almost black while the leg sides are a medium brown. This is not a stain application error — it is the predictable anatomical consequence of end grain exposure. The correction must happen before stain is applied.
Three methods — choose based on species and severity
Method 1 — Higher final grit on end grain (least effort, moderate control): If face grain finishes at 150 grit, sand end grain to 180 or 220 grit. The finer sanding partially compresses the open cell ends, reducing absorption. Effective for mild end grain darkening on hardwoods. Not sufficient for pine end grain which absorbs at extreme rates.
Method 2 — Diluted stain on end grain first (good control, moderate effort): Mix stain 1:1 with the appropriate solvent (mineral spirits for oil-based stain, water for water-based stain). Apply the diluted mixture to end grain only, wipe excess, allow to dry completely. Then apply full-strength stain to the entire piece including the end grain. The first diluted coat partially seals the end grain pores — the second full coat brings the end grain to approximately the same colour depth as the face grain.
Method 3 — Shellac wash coat on end grain (best control, most effort): Mix dewaxed shellac (e.g., Zinsser SealCoat or equivalent) 1 part with 3 parts denatured alcohol. Brush this wash coat onto end grain only and allow to dry (15–30 minutes). The thin shellac film seals the open cell ends to nearly the same absorption level as the face grain. Then apply full-strength stain to everything. This method provides the most consistent end grain / face grain colour match and is recommended for pine and any species with extreme end grain absorption.
Water-Popping — When to Use It and the Exact Timing
Water-popping is the technique of wetting the sanded wood surface with water before staining. Sanding partially compresses and closes wood pores — water-popping reverses this by swelling the cell walls and opening the pores more uniformly. The result is more even stain absorption, particularly on blotch-prone species, and a richer, deeper colour than the same stain on a dry-sanded surface.
Water-popping is particularly valuable for water-based stain applications, since the stain will raise the grain regardless — water-popping before the stain allows you to raise the grain in a controlled way and sand at 220 grit after, producing a smoother result than grain-raising at the stain application stage. It is also the recommended preparation for pine, alder, and other blotch-prone softwoods when gel stain or pre-stain conditioner is not the preferred approach.
The timing requirement — why it must be exact
The benefit of water-popping lasts a specific window of time. Apply water-popping when the surface appears visually dry (no wet patches visible) but the wood has not yet fully returned to its original moisture content — typically 30 minutes to 2 hours after the surface dries, depending on ambient humidity and temperature.
Apply stain too early (surface still wet): water in the wood pores occupies space that the stain needs to enter — pale, uneven absorption with the stain sitting on top of the water layer.
Apply stain too late (3+ hours after water-popping): the wood has dried back to its pre-wetting state and the water-popping effect has been lost. The window is most reliably identified by touch: the surface should feel dry to the fingertip but the wood temperature should be slightly cool (indicating residual moisture below the surface).
How to water-pop correctly
Dampen a clean cloth with water and wipe the entire surface uniformly — do not leave puddles and do not miss areas. Even coverage is critical because missed spots will absorb stain less than water-popped areas, creating pale patches that are actually more visible than blotching.
Use a cloth rather than a brush for most surfaces — the cloth distributes water more evenly. For carved areas and profiles: use a soft brush to ensure water reaches all recesses. Allow to dry in a consistent temperature (avoid applying in direct sunlight which dries the surface before moisture has equilibrated) and stain typically within a 30-minute to 2-hour window depending on temperature and humidity.
📝 On a pine dining table refinished with a dark gel stain, I initially followed the label recommendation and applied the pre-stain conditioner with a 15-minute wait before staining — the result was still uneven, with darker patches around earlywood bands. On a second test section, I applied the same conditioner but allowed a full 24-hour drying period before the gel stain, which produced a noticeably more uniform absorption and eliminated the patchiness. The difference came from the conditioner fully stabilising the surface porosity over time, rather than acting as a short-term wetting layer.
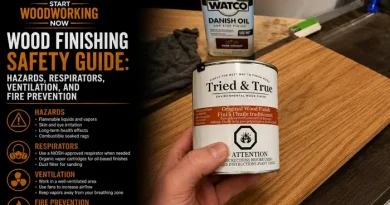
Safety Notes When Preparing Wood for Staining
- Ensure adequate ventilation when working with oil-based stains, solvents, or conditioners
- Wear nitrile gloves to avoid skin contact with chemicals
- Dispose of oil-soaked rags properly — they can self-ignite if left crumpled
Frequently Asked Questions About Preparing Wood for Staining
Why does wood stain look blotchy even after using pre-stain conditioner?
Three causes. First: conditioner applied at the label-specified 15 minutes rather than 24 hours — at 15 minutes, only the surface pores are partially filled, deeper pores remain fully open. Second: conditioner applied to a species where it is insufficient alone — maple and curly figure require dye stain rather than pigment stain regardless of conditioner. Third: sanding grit too fine (above 180) which closes pores unevenly — some areas respond to the conditioner and some don’t. If blotching persists after conditioner at 24h: switch from pigment stain to gel stain or dye stain for that species.
Should you sand before or after applying pre-stain conditioner?
Always sand before conditioner — conditioner is applied to the final, fully prepared surface. The sequence is: sand through all grits → final grit → apply conditioner → 24 hours dry → apply stain. Sanding after conditioner defeats the purpose by reopening the pores the conditioner sealed, and sanding at the conditioner stage also removes the thin conditioning film from the deepest pores that were hardest to reach.
Can you stain wood immediately after stripping?
No — three conditions must be met first. The water drop test must pass (water absorbs in under 30 seconds) confirming no stripper residue in pores. The surface must be fully dry after neutralisation (24 hours minimum). If the previous finish was oil-based (danish oil, linseed, tung oil), a dewaxed shellac barrier coat (Zinsser SealCoat) must be applied first — residual polymerised oil in pores causes stain to sit on the surface and dry unevenly. After these three conditions are met, proceed with the species-specific preparation protocol as for new wood.
Summary: Key Values for Preparing Wood for Staining
Two workflows: post-stripping (water drop test first, oil residue check, barrier coat if needed, start sanding at 80–120 grit) vs. new wood (mineral spirits wipe, fill defects, start at 120 grit). Blotching is anatomical — earlywood absorbs 3–5× more stain than latewood.
Pine/spruce/fir: gel stain or pre-stain conditioner at 24h (not 15 min label time). Maple/birch: dye stain or gel stain — pigment stain with conditioner insufficient for most applications.
Oak/walnut/mahogany/ash: no pre-treatment needed, open-grain accepts stain evenly. Cherry: use light tints, allow 2–4 weeks oxidation before staining.
Final sanding grit controls darkness: 120 grit = darkest, 220 grit = lightest — adjust grit to dial in colour depth before changing the stain product. End grain absorbs 3–5× more than face grain: sand one grit finer, OR apply diluted stain first coat to end grain, OR apply shellac wash coat to end grain before staining. Water-popping: apply water uniformly, stain within 30 minutes to 2 hours of visual drying — earlier or later loses the effect.
Pre-stain conditioner at 24h typically reduces stain colour intensity by around 30–40% depending on species and application— always test conditioner + stain on actual piece before full application.
→ Before this — stripping the old finish: How to Strip Wood Furniture
→ Post-stripping sequence: How to Refinish Wood After Stripping
→ Full refinishing guide: How to Refinish Furniture
→ Hub: How to Remove Wood Finishes — Complete Guide