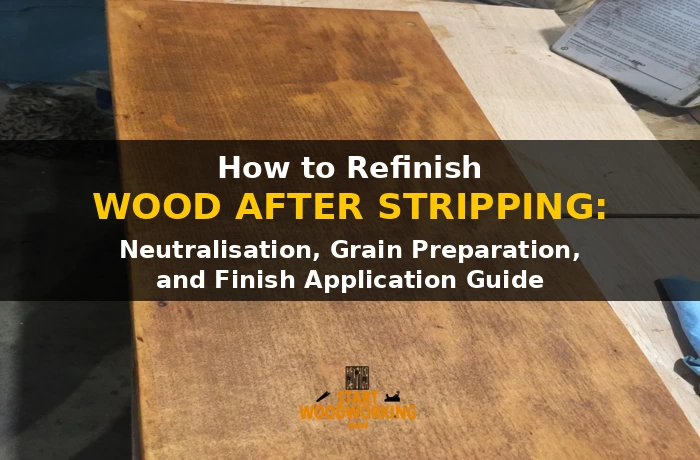
How to Refinish Wood After Stripping: Neutralisation, Grain Preparation, and Finish Application Guide
Refinishing wood after chemical stripping requires five preparation steps before any stain or topcoat is applied — and every refinishing failure (uneven stain absorption, poor finish adhesion, grain texture telegraphing through topcoat, fisheye in new finish) traces back to one of these preparation steps being skipped. The steps are: neutralise the stripper residue; remove raised grain; confirm surface readiness with the water drop absorption test; fill open grain on high-porosity species if a closed-grain finish is the goal; and apply the correct primer or barrier coat for the finish system chosen. Chemical strippers — alkaline, citrus, or methylene chloride-based — leave pH-altering residues that interfere with stain absorption and new finish adhesion unless neutralised. Water-based strippers additionally raise the wood grain by swelling surface fibres. Both problems are easily resolved with a known sequence, but both are invisible until the first stain or finish coat is applied over an improperly prepared surface.
This guide covers the complete post-stripping preparation sequence from neutralisation through to final topcoat, the stain and finish compatibility matrix by surface history, and the grain filler protocol for open-grain species.
How Do You Refinish Wood After Stripping?
→ Related: How to Remove Polyurethane from Wood→ Related: How to Remove Lacquer from Wood→ Related: How to Remove Varnish from Wood→ Hub: How to Remove Wood Finishes — Complete Guide
Not sure whether your surface needs full stripping? Use the Strip vs Recoat Decision Tool to confirm.
What Is the Complete Post-Stripping Refinishing Sequence?
Why Must You Neutralise the Chemical Stripper Before Refinishing?
Chemical strippers alter the surface pH of the wood as part of their mechanism. Alkaline strippers (sodium hydroxide, potassium hydroxide) break down finish polymer bonds by saponification under high pH (12–13). Citrus-based strippers (d-limonene, lactic acid content) work at low pH (4–5). Methylene chloride strippers work through solvent penetration rather than pH change but leave a residual solvent film.
If these residues are not neutralised before the new finish is applied, three failure modes result: stain absorption is uneven because pH differences in different areas of the surface cause varying rates of dye and pigment penetration; new finish adhesion is compromised because most wood finishes have optimal adhesion at wood surface pH of 6–7, not at pH 3–4 or pH 11–12; and finish curing can be disrupted because some finish catalysts and crosslinkers are pH-sensitive.
What Are the Key Specifications for the Post-Stripping Refinishing Process?
| Entity / Process Step | Attribute | Value |
|---|---|---|
| Neutralisation — drying time before sanding | Minimum wait | 24 hours after neutralisation wipe before sanding. The neutralising solution must fully evaporate and the wood must return to ambient moisture content before abrasion opens the grain for finishing. |
| Grain raising — water-based strippers | When to address and method | Any water-based stripper raises grain. Pre-wet the neutralised, dried surface with a damp cloth; allow 2–4 hours full drying; sand 150–180 grit. This controlled pre-raise eliminates the grain swell that would otherwise occur when the first water-based stain or finish is applied. |
| Solvent-based strippers — grain raising | Comparison | Methylene chloride and solvent-based strippers do not raise grain — the solvent does not swell wood fibres as water does. Less post-stripping sanding required. Primary concern is residue removal, not grain. |
| Sanding sequence — post-stripping | Starting grit by surface condition | If grain is significantly raised or stripper residue visible: start 80–100 grit. Normal stripped surface after neutralisation: start 120 grit. Progress 120 → 150 → 180. Final sanding before stain: 180 grit. Final sanding before oil finish: 150 grit (slightly open grain improves oil penetration). Final sanding before lacquer: 220 grit. |
| Steel wool after stripping | Why to avoid | Steel wool leaves microscopic iron particles in wood grain. On tannin-rich species (oak, walnut, mahogany): iron reacts with tannin to form dark iron-tannate staining visible under the new finish. Use synthetic abrasive pads (Scotch-Brite grey = very fine, white = extra fine) instead. Never use steel wool after stripping any species before finishing. |
| Water drop absorption test | Pass/fail criteria | Pass: 2–3 drops of water absorb completely within 30 seconds — surface is contaminant-free and ready for finish. Fail: water beads or remains visible at 60 seconds — residue (stripper, wax, oil, d-limonene) present, prevents finish penetration. Additional mineral spirits wipe or further sanding required before re-testing. |
| Grain filler — open-grain species | When to use | Optional on oak, ash, walnut, mahogany, chestnut if closed-grain (glassy, smooth) finish is desired. Apply paste wood filler across grain with rubber squeegee, force into pores. Allow to dry per product instructions (30–90 min). Sand across grain first to level, then with grain to 150 grit. Stain absorbs into grain filler differently — test on scrap of same species first. |
| Dewaxed shellac barrier coat | When required before new finish | Required when: (1) surface previously had oil finish (danish oil, linseed) where polymerised oil residue remains — prevents polyurethane fisheye. (2) After oxalic acid or two-part bleach — seals bleach residue. (3) After citrus stripper on blotch-prone woods — seals pores evenly before stain. Product: Zinsser SealCoat diluted 3:1 alcohol to shellac. Two thin coats, sand 220 grit between coats after 30 min drying. |
| Pre-stain conditioner | When required | Required for blotch-prone species: pine, cherry, maple, birch, alder, poplar. Apply oil-based pre-stain conditioner or water-based wood conditioner before any penetrating stain. Conditioner partially closes pores, reducing the differential absorption between early wood and late wood that causes blotching. Allow conditioner to dry per product time (15–30 min) before stain. |
| Stain drying time before topcoat | By stain type | Oil-based pigment stain: minimum 24 hours, 48 hours for heavy application or cold conditions. Water-based stain: minimum 2–4 hours, 8 hours recommended. Check by pressing a clean lint-free cloth on surface — if colour transfers, stain is not dry. Apply topcoat only over completely dry stain. |
| Topcoat inter-coat sanding | Grit and purpose | 320 grit between topcoats for polyurethane and lacquer. Purpose: provides mechanical bond (tooth) for subsequent coat, removes dust nibs and minor runs. Do not sand through the coat — light passes only. If sandpaper gums: coat is not fully dry — wait before sanding. |
| Blotching on bleached wood | Cause and prevention | Bleached wood (chlorine or two-part bleach) has disrupted cellulose structure that absorbs stain unevenly. Allow 48 hours minimum after bleaching and confirmed neutral pH before staining. Apply dewaxed shellac wash coat first to even absorption. Test stain on hidden area of the same bleached piece before full application. |
How Do You Confirm the Surface Is Ready for Finishing After Stripping?
Water Drop Absorption Test — Surface Readiness Confirmation
Apply 2–3 drops of water to the prepared, sanded surface. Observe absorption rate. Perform in multiple locations across the surface — different areas may have different residue levels.
Absorbs in under 30 seconds — READY
Wood pores are open and free of contamination. Surface is ready for stain or first topcoat application. The wood is accepting moisture uniformly, which predicts uniform stain absorption and finish adhesion.
Beads or remains at 60 seconds — NOT READY
Residue present — stripper, wax, d-limonene (citrus oil), silicone from previous polish, or solvent. Additional mineral spirits wipe, repeat neutralisation if stripper-related, then re-sand 150 grit and re-test. Do not apply any finish until test passes.
What Is the Correct Sanding Sequence After Chemical Stripping?
Sanding after chemical stripping has a different objective than sanding new wood. The goal is not to shape or smooth raw wood — it is to remove three specific problems: raised grain from water-based stripper, residual stripper crust in corners and grain, and any surface contamination not removed by neutralisation. The grit sequence begins where the surface condition requires, not at a fixed starting grit.
ASSESS Determine starting grit from surface condition
Run a palm across the surface in raking light. If the surface feels significantly rough — raised grain from water-based stripper or dried stripper residue — begin at 120 grit. If the surface is mostly smooth after neutralisation and drying — typical for solvent-based strippers — begin at 150 grit.
If the surface already feels very smooth with only minor raised fibres — begin at 180 grit. Starting too coarse removes unnecessary wood and requires more passes with finer grits to eliminate the deep scratches. Starting too fine fails to remove raised grain or residue — they remain visible under the first finish coat.
STEP 1 Sand with grain direction only — no circular or cross-grain passes
Every pass of every grit must be with the wood grain. Cross-grain scratches at any grit remain visible under the final finish as bright lines across the grain pattern.
On flat surfaces, a random orbital sander at 120 and 150 grit reduces sanding time significantly, but the final pass at 180 grit should always be by hand, with the grain, to remove any orbital sanding swirls. On furniture with detailed profiles, mouldings, and carved areas — hand sand with a profile sanding block or foam block throughout.
STEP 2 Vacuum and tack cloth between grits
Before changing to a finer grit, vacuum the entire surface and wipe with a tack cloth. Coarser grit particles on the surface are harder than the wood being sanded — if 120-grit abrasive particles remain on the surface when 180-grit paper is applied, the 120-grit particles cut deep scratches into the wood that the 180-grit paper cannot remove.
This is the cause of most post-finishing scratch pattern complaints. Vacuum → tack cloth → change grit is mandatory, not optional.
STEP 3 Final grit by finish type
The final sanding grit determines the surface porosity and the way the first finish coat penetrates. Oil-based penetrating finishes (danish oil, linseed, tung oil): final sand to 150 grit — slightly open grain improves oil penetration.
Stain followed by polyurethane: final sand to 180 grit. Water-based finishes: final sand to 180–220 grit. Lacquer over sealer: final sand to 220 grit. The finer the final grit, the tighter the surface pores — which reduces stain absorption depth and creates a smoother but less colour-saturated result.
Do not use steel wool at any stage after stripping: Steel wool particles left in open wood grain create iron-tannate staining under any new finish on tannin-rich species. Oak, walnut, mahogany, and cherry are particularly susceptible — even one pass of fine steel wool will deposit enough particles to create a dark spotted or streaked pattern visible under the clear finish. Use synthetic abrasive pads (Scotch-Brite grey = 320-grit equivalent, white = 400-grit equivalent) for any fine abrading after stripping. Save steel wool for furniture polish application only — never for surface preparation.
What Finish Is Compatible with the Surface History After Stripping?
The surface history of stripped wood — what was previously on it and how it was stripped — directly affects which new finish can be applied without adhesion problems or chemical incompatibilities. The most common failures occur when a new finish is applied over a surface with an invisible but chemically active residue from the previous finish or the stripping process.
| Previous Finish / Stripping History | Specific Preparation Required | New Finish Options | Risk Without Preparation |
|---|---|---|---|
| Polyurethane stripped with chemical stripper | Alkaline stripper: vinegar neutralisation. Citrus: baking soda + mineral spirits. Sand 120→180. Water drop test pass. | All finishes compatible: polyurethane, lacquer, oil, wax, stain. Standard preparation sufficient. | Uneven stain absorption if neutralisation skipped. Generally lower risk than oil finishes below. |
| Danish oil or linseed oil (polymerised penetrating oil) | After removal: apply dewaxed shellac (Zinsser SealCoat) wash coat — 2 thin coats, sand 220 between. Shellac seals residual oil in pores. | Polyurethane over shellac barrier: compatible. Lacquer over shellac: compatible. Oil finish (re-application): no barrier needed, directly compatible with existing oil residue. | Fisheye in polyurethane and lacquer — surface-active residual oil causes finish to retract from pores, creating crater-like depressions. Cannot be corrected without stripping and re-preparing. |
| Wax finish stripped with mineral spirits | Naphtha confirmation test: must evaporate within 10–15 seconds. If wax residue remains: additional mineral spirits passes. Sand 120→180 after confirmed clean. | All finishes after confirmed wax removal. Dewaxed shellac barrier if naphtha test cannot confirm complete removal. | Wax residue causes delamination of polyurethane within 6–18 months. Film-forming finishes cannot bond over wax. |
| Surface bleached with chlorine or two-part bleach | Chlorine: water rinse + 48 hours drying. Two-part: vinegar neutralisation (1:10) + water rinse + 48 hours. pH test with neutral strips before finish. Sand 150→220 after confirmed dry. | All finishes after confirmed neutralisation and drying. Use non-ambering finish (water-based poly, pre-cat lacquer) — oil-based finishes yellow bleached light wood noticeably. | Bleach residue prevents stain absorption uniformly. Uncured bleach under film finish continues reacting, causing cloudiness or adhesion failure. |
| Shellac stripped with denatured alcohol | Denatured alcohol residue evaporates quickly — 1–2 hours drying typically sufficient. Sand 150→180. Standard water drop test. | All finishes compatible. Shellac is one of the most benign stripped surfaces — no pH change, no oil residue, no wax contamination risk. Clean bare wood after removal. | Minimal risk. Denatured alcohol leaves no significant residue if wiped clean. |
| Lacquer stripped with lacquer thinner or chemical stripper | Lacquer thinner residue: 1–2 hours evaporation, then mineral spirits wipe, then 24 hours. Chemical stripper: standard neutralisation. Sand 120→180. | All finishes compatible after proper preparation. Lacquer over same bare wood is the most straightforward re-application. | Lacquer thinner residue (if not fully evaporated) can re-dissolve new lacquer coat applied too soon — bubbling and wrinkling result. |
📝 The most instructive post-stripping failure I encountered in my workshop was a solid oak dresser stripped with a citrus gel stripper (Citristrip) by the client before they brought it to me — they had applied the stain directly the next morning without neutralisation or mineral spirits removal of the d-limonene residue. The result was dramatic: the stain had formed a blotchy, uneven pattern where the citrus oil residue had blocked penetration in some areas while the open pores had absorbed deeply in others. Re-stripping was necessary — this time followed by the complete neutralisation sequence (baking soda solution for the citrus residue, mineral spirits wipe for the d-limonene oil, 24 hours drying, progressive sanding to 180 grit, water drop test pass). The second stain application was uniform across all areas.
How Do You Apply Stain on Stripped Wood?
Stripped wood in many cases absorbs stain differently from new wood — the stripping process opens the grain more aggressively than original surfacing, and certain species that were previously sealed beneath a film finish will now absorb stain more rapidly and more deeply than expected.
Testing on a hidden area of the same piece is mandatory before full stain application on any stripped surface.
SPECIES Blotch-prone species require pre-stain conditioner
Pine, cherry, maple, birch, alder, and poplar absorb stain unevenly after stripping because their early wood (lighter bands in the grain) and late wood (darker bands) have significantly different porosity.
On these species, apply an oil-based pre-stain wood conditioner (for oil-based stains) or a water-based wood conditioner (for water-based stains) after the final sanding and water drop test pass. The conditioner partially fills the most absorbent zones, creating more even stain uptake.
Allow the conditioner to penetrate for 15–30 minutes, then wipe off excess before applying stain. Apply stain within the conditioner’s open window — typically within 2 hours for oil-based conditioners.
TECHNIQUE Test on hidden area first — then full application
Apply the chosen stain to a hidden area of the piece (underside, back of a leg, inside a cabinet) using the planned technique and wipe-off time. Assess after the recommended drying time. If the colour is darker than expected: reduce the stain contact time (wipe off earlier) or dilute the stain 10–20% with the appropriate solvent (mineral spirits for oil-based, water for water-based).
If the colour is uneven: apply the pre-stain conditioner even if the species is not typically blotch-prone — the stripping may have created uneven porosity. Once the test passes, apply the full piece.
TIMING Stain must be completely dry before topcoat
Apply the topcoat only when the stain is completely dry — verified by pressing a clean lint-free cloth on the surface with no colour transfer. For oil-based pigment stains: minimum 24 hours (48 hours in cool or humid conditions).
For water-based stains: 2–4 hours minimum (8 hours recommended for polyurethane topcoat). Applying topcoat over incompletely dried stain causes the stain solvent to be trapped under the finish film, resulting in soft spots, cloudiness, or wrinkling in the topcoat after a few days as the stain continues to dry beneath.
How Do You Apply the Topcoat After Staining Stripped Wood?
Topcoat application on stripped and stained wood follows the same principles as new wood finishing, with one additional concern: the stripped surface has been chemically stressed and may have micro-variations in porosity that cause the first coat of finish to absorb unevenly, producing a slightly blotchy or uneven sheen.
The first coat of finish should always be considered a sealer coat — it will look uneven and that is expected. The appearance levels out by the second and third coats.
First coat — thin sealer pass, no correction
Apply the first topcoat thinly — 10–15% more dilute than the standard application (mineral spirits for oil-based polyurethane, water for water-based). This sealer coat penetrates the pores and seals the stain without building significant film thickness. Do not attempt to correct uneven absorption or minor runs in this first coat. Allow full drying per manufacturer specification. Sand lightly with 320 grit — light, consistent pressure, with the grain — to remove any dust nibs and provide mechanical tooth for the second coat.
Second and third coats — standard application, inter-coat sanding
Apply subsequent coats at standard consistency with consistent brush or pad strokes in the grain direction. For polyurethane: 2–3 topcoats total is standard, with 320-grit sanding between each after confirmed drying.
For lacquer: 3–5 thin coats due to lower film build per coat. For oil finish: wipe on, allow penetration (15–30 minutes), wipe off excess firmly — repeat until wood no longer absorbs. Between oil coats, buff with 0000 synthetic pad (not steel wool) after each coat dries.
📝 The fisheye situation is one I now discuss proactively with any client who says their furniture was previously “oiled.” A walnut side table finished with Danish oil three years earlier was stripped with citrus stripper, sanded to 180 grit, and I applied an oil-based polyurethane — within 24 hours the surface showed classic fisheye across 40% of the tabletop. The polyurethane had to be stripped and the protocol restarted with two coats of Zinsser SealCoat at 3:1 dilution with denatured alcohol, 220-grit inter-coat sanding, then polyurethane over the sealed surface. The second application was perfect. I now apply the water drop test and specifically look for any sign of oil contamination before recommending polyurethane on any stripped surface.
Frequently Asked Questions About Refinishing Wood After Stripping
Do you need to sand wood after chemical stripping?
Yes — sanding after chemical stripping is required for all wood surfaces regardless of the stripper type used. Sanding serves three functions that cannot be achieved by stripping alone: it removes the raised grain caused by water-based strippers; it removes residual stripper crust in the corners and open grain that scraping cannot fully reach; and it provides a mechanically consistent surface porosity that ensures even stain absorption and finish adhesion across the entire piece. The minimum effective sanding is 120 grit followed by 180 grit with the grain, with vacuuming and tack cloth between grits.
How long after stripping can you apply new finish?
The minimum wait depends on the stripper type and the neutralisation process. After alkaline or citrus stripper neutralisation: 24 hours for the neutralisation solution to fully dry before sanding; then standard drying after sanding (2–4 hours) before applying stain.
After methylene chloride stripper: 24 hours minimum for solvent evaporation from within the grain — longer in cool or poorly ventilated conditions. The water drop absorption test is more reliable than a fixed time: when water absorbs in under 30 seconds, the surface is chemically ready regardless of elapsed time.
Why does the new stain look blotchy after stripping?
Blotchy stain after stripping has four possible causes. First: the stripper was not fully neutralised and pH variation across the surface causes differential stain absorption. Second: the species is blotch-prone (pine, cherry, maple) and required a pre-stain conditioner that was not applied.
Third: the final sanding grit was too fine (220+), partially closing the pores and creating uneven absorption zones. Fourth: moisture content of the wood is not uniform — areas near joints or veneer edges dry at different rates and absorb stain differently. Test on a hidden area with conditioner before applying stain to the full piece.
Can you apply polyurethane directly over wood stripped of its oil finish?
Not without a barrier coat. Wood that previously had a penetrating oil finish (danish oil, linseed oil, tung oil) retains polymerised oil residue in the pores even after the surface oil has been removed. This residual oil causes fisheye in polyurethane — the finish retracts from oil-contaminated pores, creating small crater-like depressions across the surface.
Apply two thin coats of dewaxed shellac (Zinsser SealCoat) before polyurethane to seal the oil residue. This shellac barrier coat is compatible with both the residual oil below and the polyurethane above — it bridges the incompatibility. The SealCoat must be dewaxed; regular Zinsser Bulls Eye shellac contains wax and will itself prevent polyurethane adhesion.
For the complete list of oil finishes that require this barrier coat, see How to Remove Danish Oil and How to Remove Linseed Oil.
Summary: Key Values for Refinishing Wood After Stripping
Refinishing stripped wood requires five preparation steps before any stain or topcoat is applied. Neutralise the stripper residue: alkaline strippers with diluted vinegar (1:10), citrus strippers with baking soda solution plus mineral spirits, methylene chloride with mineral spirits wipe. Allow 24 hours drying after neutralisation. Address raised grain from water-based strippers with controlled pre-wetting followed by 150–180 grit sanding. Sand progressively 120 → 150 → 180 grit with vacuum and tack cloth between grits.
Never use steel wool — iron particles in tannin-rich grain cause dark staining under the new finish. Confirm readiness with the water drop absorption test: water absorbing in under 30 seconds confirms contaminant-free surface. Apply pre-stain conditioner on blotch-prone species (pine, cherry, maple). Apply dewaxed shellac barrier coat before polyurethane if the previous finish was oil-based — prevents fisheye. Apply stain, allow complete drying (24 hours oil-based, 8 hours water-based), then topcoat with inter-coat 320-grit sanding between coats.
Once the water drop test passes and sanding is complete, the next step is How to Stain Wood or How to Refinish Furniture for the complete topcoat guide.
→ Related: How to Remove Polyurethane from Wood→ Related: How to Remove Wax Finish from Wood (naphtha test for confirmed wax removal)→ Related: How to Remove Danish Oil from Wood→ Hub: How to Remove Wood Finishes — Complete Guide