
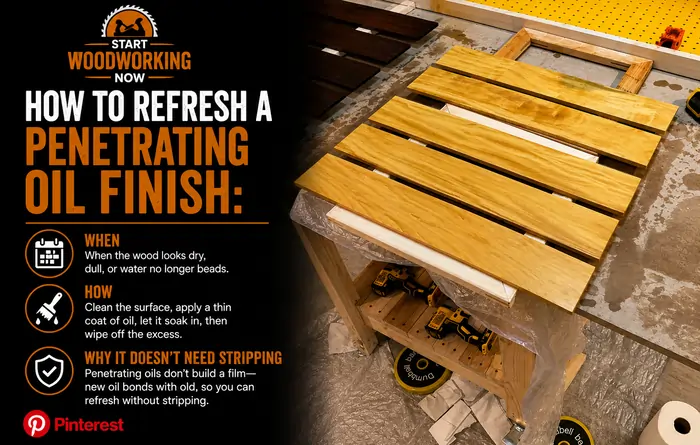
How to Refresh a Penetrating Oil Finish: When, How, and Why It Doesn’t Need Stripping
A penetrating oil finish can be refreshed indefinitely by re-applying oil to a cleaned surface — no stripping, no sanding to bare wood, no removal of the existing finish. This is one of the defining practical advantages of penetrating oil over film-forming finishes: because the new oil coat chemically bonds to the existing polymerized oil film through the same oxidative mechanism that cured the original coat, refresh is a maintenance task rather than a refinishing project. Understanding why this works — and where the process can go wrong — turns an occasional chore into a five-minute-per-session habit that keeps furniture and floors looking original indefinitely.
This article is part of the wood finishing guide — covering finish selection, application, troubleshooting, and the chemistry behind finish behaviour over time.
Navigate to your question
→ How do I know my oil finish needs refreshing? → The visible signs — dryness, water absorption, and dull patches ↓
→ How do I actually refresh an oil finish — step by step? → Why no stripping is needed and the correct application sequence ↓
→ How often should I refresh — and does it depend on species? → Refresh intervals by use case, traffic, and wood species ↓
→ Does refreshing danish oil work differently than pure tung oil? → Why metallic driers change the refresh timeline ↓
→ What mistakes ruin an oil finish refresh? → Steel wool iron contamination, over-oiling, and skipping cleaning ↓
How Do You Know an Oil Finish Needs Refreshing?
Penetrating oil finishes wear by a fundamentally different mechanism than film finishes — there is no film to crack or delaminate, only a gradual reduction in the oil’s surface protection as the cured polymer thins through use and environmental exposure. Three signs reliably indicate refresh is due.
Water No Longer Beads
The simplest diagnostic test: place a few drops of water on the surface. A well-protected oil finish causes water to bead and sit on the surface for at least several seconds before slowly absorbing. If water absorbs immediately and darkens the wood on contact, the oil’s surface protection has worn through to the point that the wood is essentially unprotected at that location. This test can be done spot-by-spot across a tabletop or floor to identify exactly which areas need attention rather than assuming uniform wear.
Visible Dryness or Dullness
Oil-finished wood that has lost surface protection often develops a visually dry, slightly chalky appearance — most noticeable in raking light, where well-oiled areas show a soft sheen and worn areas appear matte and lifeless by comparison. This is distinct from the sheen-level differences covered in the wood finish sheen guide; this is genuine surface depletion, not a deliberate matte formulation.
Increased Susceptibility to Marking
A surface with adequate oil protection resists fingerprints, light water marks, and minor contact staining. As the surface oil depletes, the wood becomes progressively more reactive to contact — fingerprints become visible, water glasses leave rings more readily, and light scratches become more visually prominent because there is less oil film to fill and obscure them. This increased marking sensitivity, more than any single dramatic sign, is usually what prompts most users to refresh.
Refreshing works for one structural reason: a penetrating oil never sealed itself off. There is no cured film to sand through, so fresh oil reaches the fibres the way the first coat did. Try the same routine on a film finish and it sits on the surface and stays tacky — the difference is set out in finishes that sit on the wood versus in it.
How to Refresh an Oil Finish — Step by Step
The refresh process for penetrating oil is simpler than original application because no sanding to bare wood and no extended cure-and-build sequence is needed — the existing surface already provides the substrate the new oil needs to bond to.
Why No Stripping Is Required
The chemical basis for skipping stripping is the same oxidative polymerization mechanism that cured the original finish. Fresh oil applied to an existing, fully-cured oil film does not need to dissolve or remove that film — it needs only to wet the surface and undergo its own oxidative cure, during which new crosslinks form not only within the fresh oil layer but at the interface between fresh and existing oil, because both layers share the same fatty acid chemistry and both are exposed to the same atmospheric oxygen during the new cure cycle.
This produces genuine chemical bonding between old and new material — comparable in spirit to the re-amalgamation mechanism in evaporative finishes, though through a different chemical pathway (oxidative crosslinking rather than solvent re-dissolution). The full mechanism of oxidative cure and how new crosslinks form during the radical chain reaction is covered in the wood finish curing guide covering all four cure mechanisms.
The Refresh Sequence
Oil Refresh — Step Protocol
Clean — mineral spirits on a cloth removes grime without attacking the cured film.
Light scuff (optional) — grey synthetic pad on heavily worn areas only. Never steel wool on tannin-rich species.
Apply oil — same product as original, generously, let penetrate 10-20 min.
Wipe off ALL excess — critical. Oil left on the surface cures sticky and uneven.
Cure — surface dry 12-24 hrs; dispose of rags via sealed-can-with-water (combustion risk).
Step 1 — Clean the surface. Remove dust, grease, and any accumulated grime with a cloth dampened with mineral spirits (for oil-based finishes) — this removes surface contamination without attacking the cured oil film, since the cured film is no longer soluble in its original solvent.
Step 2 — Light surface scuff (optional, for heavily worn areas only). If the surface shows significant wear with a glazed or burnished appearance, a light pass with a grey synthetic abrasive pad (not steel wool — covered in the mistakes section below) opens the surface slightly for better oil absorption. For surfaces in generally good condition with only mild dulling, this step can be skipped entirely.
Step 3 — Apply fresh oil. Apply the same oil product used originally (or a compatible product — pure tung oil over pure tung oil, danish oil over danish oil) generously with a clean cloth or brush, allowing it to penetrate for 10–20 minutes.
Step 4 — Wipe off excess. This step is critical and identical in importance to original application: all excess oil must be wiped off the surface, leaving only what has been absorbed. Oil left to cure on the surface rather than within the wood produces a sticky, uneven film rather than the intended smooth refresh. The wiping technique and timing follow the same protocol as initial application, detailed in the tung oil application guide covering the flood-absorb-wipe sequence and the danish oil application guide covering coat timing and rag disposal.
Step 5 — Allow to cure. Surface dry typically within 12–24 hours; light use can resume at that point, with full cure progressing over the following days as described in the oxidative polymerization chemistry.
Note that rag disposal safety applies identically to refresh sessions as to original application — refresh rags are oil-soaked and carry the same spontaneous combustion risk as application rags, requiring the sealed-can-with-water or flat-outdoor-cure protocol covered in the safety guide.
How Often Should You Refresh — By Use and Species
Refresh frequency depends on traffic level, exposure to water and cleaning, and to some extent the species being finished, since wood porosity affects how much oil the surface retains over time.
| Application | Typical Refresh Interval | Notes |
|---|---|---|
| Cutting boards (regular use) | Monthly | Frequent washing depletes surface oil rapidly |
| Dining tables | Every 3–6 months | Spot refresh high-contact areas more often |
| Oil-finished hardwood floors | Annually | High-traffic zones may need 6-month spot refresh |
| Low-traffic furniture (shelving, decorative) | Every 1–2 years | Minimal contact wear extends interval |
| Outdoor oil-finished furniture | Every 3–6 months (seasonal) | UV and weather exposure accelerate depletion significantly |
Species and Porosity
Open-grain species (oak, ash, mahogany) have larger surface pores that retain oil within the wood structure longer than tight-grain species (maple, birch, cherry), where oil sits closer to the surface and depletes faster under abrasion. In practice this means tight-grain species used as high-contact surfaces (a maple cutting board, for example) typically need more frequent refresh than an oak table experiencing similar use, simply because the oil reservoir within the wood structure is smaller and closer to the wear surface.
Refreshing Danish Oil vs Pure Tung Oil — Why the Chemistry Differs
The metallic drier content that distinguishes danish oil (and BLO) from pure tung oil — covered in detail in the oxidative polymerization guide — affects refresh behaviour in a specific, predictable way.
Danish Oil — Faster Re-Bonding, Shorter Working Window
Danish oil’s cobalt and manganese driers accelerate the radical chain initiation and propagation reactions during refresh exactly as they did during original cure. This means a danish oil refresh surface-cures faster — typically tack-free within 4–8 hours rather than the 12–24 hours typical of undried penetrating oils — but it also means the working window for wiping off excess oil before it begins to set is correspondingly shorter. Refreshing a large surface (a full dining table or floor section) with danish oil requires working in smaller sections to ensure excess oil is wiped before the drier-accelerated cure begins to tack up.
Pure Tung Oil — Slower, More Forgiving Refresh
Pure tung oil without metallic driers cures more slowly during refresh, giving a longer working window for wiping large surfaces evenly, at the cost of a longer wait before the surface can return to light use. For surfaces being refreshed for the first time after years of use, the slower tung oil cure also gives more visual feedback during the wipe-off stage — uneven absorption or missed spots are easier to identify and correct before the oil begins to set. The fundamental performance and chemistry differences between these two oils, including their respective iodine values and conjugation chemistry, are covered in the tung oil vs linseed oil comparison guide.
Common Mistakes That Ruin an Oil Finish Refresh
Using Steel Wool Instead of Synthetic Abrasive Pads
Steel wool — even fine 0000 grade — sheds microscopic iron particles that embed in the wood surface during abrasion. On tannin-rich species (oak, walnut, cherry, mahogany), these embedded iron particles react with the wood’s natural tannins to form blue-black iron-gallate staining, the same chelation mechanism covered in the tannin bleed guide covering iron-tannin staining and its differential diagnosis from tannin migration. The staining from embedded steel wool particles can appear days or weeks after the refresh, well after the work is complete, making the cause difficult to trace back to the abrasive choice. Grey or maroon synthetic abrasive pads provide equivalent surface scuffing without any risk of metal particle contamination and should be the default choice for any tannin-rich species.
Over-Oiling Past the Saturation Point
Wood has a finite capacity to absorb oil — once the accessible cell structure near the surface is saturated from repeated refresh cycles over years, additional oil applied during a refresh session has nowhere to penetrate and instead sits on the surface. If this surface oil is not wiped off completely, it cures as a separate, poorly-bonded layer that feels tacky or produces a cloudy, uneven sheen rather than the clean appearance of properly absorbed oil. The symptom is identical in mechanism to the oxygen-starvation failure mode covered in the oil finish not drying guide — a thick surface layer cures on top while remaining soft beneath, except in this case the cause is excess unabsorbed oil rather than a single over-thick application.
The correction once over-oiling has occurred is the same as for any oxygen-starved tacky finish: wipe down thoroughly with mineral spirits to remove the unabsorbed surface oil, allow the surface to fully dry, and apply a much thinner subsequent coat with more thorough wipe-off. For surfaces approaching saturation after years of regular refresh, reducing the oil quantity applied per session — rather than skipping refresh entirely — maintains protection without compounding the surface buildup problem.
Skipping the Cleaning Step
Applying fresh oil directly over an unwashed surface traps existing grease, food residue (on cutting boards and tables), or cleaning product residue beneath the new oil layer. This is particularly relevant for kitchen surfaces, where cooking oil splatter and food residue accumulate between refresh cycles. A thorough clean before refresh — using a mild dish soap and water for food-contact surfaces, dried completely before oil application — ensures the new oil bonds to clean wood and existing cured oil rather than to a layer of surface contamination that will remain trapped beneath the new coat indefinitely.
Mixing Incompatible Oil Products
Refreshing a surface originally finished with one oil product using a different, chemically distinct product can produce unpredictable results — particularly mixing a drier-containing product (danish oil, BLO) onto a surface originally finished with pure tung oil, or vice versa. While both cure by the same oxidative mechanism and will generally bond, the differing drier content and cure speed can produce uneven curing or, in rare cases, slight colour or sheen mismatches between original and refreshed areas. When the original product is known, using the same product for refresh eliminates this variable entirely.
Refreshing only works on a properly cleaned surface. Oil applied over residue sits on top of it and never bonds to the wood underneath, so the cleaning step is not optional — protocol in preparing a finished surface before maintenance.
Frequently Asked Questions
Do I need to sand before refreshing an oil finish?
No, not in most cases. A light scuff with a synthetic abrasive pad is only needed if the surface has a glazed or burnished appearance from heavy wear. For surfaces in generally good condition with mild dulling, cleaning alone is sufficient preparation — the fresh oil bonds chemically to the existing cured film through oxidative crosslinking without needing mechanical abrasion to create adhesion, unlike film-forming finishes.
Can I refresh an oil finish with a different product than what was originally used?
Generally yes, since all penetrating oils cure by the same oxidative mechanism, but using the same or a chemically similar product avoids potential sheen, colour, or cure-speed mismatches. Switching from pure tung oil to a drier-containing danish oil is usually fine; the reverse can leave a visible difference in sheen between older and newly refreshed areas since the cure characteristics differ.
Why does my refreshed cutting board feel sticky a day later?
This is almost always insufficient wipe-off, leaving excess oil on the surface that cures as a poorly-bonded sticky layer rather than penetrating fully into the wood. It can also indicate the wood has reached its saturation point from years of refresh and can no longer absorb additional oil at the rate applied. The fix is the same in both cases: wipe down thoroughly with mineral spirits, allow to fully dry, and apply a noticeably thinner coat next time with more aggressive wiping to remove all surface excess before it begins to cure.
Is it safe to refresh a cutting board with the same oil used for cooking?
No — common cooking oils (olive, vegetable, canola) have low iodine values and do not cure by oxidative polymerization; they remain liquid within the wood and eventually turn rancid, producing odour and potentially supporting bacterial growth rather than providing the protective polymerized film that food-grade mineral oil or pure tung oil create. Use only food-grade mineral oil (USP grade) or pure tung oil for cutting board refresh, as covered in the food-safe wood finishes guide.