How to Stain Wood: Pigment, Dye, and Gel Stain Guide — Application Method, Timing, and Species Protocol
Staining wood produces consistent, predictable results when three variables are matched before application: stain type (pigment, dye, or gel — each with a different penetration mechanism), wood species (open-grain species like oak and walnut respond to pigment stain; dense species like maple require dye stain; blotch-prone species like pine require gel stain), and wipe-off timing (oil-based stain: 5–15 minutes; water-based: 2–5 minutes; dye stain: immediately while wet).
The flood-and-wipe technique — apply stain liberally, then wipe off everything the wood did not absorb — is the correct application method for all stain types on all species. It eliminates lap marks, prevents blotching, and removes application skill as a variable.
This guide is part of the complete wood finishing guide — covering finish selection,
application protocols, and troubleshooting for all finish types.
⚠ Spontaneous Combustion Risk — Oil-Based Stain Rags
Oil-based stain contains drying oils that generate heat through oxidative curing. Rags saturated with oil-based stain can ignite without external flame. After every application: spread used rags flat outdoors on a non-combustible surface until fully dry, or submerge in a sealed metal container filled with water. Never bundle, fold, or leave in a bin. Water-based stain rags do not carry this risk.
How Do You Stain Wood?
The Dry Brush Uniformity Test — Before You Commit to Stain
Before applying any stain to the actual piece, brush denatured alcohol on a sample area. The alcohol temporarily darkens the wood, simulating how stain will absorb. If the darkening is uniform across the surface → stain will absorb evenly. If some areas darken more than others → grain porosity is uneven and you will see blotching with penetrating stain.
Uneven darkening in the alcohol test indicates either moisture variation in the wood (allow more drying time), residual finish in areas (more sanding needed), or a blotch-risk species that requires pre-conditioning. The test takes 30 seconds and costs nothing. Running it before staining avoids sanding the entire piece back to bare wood after a blotchy stain application.
→ Before staining — prepare the surface correctly: How to Prepare Wood for Staining — Species Protocol, End Grain, and Pre-Stain Conditioner→ Staining after stripping: How to Refinish Wood After Stripping→ Full refinishing guide: How to Refinish Furniture
What Are the Three Types of Wood Stain and How Do They Work Differently?
Stain products are labelled by carrier type (oil-based, water-based) and by brand names — but the variable that actually determines how a stain behaves on wood is the colourant mechanism: whether the colour comes from pigment particles, dye molecules, or a thick gel formulation. Understanding this determines which stain to select for each species and application, and what happens when you apply a second coat.
The choice between oil-based and water-based stain has implications for grain raising, blotching, and topcoat timing — the complete oil vs water-based stain comparison.
How Do You Apply Wood Stain Using the Flood-and-Wipe Method?
The flood-and-wipe technique is the most reliable staining method for all wood types, all stain types, and all skill levels. Its principle is simple: the wood determines the colour, not the person applying the stain. By flooding stain generously on the surface and then wiping off everything the wood did not absorb, you remove application technique as a variable. The result is governed by the wood’s own anatomy — its pore distribution, species density, and the final sanding grit — not by how evenly you brush.
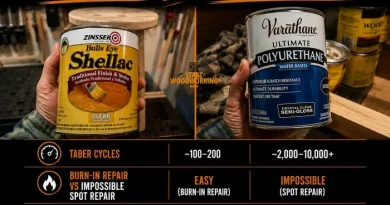
After stain has cured, the most common topcoat is polyurethane — the polyurethane application protocol with stain-specific timing requirements.
What Is the Correct Wipe-Off Timing for Each Stain Type?
How Do You Control Stain Colour on End Grain?
End grain absorbs penetrating stain at 4–8 times the rate of face grain — the cut ends of wood fibres are open tubes that pull in stain far more aggressively than the sides of those fibres. Without treatment, end grain on a stained piece appears dramatically darker than the face grain, which looks unfinished. The correct solution is a diluted shellac wash coat applied to end grain areas only before staining.
End grain [absorbs] stain through the open lumen of cut wood cells — the hollow centre of each wood fibre. Face grain [absorbs] stain only through the cell walls and the narrow inter-cell spaces. The cross-section of a wood fibre exposed at end grain [presents] an opening approximately 50–100 microns in diameter. The same fibre’s cell wall, exposed on face grain, [presents] a thickness of 2–8 microns. This geometric difference produces the 4–8× absorption rate differential.
Which Stain Type for Which Species?
| Species | Pore Type | Pigment Stain | Dye Stain | Gel Stain | Pre-Stain Conditioner? |
|---|---|---|---|---|---|
| Oak (red and white) | Ring-porous, open | ✅ Excellent — pigment lodges in large pores, creates strong grain definition | ⚠️ Acceptable — uniform colour but loses the dramatic grain pop that makes oak distinctive | ✅ Good — uniform colour but less grain definition than pigment stain | Not needed — oak absorbs evenly |
| Walnut | Semi-ring porous | ✅ Good | ✅ Good | ✅ Good | Not needed. Consider: walnut’s natural colour is often more attractive than any stain |
| Ash and Mahogany | Ring-porous, open | ✅ Excellent | ⚠️ Acceptable | ✅ Good | Not needed |
| Hard Maple | Diffuse-porous, dense | ❌ Poor — pigment wipes off with minimal colour change on dense surface | ✅ Best choice — dye penetrates into cells regardless of pore size | ⚠️ Moderate — requires ≤150 grit to give gel enough tooth | Yes if using pigment stain, but dye stain is strongly preferred |
| Cherry | Semi-diffuse, fine | ⚠️ Moderate — use light colours only; oxidises significantly over time | ✅ Good — better for even coverage on fine grain | ✅ Good | Yes with pigment stain. Note: cherry’s natural colour darkens dramatically with light exposure over 1–2 years. Consider leaving natural or very light tints that complement, not fight, the oxidation. |
| Pine, Spruce, Fir | Softwood, highly variable | ❌ Blotching — extreme earlywood/latewood contrast; requires conditioner minimum | ⚠️ Better — still shows some variation but more controllable | ✅ Best choice — does not rely on penetration; most blotch-resistant option | Yes, 24h before pigment or dye stain. Not needed before gel stain |
| Birch and Poplar | Diffuse-porous | ❌ Blotching — ray tissue pattern causes dark streaks under pigment stain | ✅ Best choice — most uniform results on birch and poplar | ✅ Good — acceptable blotch control, especially on vertical surfaces | Yes with pigment stain. Shellac washcoat (SealCoat 1:3 alcohol) is more reliable than conditioner on birch plywood |
| Alder | Semi-diffuse | ⚠️ Moderate — some blotching risk | ✅ Good | ✅ Good | Yes with pigment stain |
Pine, poplar, and alder produce blotchy stain absorption without proper preparation — the blotchy wood stain diagnosis with the gel stain or pre-stain conditioner fix.
📝From the workshop: On a solid hard maple dining table where the client wanted a medium walnut tone, I first tested Minwax Dark Walnut pigment stain with pre-stain conditioner (24-hour cure) on the underside of the apron. The result was a barely-there amber tint — maple’s density left the pigment particles with almost nowhere to grip. I switched to General Finishes Water Based Dye Stain in Brown Mahogany, diluted 1:1 with water, flooded on and wiped immediately at 150-grit surface. The colour was rich, even, and showed the figure clearly. A second undiluted coat two hours later reached the target depth. The lesson that piece confirmed permanently: pigment stain and maple are incompatible for any colour deeper than a light tint — dye stain is not a substitute, it is the only correct tool for the species.
How Do You Prevent Lap Marks When Staining?
Lap marks are the most visible staining failure — a darker band that follows the boundary where you stopped and started, visible from any angle under the finish. Once present, they require sanding back to bare wood and re-staining to correct. Prevention is the only treatment.
Lap marks form when fresh stain is applied over stain that has already begun to dry and set tacky on the surface. The fresh stain dissolves the already-set stain in the overlap area and the pigment accumulates in a concentrated band. The width of the overlap determines how visible the mark is — even a 2 cm overlap produces a detectable colour band on a flat surface under raking light.
Prevention rules by surface type
On furniture components (table legs, chair rails, drawer fronts): Complete each discrete component from one end to the other in a single uninterrupted pass. A chair leg is one unit — apply stain to the entire leg before wiping any of it. Never pause mid-component.
On large flat surfaces (tabletops, doors, floor sections): Work in strips the width of one board or panel, from one end of the surface to the other, applying and wiping each strip completely before moving to the next. Use grain lines, board joints, or panel seams as natural stop points where laps are invisible. Alternatively, on oil-based stain which has a 5–15 minute window: two people — one person floods the stain, one person immediately follows 90–120 cm behind with a clean cloth wiping.
On mouldings and profiles: Apply stain to all the recessed areas first (with a brush), then the flat faces. Wipe starting with the flat faces and finish with the recesses. This sequence prevents stain from the faces running into the recesses and creating a darker pool.
How Long Do You Wait Before Applying Topcoat Over Wood Stain?
| Stain Type | Topcoat Type | Minimum Wait Time | Risk if Too Early |
|---|---|---|---|
| Oil-based pigment stain | Oil-based polyurethane or varnish | 24 hours | Softening of stain layer, possible colour bleed into first coat |
| Oil-based pigment stain | Water-based polyurethane or lacquer | 72 hours minimum | White haze (blush) as water-based film traps residual mineral spirits. Permanent — requires re-sanding. |
| Water-based pigment stain | Water-based topcoat | 4–8 hours (fully dry) | Re-wetting of stain, possible colour movement |
| Water-based pigment stain | Oil-based topcoat | 4–8 hours | Minimal risk — oil-based topcoat solvents generally compatible |
| Dye stain (water-soluble) | Any topcoat | 30–60 minutes (fully dry) | If not fully dry: re-wets, colour moves. Ensure no powder on surface. |
| Dye stain (alcohol-soluble) | Oil-based topcoat | 30 minutes | Low risk |
| Dye stain (alcohol-soluble) | Water-based topcoat | 30 minutes + test | Alcohol-soluble dyes can bleed into water-based first coat. Apply shellac barrier coat (1 lb cut dewaxed shellac) before water-based finish over alcohol dye stain. |
| Gel stain | Any topcoat | 24–48 hours | Gel binder takes longer to cure than liquid stain — topcoat over undercured gel stain produces a soft, tacky first coat that never fully hardens. |
Stain must be fully dry before any topcoat — water-based polyurethane over wet stain produces permanent haze — the polyurethane cloudy diagnosis and the moisture-trap mechanism.
📝From the workshop:The 72-hour rule for oil stain under water-based topcoat became non-negotiable for me after a pine blanket chest came back from a client six months after delivery with hairline crazing across the entire top panel. She had applied Minwax Golden Oak oil stain, waited what she described as “a day and a half,” then applied Minwax Polycrylic. On inspection, the Polycrylic had developed micro-blushing across the entire surface — not immediately visible at application, but it appeared progressively as the residual mineral spirits continued to work their way out. The fix required stripping the Polycrylic with NMP gel, re-sanding the stained surface at 180 grit, re-staining, and this time waiting exactly 72 hours confirmed by the white cloth test before any topcoat. In a second workshop test I deliberately applied Polycrylic at 24, 48, and 72 hours over identical stained pine samples in the same conditions. The 24h sample hazed within two hours. The 48h sample developed subtle clouding by day three. The 72h sample stayed crystal clear. The cloth test at 68 hours still showed a faint amber smear — I waited the full 72 before coating, and the result was clean.
Why Does a Second Coat of Stain Look Almost the Same?
A second coat of penetrating stain produces minimal additional colour because the wood grain cells are already saturated from the first coat. The first coat fills the available absorption space in the wood cells — each subsequent coat has less capacity to enter. Darker results require a different, darker stain — not more coats of the same stain applied to already-saturated wood.
The exception is gel stain, which does not penetrate the grain and therefore does not reach a saturation point in the wood cells. Each coat of gel stain adds a layer of tinted medium on the surface. Two coats of gel stain produce noticeably darker colour than one coat — and the colour builds predictably with each additional coat, which is why gel stain is the preferred choice when very dark results on light-coloured species are required.
How to Achieve Deeper Colour with Penetrating Stain
Option 1 — Darker stain colour: The most reliable approach. If the test piece result is too light, choose a stain that is one or two shades darker on the manufacturer’s colour chart, not the same stain applied twice.
Option 2 — Longer contact time: Increase from 2-minute to 4-minute contact before wiping on oil-based stain. This uses more of the available absorption capacity. Has limits — wood cells reach saturation at approximately 5 minutes for most species with standard stain.
Option 3 — Tinted first topcoat coat: Add a small amount of compatible dye to the first thinned topcoat. This adds colour from the topcoat side rather than the stain side, bypassing the saturation limit.
Option 4 — Switch to gel stain: If multiple layers of deep colour are required (e.g., ebonising a light species), switch to gel stain for the first coat, allow full cure, then apply a second gel coat. Gel stain builds colour predictably with each layer.
The behaviour of second coats varies completely between stain types — this is one of the most misunderstood aspects of wood staining and the source of significant DIY failure.
-> Pigment stain — second coat generally does not work as intended. The binder in the first coat partially seals the wood surface after drying. A second coat of pigment stain applied over dried pigment stain cannot penetrate as deeply as the first. In many cases, the solvents in the second coat re-dissolve the first coat, actually lifting colour and producing a lighter result than the first coat alone. If you want more depth with pigment stain: leave the first coat on for the maximum safe time before wiping, or apply with no dilution. Do not add a second coat hoping for more depth — you will likely lose colour.
-> Dye stain — fully buildable with multiple coats. Because dye has no binder and penetrates into the cells directly (bonding to the wood itself), there is nothing sealing the surface to prevent a second coat from penetrating. Additional coats of dye stain deepen colour progressively. Allow each coat to dry completely before the next (typically 30–60 minutes for water-soluble dye, longer for oil-based dye). Build to the target depth coat by coat. Using a more diluted solution for multiple thin coats gives more control than one heavy coat.
-> Gel stain — multiple coats work, with conditions. Gel stain adheres to the surface texture rather than penetrating. Additional coats can be applied to deepen colour after 4–6 hours of drying. The surface does not seal between gel coats in the same way as with liquid pigment stain. However, applying a second coat over a first coat that has fully cured (over 24 hours) may be difficult — the dried binder surface can be too smooth for additional gel to grip. Apply second gel coats while the first coat is fully touch-dry but before it has cured completely (4–8 hours).
What Are the Key Specifications for Staining Wood?
| Variable | Attribute | Value and Detail |
|---|---|---|
| Oil-based pigment stain | Wipe-off timing window | 5–15 minutes after application. At 5 minutes: wood has absorbed the stain; excess on surface can be wiped cleanly. After 15 minutes on most species: stain begins to get tacky as the carrier evaporates — wiping becomes difficult and produces streaks. For large surfaces or hot weather (faster evaporation): reduce to 5–8 minute windows and work in smaller sections. Test the timing on the hidden test area first — different wood species and ambient temperatures change how quickly oil-based stain sets. |
| Water-based pigment stain | Wipe-off timing window | 2–5 minutes maximum. Water-based carriers evaporate significantly faster than mineral spirits. On warm days or in low-humidity environments, the window can shrink to 2 minutes. Always apply to one board or panel at a time and wipe that section before moving to the next. Attempting to stain an entire table top before wiping = guaranteed lap marks. |
| Dye stain | Wipe-off requirement | Immediately while wet — no delay. The stain should be flooded on and wiped off in the same continuous motion: apply section, wipe section, move forward. The colour that has penetrated into the cells remains permanently. Any dye left on the surface that dries reverts to powder form. This powder prevents finish adhesion — a topcoat applied over dried dye remains soft, tacky, or clouds. If dye dries unevenly: re-sand to 150–180 grit before any topcoat. |
| Gel stain | Working time and wipe-off window | 5–10 minutes. Gel stain’s thick consistency provides longer working time than liquid stain — it does not run and evaporates more slowly. Apply with a cloth or brush, manipulate with a clean cloth to achieve the desired colour depth, then wipe off excess. Additional coats can be applied after 4–6 hours of drying to deepen colour progressively. Between coats: lightly buff the surface with a lint-free cloth (no sanding needed between gel stain coats — the surface texture is what holds subsequent coats). |
| Flood-and-wipe technique | Why it produces the best results | Applied liberally, the stain saturates the surface — high-absorption areas (earlywood in softwood, ray tissue in hardwood) absorb what they can, low-absorption areas absorb less. When you wipe off all the excess, the resulting colour is determined by the wood’s own absorption capacity, not by brush pressure or application amount. This produces inherently more even results than trying to apply stain sparingly and control colour through application technique. For pigment stain: flood on generously, let sit per timing above, wipe in grain direction with a clean cloth. For dye stain: flood and wipe simultaneously in a continuous pass. |
| Lap marks | Cause and prevention | Lap marks occur when wet stain overlaps onto a section of stain that has already begun to dry and become tacky. The fresh stain does not blend uniformly into the tacky section — the overlap is visible as a darker band after drying. Prevention: (1) work one complete board, panel, or table leg at a time without stopping — never end a stroke in the middle of a flat surface; (2) maintain a wet edge by working toward an already-stained area rather than leaving a dry edge and coming back to it; (3) on very large surfaces, use two people — one applies, one wipes immediately behind. Water-based stain on a large dining tabletop is the highest-risk scenario for lap marks. |
| Colour intensity control | How to get more or less colour | More colour (darker): (1) apply stain and wait longer before wiping (within the safe window); (2) dilute less (use stain at full concentration); (3) use a coarser final grit to leave more open pores; (4) for dye stain: mix more dye concentrate per litre of solvent. Less colour (lighter): (1) wipe off more quickly; (2) dilute the stain (mineral spirits for oil-based; water for water-based); (3) use a finer final grit to partially close pores; (4) for dye stain: mix less concentrate. Do not attempt to adjust colour by leaving stain on longer than the safe window — tacky stain produces uneven colour, not deeper colour. |
| Pre-stain conditioner — staining interaction | Colour reduction and compensation | Pre-stain conditioner reduces stain colour intensity by 30–40% by partially filling the pores before stain is applied. This reduction is consistent and predictable — it can be compensated by choosing a stain 1–2 shades darker than the target colour, OR by leaving the stain on for a longer period before wiping. The conditioner does not affect the final dry colour of the stain once the stain has fully cured — it affects absorption depth during application. Test the full protocol (conditioner + stain + wipe timing) on the actual piece to confirm the final colour before applying to all surfaces. |
| Oil-based stain + water-based topcoat | Minimum wait time | 72 hours minimum. Oil-based stains contain mineral spirits as the carrier. Mineral spirits evaporate slowly from the wood after the surface appears dry — residual solvent in the wood fibres continues to off-gas for 48–72 hours. Water-based polyurethane or water-based lacquer applied before 72 hours traps residual mineral spirits under the film — as the solvent tries to escape, it produces a white haze or milky appearance in the finish that is permanent and requires re-sanding. Test: press clean white cloth on stained surface — any colour transfer means the stain is not dry. |
| Oil-based stain + oil-based topcoat | Minimum wait time | 24 hours. Oil-based topcoat and oil-based stain use compatible solvents — the topcoat’s solvents are not trapped by residual stain solvent in the same way as water-based topcoat. However, applying oil-based topcoat before 24 hours on heavy stain applications can produce softening of the stain layer. Light applications of stain on small projects: 12 hours may be sufficient — test by pressing clean cloth and confirming no colour transfer. |
| Gel stain + topcoat | Minimum wait time | 24–48 hours. Gel stain contains more binder than liquid pigment stain — the thicker binder layer takes longer to cure fully. In humid conditions or on highly porous wood where gel stain applied thick: 48 hours before any topcoat. Test: press clean cloth on gel-stained surface — any colour transfer or tacky feel = not ready for topcoat. |
The Stain Lift Problem — First Poly Coat Moves the Colour
Oil-based polyurethane applied full-strength over oil-based stain can re-solubilise the stain binder, causing pigment to shift or streak. Fix: apply the first polyurethane coat thinned 10%, brush in one direction only without back-brushing, and do not rework any area once the brush has passed.
Frequently Asked Questions About Staining Wood
Why does wood stain look blotchy even after following the instructions?
Four causes. First: species mismatch — pine, maple, birch, and cherry blotch when stained with liquid pigment stain because their cellular anatomy absorbs unevenly. Solution: gel stain or dye stain for these species. Second: pre-stain conditioner applied at the label-recommended 15 minutes rather than 24 hours. Third: final sanding grit too fine (220+) which closes pores unevenly. Fourth: stain left too long before wiping (tacky stain produces dark, uneven areas). The preparation guide covers the complete prevention protocol for each species.
Can you apply a second coat of wood stain to make it darker?
Depends on the stain type. Dye stain: yes, buildable layers — a second coat deepens colour without problem. Gel stain: yes, additional coats within 4–8 hours of the first. Pigment (liquid) stain: generally no — the binder in the first coat seals the wood, and a second coat often re-dissolves the first, making it lighter. For deeper colour with pigment stain: apply at full concentration without dilution, leave on for the maximum safe time before wiping, and choose a darker shade initially.
How long after staining can you apply polyurethane?
Oil-based stain + oil-based polyurethane: 24 hours. Oil-based stain + water-based polyurethane: 72 hours minimum (shorter time produces white haze that is permanent). Water-based stain + any polyurethane: 4–8 hours. Always confirm with the cloth test: press a clean white cloth firmly on the stained surface — any colour transfer means the stain is not fully dry regardless of how much time has passed.
What Are the Key Values for Staining Wood?
Three stain types with distinct mechanisms: pigment stain (particles in pores — grain contrast, best for open-grain species like oak and walnut, one effective coat), dye stain (molecules in cells — uniform colour, best for dense species like maple and birch, buildable layers, must wipe immediately), gel stain (surface-adhering — blotch control, best for pine and poplar, requires ≤150 grit for adhesion, multiple coats possible).
Flood-and-wipe is the universal application method — apply liberally, the wood absorbs what it can, wipe off all excess while still wet. Timing: dye stain immediately; water-based pigment 2–5 minutes; oil-based pigment 5–15 minutes; gel stain 5–10 minutes. Lap marks form when fresh stain overlaps tacky stain — work one complete board/component at a time, maintain wet edge. Topcoat timing: oil-based stain + water-based topcoat = 72h minimum (shorter = white haze, permanent). Cloth test confirms dry: zero colour transfer = safe to topcoat. Gel stain requires 24–48h before any topcoat.
→ Preparation guide: How to Prepare Wood for Staining — Species Protocol and Pre-Stain Conditioner→ After staining: How to Refinish Furniture — complete finishing guide→ After stripping: How to Refinish Wood After Stripping