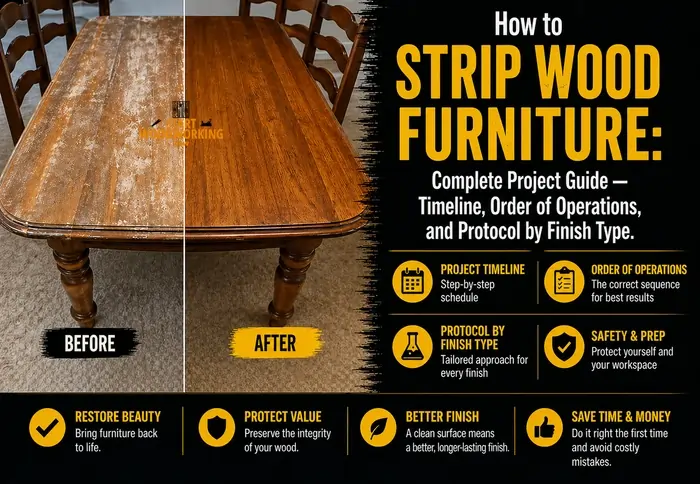
How to Strip Wood Furniture: Complete Project Guide — Timeline, Order of Operations, and Protocol by Finish Type
Stripping wood furniture is often presented as a quick, one-day task. In practice, it’s a controlled, multi-stage process where timing, material identification, and order of operations determine whether the result is clean and refinish-ready—or uneven, damaged, and abandoned mid-project.
This guide is based on practical workshop workflow, focusing on the points where most projects fail:
- applying the wrong stripper to the wrong finish or surface
- underestimating dwell time and drying windows
- skipping neutralisation and contaminating the wood before refinishing
Instead of treating stripping as a single step, this guide breaks it into a complete system:
- how to determine if stripping is needed at all
- how to identify finish type and construction (solid wood vs veneer)
- how to apply the correct stripping protocol with realistic timing
- how to manage residue, drying, and sanding to avoid refinishing defects
Where timing or material behaviour can vary (temperature, finish thickness, or product formulation), recommendations are based on typical workshop conditions, not minimum label instructions.
Safety procedures referenced here align with general guidance from product Safety Data Sheets (SDS) and regulatory bodies such as the Environmental Protection Agency (EPA). Always follow the instructions provided with the specific product you are using and comply with local regulations, especially when working with restricted or high-risk solvents.
How Do You Strip Wood Furniture?
*NMP Gel (N-Methyl-2-pyrrolidone): NMP is a high-strength solvent used in many gel strippers that penetrates thick finishes such as polyurethane and varnish. It has low vapor pressure but high skin absorption risk, which is why gloves and skin protection are required throughout use.
*Benzyl Alcohol Gel: Benzyl alcohol–based strippers are solvent systems designed for controlled, slower removal of finishes. They do not contain water, making them safer for veneered surfaces where moisture can weaken adhesives.
*Denatured Alcohol: Denatured alcohol is ethanol modified with additives to make it non-consumable. It dissolves shellac finishes quickly without requiring gel strippers.
Quick Start — What Matters Before You Begin
If you only read one section, read this.
- Neutralisation determines final result
If residue remains in the wood pores, stain will turn blotchy or fail entirely. Always confirm with a water drop test before sanding. - Most furniture does NOT need stripping
A quick mineral spirits wipe reveals this. If the surface looks good when wet, you only need cleaning and recoating. - Stripping is a multi-day process (not a weekend task)
A dining table with polyurethane typically takes 4–6 days, including mandatory drying times. - The biggest mistake is rushing dwell time
Gel strippers need 60–90 minutes under plastic film to fully lift polyurethane—not the 15–30 minutes on most labels. - Wrong protocol destroys veneer
Veneered surfaces require a different approach (no aggressive sanding, no high-moisture strippers).
→ Before starting: How to Identify Wood Finish — confirm what you’re stripping
→ Stripper selection: How to Choose a Chemical Stripper
→ After stripping: How to Refinish Wood After Stripping
→ Hub: How to Remove Wood Finishes — Complete Guide
Why Most Stripping Projects Fail (And How This Guide Prevents Each Failure)
Professional furniture restorers see the same failure patterns repeatedly in pieces that were previously attempted by DIY stripping. Understanding these before starting is worth more than any single technique in this guide.
| Failure Pattern | Root Cause | Prevention |
|---|---|---|
| Stripper “doesn’t work” after one application | NMP gel on polyurethane: one application lifts one layer. Multi-coat finish requires multiple applications — not a product failure. | Plan 2–3 applications from the start for any piece with visible paint history or thick finish. Budget the full project time (see timeline below) before beginning. |
| Stripper dries before finish lifts | Gel stripper applied without plastic film cover loses 40–60% of active solvent in 15 minutes. Dwell becomes insufficient. | Cover every cm² with plastic cling film immediately after each application. Press flat at edges. No gaps. |
| Veneer lifts or bubbles | Water-based NMP gel (including citrus-branded products) introduces moisture that softens veneer adhesive at extended dwell. PVA joints soften. | Identify veneer before starting. Use benzyl alcohol gel (solvent-based, no water) on all veneered surfaces. |
| Stain looks blotchy after stripping | Stripper residue — particularly d-limonene from citrus/NMP gel — remains in pores. Creates differential absorption. Skipped neutralisation with mineral spirits wipe. | Complete neutralisation protocol after stripping. Water drop test before stain. Pre-stain conditioner on blotch-prone species (pine, cherry, maple). |
| Dark spots appear under new polyurethane | Previous oil finish (danish oil, linseed) residue in pores causes fisheye in polyurethane. Or iron particles from steel wool on tannin-rich wood. | Apply dewaxed shellac (Zinsser SealCoat) barrier coat after stripping any oil-finished piece before polyurethane. Never use steel wool on oak, walnut, cherry. |
| Project abandoned at day 2 | Unrealistic timeline expectations. “Strip furniture this weekend” guidance ignores mandatory drying times between stages. | Read the project timeline below before starting. Block 4–6 calendar days for a dining table. 2–3 days for a chair. |
| Wrong stripper produces no result | Casein milk paint (powder-based), catalyzed lacquer, and conversion varnish resist all standard strippers including NMP and MCl. | Run the 4-solvent identification test on a hidden area before buying any product. Standard stripper zero effect at 30 min confirms special protocol needed. |
What Is the Realistic Timeline for Stripping Wood Furniture?
Every furniture stripping guide underestimates the timeline. The mandatory drying times between stages are not optional — stripping before neutralisation has fully dried, or staining before the wood is completely neutral, produces the failures documented in the table above. The timeline below is for a dining table with oil-based polyurethane (the most common scenario). Simpler pieces (chair with shellac) take 2–3 days. More complex pieces (multi-coat paint history) take 7–10 days.
- Mineral spirits test — confirm stripping is needed
- Construction identification (solid vs. veneer) and finish identification (4-solvent test)
- Remove all hardware — label and bag each piece
- Set up workspace: plastic sheet, ventilation, PPE assembled
- Buy correct stripper based on finish type
- Apply gel stripper thick to vertical surfaces first, then horizontal
- Cover all surfaces with plastic film immediately — press flat
- Wait 60–90 minutes (not 15–30 as most labels suggest for full polyurethane)
- Test edge — finish should lift with minimal pressure
- Scrape with plastic scraper into disposal container
- Detail areas with brass brush and wooden picks
- Second application of gel stripper on any areas with remaining finish
- For single-coat polyurethane: often not needed — confirm by scrape test
- For 2–3 coat polyurethane: second full application mandatory
- Cover with plastic film, 60–90 min dwell
- Scrape all remaining finish
- Mineral spirits wipe to remove d-limonene oil residue (NMP gel)
- Baking soda solution (1 tsp/litre) wipe for pH neutralisation
- Allow surface to dry completely — do not sand yet
- Water drop test first — absorbs in under 30 sec confirms neutralisation complete
- 120 grit along grain — vacuum + tack cloth
- 150 grit — vacuum + tack cloth
- 180 grit final pass — vacuum + tack cloth
- Veneer: 220 grit hand sand only
- Pre-stain conditioner on blotch-prone species, 15–30 min, then stain
- Apply stain, wipe off excess, allow 24 hours drying minimum (oil-based stain)
- Check: colour transfer to clean cloth = not dry yet — wait longer
- First coat thin — sealer pass, absorbs unevenly (normal on stripped wood)
- 320 grit inter-coat sanding after confirmed dry
- Second and third coats at standard application
“Strip furniture this weekend” — Why this timeline is wrong
The guidance that furniture stripping is a one or two day project is based on dwell times printed on stripper labels (15–30 minutes) rather than the actual time needed to fully lift oil-based polyurethane (60–90 minutes per application). It also excludes the mandatory 24-hour drying windows after neutralisation and between coats that cannot be shortened.
A dining table with two coats of oil-based polyurethane, stripped correctly with NMP gel, neutralised, sanded, stained with oil-based stain, and finished with two coats of polyurethane takes a minimum of 5 calendar days with 8–10 hours of active work spread across them.
Projects abandoned in the middle — stripped but not neutralised, or stained before wood is dry — produce the blotchy, fisheye, or peel failures documented above.
How Do You Set Up the Workspace Before Stripping?
Workspace preparation takes 30–45 minutes and is the difference between a controlled project and a chemical exposure event or a ruined floor. Each stripper type has different requirements — the setup for NMP gel indoors is not the same as for lacquer thinner.
Safety procedures in this guide align with general recommendations from product Safety Data Sheets (SDS) and regulatory guidance such as United States Environmental Protection Agency standards for chemical handling and ventilation. Always review the SDS for the specific product you are using before application.
Surface protection
Lay a minimum 100-micron (4 mil) plastic sheet on the floor extending at least 60 cm beyond the furniture perimeter in all directions. This is the distance that gel stripper drips travel when falling from a vertical surface. For liquid strippers (not gel), extend to 90 cm.
Tape the edges of the plastic sheet to the floor with masking tape to prevent feet from folding it under the piece. Cover any adjacent furniture, walls, or surfaces that could receive chemical splatter with a separate plastic layer — tape at the top only so it can drape forward to catch drips.
Ventilation by chemical type
(Citristrip, Smart Strip)
(Solvent-Based)
(Back to Nature)
*Methylene Chloride (MCl)
Methylene chloride is a powerful solvent used in industrial-grade strippers. It works rapidly but produces hazardous vapors and is metabolized into carbon monoxide in the body, requiring strict ventilation control and protective equipment.
Safety procedures in this guide align with general recommendations from product Safety Data Sheets (SDS) and regulatory guidance such as United States Environmental Protection Agency standards for chemical handling and ventilation. Always review the SDS for the specific product you are using before application.
PPE by chemical type
| Chemical | Gloves | Eye protection | Respiratory | Skin protection |
|---|---|---|---|---|
| NMP gel | Neoprene or nitrile minimum. NOT latex — NMP penetrates latex. 0.3 mm minimum thickness. | Safety glasses minimum. Goggles if overhead work. | Cross-ventilation sufficient for most indoor work. OV/P100 respirator if poorly ventilated space. | Long sleeves — NMP absorbs through skin. Wash any skin contact immediately with soap and water. |
| Benzyl alcohol gel | Nitrile gloves. | Safety glasses. | Open window ventilation sufficient. | Normal clothing. Lowest acute risk of common strippers. |
| Lacquer thinner | Nitrile or neoprene. | Safety glasses. | OV cartridge respirator recommended. All ignition sources removed. | Long sleeves. Highly flammable — no open flames, no sparks within 3 metres. |
| Denatured alcohol (shellac) | Nitrile gloves. | Safety glasses. | Cross-ventilation. Flammable — no ignition sources. | Normal caution. |
Pre-Stripping Assessment — The Three Tests Before Any Chemistry
Test 1: Mineral spirits — should you strip at all?
Apply mineral spirits to a clean cloth and wipe over a 15×15 cm section of the piece on a visible but non-prominent surface. The mineral spirits temporarily saturates the finish and reveals how the piece will look with a fresh wipe-on coat applied — without committing to any removal. Allow 5 minutes for the mineral spirits to evaporate, then assess the original surface.
If the surface looks attractive under mineral spirits saturation — clean, even colour, no obvious damage — all it needs is cleaning and a single wipe-on coat of the same finish type. This takes 2 hours instead of 5 days and preserves the original patina. For approximately 35% of pieces brought to workshops for “refinishing,” this test eliminates the need for stripping entirely.
Test 2: Construction identification
- Knock test: dull, dense sound with no resonance.
- Edges: Consistent grain visible at cut edges as end grain.
- Weight: Weight is appropriate for the apparent wood volume.
- Knock test: slight hollow resonance.
- Grain: pattern often repeats symmetrically on adjacent panels (book-matched veneer).
- Visual cues: Thin wood layer visible at corners — different colour from substrate below. Edge banding present.
- History: Modern production furniture post-1970 is predominantly veneered.
Test 3: Finish identification — 4-solvent sequence
On a hidden area (underside of tabletop, inside a drawer rail, back of a leg): apply each solvent in sequence, 30–60 seconds held still on a white cotton swab, wiping between tests.
- Mineral spirits wipe (30–60 sec): Waxy film on cloth = wax finish
- Denatured alcohol (30 sec): Sticky, gummy, or dissolves = shellac. Shellac → denatured alcohol wipe protocol. No gel stripper needed.
- Lacquer thinner (30 sec) — only after confirming no shellac: Softens or smears = lacquer. Lacquer → lacquer thinner wipe protocol. No gel stripper needed.
- Xylene (60 sec): Gummy = water-based poly. No effect = oil-based poly or varnish → gel stripper required.
→ Full identification guide with interactive tool: How to Identify Wood Finish →
What Is the Correct Order of Operations on Complex Furniture?
The sequence in which surfaces and components are stripped matters for both quality and efficiency. On a piece like a dining table with turned legs, carved aprons, and a veneered tabletop, applying stripper in the wrong order creates drip contamination, re-deposits dissolved finish on already-clean surfaces, and makes neutralisation difficult.
📝On a veneered walnut cabinet with solid wood legs, I had to run two protocols in parallel — benzyl alcohol gel with a plastic scraper on the veneer, and a standard NMP gel with a metal scraper on the legs. The sequence mattered: I stripped the legs first to avoid accidental solvent contact with the veneer, then completed the tabletop in controlled sections. This prevented veneer lift at the edges and avoided cross-contamination from stronger solvents used on the solid wood parts.
How Do You Apply Gel Stripper Correctly for Maximum Effectiveness?
STEP 1 Apply thick coat with disposable brush — 3–4 mm minimum
Pour gel stripper into a glass or ceramic container (never plastic — most strippers dissolve or distort plastic containers). Apply with a cheap disposable synthetic brush in one direction — do not brush back and forth. The goal is to deposit a uniform, thick layer of gel on the surface. 3–4 mm minimum depth. Thinner application depletes before full penetration. On a dining tabletop, expect to use 300–400 ml of gel for a single application covering the full surface adequately.
STEP 2 Cover with plastic film immediately — press flat, no gaps
As soon as each section is covered with gel, lay plastic cling film over it and press flat with a gloved hand. Work systematically so the time between gel application and plastic film placement is under 2 minutes per section. Press the edges of the plastic down firmly — any gap allows vapour escape and creates a dry zone where the gel will not be effective. On vertical surfaces: tape the top edge of the plastic film to the surface to prevent it from sliding down during dwell.
Denatured alcohol
15–30 sec
Lacquer thinner
10–20 sec/pass
NMP gel
30–45 min
NMP gel
60–90 min
NMP gel
45–90 min
NMP gel + IR
60–90 min
STEP 3 Test at 60 minutes — do not commit to scraping until finish lifts cleanly
After 60 minutes, lift one corner of the plastic film and test the finish with the edge of a plastic scraper. Correctly stripped finish feels like soft putty or peels like thick paint — it should offer little resistance. If the finish is still firm and requires significant pressure: replace the plastic film and add 15–30 more minutes. A common error is scraping at 30 minutes when the label suggests 15–30 — on polyurethane, the finish appears bubbled and softened on the surface but is still firmly adhered below. Wait for the “peel like sticker” feel before scraping.
STEP 4 Scrape in grain direction — wipe blade between passes
Remove plastic film, begin scraping with the appropriate scraper (plastic for veneer, metal for solid hardwood flat surfaces). Hold scraper at 30–45 degrees. Work in grain direction in smooth, even strokes. Wipe the blade on a rag between each pass to prevent redepositing dissolved finish. The residue in the container: dispose of as chemical waste per local regulations — do not pour down drain or into regular garbage when the stripper residue contains dissolved polyurethane or lead paint.
STEP 5 Detail areas — brass brush and wooden picks
After the main surfaces are scraped, work into mouldings, carved areas, and crevices with a brass-bristle brush using the remaining gel. Dip the brush into fresh gel as needed. Follow with old toothbrush, then wooden skewer for deepest areas. Cotton swabs soaked in the same stripper type work for inside tight angles and joint lines. Aim for consistency — any area where dissolved finish is left will show as a dark, hardened residue under the new finish.
After Stripping — Neutralisation and What Comes Next
Stripping is not finished when the finish is off the wood. The stripper residue remaining in the wood pores determines whether the new stain and finish will adhere correctly. This step is skipped most often and causes most of the staining and adhesion failures documented at the start of this guide.
Neutralisation by stripper type
NMP gel (Citristrip and citrus-branded products): Mineral spirits wipe with cloth — 2 firm passes to remove the d-limonene citrus oil residue that blocks stain penetration. Follow with baking soda solution (1 tsp per litre of water), wipe over surface, allow 5 minutes, wipe clean with water-dampened cloth. Allow 24 hours drying.
Denatured alcohol or lacquer thinner wipe (for shellac/lacquer): No neutralisation needed — both solvents evaporate completely within 2 hours leaving no residue. Sand after 2 hours.
Caustic / alkaline stripper (if used): Diluted white vinegar (1:10 in water), wipe, allow 5 minutes contact, rinse with clean water, dry. 24–48 hours before sanding — alkaline residue raises grain aggressively and must be fully neutralised before abrasion.
Water drop test — confirm readiness
After 24 hours post-neutralisation drying, apply 2–3 drops of water to the surface in 3 different locations. All should absorb completely in under 30 seconds. If any area beads or retains water at 60 seconds: residue remains — additional mineral spirits wipe, allow another 24 hours, re-test. Do not proceed to sanding or staining until the water drop test passes across the entire piece.
Sanding sequence after confirmed clean surface
Solid hardwood: start 120 grit (or 80 grit if grain is significantly raised), progress 150, 180. Vacuum and tack cloth between every grit change — coarser grit particles on the surface cut deeper scratches than the next finer grit and must be fully removed before progressing. Hand sand final pass at 180 grit in grain direction regardless of power sander used for earlier grits — removes any orbital scratches for finish-ready surface. Veneer: hand sand 220 grit only, grain direction, consistent light pressure.
📝On a solid oak dining table with four layers of oil-based paint, the client expected a one-day turnaround. I explained upfront that the realistic timeline was two full days — one for two chemical stripping cycles and one for drying and sanding. After the first pass, the surface looked clean, but the water drop test revealed inconsistent absorption across several sections, indicating residual stripper still in the grain. A second mineral spirits neutralisation and full 24-hour dry corrected it — without that step, the final stain would have appeared blotchy and uneven.
What Are the Key Specifications for Stripping Wood Furniture?
| Entity / Variable | Attribute | Value and Detail |
|---|---|---|
| NMP gel stripper — dwell time on oil-based polyurethane | Minimum effective dwell time | 60–90 minutes under plastic film for single coat. 90 minutes for two coats or thicker applications. Label time of 15–30 minutes is the minimum for thin latex paint, not polyurethane. Test edge at 60 minutes — if finish lifts cleanly with minimal pressure, proceed. If resistance remains, replace plastic film and add 15–30 minutes. |
| Plastic film cover | Effect on stripper performance | Mandatory for all gel strippers. Without plastic film, gel strippers lose 40–60% of active solvent within 15 minutes of application — the solvent evaporates before penetrating to the wood substrate. With plastic film pressed flat, the same gel maintains working concentration throughout the full dwell period. This single technique doubles stripper effectiveness without changing the product. |
| Application thickness — gel stripper | Correct depth | 3–4 mm minimum. Thin application depletes before full penetration. Apply thick enough that you can see the gel rippling slightly when plastic film is pressed on top. Use a cheap disposable brush — never a quality brush, which will be ruined by the chemicals. |
| Hardware removal | Why before any chemical contact | Metal hardware (hinges, handles, locks, screws) in contact with NMP or methylene chloride can undergo oxidation reactions. Iron hardware on oak, walnut, or mahogany: metal ions released into the stripper solution can be driven into the wood grain, creating dark iron-tannate staining under the new finish. Brass hardware: can tarnish or corrode. Remove all hardware before any stripper application, regardless of type. |
| Scraper material — veneer vs solid wood | Selection | Plastic scraper: all veneer surfaces and any antique where metal gouge risk is unacceptable. Metal (steel) scraper or putty knife: solid hardwood flat surfaces only where speed is a priority. Hold scraper at 30–45 degrees to surface. Wipe blade clean on a rag between passes to avoid re-depositing dissolved finish. Never use metal scrapers on veneered surfaces — a single slip gouges through the 0.3–0.6 mm veneer permanently. |
| Detail cleaning — mouldings, carvings, turned profiles | Tools and technique | Brass-bristle brush for general carved profiles — penetrates into low spots without scratching high spots. Old toothbrush for medium detail. Wooden skewer (bamboo chopstick) or dental pick for deep crevices and inside profiles. Cotton swabs soaked in stripper for tight corners. Never use steel wire brushes on any surface — iron contamination in tannin-rich grain causes dark staining under new finish. |
| Multi-generation finish — staged approach | Identification and protocol | If first application of stripper produces a partial result — some finish lifts cleanly (lacquer) while other areas resist (polyurethane over lacquer) — the piece has multiple generations of finish. Protocol: complete removal of accessible top layer, allow surface to dry, re-run solvent identification test on newly exposed layer, apply appropriate stripper for that layer. Each layer is a separate operation. |
| Temperature during stripping | Effect and minimum | All chemical strippers require minimum 15°C for adequate reaction rate. At 10°C: dwell time approximately doubles. At 5°C: stripper largely ineffective. Warm the piece to 18–20°C if working in a cold space. The most common misdiagnosis of “stripper doesn’t work” is temperature below 15°C. A heat lamp pointed at the work surface (not the stripper container) for 15 minutes before application is sufficient. |
| Lead paint testing — pre-1978 furniture | Mandatory check | Any furniture with paint — not clear finish — made or repainted before approximately 1978 may contain lead-based paint. On any painted piece of uncertain age, a €5 lead test swab at the hardware store takes 30 seconds. If positive: follow EPA guidance at epa.gov/lead before proceeding. Chemical stripping is the correct method — not sanding or heat gun. If positive: follow official guidance from the United States Environmental Protection Agency before proceeding. Chemical stripping is the recommended removal method for lead-based coatings, as it avoids generating hazardous airborne dust associated with sanding or heat removal. |
| Neutralisation — mandatory before sanding | Why and timing | NMP gel: mineral spirits wipe (removes d-limonene citrus oil residue that blocks stain absorption and finish adhesion) + baking soda solution (1 tsp/litre water, pH neutralisation). Allow 24 hours drying. Alkaline caustic stripper (if used): diluted vinegar 1:10, 5 minutes contact, rinse with water, 24–48 hours drying. Denatured alcohol or lacquer thinner: 2 hours drying sufficient, no neutralisation needed. Water drop test (water absorbs in under 30 seconds) confirms readiness before sanding. |
Complete Project Checklist — Strip to Refinish-Ready
Frequently Asked Questions About Stripping Wood Furniture
How long does it take to strip and refinish furniture?
For a dining table with oil-based polyurethane: minimum 5 calendar days with 8–10 hours of active work distributed across them. The limiting factor is not active work time but mandatory drying windows: 24 hours after neutralisation before sanding, 24 hours for oil-based stain to dry before topcoat, and 24 hours between topcoats. A chair with shellac can be stripped and refinished in 2–3 days. Multi-coat paint history on architectural pieces can take 7–14 days. Planning the timeline before starting — and securing workspace for the full duration — is the difference between a completed and an abandoned project.
Do you need to sand after using chemical stripper?
Yes, on all solid hardwood surfaces. Chemical stripper removes the finish but does not level the grain — water in water-based strippers and the chemical action of all strippers raises grain fibres. Sanding 120→150→180 grit removes raised grain, remaining finish residue in recessed areas, and creates the uniform surface porosity that produces even stain absorption. On veneered surfaces: light hand sanding at 220 grit only — never progressive grits with power tools on veneer.
What is the difference between stripping and sanding off old finish?
Chemical stripping dissolves the old finish — the finish becomes a gel or liquid and is scraped away, preserving the wood surface beneath. Sanding removes finish plus wood material — every grit removes a layer of the wood itself, not just the finish. For solid hardwood with flat surfaces, sanding can be an effective shortcut, particularly for floors with drum sanders. For furniture with detailed profiles (turned legs, carved aprons, mouldings), sanding cannot follow the contours uniformly. For veneer, sanding carries sand-through risk. Chemical stripping is the appropriate method for all veneered surfaces, all detailed profiles, and any solid hardwood where preserving the maximum wood thickness is the priority.
Summary: Key Values for Stripping Wood Furniture
Stripping wood furniture is a 3–6 day project — not a weekend — due to mandatory 24-hour drying windows after neutralisation and between finish coats. Before applying any stripper, three checks: mineral spirits test (confirms stripping is needed), construction check (veneer = benzyl alcohol gel only, no orbital sanding, no NMP gel), and 4-solvent finish identification test.
Hardware removed before any chemical contact — metal reacts with NMP and MCl and can stain surrounding wood. Order of operations: vertical surfaces and detail first (legs, aprons, carvings), horizontal surfaces last (tabletop, seat).
Gel stripper applied 3–4 mm thick, plastic film immediately, 60–90 minutes for polyurethane (not label-suggested 15–30 minutes). Test edge at 60 min — peels cleanly = ready to scrape. Neutralise after stripping: mineral spirits wipe + baking soda solution (NMP/citrus gel), 24 hours drying.
Water drop test confirms clean pores before sanding. Sand 120→150→180 grit solid wood; 220 grit hand veneer only. Dewaxed shellac barrier coat before polyurethane if previous finish was oil-based. Pre-stain conditioner on blotch-prone species before stain.
→ Finish identification before starting: How to Identify Wood Finish →
→ Stripper selection: How to Choose a Chemical Stripper →
→ Post-stripping protocol: How to Refinish Wood After Stripping →
→ Full refinishing: How to Refinish Furniture →
→ Hub: How to Remove Wood Finishes →