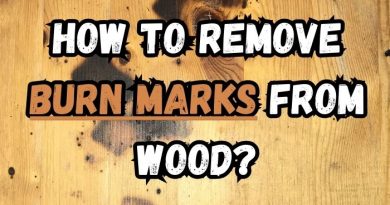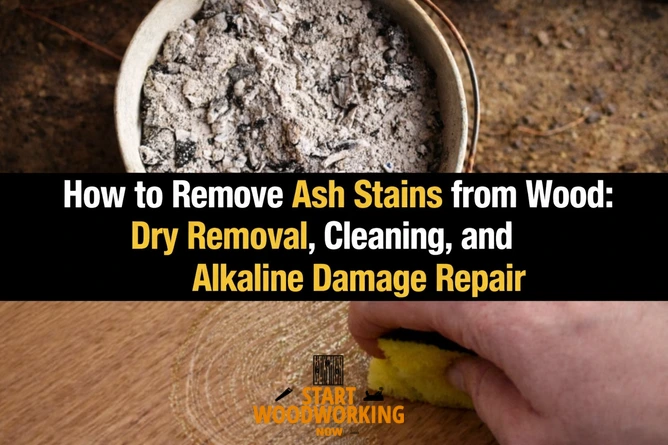
How to Remove Ash Stains from Wood: Dry Removal, Cleaning, and Alkaline Damage Repair
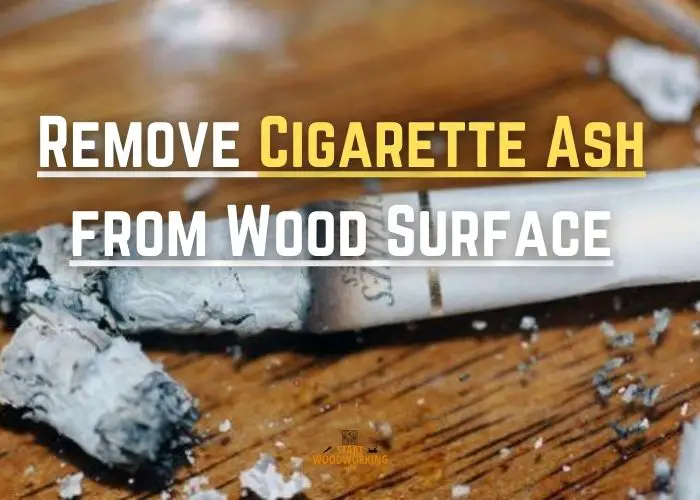
Ash stains wood through two distinct mechanisms depending on whether the ash is dry or has been wetted. Dry ash — from wood fires, incense, or cigarettes — deposits loose carbon and mineral particles on the wood surface that are removed by dry brushing and vacuuming without water contact. Wetted wood ash — from rain, condensation, or water spills on ash deposits — creates a mildly alkaline solution (pH 9–11) that can etch unsealed wood finishes, bleach the wood grain, and leave a white or grey residue bonded to the surface. Removing wetted ash stains requires neutralising the alkaline residue with a diluted acidic solution before cleaning, then assessing whether finish repair is needed. Soot and smoke deposits from fireplaces require a dry soot sponge for initial removal before any liquid contact to avoid smearing carbon into the wood grain.
This guide covers the correct removal sequence for each ash type, exact product concentrations, surface-specific methods, and the conditions under which alkaline damage to the finish requires repair beyond simple cleaning.
How Do You Remove Ash Stains from Wood?
→ For a complete overview of all wood stain and finish removal: How to Remove Wood Finishes and Stains
What Type of Ash Stain Are You Dealing With?
The removal method depends entirely on the ash type. Applying water to dry loose ash before removal smears carbon particles into the wood grain and converts a surface-level deposit into an embedded stain. Identify the ash type before selecting any cleaning method.
The removal method depends entirely on the ash type. Applying water to dry loose ash before removal smears carbon particles into the wood grain and converts a surface-level deposit into an embedded stain. Identify the ash type before selecting any cleaning method.
What Are the Key Specifications for Removing Ash Stains from Wood?
| Material | Attribute | Value |
|---|---|---|
| Wood ash (dry) | pH when wetted | 9–11 (mildly to moderately alkaline) |
| Diluted white vinegar (neutraliser) | Concentration for alkaline residue | 1 part white vinegar to 4 parts water |
| Diluted white vinegar | Contact time on ash residue | 30–60 seconds; wipe and dry immediately |
| Dry soot sponge | Use case | Soot and smoke deposits before any liquid — do not wet sponge |
| Soft-bristle brush | Brushing direction | Always with grain — never against grain or in circles |
| Vacuum for ash removal | Attachment type | Soft brush attachment only — no hard plastic nozzles |
| Dish soap solution | Concentration for residual cleaning | 2–3 drops per 250 ml warm water |
| Mineral spirits | Use case | Soot with greasy creosote residue — after dry soot sponge |
| Oxalic acid wood bleach | Use case | Alkaline grey discolouration on bare wood after ash contact |
| Fine sandpaper | Grit for light ash stain on bare wood | 220 grit — grain direction only |
| Post-cleaning drying time | Before applying any finish or polish | Minimum 2 hours at room temp |
The protocol requires 60 g of oxalic acid crystals per litre of water — use the calculator below to get the exact dose for your container size, plus the correct amount of baking soda for neutralisation after treatment.
Oxalic Acid Concentration Calculator
Exact doses for wood stain removal — acid, neutraliser, and contact times
What Is the Correct Removal Sequence for Ash Stains on Wood?
The removal sequence is the same for all ash types but differs in which tools are used at each stage. Skipping the dry removal stage and going directly to liquid cleaning is the most common cause of ash stains becoming worse during treatment.
Soft brush + vacuum. Remove all loose ash before any liquid contact.
Is a grey-white stain, dark smear, or greasy film still present?
Diluted vinegar for alkaline wood ash residue. Dry soot sponge or mineral spirits for soot/creosote.
Damp cloth with 2–3 drops dish soap in 250 ml water. Wipe and dry immediately.
Apply matching polish, wax, or oil after full drying. Oxalic acid if grey discolouration on bare wood.
How Do You Remove Dry Wood Fire Ash from Wood Surfaces?
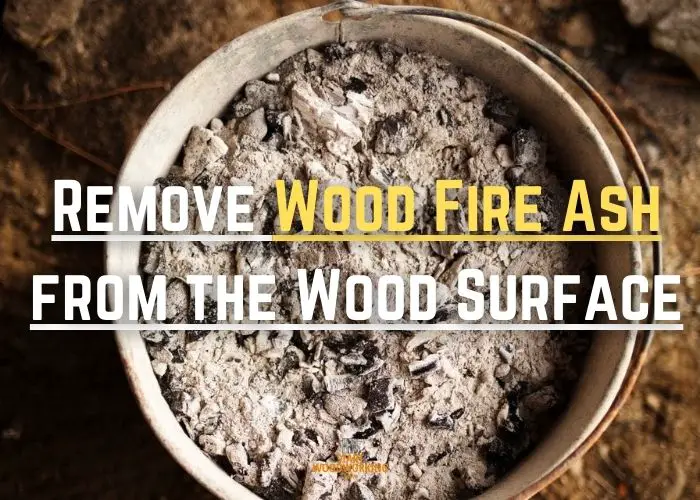
Dry wood fire ash on wood surfaces is removed entirely by mechanical means before any liquid is introduced. The dry ash from a wood fire contains calcium carbonate, potassium carbonate, and magnesium carbonate — all of which remain inert at ambient humidity but become alkaline when wetted. Complete dry removal prevents this chemical activation.
STEP 1 - Brush loose ash in the grain direction with a soft-bristle brush
Use a clean, soft-bristle brush — a natural-bristle paintbrush or a dedicated dusting brush — to sweep loose ash from the wood surface in the direction of the grain. Use short, light strokes rather than long sweeping strokes.
Long strokes push the ash laterally across the surface and can embed particles in any scratches or open grain channels. Work from the outermost edge of the ash deposit toward the centre to consolidate the ash rather than spread it.
STEP 2 - Vacuum with a soft brush attachment
After brushing, use a vacuum with a soft brush attachment to remove all loose ash from the surface and from any grain channels, moulding profiles, or crevices. A hard plastic nozzle scratches the finish — always use the soft brush attachment.
Work in the grain direction. After vacuuming, the wood surface should appear clean; only a faint grey residue or slight discolouration may remain where the ash was in extended contact.
STEP 3 - Neutralise alkaline residue with diluted white vinegar
If a grey-white residue remains after dry removal — indicating alkaline minerals have bonded lightly to the surface — mix one part white vinegar with four parts warm water. Dampen a clean lint-free cloth with this solution (damp, not wet) and wipe the residue gently in the grain direction.
The mild acidity of the vinegar (pH approximately 2.5) neutralises the alkaline ash minerals and allows them to be wiped away. Allow 30–60 seconds contact and wipe clean with a fresh damp cloth, then dry immediately with a dry cloth.
Do not use undiluted vinegar — concentrated acidity can dull polyurethane and lacquer finishes and may lighten bare wood. The 1:4 dilution provides sufficient acidity to neutralise wood ash (pH 9–11) without finish damage at this contact time.
STEP 4 - Clean with diluted dish soap solution
After neutralising, wipe the surface with a cloth dampened in 2–3 drops of dish soap dissolved in 250 ml of warm water to remove all remaining residue. Use the minimum moisture possible — the cloth should be damp, not wet. Wipe in the grain direction and follow immediately with a clean damp cloth to remove soap residue, then dry thoroughly with a dry cloth. Do not allow water to sit on the surface.
📝In my restoration practice, the most common ash stain scenario involves oak mantelpieces and fireplace surrounds where ash has accumulated over time and been wiped with a damp cloth by the owner before calling me — exactly the wrong approach. The alkaline solution had already begun etching the shellac or wax finish in several patches by the time I saw the piece. My standard protocol is always dry removal first, followed by the diluted vinegar wipe, and only then do I assess whether the finish needs repair. On pieces that arrived with existing wet ash contact, I use the vinegar neutralisation step even if the ash appears dry — there is usually residual alkaline chemistry still active.
How Do You Remove Soot and Smoke Deposits from Wood?
Soot from fireplaces and wood stoves differs from wood ash in two important ways: it consists primarily of carbon particles rather than alkaline minerals, and it often contains creosote — a complex mixture of oily aromatic compounds deposited from incomplete wood combustion. Soot that contains creosote feels slightly sticky or greasy and requires a different treatment than dry carbon-only deposits.
STEP 1 - Use a dry chemical sponge (soot sponge) — do not wet it
A dry chemical sponge — also called a soot sponge or dry cleaning sponge — is made from vulcanised rubber with a porous structure that physically traps soot particles rather than smearing them. Press the sponge lightly onto the soot deposit and lift straight up — do not wipe or rub sideways, as this smears the carbon into the wood grain and finish.
Move the sponge in overlapping downward presses across the sooted area. Replace or rotate the sponge to a clean surface as it picks up soot. A single soot sponge can typically treat 0.3–0.5 m² before becoming too saturated to absorb effectively.
STEP 2 - Assess for creosote residue
After the dry sponge treatment, inspect the surface. If a dark brown or yellowish sticky film remains — indicating creosote — this is not removable with water-based cleaning. Apply mineral spirits to a clean cotton cloth and wipe in the grain direction.
Mineral spirits dissolves creosote compounds effectively. Allow 3–5 minutes contact for heavy deposits, then wipe clean with a dry cloth. Repeat if residue remains.
STEP 3 - Clean with dish soap solution
After soot and creosote removal, clean the surface with the standard dish soap solution (2–3 drops per 250 ml warm water) on a damp cloth. Wipe in the grain direction, rinse with a clean damp cloth, and dry immediately. This removes any mineral spirits residue and restores the surface for polishing.
How Do You Repair Wood Discolouration Caused by Wet Ash Contact?
When wood ash has been wetted — by rain, condensation, or a spill — before dry removal, the alkaline solution it creates can bleach or grey the wood grain on bare or lightly finished surfaces. This discolouration is a chemical change to the wood fibres caused by the high pH — it is not a surface deposit and cannot be removed by cleaning alone.
The repair method depends on the depth of the discolouration and whether a finish is present.
| Discolouration Type | Surface | Repair Method |
|---|---|---|
| Light grey haze on polyurethane or lacquer finish | Sealed finish | #0000 steel wool + paste wax — micro-abrasion re-levels the finish surface; same technique as alcohol stain repair |
| White alkaline mineral deposit on finish | Sealed finish | Diluted white vinegar (1:4) wipe — neutralises deposit; follow with paste wax |
| Grey bleaching of bare wood grain | Bare or oiled wood | Oxalic acid wood bleach — neutralises the alkaline discolouration; re-oil or re-finish after treatment |
| Dark staining on bare wood (carbon embedded) | Bare wood | 220-grit sanding in grain direction to remove stained surface fibres; refinish after |
How Does the Wood Surface Type Affect Ash Stain Removal?
| Surface Type | Ash Risk Level | Dry Removal Tool | Liquid Treatment | Finish Restoration |
|---|---|---|---|---|
| Polyurethane finish (sealed) | Low — ash sits on finish surface | Soft brush + vacuum | Diluted vinegar if residue; dish soap solution | Wood polish or paste wax |
| Lacquer finish | Low to medium — extended wet ash contact can dull finish | Soft brush + vacuum | Dish soap solution only — no vinegar on lacquer | Lacquer-compatible polish |
| Wax finish | Medium — alkaline ash can strip wax layer | Soft brush + vacuum | Mineral spirits for residue — avoid water | Re-apply paste wax after treatment |
| Oil finish | Medium — ash can penetrate oiled grain | Soft brush + vacuum | Diluted vinegar (1:4); mineral spirits if greasy soot | Re-apply matching oil after cleaning |
| Bare / unfinished wood | High — alkaline etching and grain bleaching possible | Soft brush + vacuum + dry soot sponge | Diluted vinegar (1:4) for alkaline residue; oxalic acid if discolouration persists | Sand with 220 grit, apply new finish |
| Hardwood floor (sealed) | Low on sealed areas; medium at worn edges | Soft vacuum brush attachment | Dish soap damp mop — minimum water | Floor-specific polish or wax |
📝 The most complex ash damage case I have worked on was an unsealed pine hearth board near a wood stove where ash had been repeatedly wetted and left for several months. The grey alkaline bleaching had penetrated 1–2 mm into the pine grain. Oxalic acid at 60g per litre resolved the discolouration in two applications with 20 minutes each — the difference between applications was clearly visible. After 24 hours drying and a 220-grit sand, the pine surface was uniform enough to take a danish oil finish that matched the surrounding boards.
Frequently Asked Questions About Removing Ash Stains from Wood
Why does wood ash turn grey or white on wood surfaces and why does water make it worse?
Dry wood ash appears white-grey because it consists primarily of calcium carbonate, potassium carbonate, and magnesium carbonate — the mineral residues from combusted wood. On a sealed wood surface, these remain as inert surface particles until they are brushed away.
When wetted, these carbonates dissolve and form an alkaline solution with a pH of 9–11 that chemically reacts with the wood finish and, on bare wood, with the wood lignin itself — causing the grey bleaching effect. This is why introducing water to ash before dry removal converts a simple surface deposit into a chemical stain that requires neutralisation to remove.
Can you use baking soda to remove ash stains from wood?
Baking soda is not appropriate for removing ash stains from wood. Baking soda (sodium bicarbonate) has a pH of approximately 8.3 — it is mildly alkaline, the same chemistry as the ash stain itself.
Applying baking soda to an ash stain adds more alkaline material to the surface rather than neutralising it. For alkaline ash residue, the correct neutralising agent is a diluted white vinegar solution (1 part vinegar to 4 parts water), which provides mild acidity to counteract the alkaline deposit without damaging the wood finish.
How do you remove ash stains from an unsealed wood floor near a fireplace?
On an unsealed floor near a fireplace, ash stains involve both surface carbon deposits and potential alkaline etching of the wood grain. Remove loose ash with a soft vacuum brush attachment first — do not sweep, as brooms spread fine ash particles.
Apply the dry soot sponge to any dark soot deposits. For white-grey alkaline residue, apply diluted white vinegar (1:4) with a damp cloth, allow 30–60 seconds, wipe clean and dry immediately.
If grey discolouration remains in the wood grain after cleaning, apply oxalic acid wood bleach solution (60g per litre), allow 15–20 minutes, rinse thoroughly, allow 24 hours drying, sand lightly with 220 grit, and apply a matching floor finish.
What is a soot sponge and when should you use it instead of a cloth?
A soot sponge — also called a dry chemical sponge or smoke sponge — is made from vulcanised rubber with a cellular structure that absorbs and traps carbon soot particles without smearing them.
It is used dry, without any liquid, on soot and smoke deposits before any wet cleaning. A standard cloth wiped across soot deposits smears the carbon laterally and pushes it into the grain texture, making the stain larger and darker.
The soot sponge should be used on any surface with dark grey or black soot deposits from a fireplace, candle smoke, or incense. After the soot sponge has lifted the bulk deposit, standard damp cloth cleaning handles the remaining residue.
Summary: Key Values for Removing Ash Stains from Wood
Removing ash stains from wood requires dry removal before any liquid contact — loose ash is always brushed and vacuumed completely before cleaning begins. Wood fire ash leaves an alkaline residue (pH 9–11 when wet) that is neutralised with diluted white vinegar at 1:4 concentration for 30–60 seconds before cleaning with a mild dish soap solution.
Soot and smoke deposits require a dry soot sponge for initial dry removal to avoid smearing carbon into the grain; greasy creosote residue requires mineral spirits after the dry sponge stage.
Alkaline discolouration on bare or oiled wood caused by wetted ash contact is treated with oxalic acid wood bleach at 60g per litre, allowed 15–20 minutes contact, then sanded with 220 grit and refinished. Baking soda is not appropriate for ash stain removal — it is alkaline and adds to the problem rather than neutralising it.
→ Related: How to Remove Alcohol Stains from Wood
→ Related: How to Remove Grease from Wood
→ Hub: How to Remove Wood Finishes and Stains — Complete Guide