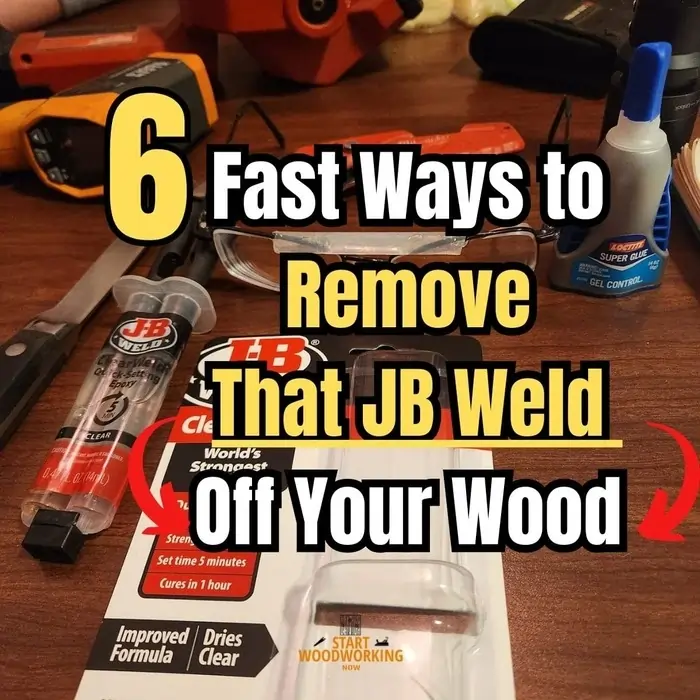
How to Remove JB Weld from Wood: Cure State Protocol, Mechanical Chipping, and Heat Gun Method
JB Weld is a two-part bisphenol-A epoxy resin cured with an amine hardener and filled with iron powder and silica. Once fully cured — after 15–24 hours at room temperature — it forms a three-dimensional cross-linked thermoset polymer network with a tensile strength of 5020 PSI. This network does not dissolve in acetone, isopropyl alcohol, vinegar, or any common household solvent. The claim that acetone “dissolves the epoxy’s polymers” or that isopropyl alcohol “breaks down the sticky polymers” is chemically incorrect for cured JB Weld — these solvents act only on uncured epoxy (within the first 1–4 hours of application) before cross-linking is complete. The correct removal method depends entirely on the cure state at the time of removal: uncured epoxy wipes away in seconds with isopropyl alcohol; partially cured epoxy (1–6 hours) can be fractured mechanically with a chisel and cleaned with acetone; fully cured epoxy requires either mechanical chipping with a sharp chisel at 10–15 degrees to the surface, or heat gun treatment at 230–260°C to reach the glass transition temperature where the epoxy becomes brittle enough to fracture cleanly from the wood.
This guide covers the chemistry of JB Weld curing, the cure state identification test, the three removal protocols by cure state, the correct chisel angle for mechanical chipping, the heat gun temperature protocol, and finish-safe residue removal.
How Do You Remove JB Weld from Wood?
→ Related: How to Remove Dried Glue from Wood (includes epoxy and all adhesive types)→ Related: How to Remove Gorilla Glue from Wood→ Hub: How to Remove Wood Finishes — Complete Guide
Why acetone, isopropyl alcohol, and vinegar do NOT remove cured JB Weld: Fully cured JB Weld is a cross-linked thermoset polymer—a 3D network of covalent bonds formed by bisphenol-A epoxide groups reacting with an amine hardener. Unlike thermoplastics, thermoset polymers cannot dissolve in solvents because their chains cannot separate or disperse within a cross-linked network. Common agents like acetone and mineral spirits lack the chemical mechanism to break the covalent C–N bonds of the epoxy network; they only work on uncured epoxy before cross-linking is complete.
What Happens Chemically When JB Weld Cures — and Why It Matters for Removal?
JB Weld consists of two components mixed in equal parts: a bisphenol-A diglycidyl ether resin (the black tube) and a polyamine hardener (the red tube), plus mineral fillers including iron powder and silica that give JB Weld its characteristic dark grey colour and additional hardness.
When the two components are mixed, the amine groups in the hardener react with the epoxide ring structures in the resin through an addition reaction. Each amine group can react with two epoxide groups — creating cross-links between polymer chains.
As this reaction proceeds, the material transitions from a liquid mixture to a gel (approximately 20–30 minutes after mixing) to a set solid (4–6 hours) to a fully cross-linked thermoset (15–24 hours). The glass transition temperature (Tg) of fully cured JB Weld — the temperature at which the network begins to soften and lose structural integrity — is approximately 230–260°C based on the bisphenol-A / aliphatic amine chemistry.
This chemistry creates three distinct removal scenarios. In the liquid phase (under ~30 minutes), the polymer chains have not yet cross-linked and are freely soluble in polar solvents. In the gel phase (30 minutes to 6 hours), cross-linking is partial — the material is rubbery rather than brittle. In the fully cured phase (over 15–24 hours), the network is complete and no solvent can penetrate or dissolve it.
What Cure State Is the JB Weld?
Fingernail test: Dents easily and cleanly under moderate finger pressure. Surface is pliable, slightly tacky.
Visual: Still fluid or thickening. Colour mid-grey, not yet the dark grey of cured state.
*Cure window by product: JB Weld KwikWeld set in 6 minutes (chemical window 15–20m). Original set in 4–6 hours (chemical window 2–3h).
Why solvents work: Cross-linking incomplete—resin and hardener molecules still mobile. Isopropyl alcohol and acetone dissolve uncross-linked chains.
Isopropyl 70% or acetone on cloth. Wipe firmly, replace cloth. 1–3 passes. Complete removal in 2–5 minutes.
Fingernail test: Leaves a visible scratch mark with moderate pressure—does not dent. Rubbery resistance rather than brittle snap.
Visual: Dark grey, surface firm but slight flexibility remains. Not glass-hard yet.
Why mechanical + chemical: Incomplete network is susceptible to acetone swelling. Acetone reduces adhesion before chiseling.
Best approach: Acetone soak 10–15 minutes to maximise brittleness at the wood interface, then chisel at 10–15 degrees.
Acetone cloth 10–15 min contact → chisel at 10–15° → acetone wipe for residue.
Fingernail test: Zero mark. Hard as stone—fingernail leaves no impression at any pressure.
Visual: Dark grey, glass-hard surface. May show slight shrinkage crack at wood interface.
Chemistry: Complete 3D cross-linked network. Iron powder filler makes it harder and more brittle, aiding mechanical removal.
Glass transition temp (Tg): ~230–260°C. Below Tg: rigid/brittle. Above Tg: softens/easier to fracture. Hair dryers do NOT reach Tg.
Chisel at 10–15° (primary). Heat gun 230–260°C for stubborn deposits (secondary). No solvent effective.
What Are the Key Specifications for Removing JB Weld from Wood?
| Method | Attribute | Value |
|---|---|---|
| Isopropyl alcohol (70–90%) | Effectiveness on uncured JB Weld | Highly effective within the first 1–3 hours of application (Original) or first 15–20 minutes (KwikWeld). Wipe with firm pressure using a cloth, replace cloth segments as they absorb dissolved resin. Complete removal in 2–5 minutes on uncured material. |
| Acetone | Effectiveness on uncured JB Weld | Slightly more aggressive than isopropyl — appropriate when epoxy has started to gel (30 minutes to 3 hours on Original). Apply to cloth, hold for 2–5 minutes, then scrub and wipe. Multiple applications for gel-phase material. |
| Acetone on fully cured JB Weld | Effectiveness | Zero dissolution. The cross-linked thermoset network cannot be dissolved by acetone. Extended soaking (1 hour+) produces negligible softening insufficient for practical removal. Acetone is not the correct approach for cured JB Weld. |
| Vinegar on JB Weld (any cure state) | Effectiveness | Zero. Acetic acid has no mechanism to attack epoxide rings, amine cross-links, or any component of the cured or uncured epoxy network. Do not use. |
| Wood chisel — mechanical chipping | Correct angle for cured epoxy removal | 10–15 degrees to the wood surface — nearly flat. This angle shears the epoxy along its bond line with the wood rather than driving the chisel into the wood. Angles above 30 degrees increase risk of wood damage and reduce the fracture force applied to the epoxy bond. |
| Chisel — force direction | Correct and incorrect | Correct: force applied parallel to the wood surface (shearing). Incorrect: force applied perpendicular to the surface (levering downward). Perpendicular force compresses the epoxy into the wood grain and can cause wood splitting. |
| Heat gun on fully cured JB Weld | Required temperature and technique | 230–260°C — reaches glass transition temperature where epoxy becomes brittle and loses structural integrity. Move continuously over deposit, 20–30 seconds per section. Chip immediately with chisel while warm. Allow 30–60 second cooling between heat applications to prevent wood scorching. |
| Hair dryer on cured JB Weld | Effectiveness | Insufficient. Maximum hair dryer temperature: 120–140°C — well below the epoxy glass transition temperature of 230–260°C. Hair dryer produces no meaningful softening of fully cured JB Weld. |
| Wood scorching temperature | Risk threshold | Wood surface begins to discolour (brown) at approximately 200°C. The heat gun temperature required to affect JB Weld (230–260°C) exceeds this threshold — keep heat gun moving continuously, never hold stationary. Direct heat at the epoxy deposit, not the surrounding wood. |
| JB Weld KwikWeld vs. Original | Cure time and removal window | KwikWeld: sets in 6 minutes, cures in 4–6 hours. Uncured removal window: approximately 15 minutes. Fully cured for mechanical/heat removal: after 6 hours. Original: sets in 4–6 hours, cures in 15–24 hours. Uncured removal window: approximately 2–3 hours. Fully cured for mechanical removal: after 24 hours. |
| Residue in wood grain after chipping | Treatment by surface type | Bare wood: sanding 80–100 grit removes residual epoxy particles from surface pores. Sealed finish (polyurethane, lacquer): thin grey residue film on finish surface — acetone at 30 seconds contact (safe on polyurethane at brief exposure) loosens surface residue for wipe removal. |
| Dremel or rotary tool on cured epoxy | When appropriate | Appropriate for large or thick JB Weld deposits on structural wood where wood preservation is less critical, or for removing JB Weld from wood used as substrate (outdoor furniture, tool handles). Grinding stone or carbide burr attachment. Not appropriate for finished furniture — creates heat and vibration that can damage surrounding finish. |
How Do You Remove Uncured JB Weld from Wood?
Uncured JB Weld is the easiest removal scenario by a large margin. Acting within the application window — the first 2–3 hours for Original JB Weld, the first 10–15 minutes for KwikWeld — allows complete removal with isopropyl alcohol and a cloth, leaving no residue and requiring no mechanical tools.
STEP 1 Remove bulk immediately — plastic card or putty knife
As soon as the JB Weld is identified as uncured (fingernail dents the surface), scrape the bulk of the mixed epoxy off the wood surface with a plastic card or flexible plastic putty knife. Work from the edge of the deposit inward.
The goal is to remove the maximum volume of epoxy before applying solvent — any epoxy removed mechanically at this stage does not need to be dissolved. Do not use metal tools on finished furniture surfaces — they will scratch.
STEP 2 Isopropyl alcohol or acetone — wipe firmly, replace cloth
Apply isopropyl alcohol (70–90%) or acetone to a clean cloth and wipe the remaining epoxy residue with firm pressure in the grain direction. The uncrosslinked resin dissolves rapidly and transfers to the cloth — replace the cloth section when it shows grey residue saturation to avoid re-depositing dissolved resin.
For epoxy that has begun to gel (dark grey, starting to firm), switch to acetone and allow 2–3 minutes contact before wiping. 1–3 passes with fresh cloth sections complete the removal.
STEP 3 Final wipe with clean cloth
After the epoxy is removed, wipe the surface with a clean cloth dampened with water to remove solvent residue. Dry immediately. On sealed finishes, inspect for any white haze from acetone contact — if present, wipe once with a cloth dampened with furniture polish or paste wax to restore the finish sheen in the treated area.
KwikWeld removal window is extremely short — act within minutes: JB Weld KwikWeld is designed to set in 6 minutes and reach handling strength within 4–6 hours. In practice, the cross-linking begins immediately on mixing and the epoxy starts to firm within 10–15 minutes. If KwikWeld contact with wood is noticed after 20+ minutes, treat it as partially cured and use the chisel protocol rather than expecting isopropyl alcohol to be fully effective.
📝 The most instructive JB Weld removal scenario in my workshop was an oak workbench leg where a customer had used JB Weld Original to attach a metal mounting bracket directly to the wood surface — the epoxy had been applied approximately 3 weeks before the repair was requested. The deposit was approximately 4 mm thick and 40 mm in diameter, fully cured. A 19 mm bench chisel at 12 degrees, struck with a wooden mallet in 6–8 mm increments from the edge inward, fractured the deposit cleanly in 8 minutes. The iron powder filler in the JB Weld made the cured epoxy noticeably more brittle than standard epoxy — each chisel advance produced a clean fracture rather than the rubbery deformation I would expect from unfilled epoxy. Residual grey staining in the oak grain required 80-grit sanding over the affected area.
How Do You Remove Fully Cured JB Weld from Wood Using a Heat Gun?
The heat gun method is appropriate for thick or wide deposits of fully cured JB Weld where mechanical chiseling alone is slow or risks wood damage. Heating JB Weld to its glass transition temperature range (approximately 230–260°C) changes the physical state of the cross-linked polymer — it becomes rubbery and loses much of its structural integrity, making it significantly easier to chip away. The risk is wood scorching at these temperatures, which requires careful technique.
STEP 1 Use a heat gun — not a hair dryer
Hair dryers have a maximum output of 120–140°C — well below the glass transition temperature of JB Weld. A heat gun capable of reaching 250°C+ is required. Variable-temperature heat guns (commonly available from hardware stores for paint stripping) set to 250°C are appropriate.
The same type of heat gun used for removing paint or wax finish from wood works for this application.
STEP 2 Apply heat moving continuously — 20–30 seconds per section
Hold the heat gun 3–5 cm from the JB Weld surface and move it continuously in small circular or back-and-forth passes over the deposit. Never hold the heat gun stationary over one spot — the wood surface begins to discolour at approximately 200°C, and the heat gun output at 250°C will scorch bare wood within seconds of stationary contact.
The epoxy will begin to darken and emit slight fumes (work outdoors or with ventilation) as it approaches Tg. After 20–30 seconds of moving heat application, the JB Weld will begin to appear less glassy on the surface.
STEP 3 Chip immediately while warm — alternate with cooling
Immediately after the heat application pass, use a chisel at 10–15 degrees to chip the deposit while it is still near Tg temperature. At elevated temperature, the epoxy is significantly more brittle and the bond line is weakened — the chisel requires markedly less force than on cold epoxy. Work quickly — the deposit cools and regains strength within 30–60 seconds.
Alternate between heat gun passes and chiseling in cycles: heat 20–30 seconds → chip 20–30 seconds → allow wood to cool 30–60 seconds → repeat. This cycle prevents excessive heat accumulation in the wood that would cause scorching.
STEP 4 Sand residue — 80–100 grit on bare wood
After the main deposit is removed, a thin grey-black residue layer typically remains in the surface grain of bare wood. This is epoxy resin and iron powder filler that penetrated the wood pores during the original application. Sand with 80–100 grit in the grain direction to remove this layer. The grey-stained dust confirms the residue is being removed.
Progress to 120 and 180 grit for finish preparation. On sealed surfaces (polyurethane, lacquer), the residue sits on the finish surface — wipe with acetone at 30-second maximum contact time to dissolve the thin residue film without damaging the underlying finish.
Protect the wood surface from chisel slip: If the chisel slips off the epoxy at an angle, it will gouge the wood surface. On finished furniture, position a thin piece of hardboard or MDF under the chisel flat (not the bevel) as a skid guard for the surrounding wood area. On bare wood, masking tape over the adjacent area reduces gouging damage from slip. Always advance the chisel slowly with controlled force—not a single heavy strike.
📝 The cure state issue comes up regularly in my restoration practice when clients describe applying acetone to cured JB Weld repeatedly without result and then asking for advice. In every case, the epoxy had been cured for days or weeks — well past the solvent removal window. The most recent case was a pine cabinet door hinge repair where JB Weld had been applied 6 months earlier. A heat gun at 250°C in alternating 25-second passes with 45-second cooling pauses produced measurable softening and fragmentation after 3 cycles per section — the deposit chipped away in 4 cycles of heat plus immediate chiseling. Without heat, the same chisel required significantly more mallet force on the same pine, which would have risked grain splitting.
Frequently Asked Questions About Removing JB Weld from Wood
Does acetone dissolve JB Weld?
Acetone dissolves uncured JB Weld — in the first 1–3 hours after application (Original) or the first 15–20 minutes (KwikWeld), before cross-linking is complete. Acetone has no effect on fully cured JB Weld. The cured epoxy is a thermoset polymer — a three-dimensional cross-linked network that cannot be dissolved by any common solvent including acetone, because solvent dissolution requires polymer chains to separate and disperse, which is impossible in a cross-linked network. Acetone contact with fully cured JB Weld for extended periods produces negligible surface change and does not constitute a removal method.
Can you use a hair dryer to remove JB Weld from wood?
No — a hair dryer cannot reach the temperature required. Fully cured JB Weld becomes brittle and easier to chip at its glass transition temperature of approximately 230–260°C. Hair dryers have a maximum output of 120–140°C — well below this threshold. A variable-temperature heat gun set to 250°C is the correct tool. The hair dryer method for JB Weld produces minimal softening and is not an effective removal technique for fully cured deposits.
How do you remove JB Weld without damaging the wood?
The chisel-at-10–15-degrees technique produces the least wood damage for fully cured JB Weld. The critical factor is the chisel angle — 10–15 degrees from the surface, bevel facing down, force applied parallel (not perpendicular) to the surface. At this angle, the chisel shears the epoxy along its bond line rather than levering into the wood. A sharp chisel is essential — a dull chisel requires greater force, which increases the risk of the tool slipping into the wood. For finished furniture where surface preservation is critical, the heat gun method (alternating heat and chipping) reduces the mechanical force required and consequently reduces wood damage risk.
What is the difference between removing JB Weld and JB KwikWeld from wood?
The difference is the time window for chemical removal. JB Weld Original sets in 4–6 hours, giving an effective uncured removal window of approximately 2–3 hours with isopropyl alcohol or acetone. JB Weld KwikWeld sets in 6 minutes, giving an effective removal window of approximately 10–15 minutes before the epoxy is too far cross-linked for solvent to be effective. After full cure, both products are chemically identical thermoset polymers that require mechanical or heat-based removal. KwikWeld cures faster but has identical chemistry and identical resistance to solvents once fully cured.
Summary: Key Values for Removing JB Weld from Wood
JB Weld removal method is determined by cure state, identified by the fingernail test. Uncured (finger dents: Original under 3 hours, KwikWeld under 15 minutes): isopropyl alcohol 70% or acetone on cloth, firm wipe, 1–3 passes, complete removal in 2–5 minutes. Partially cured (finger scratches without denting): acetone 10–15 minutes contact followed by chisel at 10–15 degrees.
Fully cured (no mark from fingernail): chisel at 10–15 degrees to wood surface with force parallel to the surface, or heat gun at 230–260°C moving continuously for 20–30 seconds per section followed by immediate chipping — alternating with 30–60 second cooling pauses to prevent wood scorching.
Acetone, isopropyl alcohol, and vinegar have zero effect on fully cured JB Weld — the thermoset cross-linked polymer network cannot be dissolved by any common solvent. Hair dryer maximum temperature (120–140°C) is insufficient to reach the JB Weld glass transition temperature (~230–260°C). Sand residue at 80–100 grit on bare wood after mechanical removal.
→ Related: How to Remove Dried Glue from Wood — All Adhesive Types→ Related: How to Remove Gorilla Glue from Wood→ Hub: How to Remove Wood Finishes — Complete Guide