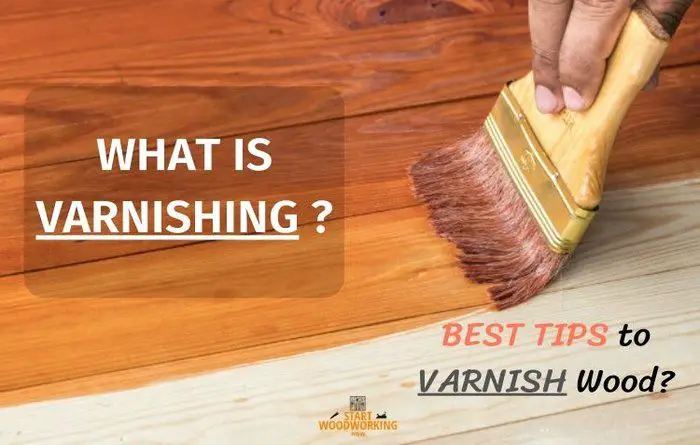
What Is Varnish? Composition, Types, and How It Differs from Polyurethane and Lacquer
Varnish is a protective wood finish made from resin, drying oil, and solvent. Unlike lacquer, which dries only through solvent evaporation, varnish cures through oxidative polymerization — oxygen reacts with the drying oil to form a flexible protective film. This slower curing process produces better moisture resistance, flexibility, and UV durability than lacquer, making varnish suitable for exterior wood, boats, windows, doors, and furniture exposed to humidity or temperature changes. Compared with polyurethane, varnish remains more flexible and easier to maintain, but offers lower abrasion and chemical resistance.
This guide covers the chemical composition of varnish and why oxidative polymerization matters for application decisions, the main varnish types with specific drying times and use cases, the complete comparison between varnish and polyurethane and lacquer, sheen levels with reflectance percentages, how many coats different applications require, the application protocol with temperature and humidity windows, and the most common varnishing failures with their root causes and fixes.
→ Remove existing varnish: How to Remove Varnish from Wood — Alkyd, Spirit, and Spar Marine Protocols→ Varnish vs lacquer selection: Varnish vs Lacquer — Which to Use and When→ Identify which finish is on your wood: How to Identify Wood Finish — Sequential Solvent Test
What Is Varnish and How Does It Work?
- Varnish is resin + drying oil + solvent. The three components serve distinct purposes: the resin (alkyd, phenolic, or modified) provides hardness and adhesion. The drying oil (linseed or tung) provides flexibility and the reactive site for oxidative curing. The solvent (mineral spirits) controls viscosity and evaporates after application — it plays no role in the final cured film.
- Varnish cures by oxidative polymerization — not solvent evaporation. After the solvent evaporates (Stage 1: dust-free in 2–4 hours), the drying oil reacts with oxygen from the air over 8–24 hours (Stage 2: tack-free) and continues to cross-link and harden for weeks after application. Full hardness develops over 14–30 days. Applying a second coat before Stage 2 is complete traps solvent and produces a permanently soft finish.
- Alkyd varnish is the standard interior type. Used for furniture, woodwork, and floors. Dries tack-free in 8–12 hours at 18–24°C. Re-coatable in 18–24 hours. 3 coats standard for furniture; 4 coats for floors. Oil-based formulations add a warm amber tone that deepens with each coat and continues to amber over years.
- Spar (marine) varnish is the exterior type. Contains UV absorbers and extra tung oil for flexibility — the flexibility is necessary because exterior wood moves 2–5% dimensionally with seasonal humidity changes that would crack a rigid interior varnish. Minimum 3 coats; 4–5 on horizontal surfaces (decks, boat tops). Re-apply every 1–3 years on fully exposed pieces.
- Varnish is not polyurethane. Modern marketing uses “polyurethane varnish” as a product name, which conflates two different chemistries. True alkyd varnish cures by oxidation. Polyurethane cures by urethane cross-linking. The distinction matters for removal: lacquer thinner removes spirit varnish in 2–5 minutes; NMP gel stripper at 45–90 minutes is required for alkyd and polyurethane varnish; polyurethane requires its own protocol.
What Is Varnish Made Of — The Three Components
Unlike penetrating oil finishes such as Danish oil or pure tung oil, varnish forms a continuous surface film above the wood. This film increases moisture exclusion and abrasion resistance, but also introduces long-term maintenance requirements because the protective layer gradually degrades under UV exposure and mechanical wear.
Every traditional oil-based varnish contains three functional components. Understanding what each contributes explains why different varnish types perform differently and why application conditions matter.
How Varnish Cures — Oxidative Polymerization Explained
Understanding the curing mechanism explains every application rule: why you must wait between coats, why varnish applied below 10°C never fully hardens, and why application in high humidity produces a permanently tacky film.
Varnish curing occurs in two overlapping stages after application:
Stage 1 — Solvent evaporation (0–4 hours): The mineral spirits carrier evaporates from the film. The surface becomes dust-free but is still soft and chemically uncured. Touching at this stage leaves fingerprints. Do not apply a second coat.
Stage 2 — Oxidative polymerization (4–48 hours): Oxygen from the air penetrates the film and reacts with the unsaturated fatty acid chains in the drying oil component. This triggers a chain-reaction cross-linking that converts the liquid oil-resin mixture into a solid polymer network. The film becomes tack-free and re-coatable as this reaction progresses. At 18–24°C with 40–70% RH: tack-free at 8–12 hours. Full cure at 14–30 days.
Why temperature matters: Oxidative polymerization is a chemical reaction between oxygen and the drying oil component. This slower curing mechanism explains why varnish requires longer recoat times than lacquer, but also why the cured film remains more flexible and weather-resistant. — the rate roughly doubles per 10°C increase. At 10°C, the same varnish that dries tack-free in 10 hours at 20°C may take 36–48 hours. Below 5°C, the reaction is so slow that the film may never fully cure, remaining permanently tacky. Minimum workspace temperature for any varnish application is 10°C; 18–24°C is recommended.
Why humidity matters: High humidity (above 70% RH) introduces water vapour into the uncured film during the secondary drying stage. Water competes with oxygen for reactive sites on the drying oil, which can produce a white haze (blushing) in the cured film — this is most visible on dark wood. Always apply varnish at 40–70% RH.
Compare varnish curing to other finish types:
Varnish vs Penetrating Oil Finishes
What Are the Key Specifications for Varnish Types?
Varnish is a film-building finish — it creates a protective layer above the wood surface. Penetrating oil finishes such as Danish oil, boiled linseed oil, and pure tung oil work differently: they soak into the wood fibres rather than building a thick surface film.
This distinction affects durability and maintenance. Film finishes provide better abrasion resistance, moisture exclusion, and chemical protection because the cured coating physically separates the wood from the environment. Penetrating oils produce a more natural appearance and are easier to repair locally, but offer significantly lower water and wear resistance.
Many modern “oil finishes” are actually oil-varnish blends that combine penetrating oils with varnish resin to balance natural appearance with improved protection.
The Main Varnish Types — When to Use Each
The term “varnish” covers several distinct product families that share the resin-oil-solvent composition but differ significantly in resin type, drying speed, hardness, and intended application. Here are the four types a woodworker needs to know:
1. Alkyd Varnish — The Standard Interior Choice
The most widely available varnish type. Alkyd resin with mineral spirits solvent and linseed or soya oil drying agent. Tack-free at 8–12 hours at 18–24°C. Good adhesion, moderate hardness, slight amber tone. Use for interior furniture, woodwork, window frames, and interior floors. Not suitable for exterior use — UV breaks down the alkyd resin chain without UV absorbers, producing chalking and cracking within one to two seasons outdoors.
2. Spar (Marine) Varnish — The Exterior Choice
Phenolic or alkyd resin with a higher tung oil content than interior varnish, plus UV absorbers not present in standard alkyd formulas. The higher oil content produces a slightly softer but more flexible cured film. This flexibility is the functional difference from interior varnish — it allows the film to move with the wood as it expands and contracts seasonally with humidity changes (exterior wood can move 3–5% dimensionally). An interior alkyd varnish on exterior wood becomes brittle and cracks within one season.
3. Spirit Varnish (Shellac) — The Antique Restoration Choice
Shellac dissolved in denatured alcohol. This is technically a varnish (resin in solvent) but cures purely by evaporation, not oxidation — a completely different mechanism from alkyd varnish. It was the dominant furniture finish before 1950 and remains the correct restoration choice for antique furniture. Re-dissolves in denatured alcohol, which enables re-amalgamation repair without stripping. Not water-resistant — unsuitable for surfaces that contact water.
4. Alkyd-Urethane Varnish (“Polyurethane Varnish”)
Alkyd resin with urethane modification. Harder and more chemical-resistant than standard alkyd varnish, but considerably more flexible and easier to sand than full polyurethane. Often sold as “urethane varnish” or marketed as “polyurethane” — which creates confusion with true polyurethane finish.
The practical difference: alkyd-urethane varnish can be re-coated without sanding if applied within the recoat window (usually 12–24 hours), produces a slightly more forgiving film, and is somewhat easier to repair than full polyurethane. Suitable for furniture and light-traffic floors.
Varnish vs. Polyurethane vs. Lacquer vs. Shellac — Decision Matrix
The practical question is never “what is varnish?” in isolation — it is “which of these four finishes is correct for my application?” The decision depends on four variables: location (interior/exterior), surface stress (furniture vs. floor vs. countertop), colour intent (natural wood vs. amber), and reversibility need (antique restoration vs. new build).
Which Wood Finish Should You Choose?
The correct finish depends on five variables: moisture exposure, UV exposure, abrasion level, repairability requirements, and desired appearance. No finish is objectively “best” in all situations — each chemistry prioritises different performance characteristics.Situation Best Finish Why Outdoor furniture Spar varnish Flexible film with UV absorbers resists moisture cycling and sunlight degradation. Kitchen table Polyurethane Higher chemical and abrasion resistance against water, food acids, and cleaning products. Antique furniture restoration Shellac Historically accurate finish with repairable re-amalgamation properties. Fast production finishing Lacquer Very short recoat time allows multiple coats in one day. Light-coloured wood (maple, birch) Water-based varnish or water-based polyurethane Prevents amber yellowing that occurs with oil-based finishes. Boat trim or exterior doors Marine spar varnish Higher oil content improves flexibility during seasonal wood movement.
Varnish Sheen Levels — What Each Means
Sheen level describes the percentage of light that a cured finish surface reflects at a specific angle (typically 60°). The percentage is measured on a gloss meter — it is a physical measurement, not a marketing term. All varnish manufacturers test to the same standard, so “satin” from one brand should have roughly the same reflectance as “satin” from another.
How sheen is achieved: All varnish starts as gloss. Matting agents — usually fine silica particles — are added to reduce reflectance. These particles scatter light at the film surface, reducing the apparent gloss. The more matting agent, the lower the sheen and the lower the film density. This is why matte finishes are generally less durable than semi-gloss or gloss finishes in the same product line.
How to Apply Varnish — Complete Protocol with Specific Values
The most consistent varnishing failure I encounter on client pieces is second coats applied too soon. The surface feels dry to the touch at 4–6 hours — which corresponds to the end of Stage 1 (solvent evaporation), not Stage 2 (oxidative cure). A second coat applied at this stage produces a soft, crinkled film that looks like dried skin — the trapped solvent from the first coat has nowhere to go through the wet second coat above it, and the partial cure makes the surface incompatible with a fresh wet layer. With oil-based varnish, I mark the time of the first coat application on a piece of tape on the workbench and do not return until 12 hours have passed, regardless of how dry the surface feels. The rule I give to anyone starting out: if it smells like mineral spirits, it is not ready for the next coat.Entity / Variable Attribute Value and Detail Alkyd varnish Drying times, coats, and use cases Touch-dry: 2–4 hours at 20°C. Tack-free (re-coatable): 8–12 hours. Full cure: 14–21 days. Number of coats: 3 for furniture and interior woodwork; 4 for floors. Sanding between coats: 220-grit after each coat fully tack-free. Applications: interior furniture, woodwork, floors, doors. Not suitable for exterior — UV exposure causes rapid embrittlement and cracking within 1–2 seasons. Amber tone: moderate, deepens with each coat and continues to yellow over years. Spar varnish (marine/exterior) Composition difference from alkyd and exterior requirements Higher tung oil-to-resin ratio than interior alkyd varnish — produces a more flexible cured film that can accommodate 2–5% dimensional movement in exterior wood without cracking. Contains UV absorbers (typically benzotriazole class) that are absent from interior varnish. Drying slower than interior alkyd: tack-free 12–16 hours. Coats: 3 minimum, 4–5 on horizontal surfaces. Re-application schedule: 2–3 years on covered outdoor pieces; 1–2 years on fully exposed. Strong amber tone from phenolic resin and high tung oil content. Spirit varnish Composition and removal method Resin dissolved in alcohol solvent rather than mineral spirits. Shellac is the most common spirit varnish. Unlike oxidative-cure varnishes, spirit varnish dries purely by evaporation — same mechanism as lacquer. Re-dissolves in denatured alcohol. Touch-dry: 20–30 minutes. Re-coatable: 1–2 hours. Identified by the denatured alcohol test: dissolution within 30 seconds confirms spirit varnish (shellac). Lacquer thinner test also positive. Hardest to confuse with alkyd varnish because of the very different drying time. Polyurethane varnish (alkyd-urethane) How it differs from standard alkyd varnish and from polyurethane finish A hybrid product: alkyd resin modified with urethane linkages. Cures by both oxidative polymerization (alkyd component) and moisture-cure urethane reaction (urethane component). Harder and more chemical-resistant than standard alkyd varnish, but not as hard as 2-component polyurethane. Marketed as “polyurethane varnish” or “urethane varnish” — this is different from standard polyurethane finish which contains no alkyd. Identification: reacts slightly to lacquer thinner at extended (5-minute) contact, which pure polyurethane does not. NMP gel at 45–90 minutes removes it. Water-based varnish Performance comparison to oil-based and application differences Alkyd or acrylic resin dispersed in water emulsion. Dries faster (tack-free 1–3 hours, re-coatable 2–4 hours) than oil-based. Does not amber — preserves natural or stained wood colour without the golden tone of oil-based. VOC: 50–150 g/L versus 300–450 g/L for oil-based. Raises wood grain on first coat — sand at 220 grit after first coat has dried. Durability: equivalent to oil-based alkyd varnish in modern formulations. Application: 3 coats minimum. One limitation: less forgiving of poor application conditions than oil-based — lap marks more visible because of faster drying. Amber tone progression — oil-based varnish Rate of yellowing and cumulative effect per coat Oil-based varnish ambers in two phases: (1) during application — each coat adds a warm golden tone that is visible on light-coloured woods (maple, ash, light oak). (2) Over time — the cured film continues to oxidise, deepening the amber over 2–5 years. Light woods (maple, birch, ash, pine) show the most visible change. Dark woods (walnut, mahogany) are barely affected. Water-based varnish does not amber at application but may show very slight yellowing over decades. If preserving the natural colour of light wood is a priority: water-based varnish is the correct choice. Inter-coat sanding Grit, timing, and purpose 220-grit sandpaper or 220-grit screen pad on a block. Purpose: removes dust nibs, brushmarks, and raised grain from the previous coat; creates mechanical adhesion for the next coat. Timing: only after the previous coat is completely tack-free. If the previous coat is still tacky, sanding balls up the varnish and creates a worse surface. Never sand with grit coarser than 220 between varnish coats — coarser grit scratches through the finish and into the wood. After final coat: 320–400 grit for a satin rub-out finish, or leave unsanded for maximum gloss. Varnish over stain — compatibility and wait time Stain type and minimum drying time before varnish Oil-based stain under oil-based varnish: minimum 24 hours at 20°C. Press white cloth on stained surface — any colour transfer = not ready. Some dark oil stains require 48–72 hours. Water-based stain under oil-based varnish: 2–4 hours after stain is completely dry. Oil-based stain under water-based varnish: 72 hours minimum — residual mineral spirits from the stain contaminate water-based varnish and produce a permanent white haze if applied too soon. Water-based stain under water-based varnish: 2–4 hours. Never apply any varnish over wax — wax prevents adhesion completely. Application tools — brush vs T-bar vs pad Best tool per surface type and varnish type Natural bristle brush (Chinese bristle or badger): oil-based varnish on furniture — maintains wet edge, less air introduction than synthetic. Synthetic brush (polyester/nylon): water-based varnish — natural bristle absorbs water and becomes limp. T-bar applicator (foam with T-bar frame): large flat surfaces and floors — thin even coat, minimal brushmarks, fast application. Foam brush: acceptable for small areas, introduces bubbles at corners. Never use roller on varnish — introduces fine bubbles that burst and leave craters in the film. Application direction: always in the direction of wood grain, in long continuous strokes, maintaining wet edge to prevent lap marks. Minimum coats per application type Coat count and cumulative thickness Interior furniture (low traffic): 3 coats. Interior floors (high traffic): 4–5 coats. Exterior furniture (covered): 3 coats + re-apply every 2–3 years. Exterior furniture (exposed): 4–5 coats + re-apply annually. Exterior decking or boat (horizontal, UV and water): 5+ coats. Note: coat count assumes correct application — thin coats applied correctly. A single thick coat does not equal two thin coats: thick coats trap solvent, cure unevenly, and are prone to wrinkling.
How to Predict Varnish Failure Before Application
Most varnish failures originate before the first coat is applied. The highest-risk conditions are uncured stain, silicone contamination, excessive humidity, cold substrates, oily tropical woods, and incompatible previous finishes.
- If the wood feels cold: the varnish viscosity increases and oxidative cure slows dramatically.
- If stain transfers onto a white cloth: solvent remains trapped in the stain layer and may interfere with varnish adhesion.
- If water beads unevenly on bare wood: silicone or wax contamination may already be present.
- If relative humidity exceeds 70%: moisture can become trapped inside the curing film and produce blushing.
- If the existing finish is unknown: perform alcohol and lacquer thinner spot tests before applying varnish.
Identifying these conditions before application is significantly easier than correcting a failed finish after cure.
Common Varnishing Failures — Root Cause and Fix
Frequently Asked Questions About Varnish
Can varnish waterproof wood?
Varnish is water-resistant, but not completely waterproof. The cured film slows moisture absorption into the wood by creating a protective barrier, but all varnish films remain slightly permeable to water vapour over time. Spar varnish provides the highest moisture resistance because its higher oil content produces a more flexible film that resists cracking during wood expansion and contraction. However, standing water, UV exposure, and mechanical wear gradually degrade all varnish films, which is why exterior varnished surfaces require maintenance coats every 1–3 years.
For permanent immersion or continuous water exposure, epoxy systems or marine coating systems provide significantly better moisture exclusion than standard varnish.
How long does varnish last?
Interior varnish on furniture can last 10–20 years before requiring full refinishing if protected from direct sunlight, water exposure, and abrasion. Exterior varnish degrades much faster because UV radiation breaks down the resin structure and seasonal moisture movement stresses the film mechanically.
Spar varnish on exterior furniture typically requires maintenance coats every 1–3 years depending on sun exposure. Horizontal outdoor surfaces such as doors, railings, and boat trim fail faster than vertical surfaces because water and UV exposure remain longer on horizontal areas.
The first signs of varnish failure are usually gloss loss, surface micro-cracking, whitening, or flaking around edges and joints. Re-coating before visible cracking develops dramatically extends service life because the damaged surface can still mechanically bond with a new coat.
Does varnish yellow over time?
Oil-based alkyd varnish yellows (ambers) continuously over time because the linseed oil component continues to oxidise slowly in the cured film. The rate of yellowing is highest in the first 2–5 years after application and continues at a slower rate thereafter. Light-coloured woods (maple, ash, light oak, pine) show the most noticeable colour shift. Direct sunlight exposure accelerates yellowing. If preserving the natural colour of light wood is a priority, water-based varnish is the correct choice — it does not contain linseed oil and does not amber. Spar varnish ambers strongly due to its high tung and phenolic resin content — this is expected and accepted on exterior wood.
Can you apply varnish over paint?
Varnish can be applied over oil-based alkyd paint that is fully cured (minimum 30 days at room temperature) as a protective clear topcoat. It cannot be applied over latex (water-based) paint with an oil-based varnish — the incompatible chemistry produces adhesion failure. Water-based varnish can be applied over fully cured latex paint. Never apply varnish over wax-based paint, chalk paint, or milk paint without testing for compatibility first — many decorative paints use wax or casein binders that prevent varnish adhesion.
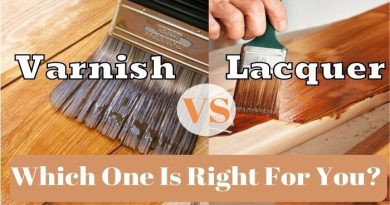
What is the difference between varnish and lacquer?
The key difference is the curing mechanism. Lacquer cures by pure solvent evaporation — the dissolved cellulose or acrylic is deposited as the solvent flashes off, and re-dissolves if its solvent is re-applied. Varnish cures by oxidative polymerization — a chemical reaction between the drying oil and atmospheric oxygen that cross-links the film into an irreversible polymer network. Practical consequences: lacquer re-coatable in 1–2 hours (varnish: 8–12 hours); lacquer repairable by re-amalgamation without stripping (varnish: must sand or strip); lacquer not suitable for exterior (varnish: spar varnish specifically formulated for exterior). For a full comparison including application protocols: Varnish vs Lacquer — Complete Comparison.
Summary: Key Values for Varnish
Varnish is resin + drying oil + solvent — cures by oxidative polymerization (oxygen reacting with drying oil), not solvent evaporation. Stage 1 (solvent evaporation, dust-free) in 2–4 hours. Stage 2 (oxidative cure, re-coatable) in 8–12 hours for oil-based alkyd. Full cure: 14–30 days. Minimum temperature: 10°C — below this, oxidative cure does not proceed reliably. Optimal: 15–28°C. Humidity: 40–70% RH — above 70% produces blushing.
Alkyd varnish: standard interior type, 8–12h between coats, 3 coats for furniture, 4 for floors.
Spar varnish: exterior type with UV absorbers and higher oil content for flexibility, 4–5 coats on horizontal surfaces, re-apply every 1–3 years. Oil-based varnish ambers — deepens at application and continues over years.
Water-based varnish: no amber, faster drying (1–3h between coats), same durability in modern formulations. Sanding between coats: 220 grit only after full tack-free cure. Common failure: second coat applied during Stage 1 (surface dry but not chemically cured) produces wrinkling. Varnish is not polyurethane: polyurethane cures by urethane cross-linking, is harder and more chemical-resistant, and requires NMP gel stripper at 60–90 minutes for removal.
→ Remove varnish: How to Remove Varnish from Wood — All Types→ Varnish vs lacquer: Varnish vs Lacquer — Full Comparison→ Identify existing varnish on furniture: How to Identify Wood Finish→ After removal, prepare for re-finishing: How to Refinish Wood After Stripping