How to Remove Alcohol Stains from Wood: White Ring and Spot Repair Guide
Alcohol stains on wood appear as white rings, spots, or cloudy patches and are not caused by a substance remaining in the wood — they are damage to the wood finish itself. Ethanol and isopropyl alcohol dissolve the surface layer of lacquer, shellac, polyurethane, or wax finishes on contact, creating micro-fractures in the finish film that scatter light and produce a white, opaque appearance. Removing an alcohol stain means repairing or re-fusing the damaged finish layer, not extracting a substance from the wood grain. The correct repair method depends on the finish type — wax finishes respond to #0000 steel wool and paste wax; lacquer and shellac finishes respond to heat re-fusion; polyurethane finishes require mechanical abrasion with steel wool followed by a fresh wax coat.
This guide covers all three repair methods with exact steel wool grades, heat distances, product types, and finish-specific instructions so the white mark is permanently removed rather than temporarily masked.
How Do You Remove Alcohol Stains from Wood?
→ For a complete overview of all wood stain and finish removal: How to Remove Wood Finishes and Stains
Why Do Alcohol Stains Appear White — and Why Most Home Remedies Fail?
Understanding why alcohol stains are white explains why most commonly recommended home remedies — cooking oil, coconut oil, mayonnaise, toothpaste — produce only temporary results or no result at all.
When alcohol contacts a wood finish, it partially dissolves the polymer or wax molecules at the surface. As the alcohol evaporates, the dissolved finish re-solidifies but in a disrupted, irregular structure rather than the original smooth film. This irregular structure scatters light in multiple directions instead of reflecting it uniformly, which the eye perceives as a white, cloudy, or opaque patch.
Oils and fats temporarily fill the micro-fractures in the damaged finish with a liquid that has a refractive index closer to the finish material, which reduces the light scattering and makes the white mark appear to disappear. When the oil dries or is wiped away, the micro-fractures return and the white mark reappears — often within hours or days. This is why oil-based home remedies produce only temporary improvement.
Permanent repair requires either mechanically re-levelling the disrupted finish surface (steel wool), re-fusing the finish molecules with heat, or dissolving and re-laying the finish layer with a compatible solvent.
What Are the Key Specifications for Removing Alcohol Stains from Wood?
| Method | Attribute | Value |
|---|---|---|
| Steel wool grade | Required grade for finish repair | #0000 (ultra-fine) only — coarser grades scratch the finish |
| Paste wax application | Quantity per stain | Pea-sized amount per 10 cm² of stain area |
| Steel wool + wax method | Rubbing direction | Always with the wood grain — never circular on finished surfaces |
| Heat iron method | Iron temperature setting | Low to medium — no steam; max 120°C surface contact |
| Heat iron method | Cloth layer between iron and wood | Single cotton cloth — no synthetic fabrics |
| Heat iron method | Movement speed | Continuous movement — never stationary; 2–3 seconds per pass |
| Mineral spirits wipe | Use case | Final surface clean after steel wool treatment — removes wax haze |
| Fresh alcohol stain (under 30 min) | First action | Blot with dry cloth immediately — do not rub |
| Wax finish (beeswax, carnauba) | Best repair method | Steel wool #0000 + fresh paste wax coat |
| Lacquer or shellac finish | Best repair method | Low-heat iron through cotton cloth — re-fuses disrupted finish |
| Polyurethane finish | Best repair method | Steel wool #0000 + paste wax; deep damage requires local recoat |
| Oil finish (danish oil, tung oil) | Best repair method | Re-apply thin coat of matching oil finish to affected area |
| Deep white stain (finish fully dissolved) | Repair required | Strip and recoat affected area — surface-level methods insufficient |
Which Repair Method Should You Use for Your Finish Type?
The correct repair method depends on the finish type on the wood surface. Applying the wrong method — particularly using a solvent or heat on polyurethane — can extend the damage rather than repair it. Identify your finish type before selecting a method.
| Finish Type | How to Identify It | Correct Repair Method |
|---|---|---|
| Wax finish (beeswax, paste wax, carnauba) | Surface feels slightly soft and waxy; no high gloss; fingernail leaves faint mark | Steel wool #0000 + paste wax — most reliable method |
| Shellac finish | Denatured alcohol dissolves it — rub a cloth with alcohol in inconspicuous area; if finish dissolves, it is shellac | Low-heat iron through cotton cloth — re-fuses disrupted shellac molecules |
| Lacquer finish | Lacquer thinner dissolves it; high gloss; common on Asian-made furniture and cabinets | Low-heat iron method or lacquer thinner re-application with a brush to local area |
| Polyurethane finish (oil-based) | Hard, plastic-like feel; resistant to alcohol and most solvents; amber tint on older finishes | Steel wool #0000 + paste wax for surface-level damage; local recoat for deep damage |
| Water-based polyurethane | Clear, no amber tint; harder surface than oil-based; very alcohol-resistant | Steel wool #0000 + paste wax; water-based poly is most resistant to alcohol damage |
| Oil finish (danish oil, tung oil, linseed oil) | No surface film; matte appearance; wood grain very visible and tactile | Re-apply thin coat of matching oil to affected area; allow full cure time |
📝 In my restoration work, the finish identification step is the one most people skip — and it’s exactly where most alcohol stain repairs fail. The majority of antique furniture pieces I work on have shellac finishes, not polyurethane, which means the heat method resolves the white mark in two or three iron passes without touching the surface with abrasives. On a piece with polyurethane, the same heat approach does nothing — knowing the difference before you start saves significant time and prevents making the damage worse.
How Do You Remove Alcohol Stains from Wood Using Steel Wool and Paste Wax?
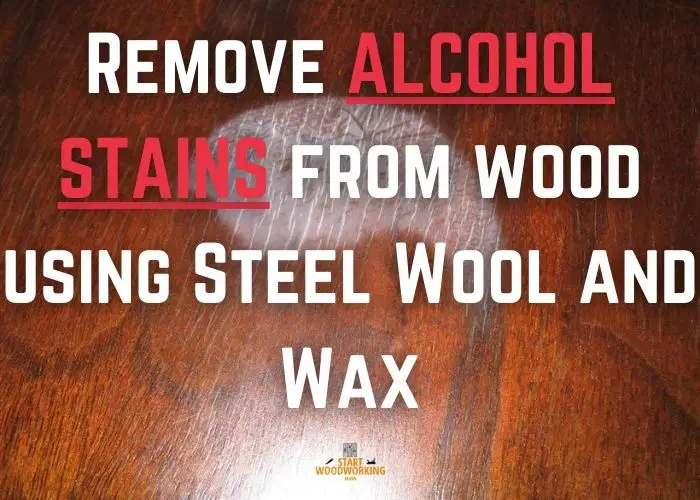
The steel wool and paste wax method is the most reliable repair technique for alcohol stains on wax and polyurethane finishes. It works by mechanically levelling the disrupted finish surface with ultra-fine abrasion, then filling and sealing the repaired area with a fresh wax layer that restores the uniform light reflection of the original finish.
This method requires #0000 ultra-fine steel wool — no other grade. Grade #000 is visibly coarser and leaves scratches that are harder to remove than the original stain. Grade #0000 abrades only the irregular surface layer of the damaged finish without cutting into the sound finish beneath.
STEP 1 – Apply a small amount of paste wax to the stained area
Apply a pea-sized amount of furniture paste wax directly to the white stain using a clean cloth. The wax serves two functions: it lubricates the steel wool to prevent scratching, and it fills the micro-fractures in the finish as you work. Do not use liquid wax — paste wax has the consistency needed to stay in place during rubbing. Beeswax paste or a commercial furniture paste wax such as Johnson Paste Wax are both appropriate.
STEP 2 – Rub with #0000 steel wool in the grain direction
Take a small pad of #0000 steel wool and rub it over the waxed stain using light, even pressure in the direction of the wood grain. Do not use circular motions — circular rubbing creates a pattern of fine scratches that are visible in raking light even after waxing. Work in straight strokes along the grain, overlapping each stroke by half to ensure even coverage.
Apply only light pressure — the combination of ultra-fine steel wool and wax requires minimal force to level the disrupted finish surface. Heavy pressure removes more finish than necessary and can create a low spot that catches light differently from the surrounding area.
STEP 3 – Wipe clean and inspect
After 6–8 strokes over the stained area, wipe away the wax residue with a clean cotton cloth. Inspect the surface in raking light — hold a lamp close to the surface at a low angle and look along the surface. The white mark should have reduced significantly or disappeared. If a faint haze remains, apply a fresh small amount of wax and repeat the steel wool pass.
STEP 4 – Apply a finishing wax coat and buff
Once the white mark is no longer visible, apply a thin final coat of paste wax to the entire panel or surface area — not just the repaired spot. Buffing only the repaired area creates a visible shine differential between the repair and the surrounding finish. Apply the wax with a cotton cloth, allow 5–10 minutes to haze, then buff to a uniform sheen with a clean dry cloth.
How Do You Remove Alcohol Stains from Wood Using Heat?
The heat method is effective on shellac and lacquer finishes where alcohol has disrupted the finish by partially dissolving it. Controlled heat re-softens the finish molecules enough for them to re-flow and re-fuse into a uniform layer as they cool, eliminating the micro-fractures that cause the white appearance.
This method does not work on polyurethane — polyurethane is a thermoset material that does not re-flow when heated at domestic iron temperatures.
STEP 1- Set a dry iron to low or medium — no steam
Use a clothes iron set to low or medium heat with the steam function disabled. Steam introduces moisture into the wood grain and can create new white marks while attempting to repair existing ones. The iron surface temperature should be warm to the touch but not hot enough to scorch cotton fabric — typically 80–120°C surface temperature.
STEP 2 – Place a single cotton cloth between the iron and wood
Lay a single layer of clean, dry, 100% cotton cloth flat over the white stain. A single layer transmits enough heat to re-fuse the finish without concentrating it. Multiple layers reduce heat transfer too much; synthetic fabrics can melt onto the finish under iron heat.
STEP 3 – Move the iron continuously over the stain — 2–3 seconds per pass
Place the iron on the cloth and move it over the stained area with continuous back-and-forth passes along the grain direction. Each pass should take 2–3 seconds. Never hold the iron stationary — stationary contact scorches the finish and the wood within seconds even at low settings.
Make 3–4 passes, then lift the cloth and inspect the stain. If the white mark has reduced, make 2–3 more passes. If the finish shows any darkening or scorching, stop immediately — the iron temperature is too high.
STEP 4 – Allow to cool and inspect
After heat treatment, allow the surface to cool to room temperature for 2–3 minutes before assessing. The re-fused finish needs to fully cool and solidify before the result is visible — inspecting while the surface is still warm gives a misleading reading.
Once cool, inspect in raking light. If a faint haze remains, repeat the heat treatment with one additional pass. If the mark is gone, apply a thin coat of paste wax to protect the repaired area.
How Do You Repair Alcohol Stains on Oil-Finished Wood?
Oil-finished wood — surfaces treated with danish oil, tung oil, linseed oil, or hardwax oil — does not have a surface film to repair. Alcohol stains on oil-finished wood affect only the thin oxidised oil layer at the very surface, which can be refreshed by applying a new thin coat of the same oil finish to the affected area.
Lightly sand the stained area with 220-grit sandpaper along the grain to remove the damaged surface oil layer. Wipe away all dust with a tack cloth. Apply a thin coat of matching oil finish with a lint-free cloth, working it into the grain.
Allow the full manufacturer-specified cure time before using the surface — typically 24–48 hours for danish oil, 48–72 hours for pure tung oil. The re-oiled area will blend with the surrounding surface as the oil cures and the grain colour equalises.
How Does the Wood Surface Type Affect Alcohol Stain Repair?
| Surface / Finish | Alcohol Damage Level | Repair Method | Result |
|---|---|---|---|
| Wax finish (beeswax, carnauba) | Surface wax disrupted — wood not affected | #0000 steel wool + paste wax | Full repair in one treatment |
| Shellac finish | Partial dissolution of shellac film | Low-heat iron through cotton cloth | Full repair if stain is recent; partial if old |
| Lacquer finish | Partial dissolution of lacquer film | Low-heat iron or lacquer thinner spot touch-up | Full repair; touch-up requires matching sheen level |
| Oil-based polyurethane | Micro-fractures in surface film — no dissolution | #0000 steel wool + paste wax | Full repair for surface damage; local recoat for deep white marks |
| Water-based polyurethane | Minimal — most resistant to alcohol damage | #0000 steel wool + paste wax | Full repair; water-based poly rarely shows deep damage |
| Oil finish | Surface oil layer disrupted | 220-grit sand + re-oil | Full repair after cure |
| Unfinished bare wood | Alcohol absorbs into grain — no finish to repair | Oxalic acid bleach for darkening; sand for raised grain | Partial — bare wood permanently stained by coloured alcohol |
📝 The most common scenario I encounter in the workshop is a wax-finished oak dining table with alcohol rings from glasses left overnight. On oak specifically, the open grain makes the white ring more pronounced than on close-grained species because the micro-fractures extend visibly into the pore channels. My standard approach is #0000 steel wool with beeswax paste — the same beeswax I use for finishing — rubbed along the grain with light pressure. On fresh rings under 24 hours old, one treatment is almost always sufficient. On older rings that have been there for weeks, I typically need two passes with a fresh wax application between them before the surface reads uniformly in raking light.
Frequently Asked Questions About Removing Alcohol Stains from Wood
Why do alcohol stains on wood appear white rather than coloured?
Alcohol stains appear white because ethanol and isopropyl alcohol partially dissolve the surface finish — lacquer, shellac, polyurethane, or wax — creating micro-fractures in the finish film.
These micro-fractures scatter light in multiple directions rather than reflecting it uniformly, which the eye perceives as white or opaque. The wood itself is not stained — only the finish layer is damaged. This is why the stain appears white regardless of the colour of the liquid spilled, as long as it contained alcohol.
Does cooking oil or mayonnaise permanently remove alcohol stains from wood?
Cooking oil and mayonnaise temporarily reduce the appearance of alcohol stains by filling the micro-fractures in the damaged finish with oil, which has a refractive index that partially restores uniform light reflection.
The effect is not permanent — when the oil dries or is wiped away, the micro-fractures return and the white mark reappears, typically within hours to days. Permanent repair requires mechanically re-levelling the finish surface with #0000 steel wool, re-fusing the finish with heat, or re-applying a compatible finish material.
Can you remove a deep or old alcohol stain from wood without refinishing?
Deep or old alcohol stains — where the finish has been fully dissolved rather than just surface-disrupted — often cannot be fully repaired without local refinishing. The steel wool + wax method and heat method address surface-level finish disruption.
When the finish has been completely removed from the stained area, the exposed bare wood absorbs light differently from the surrounding finished surface regardless of polishing. In this case, the affected area must be stripped to bare wood, re-stained if needed to match, and recoated with matching finish and sheen level.
How do you prevent alcohol stains on wood furniture?
Prevent alcohol stains on wood furniture by applying a paste wax coat over the existing finish — wax provides a sacrificial layer that alcohol contacts first. When wax is damaged by alcohol, it is repaired with a fresh wax application rather than a finish repair. Use coasters under all glasses on waxed wood surfaces. For high-risk surfaces such as bar tops or dining tables, a water-based polyurethane topcoat provides the highest alcohol resistance of all standard wood finishes and can be applied over most existing finishes after light sanding.
Summary: Key Values for Removing Alcohol Stains from Wood
Alcohol stains on wood are finish damage, not wood staining — the white appearance results from micro-fractures in the surface finish film caused by alcohol dissolving the finish molecules.
Permanent repair requires matching the method to the finish type: #0000 steel wool with paste wax for wax and polyurethane finishes (rub in grain direction, light pressure, finish with full-surface wax coat); low-heat dry iron through a single cotton cloth for shellac and lacquer finishes (2–3 seconds per continuous pass, never stationary); and 220-grit sanding plus re-oiling for oil finishes.
Cooking oil and similar home remedies produce only temporary improvement by masking the micro-fractures with oil rather than repairing the finish structure. Deep stains where the finish has been fully dissolved require local stripping and refinishing to match the surrounding surface.
→ Related: How to Apply Beeswax to Wood
→ Related: How to Remove Oil-Based Stain from Wood
→ Hub: How to Remove Wood Finishes and Stains — Complete Guide