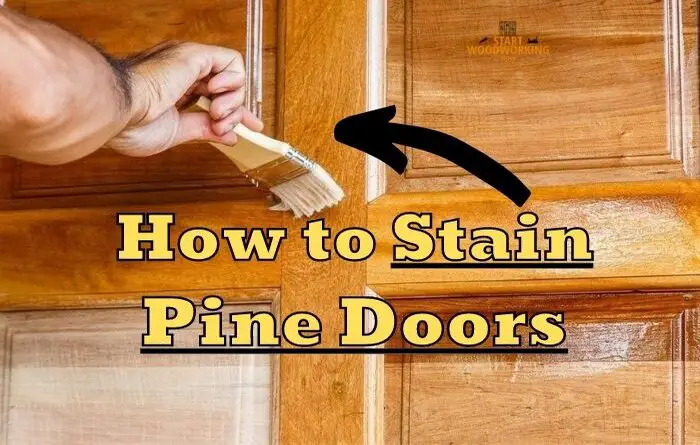
How to Stain Pine Doors: Blotch Prevention, Panel Order of Operations, and Interior vs Exterior Protocol
Staining a pine door presents two challenges that do not appear in any other woodworking staining scenario: pine is the species most prone to blotching (earlywood absorbs stain at 4–5× the rate of latewood, producing unpredictable dark bands unless you address this before applying any stain), and a paneled door requires a specific order of operations — panels stained before frame members — to prevent lap marks at the panel-to-rail and panel-to-stile joints.
- To stain a pine door correctly, you must control blotching using a 24-hour pre-stain conditioner or gel stain, apply the stain with the door laid horizontally, and follow a strict panel-first application order.
- Without these steps, pine staining almost always results in visible blotching and lap marks that cannot be corrected without sanding back to bare wood.
Get either of these wrong and the result is visible in every piece of light that catches the door surface. Get both right and a pine door can look as rich and intentional as a hardwood door at a fraction of the cost.
- The stain type determines how severe the blotching risk is:
- The stain type directly determines how severe blotching will be:
Gel stain is the most reliable choice for pine because its thick viscosity limits penetration depth, reducing the earlywood/latewood absorption differential. Oil-based pigment stain with pre-stain conditioner at 24-hour cure (not the 15-minute label time) is acceptable for lighter colours. Water-based pigment stain on pine without pre-treatment almost always blotches.
How Do You Stain a Pine Door?
- Remove the door and lay it horizontal. Staining a vertical pine door causes stain to run and streak — pine’s high porosity means liquid stain moves quickly on a vertical surface before you can wipe it. Remove hinge pins, set the door on sawhorses or a workbench, and keep it horizontal throughout the entire staining process including drying between coats.
- Sand progressively to 120 grit — treat resin pockets with shellac before conditioning. Sand 80→100→120 grit. Inspect under raking light for yellow-amber resin pockets — dark, translucent spots in the grain. Seal these with Zinsser SealCoat (dewaxed shellac) diluted 1:3 with denatured alcohol before any stain or conditioner. 30 minutes drying, then proceed.
- Apply pre-stain conditioner and wait 24 hours — not the 15 minutes on the label. At 15 minutes, conditioner only reaches surface pores. At 24 hours, it has equilibrated through the deeper pore structure that drives blotching. Apply generously to flooding point, wipe excess, allow 24 hours. This is the single biggest quality difference in pine staining. Note: conditioner reduces final stain colour intensity by 30–40% — test on a hidden area first.
- For paneled doors: stain panels before stiles and rails. The panel edges sit in grooves in the frame. If you stain the frame first then apply stain to panels, fresh stain from the panels drips onto already-stained frame areas at the joints, creating darker lines. The correct sequence: panels and their edges → rails (horizontal frame members) → stiles (vertical frame members) → architrave/door frame.
- Flood-and-wipe with gel stain or conditioned oil-based stain — wipe before stain gets tacky. Gel stain: work it into the grain with a cloth in circular then grain-direction passes, wipe excess after 5–8 minutes. Oil-based pigment stain after conditioner: flood, wipe after 5–10 minutes. Never leave oil-based stain on pine for more than 15 minutes — once it starts to set, wiping produces streaks.
- Apply topcoat matched to door location. Interior pine door: water-based or oil-based polyurethane, 2–3 coats. Exterior pine door: oil-based spar varnish only — it contains UV absorbers and flexibility agents for seasonal wood movement that interior polyurethane does not. Exterior doors must have all 6 faces (both faces, all 4 edges) finished before re-hanging.
This guide covers the correct stain type selection for pine, the pre-stain conditioner protocol, resin pocket treatment, the paneled door order of operations, the horizontal staining requirement, the interior and exterior door workflows, and the topcoat selection with drying times.
Which Stain Type for Pine Doors?
Pine is a softwood with extreme earlywood/latewood contrast — the wide, light-coloured earlywood bands absorb stain aggressively while the narrow, dense latewood bands resist it. This contrast is what causes blotching. Stain type selection determines how severely this contrast manifests.
Interior vs Exterior Pine Door — Two Different Protocols
→ Full species-specific staining preparation: How to Prepare Wood for Staining — Species Protocol, End Grain Treatment, and Conditioner
→ Complete staining guide — pigment, dye and gel: How to Stain Wood
→ Remove old finish from pine door: How to Remove Wood Finishes — Complete Hub
What Are the Key Specifications for Staining Pine Doors?
The outcome of staining a pine door is controlled by a small number of variables — especially absorption rate, resin content, and application timing. These determine whether the result is even or visibly blotchy.
| Entity / Variable | Attribute | Value and Detail |
|---|---|---|
| Pre-stain conditioner on pine | 24h vs. 15 min and colour reduction effect | At label-recommended 15 minutes: conditioner has penetrated surface pores only. The deeper pores — the ones that drive blotching — are still fully open. At 24 hours: conditioner has equilibrated through the full pore depth and significantly reduces differential absorption. Testing across multiple pine samples consistently shows 24h produces more even colour than 15 min. Trade-off: conditioner at any cure time reduces final stain colour intensity by 30–40% compared to unconditioned wood. On a pine door where you want “dark walnut”: apply the stain one shade darker than the target, or plan for 2 stain coats after 24h conditioner cure. Always test conditioner + chosen stain on the door’s top edge (hidden when hung) before committing to visible faces. |
| Resin pockets in pine | Identification and treatment before staining | Resin pockets appear as yellow-to-dark amber translucent spots or streaks in the pine grain — more common in heartwood than sapwood, and more common in older pine or pine with tight, slow-growth rings. Under raking light (torch held at a low angle to the surface) they appear as slightly darker, glossy areas. Treatment: Zinsser SealCoat (dewaxed shellac — NOT Zinsser Bulls Eye which contains wax) diluted 1 part SealCoat + 3 parts denatured alcohol. Brush onto resin pockets only. Allow 30 minutes drying. The thin shellac layer seals resin so it cannot migrate into the stain and block it. Without treatment: resin pockets stain lighter than surrounding wood (resin physically blocks stain penetration), producing a permanently visible pale spotted pattern through the finish. |
| Paneled door — staining order | Why panels must be stained before frame members | Pine paneled doors have panels (the recessed flat sections) held in grooves in the rails (horizontal frame members) and stiles (vertical frame members). Panel edges sit inside these grooves and are exposed but recessed. If rails and stiles are stained first, the stain applied subsequently to the panels will drip at the panel-to-frame joints, adding extra stain to already-stained frame areas and creating dark lines at every joint. Correct sequence: (1) Panel faces and panel edges, including inside the groove recesses using a small brush. (2) Rails — horizontal cross-members. (3) Stiles — vertical outer members. (4) Muntin bars if present. (5) Door edges. This sequence ensures that any drips from earlier-applied stain are covered or blended in subsequent staining of adjacent sections. |
| Horizontal vs. vertical staining position | Why horizontal is required for pine | Pine’s high porosity allows liquid stain to move on a vertical surface before the application wipe catches it. On a vertical pine door, stain applied at the top of a panel begins running before the bottom of the panel is stained. By the time you reach the bottom and wipe, the top has partially set with run marks. On a horizontal surface, stain remains in place and absorbs evenly. Method: remove door from frame by driving hinge pins out with a hammer and punch. Set on sawhorses at a comfortable working height — one sawhorse at each end of the door — or on the floor on two short offcuts to prevent the door edges from touching the floor. Stain all horizontal, flip to complete the reverse face, stain horizontal again. |
| End grain on pine door edges | Why edges absorb differently and how to correct | The top and bottom edges of a pine door are end grain — cell cavities exposed as open tubes rather than cell walls. End grain absorbs stain 3–5× more rapidly than face grain, producing dramatically darker edges if not treated separately. Method: apply stain diluted 50% with appropriate solvent (mineral spirits for oil-based, water for water-based) to top and bottom edges first. Allow to dry. Then apply full-strength stain to everything. The diluted first coat partially seals end grain, bringing it closer to face grain absorption level. Alternative: apply SealCoat wash coat (1:4 dilution) to top and bottom edges before any stain, allow 30 minutes, then stain everything at full strength. |
| Exterior pine door topcoat | Spar varnish vs. interior polyurethane | Interior polyurethane applied to an exterior pine door fails within 1–2 seasons. The failure mechanism: exterior temperature cycling (−20°C to +40°C in temperate climates) and UV exposure cause interior poly to become brittle and crack, allowing moisture ingress. Once moisture is under the finish film, the film lifts. Spar varnish (also called marine varnish or exterior varnish) contains alkyd resin plus UV absorbers and drying oils that maintain a degree of flexibility throughout the cure — it expands and contracts with the wood seasonally rather than cracking. Apply minimum 3 coats, 4 coats on south or west-facing doors. Sand lightly with 220 grit between all coats. Re-apply every 2–3 years on fully exposed exterior doors. |
| “Stain with integrated varnish” products (2-in-1) | Why separate stain + topcoat is always better | 2-in-1 stain/varnish products apply colour and protection in one coat. They produce results inferior to separate stain + topcoat for three reasons: (1) The stain concentration is diluted to allow brush application without tackiness — colour depth per coat is lower. (2) The “varnish” component is a thin alkyd layer — significantly less protective than dedicated polyurethane or spar varnish. (3) Compatibility with additional topcoats is limited — if the 2-in-1 requires a second protective coat, the alkyd base may not accept water-based products well. Use 2-in-1 products only for low-traffic decorative pine where result quality and durability are not the priority. |
Removing Old Finish from a Pine Door
If the pine door has an existing finish (old stain, paint, varnish), it must be completely removed before new stain is applied. Stain cannot penetrate through an existing film finish — it will sit on the surface and peel.
Do not use an angle grinder or drill with a brush attachment on pine doors.
Pine has a Janka hardness of 870–1200 N — one of the softest commercially used wood species. An angle grinder with abrasive disc or wire brush at rotational speeds of 4,000–11,000 RPM removes material so aggressively that you will gouge the soft pine irreparably in seconds.
The correct methods are chemical stripping (NMP gel, 30–45 minutes dwell under plastic film, plastic scraper) or manual sanding (80→100→120 grit progressive sequence). For removing old paint: see How to Remove Paint from Wood.
For chemical stripping of a pine door: NMP gel at 30–45 minutes under plastic film works well on latex and oil-based paint and on most varnishes. Use a plastic scraper — not a metal scraper — on pine panels to prevent gouge marks. After stripping, neutralise with mineral spirits wipe and allow 24 hours before any conditioner or stain. Confirm the water drop test passes (water absorbs in under 30 seconds) before proceeding.
Complete Step-by-Step Protocol — New Pine Door, Interior, Paneled
Order of Operations for Paneled Pine Doors — Why It Matters
The sequence of staining different sections of a paneled door is not interchangeable. Applying stain out of sequence produces dark lines at joints that cannot be corrected without re-sanding to bare wood. The correct sequence:
The most instructive pine door staining job I’ve done was a set of four interior paneled pine doors in a 1970s house — all showing the same blotchy failed stain from a previous attempt where the owner had used water-based stain directly on bare pine with no conditioning. The dark earlywood bands were dramatic even through the yellowed topcoat. After chemical stripping with NMP gel and re-sanding to 120 grit, I applied Minwax pre-conditioner and waited 24 hours on all four doors before staining. The visible difference between the 24-hour-conditioned faces and the one test strip I did at 15 minutes on the door’s top edge was significant — the 15-minute strip still showed clear earlywood banding under the stain; the 24-hour face was even. Gel stain in “Golden Oak” over 24h conditioned pine: two coats, and the result was indistinguishable at normal viewing distance from a mid-quality oak door. The order of operations — panels first — saved me one re-sanding episode on the second door when I instinctively started at the top stile and immediately saw the drip line at the panel junction. I re-sanded that junction and didn’t make the same mistake on the remaining three doors.
Topcoat Selection for Pine Doors
| Application | Topcoat | Coats | Wait After Stain | Between Coats |
|---|---|---|---|---|
| Interior, low-traffic (bedroom, wardrobe) | Water-based polyurethane (satin or matte) | 2 coats | 72h after oil stain; 4–8h after water stain; 48h after gel stain | 2–4h; 220 grit screen pad between |
| Interior, high-traffic (front door interior, bathroom) | Water-based polyurethane (semi-gloss) or oil-based polyurethane | 3 coats | Same as above | Water-based: 2–4h. Oil-based: 8–12h |
| Exterior, any exposure level | Spar varnish (exterior grade only) | 3–4 coats | 24–48h after oil-based stain | 24h between coats; 220 grit between all coats |
| Any door — avoid | 2-in-1 stain/varnish products | — | — | Produces inferior colour depth and protection vs. separate products. Not recommended for any application where result quality matters. |
Frequently Asked Questions About Staining Pine Doors
Why does stain look blotchy on my pine door?
Two causes. First: no pre-stain conditioner, or conditioner applied at 15 minutes (label time) rather than 24 hours. At 15 minutes, conditioner only reaches surface pores — the deeper pore system that drives blotching remains fully open. Second: water-based pigment stain applied without conditioner. Water-based stain penetrates pine’s high-absorption earlywood aggressively, producing dramatic dark banding. Solutions: strip the stain, re-sand to 120 grit, apply 24h conditioner, and switch to gel stain for the most blotch-resistant result on pine.
Should you stain a pine door on or off the hinges?
Off the hinges — always. Removing the door allows you to lay it horizontal, which prevents stain from running on pine’s porous surface. It also allows you to stain all 6 faces including top and bottom edges, which are critical for moisture sealing — especially on bathroom doors and all exterior doors where unfinished edges cause swelling. Drive hinge pins out from below with a hammer and punch, remove door, and set on sawhorses at working height.
Can you stain over varnished pine doors without removing the old finish?
No — stain must penetrate into bare wood to produce colour. A varnished surface is a sealed film that stain cannot penetrate. Applying stain over varnish produces a surface coat that rubs off, peels, or creates an uneven tacky layer. The old finish must be completely removed (chemical stripping or sanding to bare wood) before any stain. A quick test: apply a few drops of water to the surface — if they bead for more than 30 seconds, the surface is sealed and the old finish must be removed first.
Summary: Key Values for Staining Pine Doors
Remove door and lay horizontal — staining vertical pine causes runs. Sand 80→100→120 grit. Identify resin pockets under raking light — seal with SealCoat (1:3 alcohol) before conditioning. Pre-stain conditioner 24h (not 15 min label) — visible difference in blotching prevention. Conditioner reduces stain intensity 30–40% — test on door top edge.
Stain type: gel stain first choice (no conditioner needed, 120 grit final grit for adhesion); oil-based pigment stain with conditioner second choice; water-based stain requires conditioner and small working sections.
Paneled doors: panels first → rails → stiles — never frame before panels. End grain (top/bottom edges): diluted 50% stain first coat before face staining. Interior topcoat: water-based or oil-based polyurethane, 2–3 coats.
Exterior topcoat: spar varnish only — interior polyurethane cracks outdoors. Oil-based stain under water-based topcoat: 72h minimum (haze risk). Exterior doors: finish all 6 faces before re-hanging — especially top and bottom edges.
If your goal is a consistent, professional finish on pine, gel stain or properly conditioned oil-based stain is required. If you skip conditioning or use the wrong stain type, blotching is not a risk — it is the expected outcome.
→ Species preparation detail: How to Prepare Wood for Staining
→ Complete staining guide: How to Stain Wood — Pigment, Dye, and Gel Stain
→ Remove old paint from pine door: How to Remove Paint from Wood
→ Remove old finish: How to Remove Wood Finishes — Complete Hub