How To Make Wood Filler With Sawdust [Fast & Easy]
Wood filler is generally used for working and repairing wood. Don’t worry, don’t let a small defect ruin your pieces of wood and discover how to make wood filler with sawdust using the tricks that we are going to give you below. It doesn’t matter if it’s a door, a shelf, pine or cherry wood!
Here, we show you how to make wood filler with sawdust easily, which will allow you to stop buying it later. When you work wood, or you cut it, it always makes sawdust. So, just with sawdust, it’s like what people did back in the day.
Steps How To Make Wood Filler With Sawdust
Step 1: Gather the sawdust you created when sawing and sanding your project. Sift through the material and remove any large pieces of wood.
Step 2: Scoop a handful of fine sawdust over the piece of cardboard.
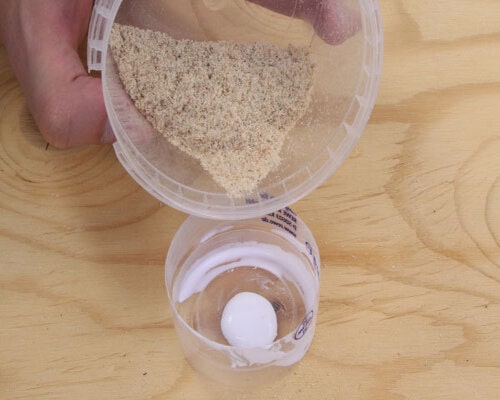
Step 3: Mix about 3 parts glue to 1 part sawdust. Use the ice cream stick(craft stick) or spatula to mix the glue and powder completely.
Step 4: Knead the mixture with your fingers until it has a sticky, clay-like texture. At this point, the wood filler should be neither runny nor hard.
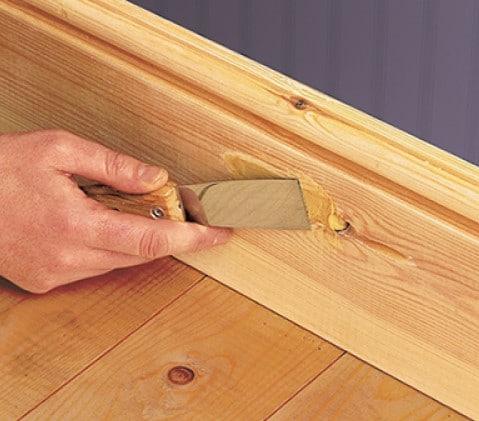
Step 5: Place the wood filler on the wood crack you want to repair, either with your finger or with a putty knife. The wood filler should stick to the glue effortlessly.
Step6: If the dough is too dry, add some glue and spread it on the dough and wood. If the dough is too wet, sprinkle a little more sawdust over it.
Step 7: Run a putty knife across the repair surface so it is smooth and level. Remove as much excess filler as possible so you don’t have a lot to sand down later.
Step 8: After the wood filler dries, lightly and gently, use a finishing sandpaper of your choice.
Step9: Finish the wood piece with varnish, paint or clear coat.
How to make Wood Filler with Sawdust – Detailed Instructions
Making wood filler is not as difficult as you might imagine. There are a few things to keep in mind, but the success is ultimately impressive.
If you are also tired of constantly buying expensive wood filler that you are not satisfied with, then just read on now!
In our article we would like to show you how you can make your own wood filler.
Before you can really get started, you must of course have the appropriate tools and the right materials ready.
Tools and Materials for making Wood Filler:
- Sanding dust or sawdust
- Possibly lighter and/or darker color pigments
- Plastic bowl or cup
- A fine sieve
- Sandpaper
- Wood glue or glue shop
- A spatula, preferably made of plastic
Step1: Collect sanding dust or sawdust
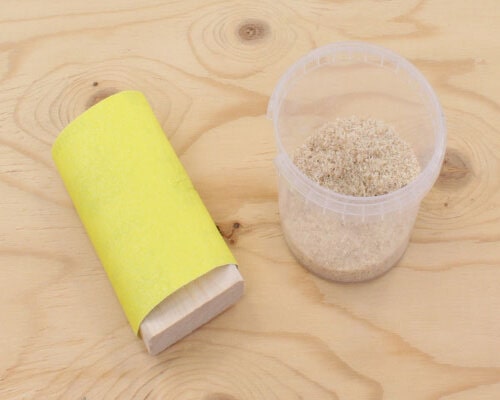
First you need the sanding dust or sawdust from the wood. What is usually considered annoying when processing wood, what is left over and causes dirt, is now of benefit to you. This dust should match the color of the wood you are trying to touch up.
Sanding dust and sawdust are produced all by themselves when processing wood-based materials. It can be easily collected in a container to have on hand when needed. If there is no sanding dust, it is also possible to sand a wooden board with fine sandpaper .
A good alternative for collecting sanding dust is the dust bag of an orbital sander. Large amounts quickly accumulate in it, which can be ideally used for the filler mix.
If there are coarse pieces in the sanding dust, the fine sieve is used now. This makes it easy to sieve out the fine grains and later you get an even and spreadable wood paste.
If all else fails, the wood section of hardware stores is a good place to start. Large quantities of sawdust are produced during cutting, which can often be obtained free of charge on request.
Step 2: Make the wood filler using sawdust
Sieve the wood dust with a fine sieve to filter out larger and unwanted particles. The finer the dust, the better the processing of the wood filler mix.
At the beginning, a small amount of wood glue is poured into the plastic cup. Now you add a little bit of wood dust and stir the ingredients until the wood filler is tough and sticky, comparable to peanut butter or hazelnut cream.
Or put some of the wood glue or glue in your bowl or cup and gradually add some of the wood dust. Always stir well in between. You then do this until the wood filler is tough, sticky and malleable.
If too little glue is used, the mixture will not stick to the wood. Too much glue isn’t ideal either, as it doesn’t provide enough coverage. However, make sure that you do not use too little or too much glue, otherwise the wood filler will not stick properly or will not cover enough.
Mix only as much wood filler as you need for your repairs. Because the finished putty dries out quickly and therefore cannot be stored.
If the filler is not the right color for the rest of the surface, you can mix it with appropriate color pigments from the hardware store until you achieve the best color result.
Your wood filler mix is finish now! So you can start patching!
Step 3: Test the effectiveness of the wood filler before applying
In order to check that you have succeeded in making a good wood paste, collect some wood to be treated where you can apply the paste. Fill the wood with the paste you just made.
It is strongly recommended to use wood and sawdust from the same tree. Indeed, if you work with oak, you must take oak chips, because at least you will have the same shade.
Step 4: Apply the wood filler to the damaged wood area
Pick up some of the wood filler with a spatula. Depending on the tannin content of the wood, the spatula should not be made of metal, otherwise the wood could subsequently discolor.
Apply the filler several times over the damaged area so that it is pressed all the way down and fills the hole optimally.
Use a wooden toothpick, and push the wood filler into the empty spaces. You’ll save time when sanding later if you get rid of the excess filler as much as possible. The wood filler should be stroked over the wood surface several times to also push it in depth.
If the area is completely filled with the it, you can remove most of the remaining filler with the spatula.
Step 5: Wait for the wood filler to dry
Quite large areas often have to be filled, since the holes to be repaired are large. Therefore, the drying of the self-made wood filler often takes quite a long time. It all depends on the proportion of the ingredients. In any case, we recommend you to be patient and not to sandpaper before time.
Allow the filler to dry and harden. The drying time will vary depending on the adhesive used and the size of the patched area. Therefore, pay close attention to the manufacturer’s product description. To be on the safe side, wait between 12 and 24 hours before proceeding to the next step.
Want to repair holes in wood? Repair holes in wood with this easy tutorial I’ve made!
Step 6: Sand the wood
After filling the desired surface with the paste, proceed to sanding this part, you will find that it becomes flat and smooth.
When the wood putty is completely dry, you should remove the last bits of filler to get an even surface. To do this, simply sand off the rest of the wood filler with the sandpaper.
If the patched area is to be particularly smooth, use a damp cloth, but please only use a damp cloth, not wet. Moisten after each sanding, wait until dry and sand again. Repeat this process until it is as smooth as it should be.
Step 7: Apply the wood finish
Once you have sanded the surface, you can apply a colorless varnish that will give the touch of perfection to your work and will hide the “fix”.
Do you prefer to give it color? Then opt for a specific paint for wood in the form of a spray . It may be a good opportunity to change the color of your furniture.
A woodworker often needs to fill in a hole in wood, or fix a scratch, while working on a project. A store-bought wood filler rarely matches the color, tone, or grain of the wood you need to fill. Homemade filler, on the other hand, can be made to match the type of wood you are working with, to effectively hide flaws.
| Methods How to Make Wood Filler with Sawdust: |
|---|
| 1. Using Sawdust and White Glue |
| 2. Using Sawdust and Flaxseed oil |
| 3. Using Sawdust with Solvent and Lacquer sealer |
| 4. Using Sawdust and Carpenter’s glue |
Method 1: How to make Wood Filler with Sawdust and White Glue
Materials :
- Sawdust or wood chips of the type you want to cover
- Chalk
- White glue
Steps to follow:
1. Pass the sawdust through a strainer to remove impurities.
2. Mix approximately equal parts of sawdust and white glue. Add white chalk powder which will counteract the dark color the filler takes on as it dries.
3. Mix well until you have a homogeneous white paste that is a little lighter in color than the wood.
4. Apply the wood filler with a spatula or similar. Cover a little more than flush with the hole, as the filler will shrink as it dries.
5. Once it is dry, sand the area until it is uniform.
Method 2: How to make Wood Filler with Sawdust and Flaxseed oil
Materials :
- 6 measures of fine sawdust of the same wood you want to cover
- 2 measures of plaster
- 4 measures of cooked flaxseed oil
Steps to follow:
1. Mix the plaster well with the linseed oil.
2. Add the sawdust and stir with the spatula until the mixture reaches the necessary thickness. If you see that the wood filler mix is too liquid, you can add a little sawdust. On the contrary, if it is too thick, add flaxseed oil.
3. Apply the wood filler with a spatula or joint in the crack you want to restore and remove the excess filler after.
4. When dry, sand the surface until smooth.
Method 3: How to make Wood Filler with Sawdust and Lacquer Sealer
Materials :
- Fine sawdust from the wood on which you are going to use the filler
- Sealing lacquer
- Solvent or paint thinner
Steps to follow:
1. Mix the solvent(paint thinner) and the sealer lacquer well in equal parts.
2. Add the wood dust little by little until you have a homogeneous and thick mass.
3. Apply with a wooden or metal spatula. As in the other methods, wait for it to dry and sand to remove the excess.
Method 4: How to make Wood Filler with Sawdust and Carpenter’s glue
This is an alternative to the former, which uses chalk and plaster to make the wood filler lighter. Lemon is also mildly whitening.
Materials :
- Sawdust from the wood you are going to cover
- Carpenter’s glue
- A few drops of lemon juice
Steps to follow:
1. Mix the carpenter’s glue and the sawdust until you get a dense and uniform paste.
2. Add a few drops of lemon. Don’t worry if the mixture initially appears to be unclear.
3. Wait for it to dry and sand.
How to make Homemade Wood Filler with Sawdust
Because we don’t always have time to go to the DIY store to buy wood pulp, or simply because we want to go 100% homemade , we offer you a very DIY easy to do, even if you are a beginner.
And to make your homemade wood filler , you will see that you only need very few ingredients. This way, you’ll never be short again when you need to fill holes , patch, restore and repair.
With a few products that you surely keep in your DIY workshop, it’s time for homemade wood filler !
Here are the materials needed:
- Sawdust (wood dust that you can collect in the bag of your sander);
- Wood glue (vinyl white glue);
- Some water ;
Step to do it:
- In a small container, put some wood glue .
- Dilute the wood glue with a little water (10 to 20% water) to obtain a better consistency.
- Mix vigorously .
- Add sawdust (about 50% of the mixture) to get the right shade.
- Mix well.
- Your wood filler is ready to use!
You can use it like commercial wood filler, scooping it up with a spatula and applying it to the hole or crack before letting it dry for several hours and sanding it down.
How to make wood filler for special woods
Do you need the filler in other shades, for example, for cherry wood, walnut, beech, pine, etc.
It is very simple. You just have to use the sawdust from these woods. That is why we insist so much that, whatever option you choose to make your putty, the sawdust is always the same as the original wood .
You can ask at the store where you usually buy the wood filler, at other DIY stores or search the Internet. And if the options are not good, you can always use an unusable part of the furniture to get the sawdust. That’s why it’s always good not to throw away leftover pieces of wood!
Now that you know how to make wood filler , practice making a small amount first and see how it dries. Is it the color and texture you were looking for? Then jump into your restoration project!
And if it isn’t, don’t worry, consider varying the proportion of the ingredients or varnishing or painting the furniture afterwards. Good luck with the results!
FAQs
Where is wood filler used ?
Wood filler has a variety of uses in a workshop and at home, including filling holes and restoring scratches on floors during the refinishing process. While there are many commercial brands of wood filler, you can make your own with.
The wood filler is a wonderful way to make damaged areas on a smooth wooden surface disappear in no time.
The repair of such unsightly flaws with wood filler is mainly used :
- when laying laminate to make cracks and joints disappear
- when repairing damaged wooden surfaces, edges and corners
- for knots or screw holes in the wood of doors, furniture, windows or stairs
What are the best glues to make wood filler?
Most fillers made from wood dust use the following glues (adhesive): epoxy, white and yellow glues, and super glue.
How to make wood filler with sawdust?
Add the appropriate amount of sawdust to the wood defect you want to repair. Place the sawdust in a food processor and blend well to obtain a much finer sawdust to make the dough . After the sawdust is finely ground, sieve to separate the fine sawdust .
Conclusions
The work is done and it seems like nothing ever happened. In addition, you have saved a lot of money and the result of your efforts is also perfectly colored, so that you do not have to fret.
And to be completely honest: Homemade is still the best and also feels the best!
This brings us to the end of our contribution to the topic of “how to make wood filler with sawdust”.
We hope that we were able to help you again this time and that you liked our article. Good luck and we look forward to your next visit to our blog.