Removing Caulk From Wood: Expert Tips and Techniques!
Caulk is a very practical sealant. However, if it gets to unwanted spots, caulk can sometimes be very difficult to remove. Learn here how to remove silicone caulk from wood, and not damage the wood.
Materials Required:
- Extra Fine Steel Wool
- Putty knife or sharp plastic scraper
- Dry cloth
Steps to do it:
1. Allow the caulk to fully cure before attempting to remove any residue. This prevents smearing or spreading the silicone deeper into the wood grain.
2. Use a sharp plastic scraper or putty knife to gently scrape the surface and lift any dried caulk chunks. Take care not to gouge or scratch the wood.
3. For thin silicon residue, scrape in the direction of the wood grain to prevent damaging the surface. Apply light pressure and keep the scraper at a low angle.
4. Wrap extra fine steel wool around a wood block. Gently rub affected areas to abrade away softened caulk residue.
5. Wipe away any silicone dust with a dry cloth. Check for any remaining residue and repeat scraping and steel wool abrasion if needed.
6. Clean the surface thoroughly with mineral spirits on a clean cloth to remove any last traces of silicone. Allow the wood to fully dry.
7. Sand lightly and finish the wood as desired. This removes any raised grain and restores the surface appearance.
Remove Fresh Silicone Caulk Residue
1. Using Putty Knife
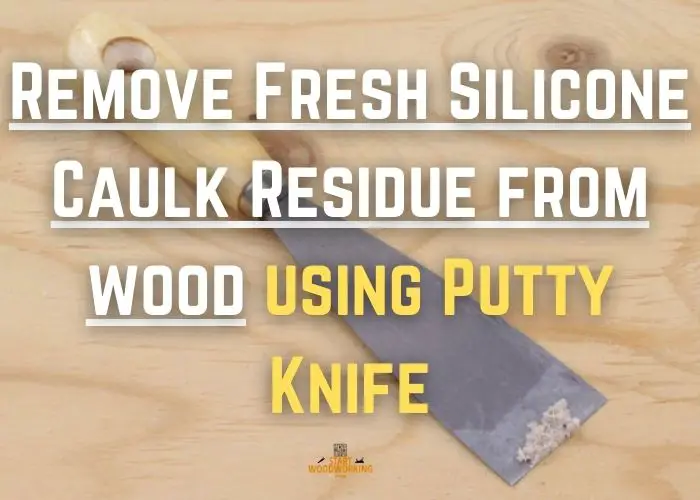
To prevent scratches on the wood surface, lay down 2″ strips of painter’s tape right up to the edge of the exposed caulking that you’re targeting. This cost-effective measure acts as a protective barrier, safeguarding your wood from potential scratches caused by the putty knife or multitool.
Step 1: Act Quickly
The sooner you address the fresh silicone caulk residue, the easier it will be to remove. Silicone caulk starts to cure pretty fast, so you want to catch it before it begins to skin over, which usually takes about 20 minutes. Once it’s cured, it becomes much more challenging to remove without damaging the wood.
Step 2: Manual Removal
If the caulk is still wet, use a plastic scraper or a specific caulk removal tool to gently lift and roll the caulk off the wood. The goal is to remove as much caulk as possible without pressing too hard, which could scratch or dent the wood surface. For caulk that’s started to dry but isn’t fully cured, you can still try to peel it off with your fingers or the tool, working slowly and carefully.
Step 3: Clean the Surface
After the bulk of the caulk is removed, take a clean, dry microfiber cloth and lightly dab at any remaining residue. This should help pick up some of the caulk without smearing it further into the wood grain.
Step 4: Use Mild Solvent (if necessary)
For any lingering residue, dampen a cloth with a small amount of rubbing alcohol or mineral spirits. Gently rub the area in a circular motion, applying minimal pressure to avoid damaging the wood’s finish. Both rubbing alcohol and mineral spirits are mild solvents that can break down silicone caulk without harming the wood, but it’s always wise to test on an inconspicuous area first.
Step 5: Wipe Down
Once the residue is gone, it’s important to remove any remaining solvent from the wood to prevent it from soaking in and causing damage. Wipe the area with a clean, slightly damp cloth, then follow up with a dry cloth to absorb any moisture.
Step 6: Touch-Up (if necessary)
Inspect the wood for any damage to the finish. If you find any areas where the finish has been removed or is looking thin, you may need to do some touch-ups. Lightly sand the affected area if necessary, being careful to blend it with the surrounding wood. Then, apply a matching wood finish or stain to restore the wood’s protective layer and appearance.
Step 7: Prevention
In the future, to avoid such issues, it’s a good practice to use painter’s tape to shield the wood around the area where you’re applying caulk. This not only makes cleanup much easier but also protects the wood surface from accidental spills. Make sure the tape is firmly pressed down along the edges to prevent any caulk from seeping underneath.
Step 8: Final Inspection
After the touch-up has dried, give the wood one last inspection to ensure the finish is even and you haven’t missed any spots of caulk residue. Look at the wood from different angles and in different lighting conditions to catch any imperfections you might have missed initially.
2. Using Vinegar Mix
Step 1: Prepare the Area
First, I ensure the work area is clean and well-ventilated. I lay down drop cloths or old towels to protect surrounding areas from spills or drips. For the wood surface, I make sure it’s free of dust and debris to avoid scratching it during the removal process.
Step 2: Prepare the Solution
I start by mixing a solution of equal parts white vinegar and warm water in a bowl or container. White vinegar is a mild acid that can help dissolve the silicone caulk, and the warm water helps to activate the vinegar’s cleaning properties.
Step 3: Apply the Solution
I use a clean rag or sponge to apply the vinegar and water solution directly onto the fresh silicone caulk residue. I make sure the area is thoroughly saturated, allowing the solution to start breaking down the silicone’s bond to the wood.
Step 4: Let it Soak
After applying the solution, I let it sit for about 5 to 10 minutes. The waiting time gives the vinegar ample opportunity to penetrate and soften the caulk residue.
Step 5: Test and Scrape
With the edge of a plastic putty knife or a caulk removal tool, I gently test an area to see if the silicone has softened enough to be removed. If it has, I use the tool to carefully scrape away the residue, taking care not to gouge or scratch the wood beneath.
Step 6: Wipe and Rinse
Once the majority of the residue has been scraped away, I use a clean, damp cloth to wipe the area clean. I make sure to remove any remaining vinegar solution as well as any bits of silicone that have been scraped off.
Step 7: Dry the Wood
I immediately dry the wood with a clean, dry cloth to prevent any water or vinegar from soaking in and potentially warping the wood or damaging the finish.
Step 8: Repeat if Necessary
If there’s still some residue left, I repeat the process, applying more of the vinegar and water solution, letting it soak, and then scraping and wiping clean until the wood is free of caulk.
Step 9: Final Inspection and Touch-Up
After all the caulk has been removed, I inspect the wood for any damage to the finish or surface. If necessary, I perform any touch-ups, which might include light sanding, staining, or refinishing to restore the wood to its original condition.
3. Using Dishwashing Liquid
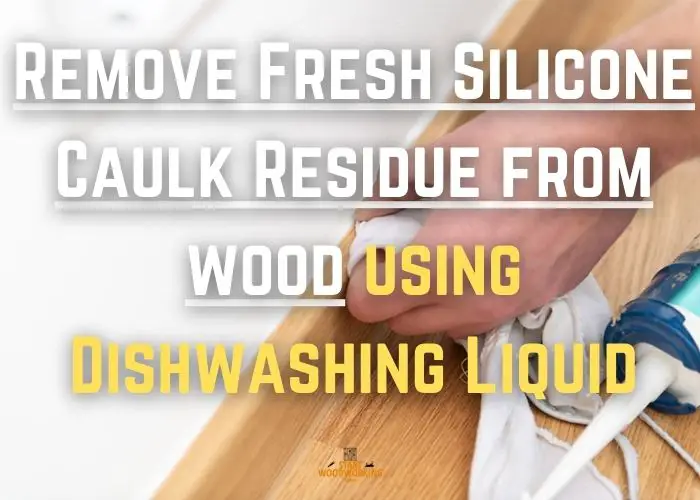
Step 1: Mix the Cleaning Solution
I start by mixing a solution of warm water and dishwashing liquid to create a sudsy solution. The ratio I use is typically a teaspoon of dishwashing liquid to a cup of warm water, but this can be adjusted depending on the amount of residue I need to remove.
Step 2: Apply the Solution to the Caulk Residue
Using a clean sponge or cloth, I apply the soapy solution directly to the caulk residue. I make sure the sponge is not too wet to avoid excess moisture seeping into the wood, which could cause damage or warping.
Step 3: Let the Solution Sit
I allow the solution to sit on the caulk residue for a few minutes. The dishwashing liquid helps to break down the caulk, making it easier to wipe away without the need for harsh chemicals or abrasives that could harm the wood finish.
Step 4: Gently Scrub the Area
With a soft-bristled brush or the soft side of a sponge, I gently scrub the caulk residue. The goal is to lift the caulk from the wood without scratching the surface. For tougher spots, I may need to apply a bit more pressure, but I always proceed with caution.
Step 5: Wipe Away the Residue
After scrubbing, I use a clean, damp cloth to wipe away the caulk residue and the soapy solution. I rinse the cloth frequently in clean water to ensure I’m not spreading the residue around.
Step 6: Dry the Wood
Once all the caulk residue is removed, I dry the wood thoroughly with a clean towel. It’s important to remove all moisture to prevent any damage to the wood.
Step 7: Inspect the Wood
After the area is clean and dry, I inspect the wood for any remaining residue or damage. If I find more caulk, I repeat the cleaning process until the wood is completely clean.
Remove Old Dried Caulk Residue from Wood
1. Using Heat
Step 1: Gather Necessary Tools
Before I begin, I make sure to have the following tools on hand: a hair dryer, a plastic putty knife or a caulk removal tool, a clean cloth, and gloves for hand protection. Choosing the right tools is crucial to avoid damage to the wood.
Step 2: Prepare the Workspace
I clear the area around the wood of any objects that could be affected by heat. I also ensure the workspace is well-ventilated, as heating the caulk can sometimes release fumes.
Step 3: Heat the Caulk
I plug in the hair dryer and set it to a medium or high heat setting. Holding it a few inches away from the caulk, I move the hair dryer back and forth over the length of the caulk line. The heat will cause the caulk to soften and expand, making it easier to remove.
Step 4: Test the Caulk
After heating the caulk for a minute or two, I use the plastic putty knife to gently test if the caulk has softened. If it’s still hard, I continue to apply heat until it becomes pliable.
Step 5: Scrape the Caulk
Once the caulk is soft, I carefully insert the edge of the putty knife under the caulk and start to lift it away from the wood. I work slowly and gently to avoid scratching or gouging the wood. I find that it’s best to work in small sections, reheating as necessary.
Step 6: Remove Remaining Residue
After the bulk of the caulk has been removed, there may be some residue left. I apply heat again and use the cloth to rub off the remaining caulk. For stubborn spots, I might need to alternate between heating, scraping, and wiping several times.
Step 7: Clean the Surface
Once all the caulk is removed, I clean the wood surface with a mild cleaner or just a damp cloth to remove any remaining particles or film. Then, I dry the wood thoroughly with a clean towel.
Step 8: Inspect and Repair
I inspect the wood for any damage or discoloration. If necessary, I sand the area lightly with fine-grit sandpaper to smooth out any roughness or to prepare the surface for refinishing. If the wood finish has been compromised, I apply a matching stain or sealant to restore the appearance of the wood.
2. Using WD-40
Step 1: Ventilate the Area
Before I begin, I ensure that the workspace is well-ventilated. WD-40 has a strong odor and can be harmful if inhaled in concentrated amounts. I open windows and doors or use a fan to circulate the air.
Step 2: Test WD-40 on a Small Area
I test the WD-40 on a small, inconspicuous area of the wood to make sure it does not damage the finish or discolor the wood. I apply a small amount, wait a few minutes, and then wipe it off to check for any adverse effects.
Step 3: Apply WD-40 to the Caulk Residue
I spray WD-40 directly onto the dried caulk residue, making sure to cover it completely. I use the smart straw for precise application to prevent the WD-40 from spreading onto areas of the wood where it’s not needed.
Step 4: Let it Sit
I allow the WD-40 to sit on the caulk residue for several minutes. This gives it time to penetrate and break down the bond between the caulk and the wood surface.
Step 5: Gently Scrape the Caulk
Using a plastic scraper or putty knife, I gently scrape away the softened caulk residue. I work carefully to avoid scratching or gouging the wood. If the caulk is not coming off easily, I apply more WD-40 and wait a few more minutes before trying again.
Step 6: Wipe Clean
After scraping off the caulk, I use a clean rag to wipe away any remaining WD-40 and caulk particles. If necessary, I may use a bit of soapy water to help remove the oily residue.
Step 7: Clean the Area Thoroughly
I clean the area with a wood-safe cleaner or just soap and water to ensure all WD-40 and caulk residue is completely removed. It’s important to remove all traces of WD-40, especially if I plan to refinish the area.
I dry the wood thoroughly with a clean, dry cloth. It’s important to ensure that no moisture remains, as this could damage the wood or affect the finish.
Step 8: Sand the Wood (If Necessary)
If there are any remaining bits of caulk or if the wood surface has been marred, I sand the area lightly with fine-grit sandpaper. This helps to smooth out the surface and prepare it for refinishing if that’s needed.
Step 9: Inspect and Touch-Up After the area is clean and dry, I inspect the wood for any missed spots or damage. I touch up as necessary, using wood filler for any gouges and reapplying the finish to keep the wood protected and looking its best.
3. Using a Caulk Scraper Tool
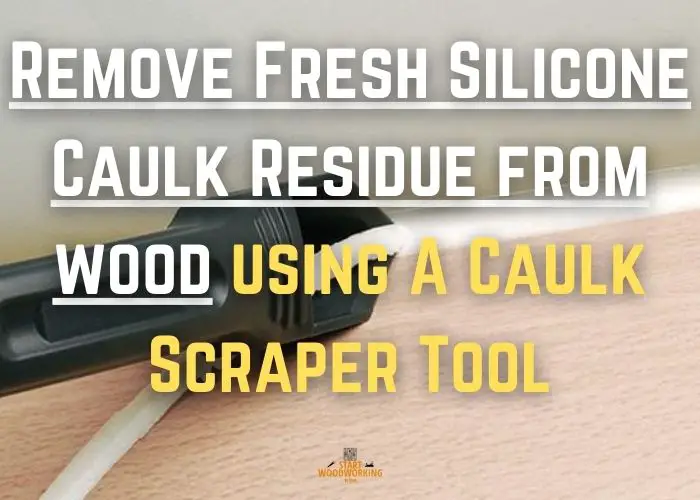
Step 1: Choose the Right Caulk Scraper
The first thing I do is select a caulk scraper that’s appropriate for the job. I prefer a scraper with a plastic blade to prevent scratching the wood surface. If the caulk is particularly tough, I might use a metal blade but with extreme caution.
Step 2: Prepare the Work Area
Before I start, I ensure the work area is well-ventilated, especially if I’m going to use any solvents later. I also lay down drop cloths or old newspapers to catch any caulk pieces that fall during the removal process.
Step 3: Score the Caulk
Using the sharp edge of the caulk scraper, I carefully score along the edges of the caulk. This helps to separate the caulk from the wood surface and makes it easier to remove in larger strips.
Step 4: Remove the Bulk of the Caulk
I then use the flat edge of the scraper to push under the edge of the caulk. I work slowly and gently pry the caulk away from the wood. I aim to remove as much of the caulk as possible in this step, but I don’t force it if it’s not coming off easily.
Step 5: Apply Heat if Necessary
If the caulk isn’t coming off easily, I might use a heat gun or a hair dryer to soften it. I hold the heat source a few inches away from the caulk and move it back and forth to avoid scorching the wood.
Step 6: Scrape Away the Remaining Caulk
Once the caulk is softened, I go back in with the caulk scraper to remove any remaining pieces. I work carefully to avoid damaging the wood surface.
Step 7: Sand the Surface
After all the caulk has been removed, I lightly sand the area with fine-grit sandpaper to ensure that it’s completely smooth and free of any residue.
Step 8: Clean the Wood
I wipe down the wood with a damp cloth to remove any dust or particles from sanding. If there’s any oily residue from the caulk, I might use a mild detergent or wood cleaner to clean the surface.
Acetone is often touted as an effective method of removing silicone caulk from the wood. To do this, simply moisten a kitchen towel with acetone and then rub over the caulk. You should always work carefully with acetone, as this substance can generate harmful vapors.
If a film of caulk remains on the wood after scraping, you can use fine-grit sandpaper to lightly sand the area. Be sure to move in the direction of the wood grain to prevent scratches. After sanding, wipe the surface clean with a damp cloth to remove any dust and residue. If necessary, follow up with a solvent like mineral spirits to remove any remaining film.
To remove caulk residue without damaging the wood finish, use a plastic scraper and gentle pressure to avoid gouging the wood. If you need to use a solvent, test it on an inconspicuous area first to ensure it doesn’t harm the finish. After the caulk is removed, clean the area with a soft cloth dampened with water and mild soap.