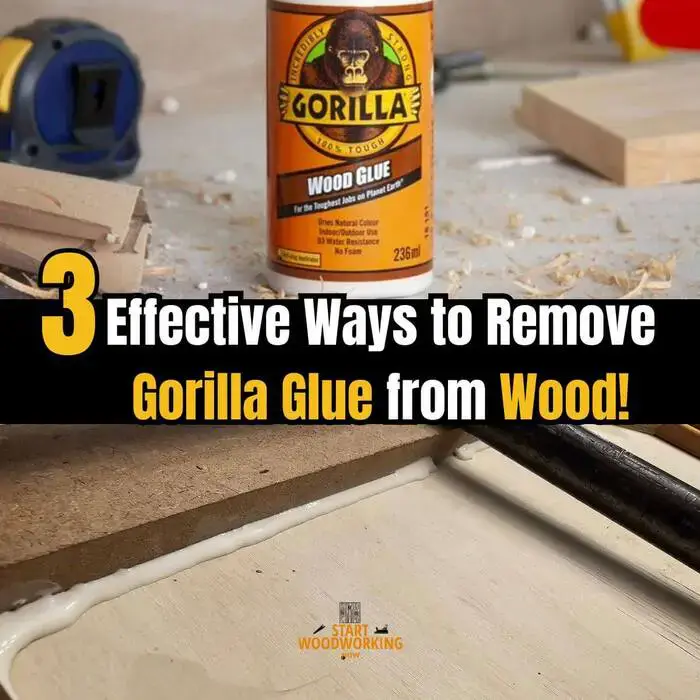
How to Remove Gorilla Glue from Wood: Formula Identification and Removal Guide by Cure State
Gorilla Glue is a brand name covering six adhesive formulas with completely different chemistries — the correct removal method depends on which formula was used, not just the brand. Original Gorilla Glue (polyurethane, expanding) requires isopropyl alcohol before curing and mechanical chipping after; it does not dissolve in vinegar, baking soda, or dish soap. Gorilla Super Glue (cyanoacrylate) requires acetone. Gorilla Wood Glue (PVA) softens with warm water. Gorilla Epoxy resists all solvents and is removed mechanically. Applying the wrong solvent to the wrong Gorilla Glue formula produces no result and wastes the critical time window before cure is complete.
This guide covers the formula identification test, the expanding foam behaviour of Original Gorilla Glue that makes timing critical, and the correct removal protocol for each formula in both uncured and cured states.
How Do You Remove Gorilla Glue from Wood?
Where Does Gorilla Glue Fit in the Wood Stain and Finish Removal System?
Gorilla Glue removal is not a stain-removal process — it is an adhesive removal problem within the broader wood restoration system. Unlike stains, which operate through chemical penetration, pigment bonding, or finish damage, Gorilla Glue creates a physical or chemical bond to the wood surface depending on its formula.
- → Polyurethane Gorilla Glue (Original) behaves as a mechanical + chemical foam deposit after curing.
- → Cyanoacrylate (Super Glue) behaves as a surface-bonded polymer similar to pigment/dye bonds requiring solvent dissolution.
- → PVA wood glue behaves as a water-based polymer deposit removable through re-softening.
Correct identification ensures the glue is treated as an adhesive system — not a stain — preventing incorrect use of bleaching agents, oils, or general cleaning solutions.
For adhesive types beyond Gorilla Glue — including epoxy, PVA, and construction adhesives — see the full adhesive removal system: How to Remove Dried Glue from Wood
→ Hub: How to Remove Wood Finishes and Stains
Which Gorilla Glue Formula Do You Have?
Identify the formula from the product label or packaging before selecting a removal method. The colour of the cap and the product name distinguish each formula.
Why Timing Is Critical for Original Gorilla Glue — The Expanding Foam Problem?
Original Gorilla Glue (the tan polyurethane formula) has a unique property that makes timing more critical than any other household adhesive: it cures by reacting with moisture in the wood and air, and during this curing process it expands to approximately 3 times its original applied volume. A small squeeze-out bead becomes a large foam deposit. A small spill becomes a significantly larger area of foam within 30–90 minutes.
Original Gorilla Glue — Removal Difficulty vs. Time
0–15 min: wipe with isopropyl 15–60 min: still soft, chips partially 60 min+: fully expanded, mechanical removal only
Every minute of delay after application means more foam volume to remove. Isopropyl alcohol removes uncured Gorilla Glue in seconds. Fully cured foam requires chiseling and sanding — which takes significantly longer and risks wood damage.
- DO: Use Isopropyl Alcohol (70% or higher) on a dry cloth.
- DO: Blot the spill to lift it rather than wiping/spreading.
- DON’T: Use vinegar solutions or damp/wet cloths.
- DON’T: Try to “wash” the glue away with soap and water.
What Are the Key Specifications for Removing Gorilla Glue from Wood?
| Formula / Method | Attribute | Value |
|---|---|---|
| Original Gorilla Glue — uncured (under 15 min) | Removal method | Isopropyl alcohol 70%+ on dry cloth — wipe immediately; do not add water |
| Original Gorilla Glue — cured foam | Primary removal method | Chisel at 10–15 degree angle + sanding 80–120 grit |
| Original Gorilla Glue — cured foam | Acetone effectiveness | Partially softens surface layer; insufficient for thick cured foam — mechanical first |
| Gorilla Super Glue (CA) — uncured | Method | Acetone immediately — CA cures in seconds to minutes |
| Gorilla Super Glue (CA) — cured | Acetone contact time | 2–5 minutes; chip mechanically between applications |
| Gorilla Super Glue on polyurethane finish | Acetone contact limit | 30 seconds per application maximum |
| Gorilla Wood Glue (PVA) — uncured | Method | Warm damp cloth (50–60°C) — water-soluble before cure |
| Gorilla Wood Glue (PVA) — cured | Method | Warm water 5–10 min contact; acetone if water insufficient on old glue |
| Gorilla Epoxy — cured | Primary method | Heat gun 150–200°C to make brittle; chisel at 10–15 degrees; no effective solvent |
| Gorilla Construction Adhesive — cured | Method | Score perimeter with utility knife; chisel from edges; mineral spirits for residue |
| Gorilla Clear Grip — cured | Method | Acetone or MEK 5–10 min; rolling dry cloth removes rubbery residue |
| Plastic scraper angle (all formulas) | Angle to surface | 10–20 degrees — nearly flat; prevents finish scratching |
| Acetone on polyurethane finish (any formula) | Safe contact limit | 30 seconds per application; repeat rather than extend |
| Acetone on shellac or lacquer | Safe use | NOT safe — dissolves finish immediately; use isopropyl only |
Common Removal Mistakes —Why the Wrong Method Fails on Original Gorilla Glue?
Original Gorilla Glue is a polyurethane polymer that cures by moisture-activated cross-linking into a rigid, chemically resistant foam structure. Cured polyurethane is highly resistant to dilute acids, dilute bases, and aqueous cleaning products — which is precisely what makes polyurethane valuable as an adhesive and a finish.
Acetone only softens the surface layer of cured polyurethane and cannot penetrate thick foam. This results in messy, repeated applications with minimal actual removal.
Water activates the moisture-curing reaction, causing the glue to expand and harden faster. This increases the total volume of adhesive that must eventually be removed.
These have no chemical interaction with PU, CA, or epoxy polymers. They neither dissolve nor weaken the adhesive structure and often leave residues behind.
Sanding spreads partially cured adhesive into the wood grain. This increases surface contamination and pushes the polymer into pores, making removal permanent.
Vinegar (dilute acetic acid, pH 2.5) and baking soda (sodium bicarbonate, pH 8.3) neutralise each other on contact and produce carbon dioxide gas and water. The resulting solution — essentially water with trace sodium acetate — has no chemical mechanism for swelling, dissolving, or degrading a cured polyurethane polymer chain.
Dish soap is a surfactant designed to emulsify water-soluble fats and oils. Cured polyurethane foam is neither water-soluble nor fat-based — it is a cross-linked polymer network that surfactants cannot penetrate or emulsify.
The correct solvents for polyurethane-based adhesive are: isopropyl alcohol (effective on uncured material), acetone (partially effective on cured surface layers), and DMF (dimethylformamide) or MEK (methyl ethyl ketone) for deeper penetration into cured polyurethane — the latter two are professional solvents not typically available to consumers. For fully cured Original Gorilla Glue foam, mechanical removal is the practical solution.
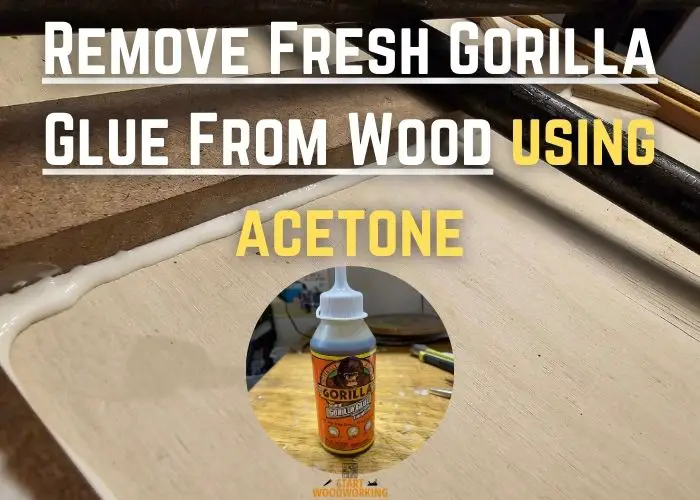
How Do You Remove Uncured Original Gorilla Glue from Wood?
Uncured Original Gorilla Glue — removed within the first 15 minutes before significant expansion occurs — is the easiest removal scenario. The polyurethane chains have not yet cross-linked fully and the adhesive can be dissolved or diluted with isopropyl alcohol before it sets.
STEP 1 – Wipe immediately with a dry cloth — do not use water
Press a dry cloth onto the fresh glue and lift straight up — do not wipe sideways or spread the material. Remove as much uncured glue as possible by blotting before applying any solvent. Using a dry cloth rather than damp is critical — any moisture accelerates the curing reaction and the expansion.
STEP 2 – Apply isopropyl alcohol 70%+ to dissolve remaining uncured glue
Dampen a clean cloth with isopropyl alcohol (70% or higher — higher concentration is more effective) and wipe the remaining glue deposit firmly. The alcohol dissolves uncured polyurethane rapidly. Replace the cloth as it picks up dissolved glue.
Continue until no glue transfers to a clean cloth section. Act quickly — uncured Gorilla Glue can expand to its full volume within 30–60 minutes depending on ambient humidity and temperature.
STEP 3 – Clean the surface and restore finish if needed
After removal, wipe the surface with a clean damp cloth to remove alcohol residue, then dry immediately. On wax finishes, re-apply paste wax — alcohol removes the wax layer. On polyurethane and lacquer, brief isopropyl contact at this concentration does not typically require finish restoration.
How Do You Remove Cured Original Gorilla Glue Foam from Wood?
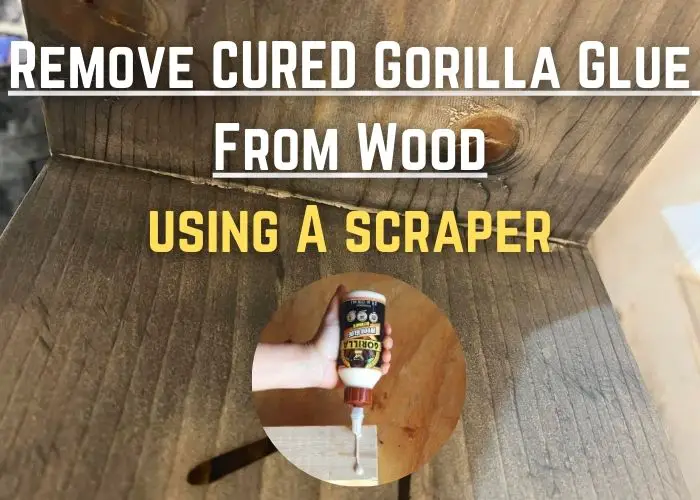
Cured Original Gorilla Glue foam — the tan, rigid honeycomb foam deposit after full expansion — is mechanically hard and chemically resistant. No household solvent dissolves cured polyurethane foam completely. The removal process is primarily mechanical: chipping followed by sanding.
STEP 1 – Allow foam to cure fully before attempting removal
Counterintuitively, partially cured foam (30–90 minutes) is harder to remove than fully cured foam (24+ hours). Partially cured foam is rubbery and tears rather than chipping — it smears into the wood grain and finish surface.
Fully cured foam is rigid and brittle enough to chip cleanly. If the foam is still in the rubbery expansion phase, wait. The curing time is approximately 24 hours at 20°C and 50% relative humidity.
STEP 2 – Chip away bulk foam with a chisel at 10–15 degrees
Hold a wood chisel or rigid plastic scraper at 10–15 degrees to the wood surface — nearly flat — and drive it under the foam deposit from the edge. Fully cured Gorilla Glue foam fractures and chips cleanly when the chisel is at the correct low angle.
Work progressively from the perimeter inward. On finished wood, a rigid plastic scraper or an old chisel with a smooth bevel is preferable to a sharp chisel, which can cut into the finish surface if the angle is too steep.
STEP 3 – Apply acetone to the thin residual base layer
After chipping removes the bulk foam, a thin layer of cured polyurethane typically remains bonded to the wood or finish surface. Acetone partially dissolves and softens this thin layer — it cannot dissolve thick cured foam but is effective on the 0.1–0.5 mm residual base.
Apply to a cotton cloth and press for 30 seconds on polyurethane finish; 2–3 minutes on bare wood. Repeat 2–4 times, wiping the softened residue between applications.
STEP 4 – Sand residual staining with 80–120 grit on bare wood
On bare or unfinished wood where polyurethane residue has bonded into the grain surface, sand with 80–100 grit in the grain direction after acetone treatment. The mechanical abrasion removes the thin residual polymer film and any associated discolouration.
Progress to 120 then 180 grit before applying finish. On finished wood, a light 220-grit pass over the repair area and local refinishing is required after acetone treatment if the finish was damaged.
How Do You Remove Gorilla Super Glue (Cyanoacrylate) from Wood?
Gorilla Super Glue is a standard cyanoacrylate adhesive — the same chemistry as Loctite and Krazy Glue. The removal protocol is identical to any cyanoacrylate: acetone dissolves the polymer directly. The key difference from Original Gorilla Glue is that CA glue does not expand, does not foam, and the cured material is glassy and brittle — easy to chip and acetone-soluble. See the complete super glue removal guide for full protocol details.
For Gorilla Super Glue specifically: apply acetone at 30-second maximum contact per application on polyurethane-finished wood, chip the brittle glass-like deposit first, then dissolve the thin base layer with acetone. On shellac and lacquer, use isopropyl 99% instead — acetone dissolves these finishes.
→ Full protocol: Acetone contact time limits by finish type — same solvent safety rules apply.
How Do You Remove Gorilla Wood Glue (PVA) from Wood?
Gorilla Wood Glue is a PVA aliphatic resin adhesive — the same chemistry as Titebond Original. It cures by water evaporation rather than chemical cross-linking, making it re-softenable by heat and moisture. Fresh PVA responds to warm water and a cloth. Old cured PVA requires acetone after warm water treatment.
For fresh glue (under 24 hours): apply a cloth soaked in 50–60°C water and hold for 5–10 minutes. Scrape with a plastic scraper at low angle. For cured PVA that does not respond to warm water: apply acetone for 3–5 minutes contact, chip, and repeat. On finished surfaces, limit acetone to 30 seconds per application.
The gel-stage removal technique — waiting until PVA squeeze-out forms a rubbery skin (20–45 minutes after application) and peeling it off in a single piece — is the most effective prevention strategy for woodworking joints.
→ Full PVA removal protocol: How to Remove Dried Glue from Wood
How Does the Wood Surface Type Affect Gorilla Glue Removal?
| Surface Type | Original PU (uncured) | Original PU (cured) | Super Glue (CA) | Wood Glue (PVA) |
|---|---|---|---|---|
| Polyurethane finish | Isopropyl 70%+ — wipe immediately | Plastic scraper + acetone (30 sec max per application) | Acetone 30 sec max; chip first | Warm water + plastic scraper; acetone for residue |
| Lacquer finish | Isopropyl 70%+ immediately | Plastic scraper; acetone NOT safe — isopropyl 90% only | Isopropyl 99% only — acetone dissolves lacquer | Warm water + plastic scraper |
| Shellac (antique finish) | Isopropyl 70% — brief contact only | Plastic scraper only; no solvents safe — chisel very carefully | Mechanical chipping only — no safe solvent on shellac for CA | Warm water only; no alcohol on shellac |
| Wax finish | Isopropyl — re-apply paste wax after | Plastic scraper + mineral spirits; re-wax after | Acetone removes wax layer — re-wax after; mechanical chip first | Warm water; re-wax after |
| Bare / unfinished wood | Isopropyl 70%+ — extended contact safe | Chisel + acetone (extended contact OK) + 80–120 grit sanding | Acetone (extended contact OK) + mechanical chip + sanding | Warm water + acetone for old glue + sanding |
| Veneer | Isopropyl — blot only, minimal contact | Plastic scraper at flattest possible angle; no aggressive sanding | Mechanical chip only; acetone risks delamination of veneer adhesive | Warm damp cloth only — minimal moisture on veneer |
📝 The most consistent glue challenge I encounter in my restoration workshop is PVA squeeze-out on solid oak joinery — specifically on mortise-and-tenon and dowel joints where the glue migrates into the open grain around the joint line and becomes invisible until stain is applied, at which point it appears as a lighter patch that refuses to absorb colour. My standard practice now is to apply glue moderately, assemble the joint, and wait exactly 25–35 minutes until the PVA reaches the rubbery gel stage. At that point it peels from the oak surface as a single clean strip with a wooden scraper, leaving no residue in the grain. Any joints where I missed this window and the PVA cured fully required acetone at 3–4 minutes contact to dissolve the surface layer, followed by 120-grit sanding across the affected grain area before staining — adding significant time to the finishing stage.
Frequently Asked Questions About Removing Gorilla Glue from Wood
Why does vinegar not remove Original Gorilla Glue from wood?
Original Gorilla Glue is a moisture-cured polyurethane polymer. Cured polyurethane is chemically resistant to dilute acids including vinegar (acetic acid at pH 2.5). Vinegar has no chemical mechanism to dissolve, swell, or degrade a cross-linked polyurethane polymer chain.
Additionally, applying vinegar solution (which is water-based) to uncured Gorilla Glue can accelerate the curing process because the moisture in the vinegar activates the moisture-curing reaction, increasing the foam volume rather than removing the glue.
What happens if you try to wipe Original Gorilla Glue before it cures with a damp cloth?
A damp cloth introduces moisture to uncured polyurethane Gorilla Glue, which activates and accelerates the moisture-curing reaction. Rather than dissolving or removing the glue, the moisture causes it to expand more rapidly and begin curing immediately on contact.
The correct action is to use a dry cloth first to blot up as much uncured glue as possible, then apply isopropyl alcohol on a dry cloth to dissolve the remainder. Isopropyl alcohol dissolves the uncured polyurethane without triggering the moisture-curing reaction.
How do you remove Gorilla Glue foam from a wood joint without damaging the wood?
Allow the foam to cure completely — 24 hours at room temperature — before attempting removal. Partially cured foam tears and smears rather than chipping cleanly. After full cure, use a sharp wood chisel or wide-bladed scraper held at a near-flat 10–15 degree angle and drive it under the foam from the edge using controlled force.
The cured foam fractures cleanly at this angle. For foam in tight joint lines, a pull saw or flush-cut saw removes the bulk before chiseling residue. Follow with a light sanding at 120–180 grit if the wood surface will be finished.
Is there any solvent that completely dissolves cured Original Gorilla Glue foam?
No household solvent dissolves cured Original Gorilla Glue polyurethane foam completely. Acetone partially softens the surface layer of thin cured deposits and is useful for residual thin films after mechanical removal. Industrial solvents such as MEK (methyl ethyl ketone) and DMF (dimethylformamide) are more effective on cured polyurethane but are not consumer products. For thick cured foam deposits, mechanical removal with a chisel is the only practical approach — acetone is useful as a secondary treatment for the thin residual base layer that remains after chipping.
📝 The Gorilla Super Glue scenario comes up regularly in my restoration workshop — clients who have attempted emergency furniture repairs with CA glue and then called me with the result. On a polyurethane-finished oak dining chair leg where a split had been repaired with Gorilla Super Glue, the acetone 30-second contact limit was essential to avoid dulling the finish. Six applications of 30 seconds each, chipping the brittle deposit between applications, removed the glue completely without visible finish damage. The finish required only a light paste wax buff afterward.
Summary: Key Values for Removing Gorilla Glue from Wood
Gorilla Glue removal depends on identifying the formula: Original Gorilla Glue (tan polyurethane foam) is removed before cure with isopropyl alcohol on a dry cloth — never water or vinegar, which accelerate curing — and after cure by chiseling at 10–15 degrees followed by acetone for the thin residual base.
Gorilla Super Glue (cyanoacrylate) is removed with acetone at 30-second maximum applications on polyurethane finish. Gorilla Wood Glue (PVA) softens with warm water (50–60°C, 5–10 minutes) when fresh and requires acetone for old cured glue.
Gorilla Epoxy resists all solvents and requires heat cycling at 150–200°C followed by mechanical chipping. Vinegar and baking soda paste have no chemical mechanism for dissolving polyurethane, cyanoacrylate, or epoxy — they produce no meaningful effect on any fully cured Gorilla Glue formula. The critical factor for Original Gorilla Glue is time: each minute before treatment means more expanded foam volume to remove.
→ Related: How to Remove Dried Glue from Wood — All Adhesive Types → Related: How to Remove Sap from Wood → Hub: How to Remove Wood Finishes and Stains — Complete Guide