How to Remove Dried Glue from Wood: Complete Guide by Adhesive Type
Removing dried glue from wood requires identifying the adhesive type before selecting a removal method — because the six adhesive types commonly found on wood surfaces cure by completely different chemical mechanisms and respond to different solvents and mechanical approaches.
PVA wood glue softens with water and heat. Cyanoacrylate (super glue) requires acetone. Epoxy resists most solvents and is best removed mechanically after becoming brittle. Hot glue re-softens at 60–80°C and peels away without solvents. Contact cement dissolves in acetone or MEK. Construction adhesive requires mechanical scraping and strong solvent gel. Applying vinegar, baking soda, or cooking oil to most of these adhesives produces no result — these substances have no chemical mechanism to dissolve any cured adhesive polymer.
How Do You Remove Dried Glue from Wood?
This guide covers the identification test for each adhesive type, the correct removal method with exact temperatures and contact times, and the finish-safe solvent for each combination of adhesive and wood surface.
→ For removing Gorilla Glue specifically: How to Remove Gorilla Glue from Wood
→ For a complete overview of all wood finish and stain removal: How to Remove Wood Finishes and Stains
How Do You Identify the Glue Type Before Selecting a Removal Method?
Visual appearance and a simple scratch test identify the adhesive type in under 2 minutes. The correct identification prevents applying a solvent that has no effect on the specific adhesive chemistry and may damage the wood finish in the process.
What Are the Key Specifications for Removing Dried Glue from Wood?
| Adhesive / Method | Attribute | Value |
|---|---|---|
| PVA glue — warm water softening | Water temperature | 45–65°C (depending on ambient temperature and wood absorption rate); soak cloth, apply 5–10 minutes |
| PVA glue — old / fully cured | Acetone contact time | 3–5 minutes; scrape with plastic scraper after softening |
| Cyanoacrylate (super glue) | Acetone contact time | 2–5 minutes until glue whitens and softens |
| Cyanoacrylate — thick deposit | Treatment cycles | 2–3 acetone applications; chip mechanically between cycles |
| Epoxy — mechanical removal | Heat gun temperature | 150–200°C to make epoxy brittle enough to chip |
| Epoxy — chisel angle | Approach angle | Nearly flat — 10–15 degrees; use wood chisel or plastic scraper |
| Hot glue — heat softening | Temperature | 60–80°C — hair dryer on medium setting or heat gun on lowest |
| Hot glue — cold method | Temperature | Below 10°C (ice pack); becomes brittle and peels cleanly |
| Contact cement | Acetone contact time | 5–10 minutes; remove with plastic scraper; re-apply for residue |
| Construction adhesive | Petroleum solvent contact time | 15–30 minutes; mineral spirits or naphtha on residue after mechanical |
| Plastic scraper angle (all adhesives) | Scraper angle | 10–20 degrees — nearly flat; prevent finish scratching |
| Acetone on polyurethane finish | Safe contact limit | 30 seconds per application; rinse with damp cloth immediately |
| Acetone on shellac or lacquer | Safe use | NOT safe — dissolves shellac and lacquer immediately |
| Sandpaper — final residue on bare wood | Starting grit | 80–100 grit for thick residue; 120 grit for thin film |
Why Do Vinegar, Baking Soda, Lemon, and Cooking Oil Fail on Dried Glue?
These substances appear frequently in glue removal guides but have no chemical mechanism to dissolve any cured adhesive polymer.
Glue vs Wax vs Grease vs Resin — Why Removal Methods Differ?
| Substance | Where it sits | Removal Logic |
|---|---|---|
| Glue | Surface bond / mechanical + chemical | Dissolve or fracture |
| Wax | Surface film | Solvent dissolution |
| Grease | Penetrates lightly | Degreaser |
| Resin | Inside pores | Solvent + heat |
How Do You Remove Dried PVA Wood Glue from Wood?
PVA (polyvinyl acetate) glue — the most common wood glue including Titebond and standard white/yellow carpenter’s glue — cures by water evaporation rather than chemical reaction. This means the cured film is thermoplastic and can be re-softened by introducing water and heat.
Fresh PVA under 24 hours responds readily to warm water. Old, fully cured PVA that has become hard and glassy is best removed with acetone after initial mechanical scraping.
FRESH TO SEMI-CURED PVA Warm water + mechanical scraping
Soak a clean cloth in hot water (50–60°C — hot tap water, not boiling). Press the damp cloth firmly over the PVA glue deposit and hold for 5–10 minutes. The warm moisture re-hydrates the PVA film and softens it enough to scrape cleanly.
Use a plastic scraper at 10–20 degrees to the wood surface to lift the softened glue. Work in passes — do not press too hard, as the softened PVA can smear across the finish if pushed rather than lifted. Replace the cloth when it cools to maintain the softening action.
OLD / FULLY CURED PVA Acetone after initial mechanical removal
Old PVA glue that has become hard and white or glassy does not respond adequately to water re-hydration. Use a plastic scraper or, on bare wood, a wood chisel held nearly flat to chip away the bulk of the dried glue mechanically first. Apply acetone to a cotton cloth for 3–5 minutes contact on the remaining thin film — acetone dissolves partially cured and old PVA effectively. On finished wood, limit acetone contact to 30 seconds per application on polyurethane or varnish. On shellac and lacquer, use isopropyl 90% instead.
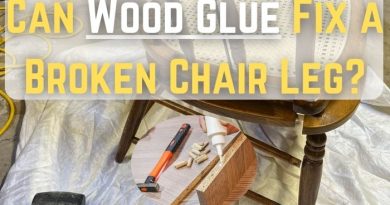
PVA glue squeeze-out on woodworking joints: The most effective removal method for fresh PVA squeeze-out on a joint is to wait until the glue forms a rubbery gel — approximately 20–45 minutes after application depending on temperature and humidity — then peel it away cleanly with a wooden scraper or chisel.
At this stage the PVA has lost most of its water content but has not yet fully bonded to the wood — it peels as a single unit rather than smearing. Do not wipe fresh liquid PVA — this pushes the water carrier into the wood grain and creates a subsurface stain that resists finish absorption.
How Do You Remove Cyanoacrylate (Super Glue) from Wood?
Cyanoacrylate adhesives cure through an anionic polymerisation reaction triggered by moisture — including the moisture in wood fibres and skin. The result is an extremely hard, glassy film bonded directly to the surface molecules.
Acetone is the correct solvent — it reverses the polymerisation by breaking the ester bonds in the cyanoacrylate polymer chain, converting the hard film back to a soft, removable state.
STEP 1 – Chip away bulk super glue mechanically before applying acetone
Super glue deposits more than 1 mm thick are more efficiently removed by first chipping away the bulk mechanically. Use a wood chisel held nearly flat (10–15 degrees) or the edge of a rigid plastic card to chip the glassy deposit from the surface.
Super glue is extremely brittle — it fractures cleanly with the right angle of force. Remove as much as possible mechanically before applying acetone — this reduces the acetone contact time needed on the finish and lowers the risk of finish damage.
STEP 2 – Apply acetone — 2–5 minutes contact for thin residue
Apply acetone to a cotton pad and press firmly onto the residual super glue film. Allow 2–5 minutes contact time for a thin residual layer — the glue will turn white and begin to soften as the acetone breaks the polymer bonds. On thicker deposits, re-apply fresh acetone after wiping and allow another 2–5 minutes.
The softened super glue can be rubbed away with the cotton pad or scraped with a plastic scraper. On polyurethane-finished wood, limit each acetone application to 30 seconds and re-apply as needed rather than leaving acetone in contact longer — multiple short applications protect the finish while achieving the same dissolution.
STEP 3 – Finish-safe alternatives on shellac and lacquer
On shellac and lacquer finishes where acetone cannot be used, super glue removal requires pure mechanical chipping only — there is no solvent for cyanoacrylate that is safe on shellac. Use a very sharp wide-blade chisel held at the flattest possible angle (5–10 degrees) to shear the brittle super glue from the finish surface.
Work in multiple light passes. Any residual film that cannot be chipped without risk of damage must be sanded away with 220 grit at the specific location, with local refinishing required.
How Do You Remove Cured Epoxy from Wood?
Fully cured epoxy — the two-component adhesive formed when resin and hardener react — is one of the most chemically resistant materials available. It resists acetone, mineral spirits, isopropyl alcohol, and most organic solvents at room temperature.
The practical removal approach for cured epoxy is mechanical: the adhesive is brittle and can be fractured and chipped from the wood surface with the right tools and technique. Heat makes epoxy more brittle and facilitates mechanical removal; it does not dissolve it.
STEP 1 – Apply heat to make epoxy brittle — 150–200°C for 30–60 seconds
Direct a heat gun at the epoxy deposit at 150–200°C, moving continuously to avoid scorching the wood beneath. Paradoxically, the goal here is not to soften the epoxy but to heat-cycle it — the difference in thermal expansion between the epoxy and the wood surface stresses the adhesive bond and makes the epoxy more brittle.
After 30–60 seconds of heat, allow 30 seconds to cool and then attempt chipping with a sharp chisel. The chip-ability of heat-cycled epoxy is noticeably higher than cold epoxy.
STEP 2 – Chip mechanically with a wide-blade chisel at near-flat angle
Hold a wood chisel at 10–15 degrees to the surface — nearly flat — with the bevel face down. Drive the chisel under the edge of the epoxy deposit with sharp, controlled strokes. The goal is to shear the epoxy at its bond to the wood surface rather than cutting through it.
Work in from the edges of the deposit progressively toward the centre. On finished wood, use a rigid plastic scraper instead of a metal chisel to avoid scratching the finish — plastic is less effective but preserves the finish beneath.
STEP 3 – Acetone for residual thin film after mechanical removal
After mechanical removal of the bulk epoxy, a thin residual layer and surface haze often remain. Apply acetone to this residue — while acetone does not dissolve fully cured epoxy at room temperature, it can soften and remove the thin surface layer that is only partially cross-linked.
Allow 5–10 minutes contact time on the residual layer. If the residue does not respond to acetone after two applications, sand at 80–100 grit to remove it mechanically.
How Do You Remove Hot Glue from Wood?
Hot glue (EVA thermoplastic adhesive) is one of the easiest adhesives to remove from wood because it has no chemical bond to the wood surface — it adheres purely by mechanical interlocking as it cools into a rigid form.
The removal process simply reverses the application: re-softening the glue at 60–80°C and peeling it away, or cooling it below 10°C to make it more brittle. No solvents are required for hot glue removal.
Heat method — hair dryer at 60–80°C surface temperature
Hold a hair dryer at medium heat setting at 5–8 cm from the hot glue deposit. Move the air stream over the deposit for 30–60 seconds until the surface of the hot glue becomes soft and slightly tacky.
Use a wooden or plastic scraper to push the softened hot glue off the surface in long strokes along the grain direction — it should peel away cleanly as a complete piece rather than fragmenting. On delicate or antique finishes, the hair dryer method is safer than the cold method because the force required is minimal.
Cold method — ice pack for 2–3 minutes
Place a sealed ice pack (ice in a plastic bag to prevent water contact) on the hot glue deposit for 2–3 minutes until the glue becomes noticeably more brittle. At temperatures below 10°C, EVA hot glue loses much of its flexibility and can be cracked and lifted away from the surface with a plastic scraper.
The cold method is particularly effective on textured or carved wood surfaces where the heat method cannot reach recessed areas easily. After cold removal, wipe the surface with a dry cloth to remove any moisture from the ice bag condensation.
📝 The most consistent glue challenge I encounter in my restoration workshop is PVA squeeze-out on solid oak joinery — specifically on mortise-and-tenon and dowel joints where the glue migrates into the open grain around the joint line and becomes invisible until stain is applied, at which point it appears as a lighter patch that refuses to absorb colour. My standard practice now is to apply glue moderately, assemble the joint, and wait exactly 25–35 minutes until the PVA reaches the rubbery gel stage. At that point it peels from the oak surface as a single clean strip with a wooden scraper, leaving no residue in the grain. Any joints where I missed this window and the PVA cured fully required acetone at 3–4 minutes contact to dissolve the surface layer, followed by 120-grit sanding across the affected grain area before staining — adding significant time to the finishing stage.
How Do You Remove Contact Cement and Rubber Cement from Wood?
Contact cement (neoprene rubber adhesive, used for laminate bonding) and rubber cement both use rubber polymers dissolved in a solvent carrier. When cured, the rubber polymer forms a flexible, yellowy-brown residue. Acetone and MEK (methyl ethyl ketone) dissolve both rubber polymers effectively.
A simpler mechanical alternative for partially cured or thin rubber cement residue is the dry-cloth rolling method: rubbing a dry cloth repeatedly over the residue causes the rubber to roll into balls and lift cleanly from the surface without any solvent.
STEP 1- Rolling method for thin residue (no solvent required)
Rub a clean dry cloth firmly over the rubber cement residue in circular motions. The friction causes the rubber polymer to roll up into pellets and balls that detach from the surface. This only works on thin residue — thick deposits require solvent pre-treatment. After rolling, inspect the surface: if residue remains, proceed to acetone treatment.
STEP 2 – Acetone for thick deposits
Apply acetone to a cotton pad and place it on the contact cement deposit for 5–10 minutes. The rubber polymer dissolves and becomes soft enough to wipe away. On finished wood, limit contact to 30 seconds per application and repeat rather than leaving acetone in prolonged contact.
On shellac and lacquer, use the mechanical rolling method only — solvent removal is not safe on these finishes.
How Do You Remove Construction Adhesive and Polyurethane Adhesive from Wood?
Construction adhesives (Liquid Nails, PL Premium, Sikaflex) and polyurethane adhesives (Gorilla Glue expanding foam type) are the hardest common adhesives to remove because they cure by chemical cross-linking rather than by simple evaporation, and the fully cured material is chemically resistant to most solvents.
The most effective removal strategy is predominantly mechanical, with petroleum-based solvents used for residue only.
STEP 1 – Score the perimeter and chisel from the edges
Use a utility knife to score around the perimeter of the adhesive deposit to separate any adhesion to the surrounding surface. Then work a wood chisel or rigid metal scraper under the edge of the deposit from the outside in, using controlled force.
Construction adhesive bonds strongly to wood but is relatively brittle in its cured state — once an edge lifts, the full deposit can often be removed in a single piece with continued chisel pressure at the same low angle.
STEP 2 – Petroleum solvent (mineral spirits or naphtha) for residue
After mechanical bulk removal, a residual film and adhesion haze remains on the wood surface. Apply mineral spirits or naphtha (petroleum ether) with a cotton cloth and allow 15–30 minutes contact — these solvents partially dissolve the residual polymer film and allow it to be wiped away.
Repeat 2–3 times for a clean surface. Naphtha is more aggressive than mineral spirits and more effective on polyurethane adhesive residue. Both are safe on polyurethane wood finish at these contact times; avoid on lacquer and shellac.
Which Solvents Are Safe on Each Wood Finish When Removing Glue?
| Finish Type | Acetone Safety | Isopropyl 90–99% | Mineral Spirits | Warm Water |
|---|---|---|---|---|
| Polyurethane (oil or water-based) | Safe at 30 sec max per application | Safe at 60 sec max | Safe — extended contact OK | Safe |
| Lacquer | NOT SAFE — dissolves immediately | Safe at 20 sec max | Safe | Safe |
| Shellac / spirit varnish | NOT SAFE — dissolves immediately | NOT SAFE over 20 sec cumulative | Safe | Safe |
| Alkyd varnish | Safe at 30 sec max | Safe at 60 sec max | Safe | Safe |
| Wax finish (beeswax, paste wax) | Removes wax layer — re-wax after | Removes wax layer — re-wax after | Safe; re-wax after | Safe |
| Oil finish (danish oil, tung oil) | Removes oil layer — re-oil after | Safe at 60 sec; re-oil after | Safe; re-oil after | Safe |
| Bare / unfinished wood | Safe — no finish to damage | Safe | Safe | Safe |
| Veneer | NOT SAFE — risks delamination of adhesive | Safe at 20 sec max — blot only | Safe | Safe — minimum moisture |
Acetone on lacquer and shellac: Acetone dissolves lacquer and shellac immediately on contact — the finish dissolves alongside the glue, leaving a bare patch that requires full refinishing to repair. On any piece with an unknown finish, apply one drop of acetone to an inconspicuous area and wipe after 10 seconds.
If the finish softens, becomes tacky, or dissolves, use mechanical removal only or switch to isopropyl 90% at strict 20-second contact limits.
📝 The most demanding adhesive removal I have done in the workshop was super glue from a shellac-finished walnut veneer surface on a 1930s Art Deco side table — a client had attempted to reattach a lifting corner of veneer using CA glue applied directly over the shellac finish. Acetone and isopropyl alcohol were both completely off the table: acetone would have dissolved the shellac finish immediately and isopropyl over extended contact would have done the same. The only viable approach was mechanical — a very sharp, wide-bladed chisel at 5–8 degrees, essentially shearing the glassy CA deposit from the shellac surface with multiple controlled passes. The result was clean enough that only a light beeswax buff was needed to restore the surface, without any finish damage.
When Glue Removal Methods Fail (And Why)?
Most glue removal failures are caused by using the wrong method for the adhesive type or surface condition. The scenarios below explain exactly why certain approaches do not work and what happens at a material level.
Epoxy is a fully cross-linked thermoset polymer and does not rehydrate. Water cannot penetrate or break its rigid chemical structure.
Acetone dissolves these finishes instantly. It removes the protective coating along with the glue, requiring a full strip and refinish.
Dry sanding generates heat that smears adhesive residues, pushing them deeper into wood pores and making chemical removal nearly impossible.
Each adhesive requires a specific removal mechanism (water, solvent, heat, or mechanical). Using the wrong one produces zero results.
High physical force damages the underlying wood fibers or finish layer rather than cleanly shearing the adhesive bond.
Frequently Asked Questions About Removing Dried Glue from Wood
What is the fastest way to remove dried PVA wood glue from a finished surface?
The fastest method for dried PVA on a finished surface depends on the age of the glue. Glue dried within the last 24–48 hours responds to a warm damp cloth (50–60°C) held in contact for 5–10 minutes followed by plastic scraper removal.
Glue older than a week that has become hard and glassy is more efficiently removed with acetone at 3–5 minutes contact — the warm water method produces little result on old fully cured PVA. On shellac or lacquer finishes, warm water is the only safe solvent option; isopropyl 90% can supplement for residue at strict contact time limits.
Does acetone damage wood when used to remove super glue?
Acetone does not damage wood fibre — it evaporates completely without leaving residue. The risk is entirely to the finish: acetone dissolves lacquer and shellac immediately and dulls polyurethane at extended contact times.
At 30 seconds per application on polyurethane, visible damage is uncommon. On bare, unfinished wood, acetone contact time for super glue removal can be extended to 2–5 minutes without any risk to the wood itself. Always test on an inconspicuous area when finish type is unknown.
Can you remove epoxy adhesive from wood without sanding?
Yes, in most cases. Fully cured epoxy is mechanically brittle and can be fractured from the wood surface with a sharp chisel held at a near-flat 10–15 degree angle after heat cycling the deposit at 150–200°C for 30–60 seconds.
This removes the bulk without sanding. Residual thin film after chipping responds to acetone at 5–10 minutes contact time. Sanding is only required when the epoxy has infiltrated the wood grain on bare surfaces — a situation that occurs when liquid epoxy was spilled rather than a discrete adhesive deposit being removed.
How do you remove hot glue from wood without damaging the finish?
Hot glue is the safest adhesive to remove from finished wood because no solvents are required. The heat method (hair dryer at medium heat, 5–8 cm distance, 30–60 seconds) re-softens the EVA thermoplastic and allows it to be peeled away with a plastic scraper at minimal force — insufficient force to damage any finish.
The cold method (ice pack in plastic bag for 2–3 minutes) makes the glue more brittle for clean mechanical removal. Neither method requires the acetone or other solvents that risk finish damage.
Summary: Key Values for Removing Dried Glue from Wood
Removing dried glue from wood begins with identifying the adhesive type: PVA glue powders white when scratched and softens with warm water (50–60°C for 5–10 minutes) or acetone for old cured glue; cyanoacrylate chips glassy and brittle and dissolves in acetone (2–5 minutes); epoxy resists all solvents and requires mechanical chipping at 10–15 degree angle after heat cycling at 150–200°C; hot glue re-softens at 60–80°C with a hair dryer and peels cleanly without any solvent; contact cement rolls into strands when rubbed dry or dissolves in acetone at 5–10 minutes; construction adhesive requires chiseling followed by mineral spirits or naphtha for residue at 15–30 minutes contact.
On polyurethane and varnish finishes, limit acetone contact to 30 seconds per application and repeat. Never use acetone on lacquer or shellac — mechanical removal only on these finishes. Common home remedies including vinegar, baking soda, lemon, and cooking oil have no chemical mechanism to dissolve any cured adhesive and produce no result on dried glue.
→ Related: How to Remove Gorilla Glue from Wood
→ Related: How to Remove Tape Residue from Wood
→ Hub: How to Remove Wood Finishes and Stains — Complete Guide