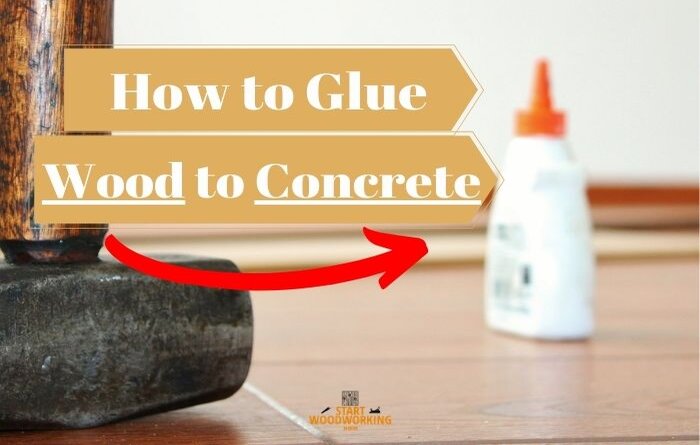
How to Glue Wood to Concrete [In 3 Effective Ways]
In this article we will learn how to glue wood to concrete. The need for gluing concrete and wood can appear in a variety of situations, but most often it accompanies finishing work: when a floor covering is mounted on a concrete screed, plinths, panels on walls, various details and interior elements are installed.
How to Glue Wood to Concrete
To glue concrete to wood choose a strong and durable concrete adhesive. Concrete can be glued to wood with assembly adhesive. It is also ideal for gluing a material mix such as concrete blocks: on metal, glass or wood. Another way to glue wood to concrete is to use mortar nails. Mortar nails are the cheapest option for attaching wood to concrete, but there is a trick to making these nails work. This method is only effective when adhering wood to concrete blocks or a black concrete wall.
The use of construction adhesive to fix wood to concrete is an alternative method that requires a minimum of tools and is also inexpensive. Preparing the concrete surface prior to setting the wood pieces is the key to achieving a strong bond.
One of the most common and safest methods for placing wood on concrete is to use nails and / or screws. However, this technique requires special drills and bits that many homeowners do not have on hand or do not want to purchase for a single task.
Here are the steps to glue wood to concrete:
Step 1: Sweep or vacuum the concrete surface to remove any dirt or residue.
Step 2: Clean the surface with a damp sponge to remove dust. Let the concrete dry completely.
Step 3: Cut the tip of the glue tube so that it lets out a line of glue about 1/4-inch (7mm) wide. Then put the glue tube into a caulking gun.
Step 4: Make a line of adhesive on the back of the wood – which will be the surface that will be applied to the concrete – 1/2 inch (1.2 cm) from the edge, so the glue is not squeezed out and pushed out. If the wood is very wide, put several lines 1 inch (2.5 cm) apart, going down the back of the wood. Stop when you reach 1/2 inch (1.2 cm) from the edge.
Step 5: Place the wood on the concrete in the desired location. Hold the piece in place long enough for the glue to cure. If the wood is against the floor, put a heavy object on top to hold it steady. If it’s on a wall or other surface, you’ll need to fasten. The drying time varies and will depend on the temperature and humidity of the environment. Expect to hold the piece for several minutes at a time.
How to Glue Wood to Concrete using 2K Epoxy Resin Adhesive
Areas of application
If you want to glue wood to concrete, a 2-component concrete adhesive can be of great service. A two-component adhesive is also an invaluable aid for bonding other materials, for example plastics or metals with concrete. You must use a solvent-free adhesive that is difficult to ignite.
Make sure that the surface of the wood or the surface of the concrete is smooth and always should be roughened before gluing.
Steps to glue wood to concrete using 2K Epoxy Adhesive:
- A thorough cleaning of the wood and concrete surface from dust, dirt, grease and oil residues, as otherwise the adhesive properties of the 2K Epoxy could be diminished.
- Using a 2 component adhesive for concrete is not difficult. Mix the two components according to the information specified on the product label.
- After mixing, the processing time begins so you have to work quickly, because when the concrete adhesive begins to harden, lumps arise that make further work impossible.
- Depending on the application, apply the adhesive point-wise or flat.
- For the exact application, be sure to follow the information gives by the manufacturer.
- Put the wood and concrete together and fix them if necessary.
- Immediately remove any adhesive residue from the adhesive seam.
- Always wear gloves and have adequate ventilation in the workplace.
- Let the glue seam harden sufficiently.
- Again, follow the manufacturer’s instructions.
- Wait at least 1 hours but the full curing will take place after 24 hours at the latest, depending on the ambient temperature and humidity.
Advantages
- This 2 component adhesive for concrete is quite inexpensive when you consider what you can repair and glue with it
- It is suitable for a wide variety of materials, including wood, metal, concrete and stone; even different plastics can be perfectly joined with it
- The hardening phase is relatively short; After just a few minutes, the concrete adhesive achieves solid hand strength
- After the complete hardening time, the glue seam shows an incredible strength
- The adhesive is supplied in a double chamber cartridge, so mixing is not necessary
- The concrete glue is easy to apply and therefore also suitable for inexperienced users
- The transparent concrete adhesive is extremely inconspicuous after hardening; however, it is possible to add additives such as dyes
- The glue is water-resistant and heat-resistant
Disadvantages
- In a few cases it can harden faster than the specified five minutes. If parts are damaged during gluing, the customer service promises to reimburse the costs.
How to Glue Wood to Concrete using Construction Glue
Construction adhesives are the same silicones that have evolved and now offer better, more resistant products. Since, they support weights, movements, climate factors such as water and humidity, among others.
They are products with lower purchase prices, since only the gun and the adhesive glue cartridge are needed. And now, let’s get to work!
Step 1 : The first thing to do is clean the concrete surface where the wood is to be glued to concrete very well . It is very important, because how strong or weak the two surfaces will adhere to depends on this cleaning.
Step 2: The next thing is to cut the tip of the tube that is screwed into the adhesive glue cartridge. The cut should be at 45 degrees for best application.
Step 3: The glue cartridge should then be mounted to the caulking gun and properly pressed into fit.
Step 4: When applying the adhesive on the wood it should be done in a perimeter way or around according to the shape of the surface. And then in the center, but a bead should be applied in a curved or zigzag shape.
Step 5: This way of applying the adhesive to the wood surface makes it stronger when pressing against the concrete surface. It is necessary to hold down the wooden step for a few minutes to better grip the glue.
In the case that the step is a bit heavy, it is best to place a support under the step, so that it presses, for about 48 hours.
Advantages
- The price is unbeatable, especially when you consider the optimal adhesive strength;
- The construction assembly adhesive offers a high initial adhesion and forms an extremely durable connection after the complete curing phase;
- It is ideally suited to level out unevenness, crevices and cracks;
- The construction adhesive is also suitable for absorbent materials;
- It is not only ideal for concrete, but also for other materials such as stone, wood or ceramics;
- It does very well both indoors and outdoors;
- The bonds can be painted over;
- The glue comes in a handy cartridge and is easy to use;
Disadvantages
- Although the adhesive is marked for outdoor use, it must not be subject to constant exposure to water
How to Glue Wood to the Concrete using Liquid Nails
What is the correct use of liquid nails? The basic steps that you should follow when gluing wood to the concrete using liquid nails are as follows :
- Before applying liquid nails, the wood and concrete surface should be cleaned and degreased for this purpose, any detergent can be used;
- The wood and concrete surface should be dry, firm, free of dust, dirty and oily stains;
- The glue is applied by means of a special gun or the contents are squeezed out manually;
- Liquid nails are applied to the surface by bands or separate dots;
- After applying the product, gently press the wood against the concrete. For large items (MDF panels, kitchen apron, etc.), you can use a rubber or wood;
- Fix the glued objects for a few minutes so that the glue “sets”;
- After the end of the work, remove the remains of the product with a solvent or acetone;
- Use extreme caution, as the solvent may damage the surface.
How to Glue Wood to the Concrete Floor
It is not as practical and simple as doing it on the wall, but with a little skill and patience it can be done. Some additional tools are required, such as a reciprocating saw to cut the wood.
This kind of wooden steps are used to give a better presentation and decoration to concrete stairs. For this reason, its gluing process will be discussed step by step:
- It is best to start installing each step on the concrete surface, from top to bottom. The wooden rung must be exact and snug in the given area.
- So if you need to make some cuts you should do it.
- This also happens with the risers, each one must be adjusted with its respective rung. In order to avoid noise when stepping on each step.
- After having the two pieces adjusted well, the surface must be removed and cleaned very well to proceed with gluing it.
- Sometimes it is necessary to put in a few small nails, but it is best avoided by filing.
- When applying the mounting adhesive, it should be done in a zigzag shape, for strong contact. Here there is a different way of applying to the one done on the wall, as this is better done on both surfaces.
- If possible, place a heavy object on the already installed wooden step to exert pressure.
- It is convenient to let it dry in this way for 24 hours, for a better consistency.
Do you know how to remove dried glue from wood? I’m convinced that this article will help you!
What is the best glue for gluing wood to concrete?
| Type of glues for sticking wood to concrete | Description |
|---|---|
| 1. Liquid nails | Is an effective and inexpensive option. The material is presented in the following modifications: “Super strong”, “Express”, “Universal”, “For panels”, “Extra strong”, etc. It is worth choosing the most durable and versatile composition. The glue is safe, suitable for interior finishing work. Concrete must be cleaned and dedusted. For work in the cold, they choose especially durable “Liquid nails” with a gripping force of about 70 kg / m2. |
| 2. PVA glue | When choosing how to glue the tree to the concrete at home, you can stop at this option. But the composition is not suitable for places where it can be exposed to high / low temperatures, moisture, as it quickly loses its properties. |
| 3. Polyurethane adhesive | Demonstrates increased adhesion when gluing hardwood to concrete. Gives maximum fixation 20 hours after application. Not afraid of sudden temperature changes, high loads, moisture. |
| 4. Casein adhesives | Have properties similar to polyurethane adhesives. Among the shortcomings, it is worth noting the property to change the color of the wood, which it fixes. |
Wood to concrete can be glued to a variety of compounds, but it is not known whether they will keep the materials securely fastened to one another. Therefore, it is best to use proven substances that have been repeatedly used by craftsmen and have shown a high level of strength and durability. The most common fastening methods are gluing, using hardware, and choosing special mounting materials.
Heat-resistant glue – tolerates high temperatures well (does not crumble, does not dry out), is often used in carpentry. Epoxy composition can be used for all types of wood, does not leave traces, dries completely within 24 hours.
Conclusions
If we follow the methods presented above, we can say that we have cleared the doubt of how to glue wood to concrete. There are many ways to reliably join concrete surfaces to wooden parts, but maximum strength will be guaranteed if preliminary preparation is carried out.
The mounting adhesive can also be applied to other surfaces such as mirrors, carpentry, acrylics, marble among others. Also, when you have to make repairs to facades or roofs on the outside of a house. This class of adhesives withstand rain, humidity and the strong heat produced by the sun.