Quick Guide: Remove Candle Wax from Wood [In 5 Easy Ways]
In this guide, we will see together how to remove candle wax from wood and wooden furniture, without damaging the wood. Not only that, we will also reveal many secrets and show you the top 5 easy ways you can do this.
Steps to remove candle wax from wood surfaces:
- First, let the candle wax cool down completely. It must be completely dry to remove it from the wood.
- Use a plastic card to roughly scrape the pieces of candle wax off the wood. Do not use an important card, such as your current debit or credit card, as this could damage the chip or magnetic strip.
- Remove the scraped-off pieces of wax.
- Then place a piece of kitchen roll on the stubborn remaining stains.
- Heat the wax with a hair dryer until it liquefies and is absorbed by the kitchen roll.
- You may have to repeat this process. You must absorb the wax without leaving any residue.
| Type of Wooden Furniture | Most Effective Method for Removing Candle Wax |
|---|---|
| Solid Wood Table | Ice Pack Method & Plastic Scraper |
| Wooden Chairs with Grooves | Ice Pack Method & Soft Brush or Toothpick |
| Wooden Floors | Hair Dryer Method & Cloth |
| Antique Wood Furniture | Lint-Free Cloth & Mineral Spirits (Test First) |
| Varnished Wood Surfaces | Hair Dryer Method & Microfiber Cloth |
| Unfinished Wood | Ice Pack Method & Gentle Scraping |
| Carved Wooden Objects | Wax Paper & Iron Method (Low Heat) |
| Wood Paneling | Hair Dryer Method & Wooden Spatula |
| Painted Wood | Ice Pack Method & Plastic Scraper (Test First) |
| Wooden Countertops | Hair Dryer Method & Damp Cloth |
| Stained Wood | Hair Dryer Method & Soft Cloth (Avoid Excess Heat) |
| Laminate floor | Vinegar and a Sponge |
| Raw or open-pored wood | Ice Pack Method & Soft Bristle Brush |
| Stained cabinet | Hair Dryer Method & Microfiber Cloth (Test Finish First) |
5 Ways to Remove Candle Wax From Wood
1. Using An Iron and Paper Towels
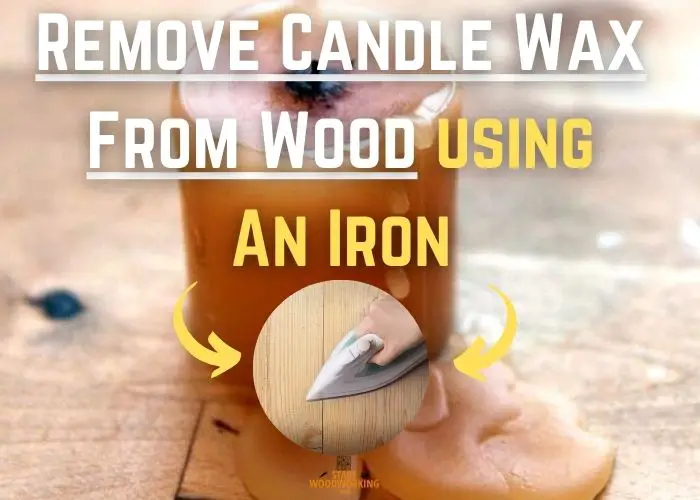
Do not use an iron to remove colored wax stains; this will only fix the dye. In this case, white spirit should be used!
Step 1: Let the Wax Harden
First, I make sure the wax is completely hardened. This makes the removal process much easier and prevents the wax from spreading further into the wood grain. If I’m in a hurry, I might speed up the hardening process by placing a bag of ice or a cold compress on the wax.
Step 2: Set Up Your Iron
I grab my iron and ensure it’s clean and free of any water if it has a steam function. I set it to a low to medium heat setting—high heat isn’t necessary and could damage the wood’s finish.
Step 3: Gather Paper Towels
I take a few paper towels and fold them to create a thick layer. This will be used to absorb the wax as it melts. I avoid using printed or colored paper towels because the ink could potentially transfer to the wood.
Step 4: Place Paper Towels Over the Wax
I lay the folded paper towels directly over the area with the hardened wax. It’s important to cover the entire spot of wax with the paper towels to ensure all of it gets absorbed.
Step 5: Apply the Iron
I place the iron on top of the paper towels over the wax. I hold it there for a few seconds, allowing the heat to warm the wax beneath. I’m careful not to leave the iron on too long, as prolonged heat can damage the wood. I check frequently by lifting the iron and paper towels to see if the wax is transferring to the paper.
Step 6: Lift and Repeat
As the wax melts, it gets absorbed by the paper towels. I lift the iron and the paper towels to see the progress. I use a clean section of the paper towels and repeat the process until no more wax comes up from the wood surface.
Step 7: Clean the Wood Surface
Once the wax is removed, there might be a slight residue left on the wood. I clean the area with a soft, damp cloth, using a mild wood cleaner if necessary. I make sure not to soak the wood and dry it thoroughly afterward.
Step 8: Buff the Wood
After cleaning, if the wood’s finish looks a bit dull, I buff it gently with a clean, dry cloth. If it’s needed, I apply a small amount of furniture wax or polish to restore shine and protect the wood surface.
Tip: Remove candle wax on rough wooden surfaces
For rough wooden surfaces, removing candle wax can be more challenging due to the wax penetrating deeper into the pores. To tackle this issue, consider using potato flour:
- Scatter potato flour on the surface.
- Gently press the flour into the wax.
- Allow the flour to absorb the wax for a few minutes.
- Vacuum the area to remove the residues.
This method helps absorb the lower-lying wax, making it easier to remove without damaging the wood surface.
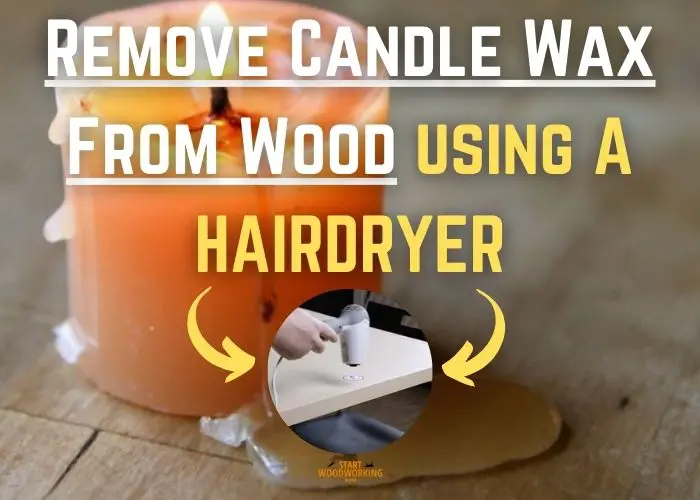
2. Using the Hairdryer
Materials Needed:
- Hairdryer
- Plastic scraper or old credit card
- Clean, soft cloth (microfiber works well)
- Mild wood cleaner (optional)
- Furniture polish or wax (optional)
Here is how to remove candle wax using a hairdryer:
Step 1: Gather Your Materials
Before I begin, I make sure to have all my materials ready. This includes a hairdryer with adjustable heat settings, a plastic scraper that won’t scratch the wood (an old credit card can work in a pinch), a clean, soft cloth, and, if necessary, some mild wood cleaner and furniture polish.
Step 2: Plug in the Hairdryer
I plug in the hairdryer and set it to a medium heat setting. It’s important not to use too high of a heat setting, as this could damage the finish of the wood.
Step 3: Soften the Wax from Wood
Holding the hairdryer a few inches away from the wax, I aim the warm air directly onto the wax spot. I move the hairdryer back and forth slightly to evenly distribute the heat. I watch closely as the wax begins to soften, which usually takes a minute or so, depending on the amount of wax and the heat setting.
Step 4: Scrape the Wax
Once the wax is soft, I gently use the plastic scraper to lift the wax from the wood. I hold the scraper at an angle to avoid gouging the wood and use light pressure to push the wax off the surface.
Step 5: Wipe the Surface
After I’ve removed the bulk of the wax, I use the soft cloth to wipe away any remaining residue. The warmth from the hairdryer usually makes it easy to wipe the wax away without much resistance.
Step 6: Clean and Polish (if necessary)
If there’s still a bit of wax residue or if I want to ensure the wood is completely clean, I might use a mild wood cleaner applied to the cloth, then wipe the area. After cleaning, I dry the wood thoroughly with a fresh cloth.
Step 7: Restore the Finish
Finally, to restore the luster and protect the wood, I apply a small amount of furniture polish or wax with a clean cloth, following the product’s instructions. I buff the wood to a shine, which also helps to hide any slight imperfections that might have been caused by the wax. I make sure to buff with the grain of the wood, as this will give the best finish and reduce the risk of adding any scratches to the surface.
Step 8: Inspect and Touch-Up
After polishing, I inspect the wood closely to ensure that all the wax has been removed and that the finish looks even and undamaged. If I find any areas that need a touch-up, I repeat the necessary steps on those specific spots. For tougher spots, I might apply the hairdryer again to soften the wax and then gently scrape and wipe it off.
Step 9: Final Cleaning
Once I’m satisfied with the wax removal and the wood’s appearance, I give the entire piece a final once-over with a clean cloth, just to pick up any remaining cleaner or polish residue. This leaves the wood surface clean, wax-free, and with a renewed shine.
3. Using Plastic Cards and Ice Cubes
Materials Needed:
- Ice cubes or a commercial ice pack
- Plastic bag (to prevent water damage from melting ice)
- Plastic card (like an old credit card or loyalty card)
- A soft cloth or microfiber towel
- Mild wood cleaner (optional)
- Furniture polish or wax (to restore shine, if necessary)
Step 1: Prepare the Ice Cubes
I start by placing a few ice cubes into a plastic bag. This helps to prevent any water from the melting ice from seeping into the wood, which could cause water stains or damage.
Step 2: Harden the Wax
I place the bag of ice directly on top of the wax spill. The cold will cause the wax to harden further, making it easier to scrape off. I leave the ice on the wax for a minute or two, checking occasionally to see if the wax has become brittle.
Step 3: Scrape the Wax From the Wood
Once the wax is hard and brittle, I use a plastic card to gently scrape it off the wood. I hold the card at a shallow angle to the wood surface to avoid scratching the finish. I start at the edges of the wax and work my way inward, taking care not to gouge the wood with the edge of the card.
Step 4: Clean Up Residue
After removing the bulk of the wax, there might still be some residue left on the wood. I gently buff this off with a soft cloth, moving in the direction of the wood grain. For any stubborn spots, I might wrap the cloth around the edge of the plastic card to apply a bit more pressure.
Step 5: Use Mild Wood Cleaner (if necessary)
If there’s still a waxy film on the wood after scraping and buffing, I’ll use a mild wood cleaner. I apply a small amount to my cloth and gently clean the affected area, following the manufacturer’s instructions. It’s important to use a cleaner that’s appropriate for the wood’s finish.
Step 6: Dry and Polish
After cleaning, I make sure to thoroughly dry the area with a clean, dry cloth. If the finish looks a bit dull from the cleaning process, I apply a small amount of furniture polish or wax. I use a circular motion to apply the polish, then buff it to a shine with a clean section of the cloth. It’s important to follow the grain of the wood while polishing to achieve a natural, even finish.
Step 7: Inspect the Wood
With the wax removed and the surface polished, I take a moment to inspect the wood. I look for any remaining wax residue or signs of damage to the finish. If I find any areas that need additional attention, I repeat the necessary steps on those specific spots until the wood looks clean and restored.
Step 8: Address Any Remaining Issues
If there are any remaining issues, such as a slight discoloration or a dull spot where the wax was, I might need to carefully blend the area with the surrounding wood. Sometimes a touch-up with a bit of tinted furniture wax or a matching wood stain can help camouflage any imperfections.
Step 9: Final Touches
Once I’m satisfied with the condition of the wood, I give the entire piece a final once-over with a new, clean cloth to ensure there’s no leftover cleaner or polish residue. This leaves the wood surface looking as good as new.
4. Using Hot Water
When in doubt, it is better to resort to one of the methods mentioned above that don’t require water.
Materials Needed:
- Bowl or bucket
- Hot water (not boiling, to prevent wood damage)
- Soft cloth or sponge
- Plastic scraper or old credit card
- Mild dish soap (optional)
- Wood cleaner or polish
Step 1: Prepare the Hot Water I fill a bowl or bucket with hot water from the tap. It’s important that the water is hot enough to melt the wax but not boiling, as extreme temperatures can harm the wood’s finish.
Step 2: Soak the Cloth I submerge a soft cloth or sponge in the hot water, making sure it’s thoroughly soaked. Then, I wring out the excess water so it’s damp but not dripping, to minimize the amount of water coming into contact with the wood.
Step 3: Apply to the Wax I place the damp cloth or sponge over the wax spill on the wood surface, letting the heat transfer to the wax. I hold it there for a few seconds to allow the wax to soften. It’s important not to let the water sit too long on the wood to avoid water damage.
Step 4: Gently Scrape the Wax Once the wax has softened, I use a plastic scraper or an old credit card to gently scrape off the wax. I always make sure to use a tool that won’t scratch the wood and to work with the grain rather than against it.
Step 5: Wipe the Area After scraping off the wax, I use another section of the damp cloth to wipe the area clean. If the wax isn’t coming off easily, I repeat the process of applying the hot cloth and scraping until the wax is removed.
Step 6: Clean with Mild Soap (if necessary) If there’s any residue left, I might add a drop of mild dish soap to my damp cloth and gently clean the affected area. Soap can help break down the wax further, but it’s important to use it sparingly and avoid soaking the wood.
Step 7: Dry the Wood Immediately after cleaning, I dry the wood surface thoroughly with a clean, dry cloth. It’s essential to remove any moisture to prevent water marks or damage to the wood.
5. Using a Sponge and White Vinegar
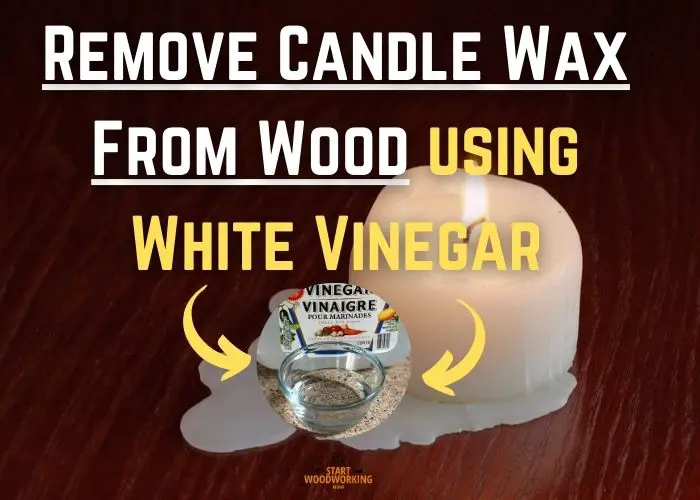
Materials Used:
- White vinegar
- Clean cloth or sponge
- Plastic putty knife or credit card
- Hair dryer (optional)
Step 1: Gather Your Materials Before you begin, make sure you have the following items on hand: white vinegar, a clean cloth or sponge, a plastic putty knife or credit card for scraping, and a hair dryer (optional).
Step 2: Soften the Wax If the wax is still soft, you can skip this step. If it has hardened, you can use a hair dryer on a low heat setting to gently warm the wax. The goal is to soften it without melting it into the wood grain further. Hold the dryer about 6 inches away from the surface and keep it moving to avoid overheating any area. Dip the sponge in the water and wring it out until it is only slightly wet.
Step 3: Scrape the Wax Once the wax is soft, use a plastic putty knife or the edge of a credit card to gently scrape off the excess wax. Be careful not to scratch the wood surface. Scrape in the direction of the wood grain to minimize potential damage.
Step 4: Create Your Cleaning Solution Mix a solution of equal parts white vinegar and water. The vinegar acts as a mild solvent that can help break down the wax without damaging the wood finish.
Step 5: Apply the Vinegar Solution Dip a clean cloth or sponge into the vinegar solution and wring it out so it’s damp but not dripping. Gently rub the affected area, going with the grain of the wood. The vinegar will help dissolve the remaining wax.
Step 6: Wipe the Area Clean After you’ve removed the wax, use a separate clean, dry cloth to wipe the area. This will remove any residual vinegar solution and wax. Ensure that the wood surface is completely dry to avoid any moisture damage.
Step 7: Buff the Wood As a final step, you can buff the area with a clean, soft cloth to restore shine to the wood. This will also help blend the cleaned area with the surrounding wood.
Step 8: Optional – Condition the Wood If the wood looks a bit dry after this process, you can apply a small amount of wood furniture polish or oil to condition it and bring back its natural luster. Always test the polish on an inconspicuous spot first to ensure it doesn’t affect the finish.
| Wood Surface Type | Fresh Candle Wax Removal | Dried Candle Wax Removal |
|---|---|---|
| Smooth Wood Surfaces | Gently blot the wax with a soft, absorbent cloth to remove as much as possible without spreading it further. | Harden the wax using ice, then carefully scrape it off with a plastic scraper. Use a hair dryer on a low setting to soften any remaining wax, then wipe it away with a cloth. |
| Uneven Wood Surfaces | Blot gently with a soft cloth, taking care not to push the wax into the grooves and crevices. | Use ice to harden the wax and a toothbrush or soft-bristled brush to gently remove it from nooks and crannies. Soften any leftover bits with a hair dryer on low heat and blot with paper towels. |
Tips to Prevent Candle Wax Stain from Getting to the Wood Surface
1. Use Protective Barriers Always place candles on a protective barrier such as a coaster, tray, or candle holder that is larger than the candle base. This will catch any drips or spills before they reach the wood surface.
2. Choose the Right Candles Opt for high-quality candles that are less likely to drip. Some candles are specifically designed to be dripless, and these can be a good choice for reducing the risk of wax spills.
3. Maintain a Clean Burn Regularly trim the candle wick to about 1/4 inch before lighting it. A shorter wick creates a cleaner burn with less soot and reduces the likelihood of dripping wax.
4. Avoid Drafts Place candles in areas away from drafts, vents, and air currents. Moving air can cause candles to burn unevenly, increasing the chance of dripping wax.
5. Monitor Candles Never leave candles burning unattended. Always keep an eye on burning candles and extinguish them before leaving the room or when they burn down to the holder.
6. Burn Candles Properly Allow the candle to burn long enough for the wax pool to reach the edges of the container or to cover the candle’s surface evenly. This helps prevent tunneling and uneven surfaces that can lead to drips.
7. Keep Candles Away from Edges Place candles away from the edges of tables or shelves to reduce the risk of wax spills reaching the wood if the candle is accidentally bumped.
8. Use Candle Snuffers When extinguishing candles, use a candle snuffer rather than blowing them out. This prevents hot wax from splattering and reduces smoke.
9. Be Cautious with Scented Candles Scented candles can sometimes burn differently than unscented ones due to the oils they contain. Be extra vigilant with these candles as they may have a higher tendency to drip.
10. Clean Spills Immediately If wax does drip onto the wood, act quickly to clean it up before it hardens and stains. Let the wax cool slightly until it’s firm but not completely hard, then gently scrape it off.


