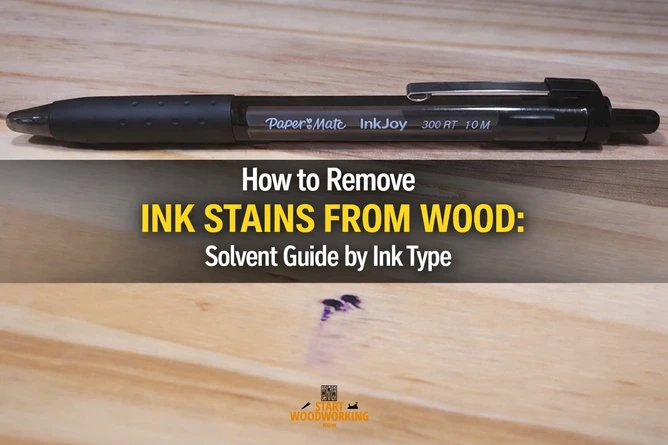
How to Remove Ink Stains from Wood: Solvent Guide by Ink Type
Removing ink stains from wood requires identifying the ink chemistry before selecting a solvent — because the four main ink types found on wood surfaces use different binders and carriers that respond to different solvents. Dye-based inks (fountain pens, watercolour markers, most printer inks) are water-soluble and respond to rubbing alcohol or warm water. Pigment-based inks (archival ballpoint pens, pigment inkjet inks) are water-resistant and require isopropyl alcohol at 70–90% concentration. Solvent-based inks (permanent markers, Sharpie, industrial inks) resist both water and standard alcohol and require acetone, MEK, or lacquer thinner for complete removal. Oil-based inks (traditional ballpoint pen, offset printing ink) require mineral spirits or acetone. Applying the wrong solvent wastes time, risks damaging the finish, and can spread the ink further into the wood grain.
This guide covers ink type identification, the correct solvent for each type, exact contact times per finish type, and the sanding protocol for ink that has penetrated bare wood grain.
How Do You Remove Ink Stains from Wood?
→ For removing permanent marker specifically, see: How to Remove Permanent Marker from Wood
→ For a complete overview of all wood stain removal: How to Remove Wood Finishes and Stains
What Type of Ink Is on the Wood Surface?
Ink type determines which solvent will work and which will spread the stain. The strips below cover the four ink categories found on wood surfaces with their visual identification, sources, and the correct first-choice solvent.
How Do You Identify the Ink Type with a Quick Water Test?
Before applying any solvent, identify the ink chemistry with a 30-second water test on an inconspicuous corner of the stain. This test prevents wasted time and avoids using a solvent that spreads the ink rather than dissolving it.
Water Test — Apply a drop of clean water to the edge of the ink stain and observe for 30 seconds
Water spreads the colour outward and lightens the stain centre — dye-based ink. Use isopropyl alcohol 70–90% or warm water + soap on sealed surfaces. Blot only — never wipe laterally on dye-based ink.
Water beads or pools without affecting the stain colour — pigment-based or solvent-based ink. Use 90–99% isopropyl alcohol first. If no result after 2 applications, escalate to acetone.
Water leaves a slight greasy ring around the stain edge — oil-based ballpoint ink. Use mineral spirits first; acetone as secondary option.
Cannot determine from water test — apply a drop of isopropyl alcohol 70% to the stain edge. If it spreads = dye-based. If it dissolves without spreading = pigment-based. If unaffected = solvent-based permanent marker.
What Are the Key Specifications for Removing Ink Stains from Wood?
| Ink Type / Solvent | Attribute | Value |
|---|---|---|
| Isopropyl alcohol 70% (dye-based ink) | Contact time on sealed finish | 30–60 seconds per application; blot method |
| Isopropyl alcohol 90–99% (pigment-based) | Contact time on sealed finish | 60–90 seconds per application; 2–3 applications |
| Acetone (solvent-based / permanent marker) | Contact time | 30–60 seconds; blot — never wipe laterally |
| Acetone on polyurethane finish | Safe contact time limit | 30 seconds per application — extended contact dulls polyurethane |
| Acetone on shellac finish | Safe use | NOT safe — acetone dissolves shellac. Use 99% isopropyl only |
| Mineral spirits (oil-based ballpoint ink) | Contact time | 2–3 minutes; wipe in grain direction |
| Lacquer thinner (solvent-based on bare wood) | Contact time | 30 seconds; wipe clean immediately — aggressive solvent |
| All solvents — application direction | Wiping method | Blot from stain edge inward — never wipe outward |
| Sandpaper (ink on bare wood) | Starting grit | 120 grit — then 180 grit final pass |
| Oxalic acid (ink on bare wood with grey discolouration) | Concentration | 60 g per litre warm water; 15–20 min contact |
| Cotton pad colour | Required specification | White cotton only — coloured pads may transfer dye to wood |
| Post-treatment finish restoration | On wax finishes | Re-apply paste wax after any solvent treatment |
Why Do Vinegar, Murphy Oil Soap, and Hairspray Fail on Most Ink Stains?
Vinegar, Murphy Oil Soap, and general household cleaners appear frequently in ink removal guides but have no solvent chemistry for the binders and carriers used in most modern inks.
White vinegar (pH 2.5) is a mild acid that dissolves some mineral deposits and cuts through grease — neither of which is present in ink stains. It has no mechanism for dissolving dye molecules, pigment particles, or the resin binders that fix ink to surfaces.
Murphy Oil Soap is a wood-safe cleaning detergent designed to remove dirt and surface contamination from finished wood. It can remove very fresh dye-based ink before it fully absorbs into the finish, because the surfactant emulsifies the water-based dye carrier. On any ink that has dried or partially cured, it produces no result.
Hairspray works on fresh ink stains because it contains isopropyl or denatured alcohol as a solvent carrier — it is the alcohol that dissolves the ink, not the hairspray itself. Using rubbing alcohol directly is more effective, more precise, and leaves no sticky lacquer residue that hairspray deposits on the wood surface.
Magic Eraser (melamine foam) removes ink from surfaces by mechanical micro-abrasion — it physically cuts away the stained surface layer. On sealed wood finishes this removes the finish alongside the ink, leaving a dull patch that requires re-waxing or refinishing. On bare wood it can work for very superficial pigment deposits. It is not a chemical ink removal method.
How Do You Remove Ink from Wood Using Isopropyl Alcohol?
Isopropyl alcohol is the correct first-choice solvent for dye-based ink and pigment-based ink on sealed wood surfaces. At 70% concentration it is effective on dye-based inks; at 90–99% it dissolves most pigment-based inks including India ink and archival ballpoint.
The higher concentration is significantly more effective because the lower water content reduces the risk of the dissolved ink migrating back into the wood grain as the solvent evaporates.
STEP 1 – Blot fresh ink immediately — do not rub
If the ink is fresh, press a dry white cotton cloth onto the stain with straight downward pressure and hold for 5–10 seconds. Lift straight up. Do not wipe sideways — lateral movement spreads the ink across a larger area of the finish. Replace the cloth with a clean section and blot again until no more ink transfers. Remove as much fresh ink as possible before applying any solvent.
STEP 2 – Saturate a white cotton pad with isopropyl alcohol
Use a white cotton pad or folded white cloth — never coloured fabric, which can transfer dye to the wood under solvent contact. Saturate with 70% isopropyl for dye-based ink or 90–99% isopropyl for pigment-based ink. Do not pour alcohol directly onto the wood — direct pouring spreads the solvent and dissolved ink beyond the stained area.
STEP 3 – Press and hold — blot from the edge inward
Press the saturated pad onto the outer edge of the ink stain and hold for 30–60 seconds. Lift and inspect the pad — dissolved ink should be visible as a coloured stain on the white cotton. Move to a clean section of pad and work inward toward the centre of the stain. Always work from the stain edge inward — working outward from the centre pushes dissolved ink into clean surrounding finish.
Allow each application to evaporate for 20–30 seconds before the next to prevent over-saturation of the finish. On dye-based ink, 2–3 applications typically resolve the stain. On pigment-based ink, 3–5 applications at 90–99% concentration may be needed.
STEP 4 – Clean and restore the finish
After the ink has been removed, wipe the treated area with a damp cloth and dry immediately. On wax finishes, apply a thin coat of paste wax and buff — alcohol removes the surface wax layer. On polyurethane and lacquer, brief alcohol contact at these concentrations does not require finish restoration in most cases. If the finish appears slightly dull after treatment, apply a small amount of furniture polish and buff.
On shellac-finished antique furniture: Isopropyl alcohol at any concentration dissolves shellac rapidly. On shellac surfaces, limit contact to a single brief blot of under 30 seconds per application.
For dye-based ink on shellac, a single quick wipe with 70% isopropyl dissolves both the ink and the minimal shellac surface — the finish re-fuses as the alcohol evaporates at this concentration and brief contact time.
For solvent-based permanent marker on shellac, use only mineral spirits — alcohol in any concentration is too aggressive.
How Do You Remove Solvent-Based Ink and Permanent Marker from Wood Using Acetone?
Solvent-based inks — permanent markers, Sharpie, industrial marking inks — contain resin binders dissolved in fast-evaporating solvent carriers (typically alcohols and ketones). Standard 70% isopropyl alcohol dissolves the carrier but often fails to fully break the resin binder bond to the surface.
Acetone dissolves both the carrier and the resin binder completely, making it the correct first choice for permanent marker and solvent-based ink on sealed wood finishes.
Acetone is safe on polyurethane and varnish at brief contact times. It dissolves lacquer, shellac, and some older varnishes — use isopropyl alcohol instead on these finishes.
STEP 1 – Confirm finish type before applying acetone
Test the finish with a drop of acetone on an inconspicuous area and wipe after 10 seconds. If the finish is unaffected (no softening, dulling, or tackiness), it is polyurethane or alkyd varnish — acetone is safe.
If the finish softens, becomes tacky, or dissolves, it is lacquer or shellac — use 90–99% isopropyl alcohol instead, which is less aggressive but still effective on most permanent marker inks.
STEP 2 – Apply acetone to white cotton pad — contact time 30 seconds maximum per application
Apply acetone to a white cotton pad and press onto the ink stain for a maximum of 30 seconds per application. Extended acetone contact dulls polyurethane finish surfaces — the 30-second limit prevents finish damage while still providing sufficient dissolution time.
Lift the pad, check for ink transfer, and allow the surface to air dry for 60 seconds before the next application. On large ink deposits, work in overlapping sections from the edge inward rather than one central application.
STEP 3 – Restore finish sheen after treatment
Multiple acetone applications will dull the sheen of polyurethane and varnish surfaces slightly. After the ink is removed, apply paste wax to the treated area and the surrounding panel, allow 5 minutes, and buff with a clean cloth. This restores uniform sheen and masks any micro-dulling caused by the acetone contact.
How Do You Remove Ink from Bare or Unfinished Wood?
On bare, unfinished, or oil-finished wood, ink penetrates the open grain fibres directly rather than sitting on a finish film surface. Solvent treatment dissolves the surface ink but the stained wood fibres beneath may retain discolouration after the solvent evaporates. The removal process has two stages: solvent extraction of accessible ink, followed by mechanical removal of stained fibres if discolouration persists.
Stage 1 — Solvent treatment
Apply the correct solvent for the ink type (isopropyl alcohol for dye-based and pigment-based, acetone for solvent-based, mineral spirits for oil-based) to a white cotton cloth and work into the stain in the grain direction.
Allow 2–3 minutes contact time on bare wood — the open grain allows deeper solvent penetration than sealed surfaces. Repeat 2–3 times. If the stain is significantly lighter after 3 applications but still visible, proceed to sanding.
Stage 2 — Sanding when solvent treatment leaves residual discolouration
Sand in the grain direction starting at 120 grit to remove the stained wood fibre surface layer. Check progress by wiping dust with a tack cloth after each pass — if the ink colour is still visible in the grain, the stained layer extends deeper.
Continue at 120 grit until the stain is no longer visible, then progress to 180 grit to prepare the surface for refinishing. If a grey discolouration remains after sanding — common with iron-based inks on oak and walnut — apply oxalic acid wood bleach at 60 g per litre for 15–20 minutes to neutralise the residual iron-tannate compounds.
The protocol requires 60 g of oxalic acid crystals per litre of water — use the calculator below to get the exact dose for your container size, plus the correct amount of baking soda for neutralisation after treatment.
Oxalic Acid Concentration Calculator
Exact doses for wood stain removal — acid, neutraliser, and contact times
How Does the Wood Surface Type Affect Ink Stain Removal?
| Surface Type | Ink Type | Correct Method | Key Constraint |
|---|---|---|---|
| Polyurethane finish | Dye-based | Isopropyl 70–90%, blot method, work edge to centre | Works on fresh and dried; multiple applications for dried ink |
| Polyurethane finish | Solvent-based (permanent marker) | Acetone, max 30 sec per application; restore with paste wax | Extended acetone dulls finish; 30 sec limit per application |
| Lacquer finish | Any | Isopropyl 70–90% only — 30 sec max contact; blot method | Acetone dissolves lacquer immediately — never use on lacquer |
| Shellac finish (antique) | Any | Isopropyl 70% — single brief blot, 30 sec max; mineral spirits for solvent-based ink | Alcohol dissolves shellac — limit contact strictly; test first |
| Wax finish | Any | Isopropyl 70–90%; re-apply paste wax after treatment | Alcohol removes wax layer — always re-wax after treatment |
| Oil finish | Any | Isopropyl 90% or mineral spirits; re-oil after treatment | Re-apply matching oil finish after any solvent treatment |
| Bare / unfinished wood | Any | Correct solvent for 2–3 cycles; sand 120–180 grit if residue; oxalic acid for grey discolouration | Open grain absorbs ink deeper — sanding often required for complete removal |
| Veneer | Any | Isopropyl 70% only — blot method, minimum contact; no acetone, no sanding | Veneer 0.6–2 mm thick — acetone risks delamination; sanding cuts through |
📝 In my restoration workshop, the ink type identification step has prevented several mistakes on antique shellac-finished furniture. Twice I have received pieces where the client had already tried acetone on what turned out to be shellac-varnished surfaces — attempting to remove a fountain pen mark — and dissolved a patch of finish in the process. My standard protocol now is to apply the water test and solvent test before touching the stain, particularly on any piece that might have an alcohol-soluble finish. A 30-second test before starting prevents a repair job that takes two hours.
Frequently Asked Questions About Removing Ink Stains from Wood
Why does rubbing alcohol work on some ink stains but not others?
Rubbing alcohol (isopropyl alcohol) dissolves the water-soluble dye molecules in dye-based inks and the alcohol-soluble carriers in some pigment and solvent-based inks. It does not work on inks with resin binders specifically formulated to resist alcohol — particularly solvent-based permanent markers whose binder chemistry is designed to be permanent on most surfaces.
On these inks, acetone or lacquer thinner is required to break the resin bond. The water test before treatment identifies which category the ink falls into and whether alcohol will be sufficient.
Can you remove ballpoint pen ink from wood without damaging the finish?
Yes. Traditional ballpoint pen ink is oil-based and responds to mineral spirits or isopropyl alcohol at 90–99% concentration applied with a white cotton pad in a blotting motion. On polyurethane, lacquer, and varnish finishes, both solvents are safe at brief contact times — 60–90 seconds per application.
On shellac, use only mineral spirits — isopropyl alcohol beyond a brief 30-second contact dissolves the shellac film. On wax finishes, use isopropyl alcohol and re-apply paste wax after treatment.
What is the difference between removing ink and removing permanent marker from wood?
The distinction is solvent type. Most ink — fountain pen, rollerball, inkjet — is dye-based or water-based and dissolves with isopropyl alcohol at 70–90%. Permanent markers use solvent-based inks with resin binders engineered to be chemically resistant to alcohol and water — they require acetone or lacquer thinner for complete dissolution.
This is why rubbing alcohol removes a fountain pen stain cleanly but only partially blurs a Sharpie mark. The water test distinguishes them: dye-based ink spreads when water contacts it; permanent marker ink is completely unaffected by water.
Is it safe to use acetone on wood furniture to remove ink?
Acetone is safe on polyurethane and alkyd varnish finishes at brief contact times of 30 seconds or less per application. At this contact time and on these finishes, acetone dissolves the ink without visibly damaging the finish in most cases.
It is not safe on lacquer or shellac — it dissolves both immediately. Test on an inconspicuous area before applying to the visible stain: apply one drop, wait 10 seconds, and wipe. If the finish softens or becomes tacky, switch to 90–99% isopropyl alcohol.
📝 The most common ink stain scenario in my workshop is ballpoint pen on a modern polyurethane-finished oak dining table — usually from a child doing homework. The oil-based nature of ballpoint ink means isopropyl alcohol at 70% shows little effect, which surprises clients who tried it first. Mineral spirits at 2–3 minutes contact, worked into the grain with a white cloth, resolves the stain in 2–3 applications on polyurethane without any finish damage. On one occasion the stain had been there for months — the mineral spirits lightened it significantly but a faint shadow remained, which required a single pass with 120-grit paper and a local re-polish.
Summary: Key Values for Removing Ink Stains from Wood
Removing ink stains from wood requires identifying the ink type with the water test before selecting a solvent. Dye-based inks (fountain pens, water markers, inkjet) spread when water contacts them and respond to isopropyl alcohol 70–90% in a blotting motion, working from stain edge inward.
Pigment-based inks (archival ballpoint, India ink) resist water and require isopropyl 90–99% at 60–90 seconds contact per application.
Solvent-based inks (permanent markers, Sharpie) require acetone on polyurethane and varnish — 30 seconds maximum per application — or 90–99% isopropyl on lacquer and shellac.
Oil-based ballpoint ink responds to mineral spirits at 2–3 minutes contact. On bare wood, solvent treatment followed by 120–180 grit sanding removes stained fibres; grey residual discolouration requires oxalic acid at 60 g per litre for 15–20 minutes.
Common remedies including vinegar, Murphy Oil Soap, and hairspray are ineffective on cured ink — vinegar has no ink-dissolving chemistry, and hairspray works only through its alcohol content, which is less concentrated and less effective than rubbing alcohol directly.
→ Related: How to Remove Permanent Marker from Wood
→ Related: How to Remove Hair Dye from Wood
→ Hub: How to Remove Wood Finishes and Stains — Complete Guide