Fix Glue Spots After Staining: Expert Tips for a Flawless Finish
In woodworking, one of the most frustrating experiences is applying a beautiful stain to your project only to discover unsightly glue spots marring the finish. These spots are typically the result of residual glue that wasn’t completely removed before staining.
Supplies Needed:
- Sandpaper (220, 400, 600 grit) or Micro-Mesh sanding pads (1500-12000 grit)
- Tack cloth
- Stain and applicator (brush, cloth, etc.)
- Finishing topcoat (polyurethane, varnish, lacquer, etc.)
Steps to do it:
- Dry Completely: Ensure the stained area and finish are completely dry before beginning any sanding.
- Clean the Area: Dust off the wood area around the glue spot to prepare for sanding. Optionally, tape off nearby edges.
- Start Sanding: Lightly sand the glue spot with 220 grit sandpaper or 1500 grit micro-mesh, following the wood grain.
- Gradually Increase Grit: Move up to higher grits (up to 600 grit sandpaper or 12000 micro-mesh), applying minimal pressure to avoid damaging the surrounding finish.
- Remove Dust: After each sanding pass, wipe off the dust with a tack cloth.
- Wipe with Damp Cloth: Once the glue is gone, clean the wood with a damp cloth and let it dry.
- Reapply Stain: Touch up the sanded spot with matching stain, feathering the edges for a seamless look.
- Apply Topcoat: After the stain dries, seal the area with the appropriate finishing topcoat.
- Buff the Area: Once dry, buff the spot with 6000 grit micro-mesh or 0000 steel wool for a smooth finish.
- Final Inspection: Check the repair under good lighting to ensure it blends well with the rest of the surface.
| Methods to Fix Glue Spots After Staining | Type of Wood | State of Glue Spot | Type of Furniture |
|---|---|---|---|
| Cabinet Scraper | Hardwoods like oak, maple, walnut | Dried excess glue | Tables, chairs, cabinets |
| Artist’s Brush | Softwoods like pine, cedar | Discolored but not raised | Frames, bookshelves, decorative pieces |
| Vinegar & Putty Knife | Plywood, veneer | Sticky, not fully dried | Cabinets, built-ins, laminates |
| Stain Pens | Any except soft open-grained | Light colored spots | Tables, dressers, nightstands |
| Wet Sanding | Closed-grain hardwoods | Rough, raised spots | Dining sets, desks, entertainment centers |
| Mineral Spirits | Oil-based stains and finishes | Tacky, partially dried | Doors, trim, paneling |
| Acetone/Nail Polish Remover | Any | Super glue spots | Chairs, benches, stools |
| Heat Gun | Hardwoods | Old, dried glue | Furniture with polyurethane finish |
Mechanical Removal Methods
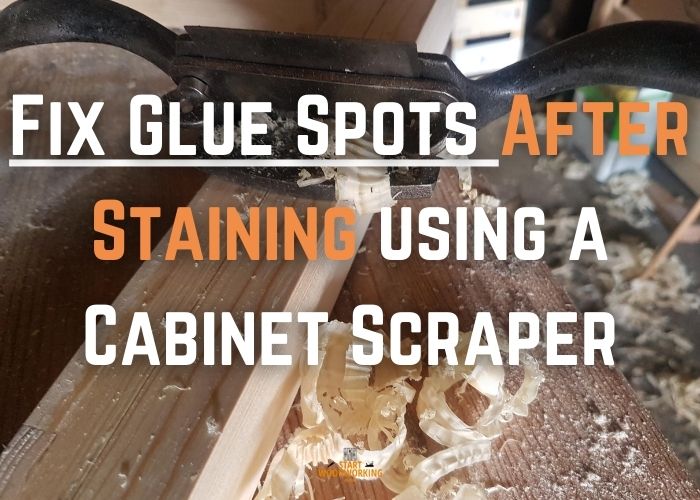
1. Cabinet Scraper
Materials Used:
- Cabinet Scraper
- Rag
- Lint-free Cloth
- Topcoat Finish (Varnish or Lacquer)
- Small Artist’s Brush
- Extra Fine Steel Wool
Step 1: Inspect the glue spot
I start by examining the glue spot and surrounding area to assess the extent of the problem. I look to see how large the glue spot is, how deep into the wood it penetrates, and how much finish needs to be removed.
Step 2: Let the stain dry completely
I always make sure the glue stain has dried fully before using a scraper. Scraping wet glue spots could create a bigger mess.
Step 3: Prepare and sharpen the scraper
I prepare the area by cleaning it thoroughly to remove any dust, dirt or debris. It’s important to have a clean surface before scraping to prevent tearing or scratching. I may lightly dampen the area to raise the wood grains.
I select an appropriate cabinet scraper for the job – one that allows me to target just the affected area. I make sure the scraper blade is sharpened for maximum effectiveness.
Step 4: Position the scraper at a 30-degree angle
Holding the scraper at a 30-45 degree angle, I begin gently scraping the glue spot using smooth, even strokes. I apply light pressure and frequently check my progress to ensure I am removing the glue and not gouging the wood.
Apply firm downward pressure Keeping the angle consistent, I apply firm downward pressure as I slowly push the scraper over the glue spot in the direction of the wood grain.
I focus on using short 1-2 inch scraping strokes. Too long of a drag could gouge the wood. I repeat strokes until the glue spot begins to lift.
Step 5: Clear away glue residue
I frequently stop to wipe away any glue residue that accumulates on the scraper blade using a rag. This prevents reapplying the glue spot stain.
Once I have carefully scraped away all traces of the glue, I wipe the area clean with a dry, lint-free cloth. I inspect it closely to confirm the glue is gone and the bare wood is exposed.
Step 6: Reseal with a topcoat
After the stain has dried per the manufacturer’s recommendation, I finish by applying a topcoat finish like varnish or lacquer to seal and protect the repaired area.
Using a small artist’s brush, I apply fresh stain matching the surrounding wood. I may use multiple coats to achieve the right color blend. I feather out the edges so the touch up blends seamlessly.
Finally, I will buff the edges gently with extra fine steel wool and examine the area under good lighting conditions to ensure my glue spot repair is invisible.
2. Artist’s Brush

Materials Used:
- Clean Rag
- Small, High-quality Artist’s Brush
- Disposable Cup
- Stain (oil-based)
- Paint Thinner
- Pigments
- Clear Protective Topcoat (polyurethane or similar)
Step 1: Allow glue stain to fully cure
I always let the glue stain dry and cure completely, usually 24-48 hours, before attempting any touch ups. This prevents the brush strokes from lifting the existing stain.
Step 2: Sand down any raised edges
Using a clean rag, I wipe the area surrounding the glue spot to remove any dust or debris that could get caught in the new stain.
If the glue spot has any raised edges or texture, I’ll gently sand it down. This ensures the touch up blend smoothly. I wipe away any sanding dust.
Step 3: Select a matching artist’s brush
I select a small, high-quality artist’s brush that allows me to precisely apply stain just to the affected area.
The brush size depends on the spot size. I make sure the bristles match the stain color. The tapered brush tip is ideal.
Step 4: Mix custom stain match
I’ll mix custom stain in a disposable cup to match the color of the surrounding stain as closely as possible. I use stain, paint thinner, and pigments.
Step 5: Apply thin stain layers
I dip the brush into my stain, removing any excess on the rim of the container. I prefer oil-based stains for glue spot repairs because they penetrate deeper into the porous sanded wood.
Lightly dipping just the brush tip in the stain, I gently brush thin layers of stain only onto the glue spot using straight brush strokes.
With a very light touch, I dab the stain into the glue spot, working from the outside edge inward. I build up layers, allowing each to dry before applying more to achieve the desired color intensity.
Once I’ve matched the color of the surrounding finish, I use the brush tip to gently feather out the edges of the touch-up area to seamlessly blend with the existing stain.
Step 6: Let dry between layers
I patiently let each stain layer dry completely before applying the next. This builds the color slowly to match the existing finish.
I inspect the repair under good lighting, at eye level and from multiple angles. I reapply stain if any discrepancies are visible to ensure a perfect color and finish match.
Step 7: Blend edges
Once the spot color matches, I use delicate circular motions to soften and blend the edges into the surrounding stain. After the stain has dried thoroughly, I seal the repaired spot with a clear protective topcoat, using the brush to isolate the area.
Step 8: Seal with a finish coat
Finally, I apply a thin sealant coat, like polyurethane, over the touch up area and feather it out to seal the renewed finish.
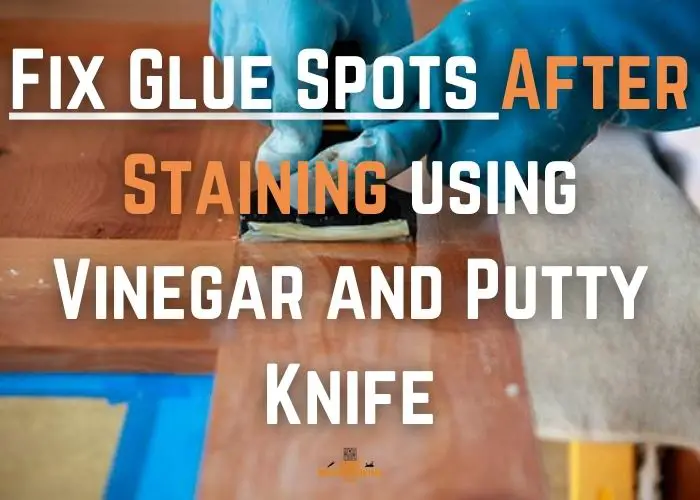
3. Vinegar and Putty Knife
Materials Used:
- Clean Cloth or Brush
- White Vinegar
- Small Container
- Putty Knife (preferably plastic)
- Fine-grit Sandpaper
- Small Artist’s Brush
- Wood Stain
- Clear Finish (e.g., polyurethane)
Step 1: Identify and isolate the glue spot
First, I carefully examine the stained wood to locate the glue spot. I ensure that the stain around the glue spot is completely dry to avoid any further damage during the removal process.
Step 2: Prepare white vinegar solution
I prepare a solution using white vinegar, which is known for its ability to break down the adhesive properties of many common wood glues. I pour some undiluted white vinegar into a small container for easy access.
Step 3: Apply vinegar to the glue spot
After testing on an inconspicuous spot, I use a clean cloth or a brush to apply the vinegar directly onto the glue spot. I make sure to cover it thoroughly and let it soak in for a few minutes. The vinegar will penetrate and soften the glue, making it easier to remove.
Step 4: Test the glue’s softness
After allowing the vinegar to sit for about five minutes, I gently test the glue with a putty knife to check if it’s softened enough. If it’s still hard, I apply more vinegar and wait a few more minutes.
Step 5: Scrape off the softened glue
Once the glue is sufficiently softened, I use a plastic putty knife to gently scrape away the glue. I’m careful to use the putty knife at a shallow angle to avoid gouging the wood.
Step 6: Clean the area
After removing the glue, I wipe the area with a clean, damp cloth to remove any remaining vinegar and glue residue. It’s important to remove all residue to prevent interference with any further finishing steps.
Step 7: Lightly sand if necessary
If there’s any discoloration or raised grain, I lightly sand the area with fine-grit sandpaper, following the direction of the wood grain. This helps to prepare the surface for a touch-up stain.
Step 8: Touch up the stain
Using a small artist’s brush, I apply a matching wood stain to the affected area. I blend the edges into the surrounding area to ensure a seamless finish.
Step 9: Apply a finish
Once the stain dries, I seal the area with a matching clear finish, such as polyurethane, to protect the wood and give it a uniform appearance.
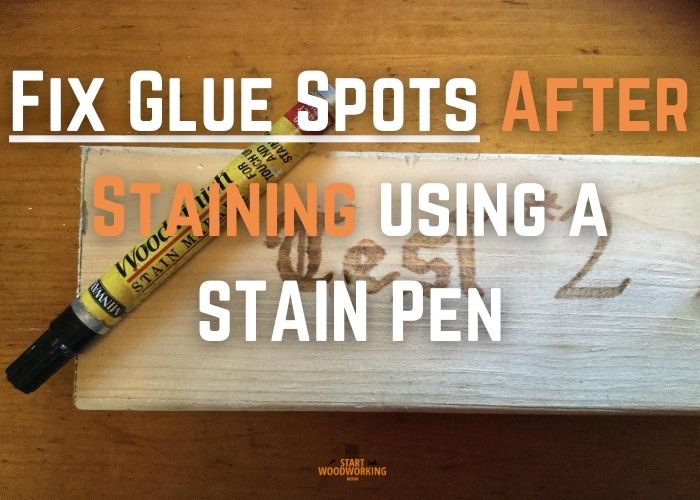
4. Stain Pens
Materials Used:
- Soft, Damp Cloth
- Stain Pen
- Scrap Piece of Wood (for testing)
- Clean, Dry Cloth or Cotton Swab
- Clear Finish (for protection and sheen)
- Fine Artist’s Brush
Step 1: Wipe and clean the area
I clean the area around the glue spot with a soft, damp cloth to ensure that no dust or debris interferes with the repair. I then allow it to dry completely before proceeding.
Step 2: Choose the Right Stain Pen
I choose a stain pen that closely matches the color of the existing stain. If the exact shade is not available, I might need to blend different stain pen colors to achieve a perfect match.
Shake the Stain Pen thoroughly before use to ensure the stain pigment is well-mixed. This helps achieve a consistent color application.
Step 3: Test in an Inconspicuous Area
I test the stain pen on a scrap piece of wood or an inconspicuous area to confirm the color match. Once satisfied with the color, I prepare to apply it to the glue spot.
Step 4: Apply Stain Pen to Glue Spots
I carefully apply the stain pen to the glue spot, using light strokes to build up the color gradually. It’s important to stay within the boundaries of the glue spot to avoid over-staining the surrounding area.
If the glue spot is larger or has an irregular shape, I use the edge of the stain pen tip for more precision. I blend the edges by lightly feathering the stain outward to merge with the existing finish.
Step 5: Blend the edges
I wait for the stain to dry according to the manufacturer’s instructions. If necessary, I apply additional coats to darken the color, ensuring each coat dries fully before adding another.
Use a clean, dry cloth or a cotton swab to blend the applied stain with the surrounding stained wood. Work in the direction of the wood grain to achieve a seamless appearance.
Step 6: Wipe Excess Stain
Immediately wipe away any excess stain using a clean, dry cloth. This prevents the stain from darkening the wood excessively and ensures an even finish.
Step 7: Allow Stain to Dry
Allow the applied stain to dry completely according to the product instructions. This typically takes a few hours, but the drying time may vary.
Step 8: Assess and Repeat if Necessary
Once the color is matched and the stain is dry, I evaluate the repair under various lighting conditions to ensure it blends well with the original finish.
To protect the area and give it the same sheen as the rest of the piece, I apply a small amount of clear finish over the repaired spot with a fine artist’s brush.
5. Wet Sanding
Materials Used:
- Stain (same as originally used)
- 600-grit or finer sandpaper
- Sanding Block
- Clean Cloth
- Clear Finish (polyurethane or similar)
- Fine Brush or Spray Applicator
Step 1: Allow the Stain to Fully Cure
I ensure the stained wood is allowed to dry and cure completely, which typically takes 24-48 hours. This is crucial to prevent disturbing the existing finish during the repair process.
Step 2: Lightly Sand the Glue Spot
Using 600-grit or finer sandpaper, I lightly sand the glue spot to remove any raised areas and smooth it out, being cautious not to sand through the stain. I then wipe away any resulting dust.
Step 3: Prepare a Stain-Wetted Sanding Pad
I cut a piece of ultra-fine sandpaper to fit my sanding block and dip it into the same stain that was originally used, ensuring full coverage without over-saturating the paper.
Step 4: Re-Stain the Spot with Wet Sanding
With gentle, circular motions, I wet sand the glue spot using the stain-wetted sandpaper. This technique applies a fresh layer of stain while simultaneously blending the edges into the surrounding finish.
Step 5: Wipe and Check the Color Match
I frequently wipe the area with a clean cloth to check the color match. If the glue spot still appears lighter, I repeat the wet sanding process until the color blends seamlessly with the rest of the wood.
Step 6: Feather Out the Edges
After achieving an even color match, I focus on feathering out the edges by extending the wet sanding in wider concentric circles to ensure a smooth transition.
Step 7: Wipe Clean and Let Dry
I clean off any remaining stain residue with a clean cloth and allow the touch-up to dry thoroughly. This step is important to ensure the stain sets properly before applying a finish.
Step 8: Apply Protective Clear Coat
To finalize the repair, I apply a thin layer of clear finish, such as polyurethane, over the repaired area. This not only unifies the appearance of the finish but also provides protection to the newly stained spot. I use a fine brush or a spray applicator to achieve a consistent coat that matches the sheen of the existing finish.
Chemical Removal Approaches
1. Mineral Spirits
The mineral spirits temporarily saturate the wood, making the glue spots stand out due to their resistance to the solvent.
Materials Used:
- Mineral Spirits
- Protective Gloves
- Drop Cloths
- Clean, Lint-free Rag
- Plastic Putty Knife or Razor Blade
- Fine-grit Sandpaper (e.g., 220-grit)
- Matching Stain
- Small Artist’s Brush or Clean Rag
- Topcoat Finish (polyurethane, lacquer, etc.)
- Fine Brush or Spray Applicator
Step 1: Prepare the Area
I ensure the workspace is well-ventilated because mineral spirits emit fumes. I put on protective gloves to avoid skin contact with the solvent and lay down drop cloths to protect the surrounding area from spills.
Step 2: Apply Mineral Spirits
Using a clean, lint-free rag, I apply a small amount of mineral spirits directly onto the glue spot. I work in a well-ventilated area and use just enough mineral spirits to dampen the glue spot without soaking the wood.
Step 3: Soften the Glue
I allow the mineral spirits to sit on the glue spot for a few minutes. The solvent softens the glue, making it easier to remove without damaging the wood’s stained finish. I make sure not to let it sit for too long, as prolonged exposure might affect the surrounding finish.
Step 4: Scrape Away the Glue
Once the glue is softened, I carefully scrape it off with a plastic putty knife or a razor blade held at a low angle. I use light pressure to avoid gouging the wood. If the glue is stubborn, I apply more mineral spirits and repeat the process until the glue is completely removed.
Step 5: Clean the Area
After the glue is scraped off, I wipe the area with a clean rag to remove any residue. I ensure all traces of mineral spirits are gone before moving to the next step, as leftover solvent can interfere with touch-up finishes.
Step 6: Sand the Spot (if necessary)
If the glue removal has left the wood slightly rough, I lightly sand the area with fine-grit sandpaper, such as 220-grit, to smooth it out. I sand with the grain of the wood and take care not to remove the surrounding stain.
Step 7: Touch-Up Stain (if necessary)
If the glue removal has lightened the wood, I touch up the spot with a matching stain using a small artist’s brush or a clean rag. I apply the stain sparingly, feathering it out towards the edges to blend it with the surrounding area. It’s important to start with a light application, as I can always add more stain if needed, but removing excess stain can be difficult.
Step 8: Allow the Stain to Dry
I leave the touched-up area to dry completely, which could take anywhere from a few hours to overnight, depending on the stain manufacturer’s recommendations and the environmental conditions.
Step 9: Reapply Topcoat (if necessary)
Once the stain is dry and I’m satisfied with the color match, I reapply the topcoat finish to the repaired area. This could be a polyurethane, lacquer, or other appropriate finish that was used on the original piece. I apply it with a fine brush or spray applicator, taking care to feather the edges into the existing finish to avoid noticeable lines.
Step 10: Buff the Finish
After the topcoat has dried, I gently buff the area with fine steel wool or a soft cloth to ensure that the sheen matches the rest of the piece. This step helps to blend the repair into the surrounding finish, making it less noticeable.
Step 11: Inspect and Clean Up
Finally, I inspect the repaired area to ensure the glue spot is no longer visible and that the finish looks uniform. I clean up my workspace, properly disposing of any rags soaked with mineral spirits, as they can be a fire hazard if not handled correctly.
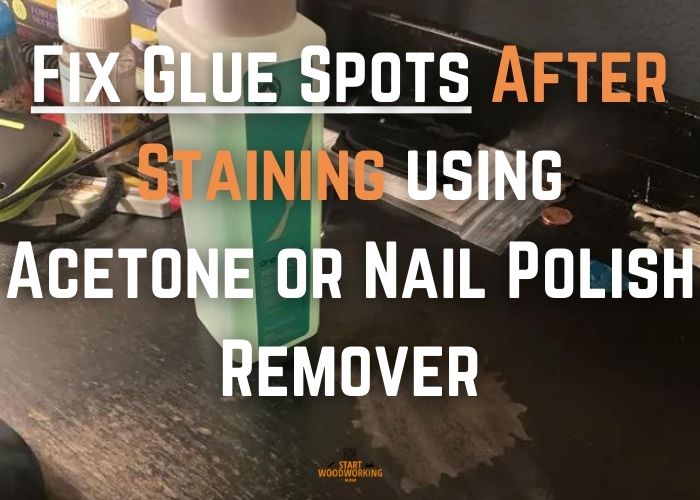
2. Acetone or Nail Polish Remover
Materials Used:
- Acetone or Nail Polish Remover
- Cotton Swab or Small, Lint-free Cloth
- Plastic Scraper or Putty Knife
- Clean, Damp Cloth
- Water or Mineral Spirits (for neutralizing)
- Fine-grit Sandpaper (e.g., 220-grit)
- Tack Cloth or Soft Brush
- Compatible Topcoat Finish (polyurethane, lacquer, etc.)
- Fine Brush, Foam Brush, or Spray Applicator
- Fine Steel Wool or Soft Cloth
Step 1: Prepare the Workspace
I ensure the area is well-ventilated because acetone and nail polish remover emit strong fumes that can be hazardous. I don protective gloves and safety glasses to protect my skin and eyes. I also lay down protective coverings to safeguard the workspace from potential spills.
Step 2: Test the Solvent
Before applying acetone or nail polish remover to the affected area, I test it on an inconspicuous spot to check for any adverse reaction with the wood finish. I’m looking for any discoloration or damage that might be caused by the solvent.
Step 3: Apply Acetone or Nail Polish Remover
Using a cotton swab or a small, lint-free cloth, I apply a minimal amount of acetone or nail polish remover directly onto the glue spot. It’s important to control the amount of solvent to prevent it from spreading beyond the glue spot and affecting the surrounding finish.
Step 4: Allow the Solvent to Work
I let the solvent sit on the glue for a short period, usually a minute or two, to soften the adhesive. During this time, I avoid rubbing or scrubbing, as this can spread the glue and damage the finish.
Step 5: Gently Scrape the Glue
Once the glue is softened, I use a plastic scraper or a putty knife with its edge wrapped in a cloth to gently lift the glue off the wood. I’m careful to use light pressure and keep the tool flat against the wood to avoid scratching the finish.
Step 6: Wipe Away Residue
After removing the glue, I quickly wipe the area with a clean, damp cloth to remove any remaining solvent and glue residue. This helps to prevent the acetone or nail polish remover from affecting the wood stain.
Step 7: Neutralize the Area
To ensure that no solvent remains on the wood that could interfere with future finishing steps, I wipe the area with a cloth dampened with water or, if the finish is oil-based, a bit of mineral spirits. This step neutralizes the area and helps to prevent any further reaction from the solvent.
Step 8: Assess the Need for Sanding
After the glue and solvent are completely removed, I check the smoothness of the wood. If the surface feels rough or if there’s a slight raise where the glue was, I lightly sand the spot with a fine-grit sandpaper, such as 220-grit. I sand in the direction of the wood grain and use a light touch to avoid removing or damaging the surrounding stain and finish.
Step 9: Clean the Sanded Area
I remove all sanding dust with a tack cloth or a soft brush to ensure a clean surface for any touch-up work. It’s important that no dust remains, as it could get trapped in the finish and mar the final appearance.
Step 10: Apply Topcoat Finish
Once the stain is dry and I’m satisfied with the color match, I apply a compatible topcoat finish over the area. Whether it’s polyurethane, lacquer, or another type of finish, I apply it with a fine brush, a foam brush, or a spray applicator, depending on the original finish and the size of the repair. I feather the edges into the existing finish to create a smooth, unnoticeable transition.
Step 11: Buff the Finish
After the topcoat has fully dried, I gently buff the area with fine steel wool or a soft cloth to match the sheen of the surrounding finish. This helps to integrate the repaired spot with the rest of the surface and ensures a professional-looking result.
Heat Application Technique
1. Heat gun
Materials Used:
- Protective Gloves
- Safety Glasses
- Heat Gun or Hair Dryer
- Plastic Scraper or Putty Knife with Rounded Corner
- Soft, Damp Cloth
- Fine-grade Steel Wool or Soft Cloth
- Wood Cleaner or Polish
- Soft Cloth (for applying cleaner or polish)
Step 1: Prepare the Area
Safety is paramount, so I make sure the area is clear of any flammable materials. I also wear protective gloves to avoid burns and safety glasses to protect my eyes from any debris.
Step 2: Choose the Right Tool
Depending on the size of the glue spots and the delicacy of the finish, I decide whether to use a heat gun or a hair dryer. A heat gun provides higher temperatures, which can be more effective but also riskier, while a hair dryer is safer for delicate finishes but might be less effective.
Step 3: Apply Heat
I set the heat gun or hair dryer to a low or medium setting to start. Holding the tool a few inches away from the surface, I apply heat evenly over the glue spot. I avoid overheating any single area to prevent damaging the wood or the finish.
Step 4: Monitor the Glue’s Response
As I apply heat, I carefully watch the glue spot. I’m looking for signs that the glue is softening, which usually happens within a few seconds to a minute.
Step 5: Gently Scrape the Glue
Once the glue is softened, I use a plastic scraper or a putty knife with a rounded corner to gently lift the glue from the wood. I work slowly and carefully to avoid gouging the wood or disturbing the surrounding finish.
Step 6: Clean the Area
After removing the glue, I immediately clean the area with a soft, damp cloth to remove any residue. This also helps to cool down the wood quickly, preventing any further heat damage.
Step 7: Assess the Finish
After the glue is removed and the area is clean, I check the finish. If the heat has caused any discoloration or blushing (whitening of the finish), I may need to address that with additional steps.
Step 8: Buff the Repaired Area
Once the topcoat is dry, I gently buff the area with a fine-grade steel wool or a soft cloth to even out the sheen and ensure that the repaired spot matches the rest of the piece. I take care not to buff too aggressively, which could damage the new finish.
Step 9: Inspect the Repair
I inspect the repair from different angles and under different lighting conditions to make sure the glue spot is no longer visible and that the finish looks uniform and smooth. If necessary, I’ll perform additional touch-ups until I’m satisfied with the appearance.
Step 10: Clean and Polish the Entire Piece
To give the piece a finished look and to blend the repaired area with the rest of the piece, I clean and polish the entire surface following the grain of the wood. I use a wood cleaner or polish compatible with the finish, applying it with a soft cloth and buffing it to a consistent shine.
Inspect the surface of the wood thoroughly for any existing glue spots by wiping it with a solvent such as lacquer thinner, naphtha, mineral spirits, or denatured alcohol. This will temporarily darken the bare wood and make the residual glue visible.
Perform sequential sanding using a combination of machine and hand sanding with different grits (e.g., 120, 150, or 180), depending on the wood species, to remove residual glue effectively. Wet the wood before final sanding to reveal any remaining spots and feather out the sanded area to avoid depressions.
Use a UV colorant in the glue to make it visible under black light during inspection, minimize excess glue during application, and address any squeeze-out immediately. When dealing with glue squeeze-out, let it dry to a rubbery consistency, then peel it off with a putty knife before sanding the area.
Use Blendal powders or sticks mixed with other finishes and apply them with precision using an artist’s brush to the affected area. This will lock in the corrected color and mask the presence of the original glue spot.