Why is Wood Glue Not Holding? Fix Adhesion Issues Fast!
When working with wood glue, I’ve encountered situations where the wood glue does not hold as expected. In these cases, it’s important to understand the reasons behind wood glue failure to prevent it from happening again.
Common Reasons for Wood Glue Failure
- Incorrect surface preparation – The surfaces need to be clean, dry and smooth for optimal bonding. Any dirt, grease, old finish or raised grain will prevent the glue from adhering fully.
- Poor joint design – Butt joints with end grain or gaps are weak points. Dovetail, mortise and tenon, or biscuit joints distribute stress better.
- Insufficient clamp pressure – The pieces need to be firmly pressed together to squeeze out excess glue and form a strong bond. Under-clamping leaves gaps.
- Temperature/humidity issues – Glue won’t bond if the wood or air is too dry, wet or cold. Most glues require surfaces above 60°F.
- Improper glue application – Too little glue starves the joint. Too much glue prevents close contact of wood.
- Glue past shelf life – Old glue may not cure fully and harden adequately to reach full strength.
- Wrong glue for the job – Not all glues are suitable for all wood types or outdoor applications.
- Joint not flush – Any proud or recessed areas prevent good surface contact for bonding.
- Wood defects – Voids, knots or shakes introduce weaknesses for stress to propagate failures.
1. Incorrect surface preparation
Ensuring the surfaces are completely clean of all dust and debris is imperative, as even microscopic particles prevent the glue from fully bonding to the wood. The surfaces also must be sanded smoothly, especially end grains which tend to be rougher, to allow the glue to fully penetrate and grip the wood for maximum adhesive strength.
Any previous finishes like stains, oils or paints on the gluing surfaces could interfere with bonding as well, so removing those thoroughly through scraping is important.
Grease or oils transferred from handling the wood must be wiped away with a mineral spirits dampened rag to avoid compromising the bond. And the surfaces need to be dry, as any moisture prevents curing of the glue.
Meticulous surface prep—sanding to the appropriate grit, removing all residues, and ensuring complete dryness—is essential for an indissoluble bond. My adherence to these precepts has been instrumental in avoiding adhesive failure.
How to Fix
To remedy this, the joint can be carefully disassembled and the surfaces thoroughly cleaned and prepared again as described above. Any existing uncured glue residue should be scraped away.
Here’s how I ensure the surface is optimally prepared:
- I always start by thoroughly cleaning the wood to remove any contaminants.
- Drying any damp wood is a must, as moisture can severely impact the adhesion process.
- Sanding the wood provides a smooth surface that’s ready for glue application.
The surfaces can then be re-glued with fresh adhesive, ensuring optimal contact this time.
While inconvenient, taking the time to properly prepare surfaces at the start or via corrective action can salvage the joint and result in a bond with maximum strength meeting the woodworker’s intended use.
2. Poor joint design
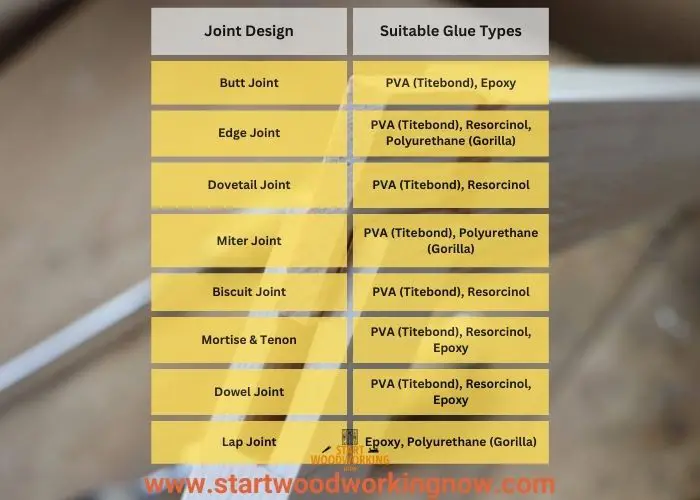
Butt joints with plain end grain contacting are very weak, as end grain soaks up glue without much surface area for bonding. Instead, joints like mortise and tenon, dovetail, or dowel/biscuit joints should be used which help distribute stresses across wider glue surfaces.
For a mortise and tenon, ensure a tight fit with minimal play in the joint. Glue inside the mortise for maximum strength. The tenon should be equal to or greater than the width of the material being joined.
With dovetails, cut joints at least 1/3 the thickness of the material. Wider tails and pins provide more gluing area. Avoid gaps between joints.
When using dowels or biscuits, the holes should be snug on the inserts, not sloppy fits. Place dowels/biscuits close to the edges and ends of joints for reinforcement.
Butt joints with scraps of wood laminated across to reinforce, or edge banding with splines or biscuits, can strengthen plain-grain butt joints if no other joint type is feasible.
Taking joint design into consideration from the start helps distribute stresses evenly across the bond line for reliability.
How to Fix
| Joint Type | Glue Application Method | Amount of Glue Needed |
|---|---|---|
| Butt Joint | Apply glue to both mating surfaces, assemble and clamp. | Glue thickness should be about 1/16-1/8 inch on each surface. |
| Dowel Joint | Apply glue in holes and to one mating surface, insert dowels, assemble and clamp. | Glue thickness in holes should coat sides fully. On surface, apply 1/16-1/8 inch thickness. |
| Biscuit Joint | Apply glue to both mating surfaces, insert biscuits, assemble and clamp. | Glue thickness should be about 1/16-1/8 inch on each surface. |
| Mortise & Tenon | Apply glue inside mortise and on tenon, insert tenon, assemble and clamp. | Glue thickness inside mortise should coat sides fully. On tenon, apply 1/16-1/8 inch thickness. |
| Dovetail Joint | Glue thickness in holes should coat the sides fully. On surface, apply 1/16-1/8 inch thickness. | Glue thickness in spaces should coat sides fully. On surface, apply 1/16-1/8 inch thickness. |
| Lap Joint | Apply glue to both mating surfaces, assemble and clamp. | Glue thickness should be about 1/16-1/8 inch on each surface. |
If the joint has already been assembled with a weak design, it may need to be carefully disassembled. The wood surfaces can then be prepared again as previously described.
Rather than reusing the original poor joint design, the woodworker can modify it by adding strengthening features like:
- Inserting splines, biscuits, or dowels into a butt joint to reinforce across the grain.
- Replacing a butt joint with a mortise and tenon, dovetail or other mechanical joint type if the design allows.
- Laminating thin strips of wood across the joint to distribute stresses.
3. Insufficient clamp pressure
When gluing two pieces of wood together, it is crucial to apply enough clamping pressure to squeeze out excess glue and force the wood surfaces into full contact. Without adequate pressure, voids and gaps can remain.
An even distribution of clamping pressure is the backbone of a solid glue line. Too little pressure leads to weak joints, while too much can squeeze out the glue and starve the joint. Balancing this pressure is key to my successful woodworking outcomes.
Proper pressure allows the glue to be squeezed into all areas of the joint, displacing air and moisture that would otherwise prevent curing. It also helps draw the wood tightly together so it cures in close contact for maximum strength.
How to Fix
| Glue Type | Recommended Clamping Pressure |
|---|---|
| PVA/Titebond | 100-150 psi for softwoods. 125-175 psi for hardwoods. |
| Polyurethane/Gorilla Glue | 150-250 psi for all woods. |
| Resorcinol | 150-250 psi for all woods. |
| Epoxy | 1000-1500 psi. Firm pressure until cured, then release clamps. |
| Cyanoacrylate (CA/Super Glue) | Not typically required; light pressure may be applied. |
Clamps should be positioned as close to the joint as possible for maximum force transfer. Enough clamps must be used to span the entire length of the joint. Test that glue is being forced out around the entire perimeter.
If no squeeze-out occurs, not enough pressure is being applied. Tighten clamps gradually in small increments, checking for squeeze-out each time, until it appears.
Leave clamps in place until the glue reaches its rated working time as specified by the manufacturer. Only then will the joint achieve its full bonding capability.
4. Temperature/humidity issues
For most wood glues like PVA/aliphatic resin glues to set and cure correctly, the wood being bonded and surrounding air must be within certain temperature and humidity ranges.
If the wood is too cold, below around 60°F, it slows the curing process so the glue does not reach full bonding strength before setting up. The same is true for low relative humidity below 30-40%.
High heat over 100°F or humidity over 65% can also cause issues. The glue may cure too quickly before good contact is made, or the wood may swell so the joint no longer fits tightly after curing.
Changes in environmental conditions while curing can introduce weaknesses at the glue line, as wood wants to move with humidity/temperature fluctuations while the cured glue does not.
Woodworkers should control temperature to between 70-80°F and humidity from 40-65% for optimal curing. Heating or cooling wood slowly over several days before gluing helps it acclimatize.
How to Fix
First, disassemble the joint carefully without damaging the wood surfaces. Then, clean off any uncured or partially cured glue residue.
The wood should be acclimatized to the working environment before re-gluing. This can be done by storing it in the gluing area for several days, or using methods like humidifying or dehumidifying as needed.
| Wood Glue Type | Optimal Temperature Range (°F/°C) | Optimal Humidity Range (%RH) |
|---|---|---|
| PVA (Yellow Glue) | 55-75°F (13-24°C) | 40-60%RH |
| Polyurethane Glue | 70-80°F (21-27°C) | 40-70%RH |
| Epoxy Resin | 70-80°F (21-27°C) | Varies; typically not highly sensitive to humidity |
| Hide Glue | 70-75°F (21-24°C) | 40-60%RH |
| Cyanoacrylate (CA) Glue (Super Glue) | 50-77°F (10-25°C) | Low humidity preferred, but not highly critical |
- Lower ambient temperatures: Ensure the workspace is comfortably warm to prevent slow setting times.
- High humidity environments: Slightly reduce the amount of adhesive and work swiftly to avoid moisture-related complications.
- Heat and dry conditions: Increase the amount of glue or use additives to extend open time, monitoring closely for quick set-up times.
Ensure temperature and humidity fall within the recommended ranges for the glue used, between 70-80°F and 40-65% relative humidity. An environmentally controlled chamber provides the best conditions.
Once acclimatized, the joint can be re-glued, applying proper clamping pressure until the glue fully cures this time. Reinforcing the joint with splines, biscuits or dowels may also help.
5. Improper glue application
When applying wood glue, the method and amount used are critical for achieving maximum bond strength. An even coat of glue should be applied to both surfaces of the joint, without globs or puddles. This allows for full contact without excess that could weaken the bond line.
It’s best to apply glue using a high quality glue brush in long, thin strokes along the wood grain. This helps the glue penetrate fully into the pores without leaving air pockets. Alternatively, a fine-toothed spreader produces a smooth, consistent coat.
The correct glue amount is enough to squeeze out slightly from all edges of the joint when clamped. If no squeeze-out occurs, not enough glue was applied. Too much glue risks creating voids that weaken adhesion.
Glue should be applied uniformly to both wood surfaces in full contact area of the joint. Any gaps or inconsistencies risk incomplete bonding.
Finding the right amount of wood glue can feel like an art form. Both paucity and excess can lead to joint strength issues, a challenge I continually strive to perfect to maintain my craftsmanship’s integrity.
How to Fix
First, carefully disassemble the joint without damaging the wood surfaces.
Thoroughly clean off any uncured or partially cured glue residue from both pieces using mineral spirits or denatured alcohol. This ensures a fresh bonding surface.
Once clean, re-apply glue to the joint properly. Use a high-quality brush or spreader to coat both surfaces with an even layer of glue, following the grain direction.
Apply only the correct amount of glue needed for full coverage without excess. Ensure full contact surface bonding when re-assembling the joint.
Use adequate clamping pressure and time to allow for a proper cure this time. The joint may also benefit from reinforcement, such as splines or biscuits, to supplement the glue bond.
6. Glue past shelf life
All wood glues have a finite shelf life listed by manufacturers, usually between 6 months to 2 years from the date of purchase. Beyond this date, the glue’s bonding ability starts to degrade.
This occurs because the glue chemistry slowly breaks down over time when stored. Some glues also react with moisture in the air, hardening in the bottle.
As shelf life is exceeded, the glue takes longer to cure fully. Its viscosity changes, reducing penetration and adhesion to wood. Bubbles or voids may form weakening the bond line.
To check shelf life, note the date on the bottle or carton. Discard any glue past the listed expiration. Changes in color or consistency also indicate degradation.
How to Fix
If a joint fails solely due to using expired glue, it may be possible to repair it. The first step would be to carefully disassemble the joint without damaging the wood.
Thoroughly clean both surfaces to remove any uncured residue from the outdated glue. This can be done with mineral spirits or denatured alcohol to leave clean bonding surfaces.
Purchase a new tube or bottle of the same type of wood glue, checking that it is within its fresh shelf life dating. Apply the fresh glue liberally to both cleaned surfaces following the grain pattern.
Reassemble the joint, applying ample clamping pressure as the new glue cures. The joint may need additional reinforcement, such as splines, biscuits or dowels, to supplement the re-bonded area weakened by the previous glue failure.
7. Wrong glue for the job
There are many types of wood glues suitable for different applications. Using the incorrect glue can cause a joint to fail. For example, aliphatic resin glues are moisture-resistant but less flexible than PVA glues. Epoxies are strong but do not like heat or moisture.
| Wood Type | Glue to Avoid | Reason for Avoidance |
|---|---|---|
| Softwoods (pine) | Epoxy | Epoxy is too rigid and may crack softwood across grain. |
| Hardwoods (oak) | Cyanoacrylate | CA sets too fast to clamp hardwoods before glue sets. |
| Exotic Hardwoods (ebony) | PVA/Titebond | End grains of exotic woods don’t bond well to PVA. |
| Raw/Untreated Wood | Polyurethane | PU needs clean surfaces and may not bond to oils on raw wood. |
| Oily Wood (teak) | PVA/Titebond | Oils inhibit PVA cure, joint would likely fail prematurely. |
| High Moisture Wood | Epoxy | Epoxy requires dry wood and risks osmotic blistering in wet wood. |
| Pressure Treated Wood | Cyanoacrylate | CA doesn’t bond well to chemicals in treated wood surfaces. |
It’s important to select a glue suited to the wood species, joint type, expected stresses and environmental conditions. Tropical hardwoods may require a gap-filling polyurethane rather than a standard PVA. Outdoor furniture needs a waterproof option like resorcinol or epoxy.
If failure occurs due to an unsuitable glue, the joint may still be salvageable with the right adhesive.
How to Fix
Carefully disassemble the joint and clean both surfaces thoroughly. Assess the joint type and intended use to determine the most appropriate glue to rebond it properly.
| Joint Type | Glue to Avoid | Reason for Avoidance |
|---|---|---|
| Butt Joint (end grain) | PVA/Titebond | End grain does not hold PVA well, joint would likely fail. |
| Dovetail Joint | Cyanoacrylate | CA sets too fast to properly align joint before bonding. |
| Lap Joint | Epoxy | Epoxy is too inflexible and brittle for wood movement in a lap joint. |
| Mortise & Tenon | Cyanoacrylate | CA would wick into end grain and prevent a tight fit of tenon. |
| Biscuit Joint | Resorcinol | Resorcinol is too brittle and thick, could prevent proper biscuit insertion. |
| Dowel Joint | Epoxy | Epoxy is difficult to apply in tight dowel holes and risks bond failure. |
| Edge Joint | Polyurethane | Expansion of PU during cure could crack wood along glue line. |
Apply the new glue liberally to achieve full coverage and penetration. Use adequate clamping pressure for the full cure time. The joint could also benefit from reinforcement, such as splines or dowels inserted with the new glue.
8. Joint not flush
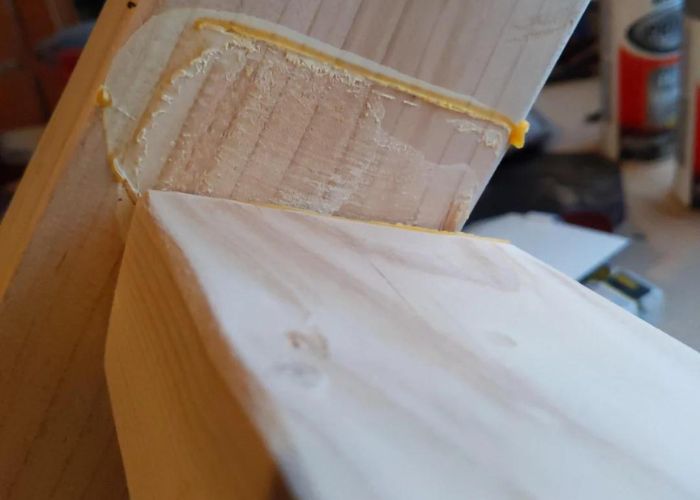
For wood glue to develop maximum adhesive strength, it’s crucial that mating surfaces be held tightly together without gaps once clamped. Any voids or unfilled spaces prevent the glue from forming a continuous, load-bearing bond line.
Common causes of non-flush joints include insufficient joint preparation, errors in layout/cutting, wood with uneven thickness, or joint components with twists or cups that prevent tight mating.
Glue cannot bridge gaps; it will only bond where it makes direct contact with wood fibers on both sides of the joint. Even minute openings severely compromise the joint’s integrity.
How to Fix
To remedy this, first carefully disassemble the joint without damaging surfaces. Then, true up components using hand planes or power tools to remove any errors preventing a tight closure.
Re-glue after applying additional clamping pressure to draw the joint completely closed. Reinforce with splines, biscuits or dowels to add strength.
9. Wood defects
Wood is a natural material that often contains irregularities such as knots, cracks, checks or voids. These defects interfere with a glue bond forming properly.
Knots are areas where branches grew out from the trunk. Glue cannot penetrate the dense, non-porous knotwood like the surrounding grain. Knots create gaps that prevent a solid bond.
Jagged or rough-cut edges might give character to a piece, but they are detrimental to the adhesive’s ability to bond. A smooth, uniform surface is paramount for the glue to fully integrate and form a sturdy union between the wood pieces.
Checks or cracks allow moisture ingress into the joint, keeping it from curing fully. Even sealed cracks may reopen over time, weakening the joint.
Voids are internal pockets within the wood structure where growth has been inhibited. Glue cannot contact wood fibers to bond across such openings.
How to Fix
If a joint fails due to underlying wood defects like knots, cracks or voids, repair is possible with the right approach.
Carefully disassemble the joint to preserve the wood surfaces. Thoroughly clean to remove any uncured glue residue.
Fill all cracks, checks and voids with an epoxy filler. For knots, cut out surrounding wood and reinforce with dowels/splines bonded with thick epoxy.
Sand the repaired areas smooth once filler has cured. This prepares a continuous bonding surface.
Select a high-quality wood glue suitable for the repair, like an epoxy or resorcinol formula. Apply liberally to both prepared surfaces.
Reassemble the joint, applying firm clamping pressure. Consider additional reinforcement like biscuits to supplement weakened areas.
Allow adequate cure time. The joint may not regain full original strength, but following these steps of defect remediation and reinforcement can potentially result in a durable bond.
Tips to ensure strong and lasting glue bonds in woodworking projects
TIP #1. Sanding
- Sand all surfaces to at least 120 grit to create a roughened surface for glue adhesion. Sand with the grain.
- For difficult woods like oak, increase grit to 150-180 for the best bonding.
TIP #2. Cleaning
- Wipe surfaces with a clean, dry cloth to remove all dust before gluing.
- For oily/resinous woods, wipe with denatured alcohol beforehand to degrease.
TIP #3. Glue Selection
- Choose the right glue for the wood types and joint design.
- Epoxies are best for high-stress joints while PVA works well for general carpentry.
Before I embark on any woodworking venture, meticulous adhesive selection is imperative. Here’s how I approach this critical decision:
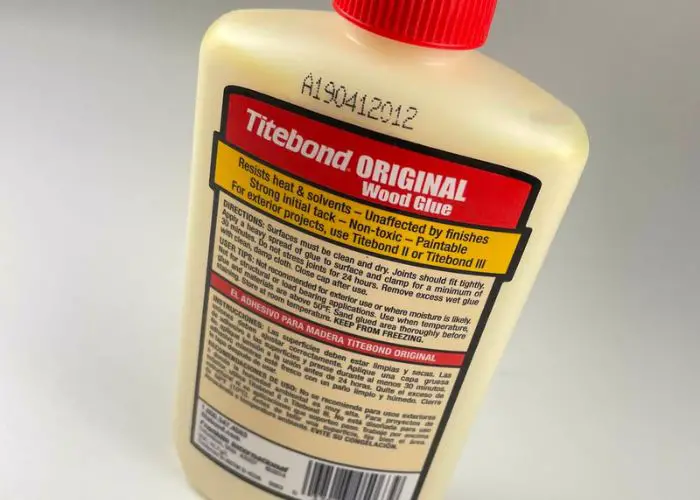
- PVA glue is my default for fine furniture work where the wood is bone-dry and precision in joinery is paramount.
- Polyurethane adhesive is a reliable option for garden projects, ensuring that the fluctuating outdoor humidity won’t compromise the bond.
- Epoxy formulations cater to my restorative tasks, helping me salvage pieces that many would consider beyond repair due to their deteriorated joint conditions.
TIP #4. Correct Glue Application Techniques
Let me share with you the insights I’ve gathered to improve your woodworking skills:
- A thin layer of PVA glue is often sufficient for tight-fitting joints and will ensure flexibility within the bond.
- Uniform distribution across the joinery is crucial; apply glue methodically to avoid dry spots that could compromise the joint’s integrity.
- Adjust the clamping pressure to be firm but not excessive, allowing the glue to properly penetrate and bond the wood fibers.
Keeping a careful eye on the amount of adhesive and its distribution is more than just meticulous work—it’s the difference between a project that lasts and one that falls apart.
| Aspect | Importance | Tips |
|---|---|---|
| Adhesive amount | Crucial for bond strength | Apply enough to cover surfaces without over-saturating |
| Distribution | Prevents weak spots | Spread evenly, paying attention to edges and end-grain |
| Clamping pressure | Enhances penetration | Use consistent pressure across the joint without distorting wood |
| Glue type | Match with materials | Select the glue according to wood type and intended use |
TIP #5. Application
- Apply a thin, even layer of glue to both surfaces.
- Wipe away excess that squeezes out so it doesn’t weaken joints.
TIP #6. Application Techniques for Longer Open Time
To enhance their open time, I recommend colleagues either apply a thicker layer of the fast-setting adhesive or opt for a quicker pace of application where suitable.
For instance, spreading glue with a fine-notched trowel can give us just a bit more time to work. It’s a delicate dance between quantity and timing, requiring a good feel for the materials and the glue’s behavior.
TIP #7. Clamping
- Use enough clamps, placed correctly, to squeeze out excess glue while maintaining tight joints.
- Check for slippage and add clamps as needed while glue dries.
As a woodworker, I cannot underscore enough the importance of allowing the glue to cure without interruption. It’s tempting to dismantle the clamps and see your work come to fruition, but giving the adhesive its required time is non-negotiable for a bond that stands the test of time.
| Adhesive Type | Curing Time | Clamping Pressure |
|---|---|---|
| PVA Glue | 18-24 hours | Consistent |
| Epoxy | 6-24 hours | Heavy |
| Polyurethane Glue | 24 hours | Moderate |
| Cyanoacrylate | 20-60 seconds | Light |
TIP #9. Setting
- Allow sufficient open/setting time per glue instructions before moving pieces.
- Control temperature/humidity during curing for optimal strength development.
In summary, successful woodworking with quick-setting adhesives involves proactive measures to extend working time and careful environment control. By doing so, my projects tend to have a more reliable and satisfying outcome. I trust that these insights will be beneficial to fellow woodworkers facing similar challenges with fast-setting glue issues.
FAQs
To prevent adhesive failure, make sure all surfaces are clean, dry, and free of any oils or residues. Rough surfaces should be smoothed, and any old adhesive must be removed. It is crucial to follow the surface pre-treatment required by the type of adhesive you’re using and give the glue enough curing time to achieve maximum bond strength.
Achieving strong wood joints involves applying the right amount of glue, ensuring an even distribution, and using the correct clamping pressure. It is significant to use a glue type that is appropriate for the materials, ensuring tight-fitting joints and removing excess glue before it sets.
Common glue failures include joint creep, where bonded joints slowly move or deflect under stress; joint failure, which results in the separation of bonded wood pieces; and glue line failure, where the glue bond itself becomes faulty and often visible, compromising both the structure and the aesthetics of the project.