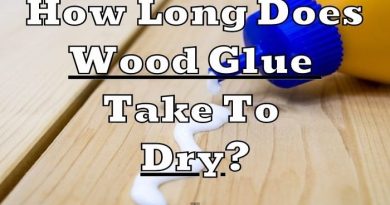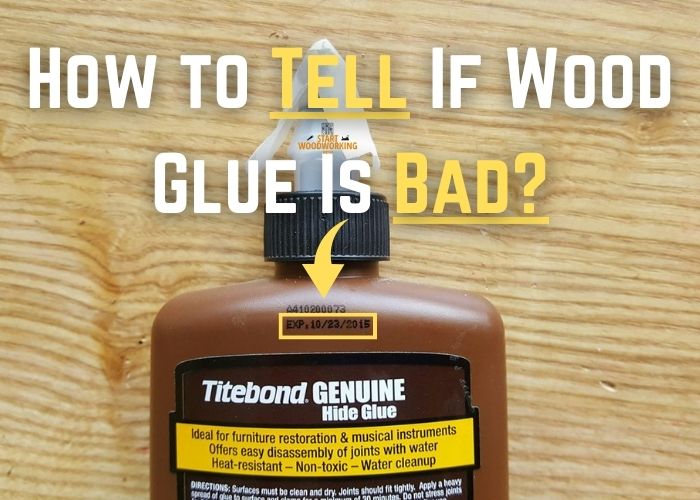
Is Your Wood Glue Bad? Check for Signs Now!
As a professional woodworker, I know how important it is to use good quality wood glue. But how do you know if the glue you have is still good? Would you recognize the signs if your ineffective adhesive had lost its bonding power?
How to Tell If Wood Glue Is Bad
- Inspect the Physical Appearance – Bad glue will often look thicker and more viscous than fresh glue. It may be lumpy, stringy, or separated. Discoloration is also common.
- Check the Consistency – Fresh glue should be thin and smooth, able to be squeezed out or brushed on easily. Stiff, thick glue that won’t come out smoothly is a red flag.
- Smell Test – Put your nose right up to the bottle opening. Stale, sour, chemical smells indicate degradation of the formula over time.
- Conduct a Water Test – Add a drop of fresh water to the glue. Fresh glue will mix in smoothly. Bad glue may resist mixing or separation may occur.
- Perform a Bond Strength Test – Glue up two scraps and check the joint after 24 hours. Weak or no bonding shows diminished adhesive properties.
- Look at the Expiration Date – Most glues only last 1-2 years once opened. Refer to the date on the bottle for age.
- Consider Storage History – Glue stored in extreme cold/heat, dampness won’t last as long as in climate-controlled areas.
1. Inspect the Physical Appearance
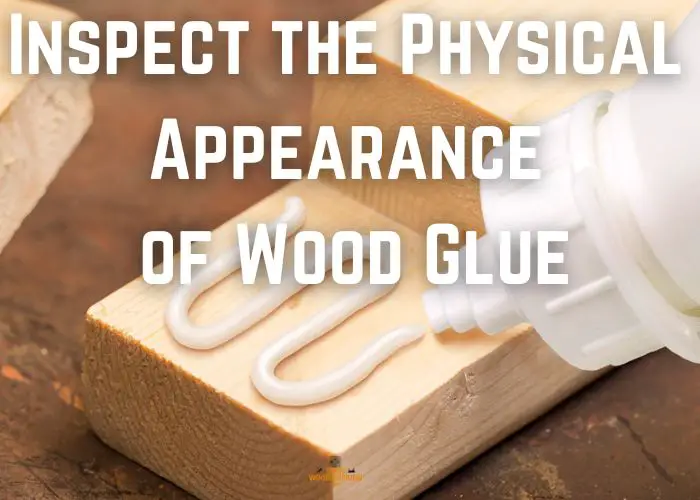
Start by holding the glue container up to a light source. Tilt it from side to side and look for any separation of colors or particles within. Fresh glue will appear uniform when backlit, while expired glue may show striations.
| Physical Appearance | Good Wood Glue | Bad Wood Glue |
|---|---|---|
| Color | Clear/white/colorless | Yellowed, brownish or gray tint |
| Texture | Smooth and glossy | Dull, semi-matte finish |
| Container walls | Leaves walls clean when swirled | May stain or cling to walls |
| Clumping | Remains uniformly mixed | May separate or form clumps |
| Container appearance | Clear to see through | Cloudy, may distort view |
| Drying | Dries evenly without distortion | May have thicker edges or bubbles |
| Discoloration | Maintains consistent color | Spots, flecks or swirls present |
Inspect the container walls closely. Fresh glue will leave the sides looking clean and clear. Dried-out glue could stain or leave streaks of residue clinging to the plastic.
Check for any changes in transparency. Fresh glue lets light pass through with little diffusion. Stale glue may look cloudy or distort objects seen through it.
Examine the glue surface directly. Fresh glue will look smooth and glossy. As glue dries out over time, the surface takes on a dull, semi-matte sheen with subtle variations.
Look for signs of uneven drying like thicker edges or a raised bubble pattern. Fresh glue dries evenly without distortion.
Pay attention to any spots, flecks or swirls of discoloration against the normal hue of the glue. Fresher glue maintains a consistent color.
2. Check the Consistency
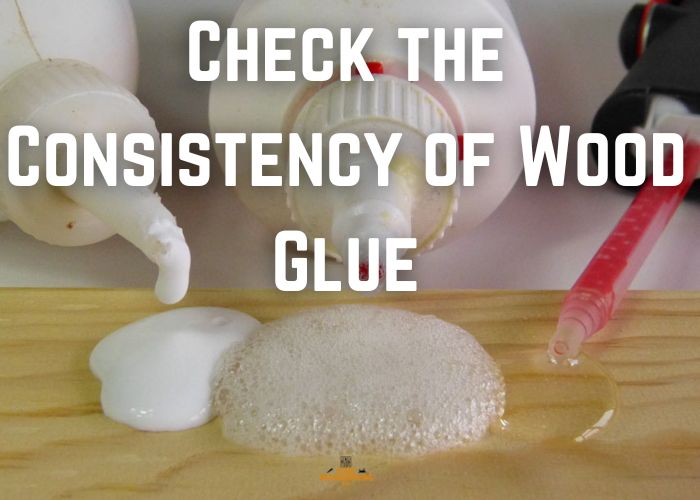
Begin by unscrewing the cap/lid and smelling the glue. This allows you to notice any odd odors before touching.
Use the tip of a finger or a clean stir stick to scoop up a small amount from the center of the container. Fresh glue should adhere smoothly and come off the tool easily.
Roll the sample between your fingers. Fresh glue has a buttery, pliable texture that forms a thin, transparent layer. Stiff glue may crack or peel up in patches.
Form the sample into a small ball and gently flatten it. Fresh glue will spread out smoothly like thick paint. Stiff glue will crack or resist flattening.
Try stirring the glue directly in the container. Fresh glue incorporates air easily, while stale glue can appear ropy or stubbornly maintain clumps.
Apply pressure with your finger and observe how the sample reacts. Fresh glue compresses then slowly springs back without leaving a residue. Hardened glue may crack or remain indented.
Check for signs of bubbling if the sample is laid on a non-porous surface like your nail or a table. Air pockets indicate degraded elasticity.
3. Smell Test the Glue
Describe any scents – is it subtle like fresh glue, or stronger/more pungent? Fresh glue has a mild, inoffensive smell or no smell at all.
Uncap the container and take a deep whiff with your nose just above the opening. This helps you concentrate volatile organic compounds in the fumes.
Be aware that expired glue may smell sour, acrid, or chemical-like as preservatives break down. It could resemble old paint, varnish, or solvent odors.
Fresh glue has a neutral fragrance. Stale glue odors tend to linger and become stronger the longer you inhale.
Try fanning air into the container with your hand. Does the smell intensify noticeably? Weaker scents suggest fresher glue.
Compare the odor to a new tube if available. Subtle differences could mean the glue is nearing the end of its shelf life. More pronounced divergences indicate advanced degradation.
Document any smells detected. Referring to written smell descriptions helps you recall the test over time. The nose knows, so pay attention to what yours detects!
| Smell Test | Good Wood Glue | Bad Wood Glue |
|---|---|---|
| Unopened container | Subtle smell or no smell at all | Stronger or more pungent smell |
| Opened container | Neutral or mild fragrance | Sour, acrid, or chemical-like smell |
| Intensity | Weaker, non-lingering scent | Stronger scent that lingers |
| Comparison to new glue | Subtle difference, if any | More pronounced difference |
4. Conduct a Water Test
Scoop out a 1/4 teaspoon of glue and place it in the water. Fresh glue will immediately start dissolving and dispersing into the water.
Gently stir to see how easily it mixes. Fresh glue blends smoothly without lumps or separation. Bad glue may resist blending or remain viscous.
Check for any precipitates, flecks or blobs that don’t fully incorporate. These indicate the emulsion has broken down over time.
Tilt the container and observe how the glue/water mixture coats the sides as it settles. Fresh glue makes a uniform, transparent solution. Stale glue solutions may look cloudy.
Let it sit undisturbed for a minute. Fresh glue mixtures remain blended. Bad glue could separate into distinct layers of liquid and solids.
Swirl the container and see if it easily re-emulsifies into a homogenous solution. Fresh glue reincorporates fully. Stale glue may leave residue or flecks behind.
Discard the water properly when finished. The test lets you witness how the glue interacts with a polar liquid on a microscopic level. Take notes!
| Water Test | Good Wood Glue | Bad Wood Glue |
|---|---|---|
| Dissolving in water | Immediately starts dissolving | May resist blending |
| Mixing | Blends smoothly without lumps | Could remain viscous or have lumps |
| Precipitates | None – fully incorporates | May have flecks or blobs that don’t mix |
| Coating sides of container | Makes uniform, transparent solution | Solution may look cloudy |
| Settling | Remains blended | May separate into layers |
| Re-emulsifying | Easily reincorporates into solution | May leave residue or flecks behind |
5. Try a Bond Strength Test
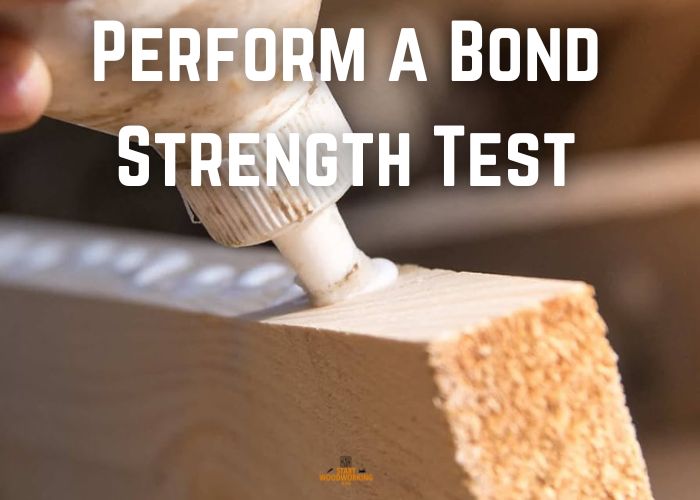
To conduct a bonding test, gather two scrap wood pieces about 1″ thick by 3″ wide. Sand both surfaces smoothly with 150 grit sandpaper.
Apply a thin, even layer of glue to one surface using a disposable brush or wood glue applicator. Spread from the center outwards to remove air bubbles.
Press the glued surface firmly onto the untreated piece within the working time listed for the glue. Clamp with consistent 40-50 psi pressure.
Inspect the glue squeeze-out and make sure it’s present all around the seam in a smooth bead. Uneven or missing squeeze-out hints at application issues.
Let the bonded samples dry fully, about 24 hours. Fresh glue requires the full cure time to develop maximum strength.
Remove the clamps and inspect the bond line closely. Fresh glue leaves a very thin, nearly invisible seam. Gaps suggest weak bonding.
Try carefully twisting or prying the pieces apart. Fresh glue resists separation, possibly even breaking the wood first. Weak glue allows delamination.
If it separates, examine the failure mode. Fresh glue tends to leave some adhered to both pieces. Bad glue separates cleanly at the bond line.
| Bond Strength Test | Good Wood Glue | Bad Wood Glue |
|---|---|---|
| Glue squeeze-out | Present all around in smooth bead | May be uneven or missing in spots |
| Bond line visibility | Very thin, nearly invisible seam | May have visible gaps |
| Bond strength | Resists twisting/prying, may break wood first | Allows delamination or separation |
| Failure mode | May leave some glue on both pieces | Separates cleanly at bond line |
Remember, a compromised glue not only affects the durability of your projects but also potentially wastes your time and materials.
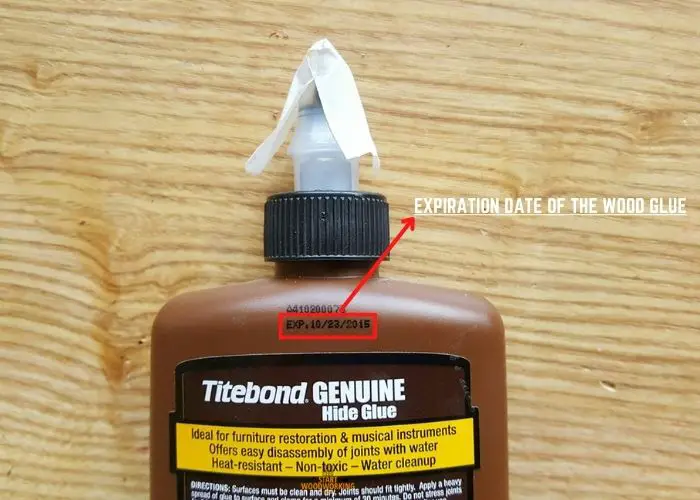
6. Look at the Expiration Date
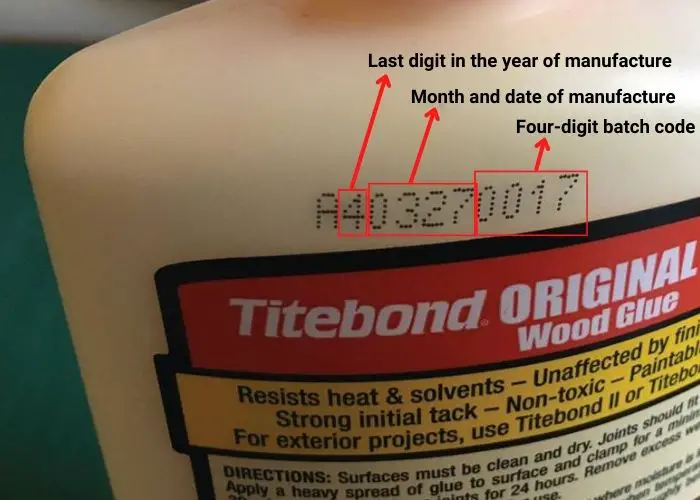
Inspect the date closely under good lighting. Make sure it is clearly legible and not smeared, faded or difficult to read due to the age/wear of the printing. An illegible date is a red flag.
Check the date format for clarity. Most glues use month-year (e.g. 10/2023) or year-month (e.g. 2023-10) to avoid ambiguity. Note the format to properly interpret the date.
Compare the expiration date to today’s date. Calculate the time elapsed in months or years, taking into account any partial months. Most PVA glues last 12-18 months before degrading.
Consider any temperature fluctuations the glue may have experienced during its lifetime that could affect shelf life. Higher heat reduces glue lifespan.
Note if the date is a firm expiration or a “best by/use by” quality date when properties begin changing, as many glues specify the latter.
Practical Tips for Extending the Life of Your Wood Glue
Here’s my personal routine for keeping glues in top shape:
- Store glue bottles in a cool, dark place like a basement or cabinet, away from direct heat and sunlight which can degrade the glue faster.
- Refrigerate glue for maximum shelf life extension. The cool temperatures slow chemical reactions that cause glue to expire.
- Always seal the cap tightly after use. Leaving it open allows moisture to enter and degrade the glue over time.
- Scrape out excess glue from the tip after applying and return it to the bottle. This minimizes wasted glue left exposed to air.
- Consider transferring glue to smaller sealed containers for projects where only small amounts are needed. Less oxygen contact preserves the unused portion.
- Clearly label glue bottles with the opening date so you know how old it is getting. Most glues last 12-18 months before properties degrade.
- Perform regular bonding tests on older glue to check performance. Glue that still bonds well can continue being used.
- Donate partially used but still viable glue bottles to a local school shop class or makerspace to extend the product lifespan.
- Purchase glue in smaller quantities so it gets used before expiring. Large containers increase risk of glue drying out before it’s fully consumed.
| Storage Tip | Benefit |
|---|---|
| Temperature Control | Prevents premature spoilage |
| Air-tight Sealing | Keeps out moisture and air |
| Upright Positioning | Ensures even dispersion and prevents clogging |
| Shielding from Extreme Temperature | Helps maintain consistent viscosity |
| Minimal Water Addition | Thins out thickened glue without compromising bond strength |
Analyzing Titebond’s Quality Guarantees
My investigation into Titebond’s quality claims reveals that these adhesives are designed to maintain their performance for years, with a caveat.
Titebond emphasizes that their varieties, including Titebond Original, Titebond II, and Titebond III, are expected to deliver optimal results within this timeframe, provided they remain in a fluid state with no alarming alterations in appearance.
In my experience, following the adhesive manufacturer guidelines is essential for ensuring reliability and achieving the best outcomes in woodworking projects.
Debunking Myths Around Glue Expiration
One of the prevalent glue shelf life myths suggests that the life of a glue is only as long as the expiration date printed on the container. In my experience, this is not necessarily true.
Several high-quality PVA glues and polyurethane adhesives possess incredible staying power and can perform well past their printed dates, provided their storage conditions have been optimal. It’s not uncommon for users to discard products prematurely based on a date alone—a practice that results in unnecessary waste and additional expense.
Conclusion
In my experience with woodworking, I’ve learned the importance of assessing wood glue usability before diving into a project.
When the integrity of my work hinges on the strength of my chosen PVA or polyurethane adhesive, I pay close attention to its consistency, color, and any off smells. The moment I spot clumping, stringiness, or discoloration, I make the call to let it go and grab a fresh bottle.
FAQs
A gallon of PVA glue like Titebond Original, Titebond II, and Titebond III typically has a shelf life of about one year after opening. However, it may remain usable for longer if stored properly at room temperature.
Yes, temperature fluctuations can impact the consistency and effectiveness of adhesives. PVA glues, including yellow and white PVA glues and polyurethane glues, should be stored at stable room temperatures to maintain longevity.
Deterioration signs in PVA glues include excessive thickening, difficultly in spreading, and the development of lumps. These alterations suggest a compromise in the adhesive’s strength and workability.
Trust your wood glue if it maintains a consistent fluidity, color, and has no off-putting smell. If the glue shows clumping, stringiness, or drastic discoloration, it’s an indication that the glue is no longer trustworthy for woodworking projects.