How to Waterproof Outdoor Wood [Fast and Effectively]
If wood is untreated, it is very susceptible to moisture and water damage. It is therefore important to protect wood in such a way that it is not only waterproof, but also significantly extends its lifespan. In this article you will learn how to waterproof outdoor wood and which different methods are best suitable.
This waterproofing wood tutorial will show you step by step how to protect the outdoor wood with a sealant and then varnish it to give it a long lasting waterproof finish.
How to Waterproof Outdoor Wood Step by Step
Step 1: Gather the necessary materials
To waterproof outdoor wood, you will only need three materials: sealant, varnish and sandpaper.
Step 2: Clean and sand the wood
Start by cleaning the wood with a soft, damp cloth. Sand the wood to remove the old varnish or coating and remove any accumulation of surface dirt or dust. Also, sanding ensures that the wood surface is rough, which will make the sealant and varnish stick better.
Step 3: Apply sealant to waterproof outdoor wood
Apply sealant all over the outdoor wood to make it waterproof and let it dry.
Step 4: Sand the outdoor wood again
After the sealant dries, sand the outdoor wood again so that the varnish penetrates better when applied.
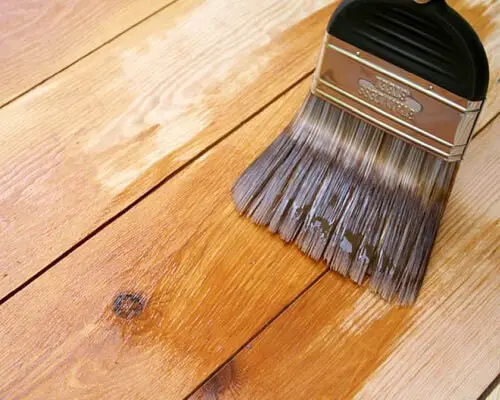
Step 5: Apply the first coat of varnish
To start with, apply a thin coat of varnish. Use regular and continuous movements when spraying the varnish on the wood to ensure a smooth layer. Avoid spraying more than once on the same spot as this will cause an uneven finish. Another tip is to spray from further away first.
Step 6: Let it dry
Wait for the varnish to dry completely before applying another coat.
Step 7: Apply more protective layers
Generally you need to apply at least three coats of varnish to waterproof the outdoor wood and ensure that it lasts for a long time. Allow the varnish to dry completely before applying each coat.
| Products to waterproof wood | Description |
| 1. Oil | It is also common to find oil options for waterproofing wood. Linseed, tung oil and walnut oils are the most used to do this procedure. It is worth noting that the oil is only suitable for small projects , so when considering larger renovations, varnish and waterproofing options are more suitable; |
| 2. Varnish | The product is mainly indicated for treating exposed(outdoor) wood . It is worth noting that in order not to affect the color of the wood, it is important to buy a clear varnish . To carry out the waterproofing process with the varnish, it is necessary to buy the oil-based product, brushes and sandpaper; |
| 3. Sealants | Is the most suitable material for treating all types of wood . It was developed for this purpose, it penetrates very easily into the base of the wood, even in those that have already had some previous finish. The ideal waterproofing should be water-based |
How to Waterproof Wood for Outdoor
| Methods of Waterproofing Outdoor Wood |
|---|
| 1. Using Oil |
| 2. With Varnish |
| 3. With Sealant |
| 4. Using Epoxy |
There are many ways to make wood waterproof. Depending on how completely waterproof your wood needs to be after treatment, we will show you three 4 methods how to waterproof outdoor wood against moisture.
Depending on the type of method you want to use to waterproof outdoor wood you need to following things:
- a nylon sheet to protect the worktop
- a clean, soft, non-hairy rag
- 120 and 180/220 grit sandpaper
- wood filler in the color of the wood to be treated
- a small spatula
- colorless water-based varnish for wood
- a flat-shaped brush for water-based sealants
- a jar for water
- a stick to mix the products
- a container to rest the brush during breaks
- work gloves and suitable clothing
Method 1: How to Waterproof Outdoor Wood using Oil
For the care of furniture with oils, linseed oil, walnut and tung oil have established themselves. While tung oil is somewhat more expensive and is therefore mainly used for small areas, linseed oil can be bought from hardware stores.
With raw linseed oil from the grocery store, on the other hand, the kitchen worktop can easily be coated and made waterproof. It is advisable to maintain the furniture with oil , especially for smaller projects .
Step 1: Mix the oil with turpentine and apple cider vinegar
It is true that the oil already offers protection and makes it waterproof when applied on its own. However, the wood is optimally waterproof if turpentine oil and apple cider vinegar are also added.
The mixing ratio is very simple: oil (linseed oil, walnut or tung oil) and turpentine oil in the same amount and then half the amount of apple cider vinegar.
Step 2: Prepare of the outdoor wood
If any wood irregularities are still visible, these should be removed with sandpaper until the wood surface appears even. Rough wood surfaces will become visibly apparent and unsightly when you are done oiling so this step is important .
When the roughest is done, the entire surface should be worked with very fine sandpaper (grain 220) so that the oil can be optimally absorbed by the surface.
After wiping the entire area with a dry cloth, the oil can be applied.
Step 3: Apply several layers of oil until the outdoor wood is waterproof
The oil can now be applied using a lint-free cloth or a bristle brush. Dip a soft bristle brush into the oil (either the mixture or plain oil) and apply completely around the wood leaving no untouched surfaces or edges.
When applying the mixture with turpentine oil, it is important to put on thick rubber gloves.
The oil should not be poured directly onto the wood surface, but onto the cloth and then distributed evenly on the wood in the direction of the grain from the inside out. Let the wood absorb the oil again, and then wipe off any oil residue with a clean, dry rag.
Wait for the outdoor wood to dry. Oil blends dry faster than individual oils. Drying time can take a couple of hours or even half a day if you use just one oil. Once you’ve allowed the wood to dry, you can reapply the oil to the dry wood surface if you have more to ensure it’s well finished and waterproofed.
Step 4: Sand the wood
After the surface has hardened for 24 hours, it can be sanded with very fine steel wool.
Then repeat the procedure again from the beginning, since a total of either two or three oil layers are necessary to make the wood waterproof.
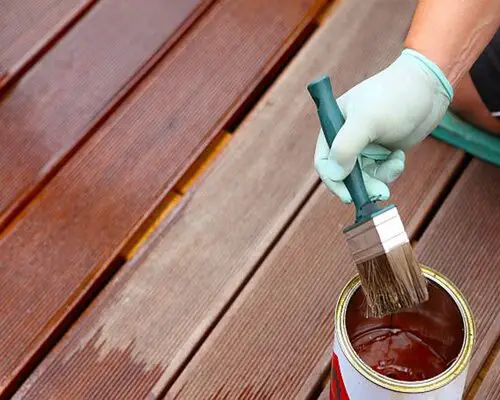
Method 2: How to Waterproof Outdoor Wood using Wood Sealants
Another way to waterproof wood and to maintain it at the same time is to apply water-based sealer. Water-based wood sealers are ideal for protecting and maintaining the wood surface.
The sealing layer must be applied particularly evenly to the wood surface. Before starting, it is also advisable to read the manufacturer’s instructions for the selected product carefully, as the humidity and ambient temperature are very important.
You can apply the sealer by spraying or using a brush . Let dry once the application is finished. Then apply two more times to ensure your wood is well protected from water.
In order for the wood to be waterproof, multiple treatments are necessary, even with sealers.
For optimal results follow the steps below:
- Sand the wood surface to smooth edges. This will allow for the wood surface to have a nice and smooth visual appearance.
- Dip a soft bristle brush into the sealant and apply completely around the wood leaving no untouched surfaces or edges.
- Let the outdoor wood soak up the wood sealer, this will allow you to identify any untouched areas.
- Reapply the wood stain if you have identified untouched wood areas or edges.
- Let the wood absorb the sealer again, and then wipe off any sealer residue with a clean, dry rag.
- Let the wood dry. Sealer blends dry faster than individual oils. Drying time can take a couple of hours or even half a day if you use just one oil.
- Once you’ve allowed the wood to dry, you can reapply the sealer to the dry wood surface if you have more to ensure it’s well finished and waterproofed.
- You are on the safe side if you apply two coats of sealant. Now the wood has to harden for several days before it can be used.
How effective the sealant is depends on the preparatory work. Here you should make sure that the surface is as clean as possible before applying it to the wood.
It is also important to observe the drying time specified by the manufacturer however, it is usually less than 24 hours. If the wood is well dried, it is treated with a very fine steel wool and cleaned.
This allows the second layer, which is then applied, to adhere better. However, a single coat of wood sealer is sufficient for many hardwoods, while softwoods can withstand up to three layers.
If the property is exposed to particularly strong weather conditions, sealing for ship wood is advisable. In contrast to the treatment with oils, no rag is required for application, but either a paint spray gun or a paint brush.
Tips for Waterproofing Outdoor Wood using Sealants
- It is important that the layer is applied evenly. It is also important to read the product information carefully, as the correct ambient temperature or humidity can be particularly important. Ideally, work is carried out in a controlled environment such as a workshop or garage, where no huge temperature fluctuations.
- The quality of the sealant is largely determined by the preparatory work. It is important to ensure that the wood surface is clean before application. The drying times vary depending on the selected sealing product. In general, however, the drying time required is significantly shorter compared to waterproofing with oils.
- After the object has dried sufficiently, it can be cleaned with very fine steel wool, which improves the adhesion of the second layer.
- Anyone who wants to be absolutely on the safe side is well advised to apply at least two coats regardless of the type of wood. After this process has also been completed, you have to wait. For the best result, the wooden furniture is now cured for several days before it is used.
Method 3: How to Waterproof Outdoor Wood with Stain
In order to optimally protect wood from water, it should be an oil-based stain. However, it is important to clarify in advance whether you want to use the wood inside or outside. Because the lighter the stain, the more oil it contains and the better it is also suitable for use in the home.
List of materials required:
- Sandpaper (grain: 80-120) optionally with bench grinder or grinder
- Matching brush
- Wood stain
- Wood primer
- Masking tape (optional)
1. Check and prepare the wood surface
How good the result will be depends on how well you prepare the wood for it. Damage or uneven areas in the wood should definitely be repaired in advance. Ideally, you work with coarse sandpaper to smooth the material.
Check that the wood is dust-free and dry. Remove old paint and thick-layer glazes. Sand the wood to get the best possible hold.
2. Apply impregnation if necessary
For previously untreated wood, we recommend special wood care for outdoor use. A wood stain penetrates deep into the wood and protects and cares for it from the inside.
It is well known that wood must be treated adequately as it is a very delicate material that can easily be damaged when faced with external agents. Wood waterproofing products can be clear or tinted. Light shapes show off the natural beauty of the wood, but stained blends with natural wood tones can offset any loss of color as the wood ages.
On the market, there are products like impregnating’s wood stains that, if used on wood, make it resistant to any external substance and waterproof.
In addition to creating a protective film, they penetrate inside the wood, filling all the cracks and making every single fiber of it permeable.
So that areas that are not to be painted remain protected you may need to mask off adjacent areas.
3. Apply wood stain with a stain brush
When applying wood stain, make sure you brush along the wood grain and distribute the wood protection evenly.
The wood stain can then be applied one after the other in even layers and should soak in for a few hours. Now work with fine sandpaper with 220 grit and wipe off any residue from the surface with a dry cloth.
Once the last layer of stain has been applied, the wood must fully cure for three to four days until it is completely waterproof, only then can it be used as intended.
4. Wait the necessary drying time
The drying times for most products are in the range of a few hours. You should also make sure that no moisture gets onto the wood during the drying phase to ensure even drying.
Depending on the temperature in the room and the thickness of the applied stain layer, the drying time can vary. However, the outdoor wood should be given more than four hours so that it can dry sufficiently. If you want to be sure here too, it is better to wait a little longer before applying the second layer to the wood.
Those who want to be on the safe side here, too, prefer to wait longer. Before the second layer is applied to the furniture, the surface should first be treated with very fine sandpaper or steel wool and then cleaned again with a dry cloth.
This shows that if treated correctly, wood can be very well protected against water damage. It is important to waterproof outdoor wood at regular intervals so you can enjoy your wooden furniture in the long term.
How to Waterproof Outdoor Wood using Epoxy
Epoxy can give wood a water resistant finish. In most cases, it is an ideal coating for outdoor wood projects that will be exposed to moisture or wear and tear.
While epoxy sealing will add a little more time to this phase of your project, the extra effort will pay off in increased longevity and lower maintenance costs.
Here is how to waterproof wood using epoxy:
- Sand the outdoor wood surface. The surface must be smooth and free of rough spots, grooves or voids.
- Remove all dust from the wood with an adhesive cloth. Any residue left on the wood surface at this point will become permanently bonded to the surface when the epoxy is applied.
- Place newspapers or a cloth under the wood surface. Epoxy is very difficult to remove from almost all surfaces.
- Pour the epoxy resin and hardener into a clean coffee can.
- Stir slowly and carefully with a paint stick.
- Apply epoxy to the outdoor wood surface with a bristle brush to waterproof it.
- Work from the middle of the wood surface towards the edges. Always work from wet to dry areas.
- Check for blemishes or dry spots when painting. Porous woods can absorb a considerable amount of epoxy as you work.
- Look for a consistent coating.
- Let the outdoor wood cure for 24 hours in a dust-free room.
How to waterproof outdoor wood at home
Waterproofing wood for outdoor use is an important part of garden maintenance. Whether it’s fencing or seating, this is a pretty straightforward job once you know how to do it.
These are the most important things you need to know about how to waterproof pine wood for exteriors and how to waterproof wood for bathrooms and other areas with humidity:
1. Prepare the surface before you begin. This involves giving it a good cleaning and waiting for the wood to dry.
2. Buy a good quality water-based wood sealer. These can be found at large hardware stores.
3. Apply the sealer to the wood, evenly with a soft bristle brush.
4. Let it dry and evaluate the effect. You can go through more layers depending on how waterproof you want your outdoor wood to be. I always followed the instructions on the back of the package. If so, repeat the steps another two or three times.
Water Resistant Woods
| Water Resistant Woods | Description |
|---|---|
| 1. Teak | Teak wood contains a large amount of essential oils, which are a kind of natural waterproof. Teak has long been used in shipbuilding. Also today teak board is used in the manufacture of, for example, outdoor (garden) furniture. All these facts indicate that teak is the most moisture-resistant(waterproof) wood. |
| 2. Ipe wood | Ipe wood is second type of wood on our list when it comes to waterproof (moisture resistance). It also has high weather resistance and high durability. |
| 3.Iroko wood | Wood with benefits similar to teak but cheaper. Iroko wood is an inexpensive, water resistant wood without many apparent benefits. |
| 4. Pine | Mainly originating in Europe, pine is a moderately dense wood but which is easy to work with and which is perfectly resistant to fresh water or sea water. |
| 5. Elm wood | It is one of the most durable water resistant woods, it can last submerged for years in fresh or salt water and stay without problems. |
| 6. Cedar | One of the common type of woods but still resistant to contact with moisture and water; This, of course, must be treated with certain protective paints and varnishes, but once prepared it does not generate any kind of inconvenience |
How to Waterproof Outdoor Wood: More Tips
Here are more tips for you to put into practice when waterproofing wood for the different environments in your home:
- Clean your wood before waterproofing it; otherwise they will be blocked by dirt.
- If you need to remove paint from the wood, do so before you begin waterproofing the exterior wood.
- After waterproofing the wood, it takes a while for the process to take effect, so you should factor time into your project plan.
- People often ask if the wood can be sealed with oil. The answer is generally yes, but it is important to use a product designed for this, not just use homemade solutions.
- After you waterproof your wood, clean your surfaces and floors frequently to maintain their shine.
Why Waterproof Wood?
Wood is naturally protected by its bark. Due to its nature, it forms a unique protective layer that protects the tree from drying out, UV rays and insects.
With further processing the tree loses its bark and with it this important protective layer. By impregnating the wood, you make it weatherproof, water-repellent, protect it from insects and give it a high level of UV protection.
Moisture is the most serious problem that your woods can have. Once the moisture has reached the inside of the wood, it swells up and can tear. In addition, perfect conditions are created for mold and fungus to grow.
The best precaution is constructive wood protection : by waterproofing the wood, you prevent water and moisture from getting inside. If there have already been mold stains, you can find more information in our article “ How to remove mold stains from wood! “
Wood waterproofing is almost equally important for furniture that you have indoors or in the outdoors (garden). Garden furniture and wood, for example in the form of fences, floor coverings or windows, should be impregnated more often to ensure constant wood protection.
Conclusion
In this article we have presented you different methods how to waterproof wood. To choose the best method, you should consider what type of location the wood will be in, after all, some products are better suited for indoors and others for outdoors. Also, some products work better for light colored wood, while others are better suited for dark wood.
Wood can withstand a lot, but you should protect it, especially outdoors, to extend its durability. Moisture in particular damages wood in several ways. Waterproofing wood is one of the most sustainable, environmentally friendly and maintenance-free ways to protect wood for a long time.
The wood waterproofing process is important to prevent infiltration, fungi and wear from direct exposure to the sun. When not waterproofed, wood absorbs moisture and ends up warping and deforming and even deteriorating to the point of rotting. Waterproofing makes the wood last longer because it forms a surface coating that repels water.
Frequently Asked Questions
How much does it cost to waterproof wood?
Surely, as you may have guessed, the cheapest method is the one that involves the use of impregnating paints. The waterproofing costs depend on the surface to be worked and the conditions in which it is found.
How to waterproof wooden furniture?
Varnish is a waterproofing product for wooden worktops . In order to reinforce the wood ‘s resistance to water, it is advisable to apply a pore filler primer beforehand. This product reinforces the benefits of your waterproofing wood varnish . Thus, your wood is waterproof.
Which waterproof products to choose?
There are different products capable of protecting wood, but it can be considered that products operating by impregnation such as oils or sealants will provide, at least over time, more effective protection than products that deposit a film simply on the surface, such as varnishes or wood stains.
Tinted or clear, they effectively protect against rain and UV rays. They must be applied in several layers to obtain lasting protection.
Is the oil finish enough to waterproof the wood?
While using oils such as linseed or tung oil will give wooden surfaces a natural finish and protect them from water absorption, they are not as effective as using sealant and varnish. The oils don’t last long and need to be reapplied every couple of months.
What is the difference between water resistant and waterproof woods?
The main difference between water-resistant and waterproof wood is the amount of water exposure it can withstand. Water resistance offers limited protection, which means it will protect wood surfaces from small spills if cleaned immediately. In comparison, waterproofing creates a surface that prevents water from penetrating the wood.
Therefore, waterproofing is ideal for outdoor porches or decks that have prolonged contact with water. Water-resistant finishes are sufficient for areas with limited exposure to water, such as bathroom cabinets, kitchen counters, and used furniture in the living room or dining room.