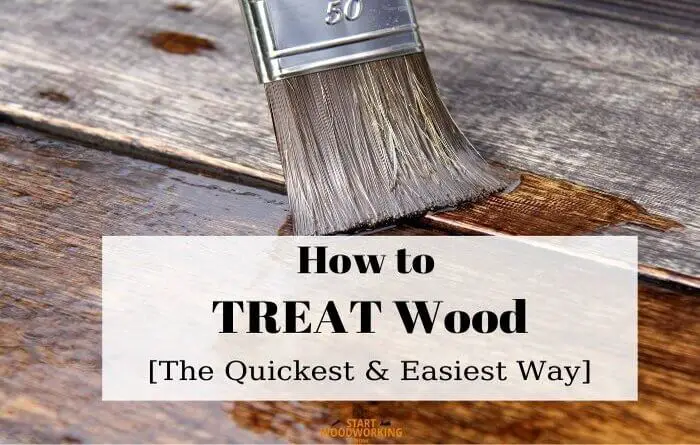
How to Treat Wood [The Quickest & Easiest Way]
In this article we show you how to treat wood. In addition, we show the different products that we can apply to treat wood such as wax, oil or varnishes.
Why does wood need to be treated?
Before knowing the best practices on how to treat and protect wood , let’s try to find out which are the particularly damaging factors that damage it the most.
Here are the main degrading factors of wood:
- Sun rays : the sun acts negatively both in terms of heat and ultraviolet rays; in the first case the heat weakens the bonds of the lignin and favors the detachment of the fibers, on the other in a short time it attacks the surface generating a whitening of color.
- Water and humidity : rain, snow, frost cause a high level of humidity. Humidity in general is very dangerous for wood because it can cause fungi, molds, which lead to the maceration of the substance. The presence of water is a very harmful factor because it affects the technical and deep structure of the structure.
- Insect attack : known mainly as “woodworms” which are often found already present in larval form on imported woods.
Once we know the factors from which we must treat our wood, let’s try to understand what we must do and what steps to follow to treat it.
This article I wrote you help you remove mold or fungi from the wood in a easy way!
| Paint | Glaze | Oil | |
| Features | Opaque paint Many colors available | Natural, invisible protection The grain is retained Use thick layer glaze for dimensionally accurate parts | Protection against graying, drying out, cracking Refreshing the colors Long durability |
| Applications | Furniture (acrylic paint) Window (synthetic resin paint) Toys (special low-solvent paint) | Garden houses Fences, privacy screens Raised beds Windows and doors (thick layer glaze) Carports | Decking Wooden furniture, garden furniture |
Steps before treating the wood
Even if the treatments are compatible with all kinds of wood, they can only be applied to dry, unfinished wood.
When an attack is due to a high level of humidity, it is necessary to endeavor first of all to dry the environment of the wood, or if outside, to dry out the part to be treated.
Then you have to prepare the wood to be treated by:
- Strip old finishes.
- Sand with sandpaper, then dust.
- Reinforce or replace too weak wooden elements.
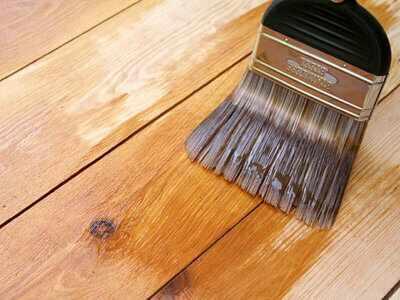
How to Treat Wood With Oil
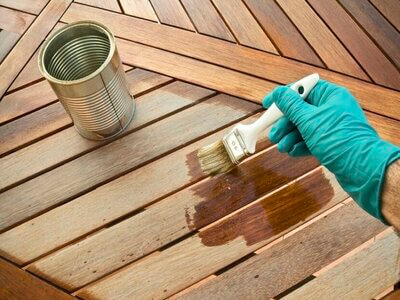
The easiest way to protect wood from external influences is to treat it with an oil.
A wood oil does not create a closed surface like a lacquer, for example. The wood can therefore continue to breathe. At the same time it looks very natural. Another advantage is the velvety soft surface, which is why wood oils are also often used for garden furniture.
With wood oils, you have the choice between colorless oils and products to which color pigments have been added.
If you want to use a wood oil, you should know that there are oils for indoor and outdoor use. The latter also protect the wood from the sun’s UV rays and are used for garden furniture, wooden windows and wooden terrace floors, among other things .
This category includes, for example, teak oil, which despite its name is not only suitable for treating teak wood.
When it comes to wood oils, you also have the choice between colorless oils and products to which color pigments have been added.
With colored wood oils, the color of a piece of furniture or another component made of wood can be changed a little. You can also use them to freshen up wood that has turned colorless or gray over time.
If you want to oil a wooden floor on the terrace or wooden stairs, it is best to use a hard oil specially designed for floors.
It contains resin or other additives that protect the wood even better from moisture and dirt. This treatment makes the floor more durable and easier to keep clean.
Steps how to treat wood with oil:
- You must make sure that the wood is clean and free of dust.
- Rub a generous amount of linseed oil on the surface of the wood.
- Using a clean, lint-free cloth rub the wood until the wood no longer absorbed the oil.
- Discard rags that get too saturated.
- Using another clean cloth rub the entire wood surface as you were polishing.
- To this until the oil stop feeling to the touch
- Let it dry overnight. The ideal temperature should be around 21°C or more.
- Shine the wood with “0000” steel wool once the wood surface has completely dry.
- Clean the dust and repeat the whole process 3-4 times.
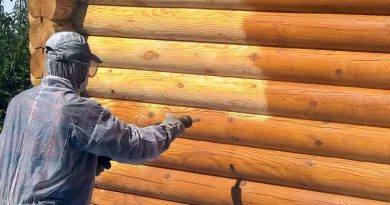
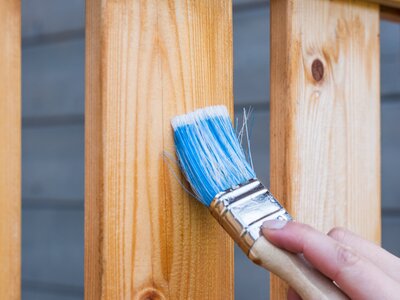
How to Treat Wood with Glaze
The glaze is one of the most popular ways to treat wood, as it is gently absorbed into the wood without closing the pores.
The user can choose between different colors for decorative purposes.
Compared to painting, the glaze can be processed more evenly more easily and the wood grain is still optically preserved.
As with all other surface treatments, the wood surface must first be sanded off before the glaze.
Here are the steps how to treat wood with glaze:
- The glaze has to be stirred well again and again , otherwise the result will be uneven. You can use any clean wooden stick for this.
- Use the glaze sparingly and don’t apply too much at once.
- The best way to do this is to use a brush, so you can dose the agent well.
- Always paint in the direction of the grain and make sure not to miss any areas. Particular attention should be paid to clean work at the transitions.
- When you have processed everything once, the wood must dry out completely.
- Pay attention to the information in the instructions for use or on the product.
- After applying a glaze, the wood fibers usually stand up and stop.
- That is why it makes sense to go over the entire surface with a fine sandpaper and sand everything again.
Then, if desired you can go through the same process again. It is also possible to oil the wood after the glaze.
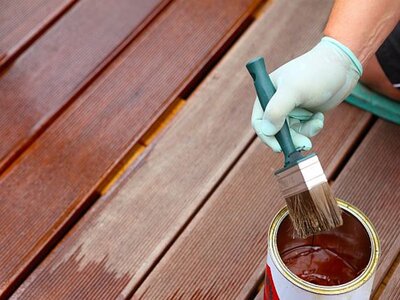
How to Treat Wood with Wax
Treating wood with wax is just as easy as applying a care oil.
It offers even better protection against moisture and is therefore even suitable for wooden parts such as table tops that occasionally come into contact with liquids. Wax also keeps the wood supple and prevents cracks from forming.
Good quality wood wax is harmless to health and is therefore often used for the surface treatment of children’s toys.
It’s also best to apply wax to the wood with a cloth. However, due to its consistency, it does not penetrate the wood as easily as an oil. So that it still protects the wood well, it should therefore be worked into the surface with circular movements.
A good quality wood wax is harmless to health and is therefore often used for the surface treatment of children’s toys. It is just as interesting for households in which allergy sufferers and other sensitive people live.
Here are the steps how to treat wood with wax:
- The wooden object should also be cleaned, sanded and finally freed of dust before waxing.
- Liquid wood wax is applied quickly with a flat brush
- Creamy wax is gently worked into the object with a soft microfiber cloth.
- After a drying time of 60 minutes , the surface should be sanded again and finally polished with a polishing fleece.
- This last step is not necessary with self-shining products.
How to Treat Wood with Varnish
A protective varnish is more robust way of treating wood than a glaze and usually lasts up to four years. Before repainting, it is always advisable to sand down old layers of paint so that the new paint does not peel off or blister.
Paint here at least twice, but bear in mind that repeated painting makes the color appear darker.
Basically, wood protection with varnish has one disadvantage: If moisture does penetrate through a leak, it can no longer evaporate. Swelling and stress cracks in the wood can result.
Therefore, paint must be processed particularly carefully. In addition, cracks in the paint layer must be repaired as quickly as possible.
Step how to treat wood with varnish:
- Remove dust, dirt and grease from the wood beforehand by cleaning it well.
- To apply the varnish, it is advisable to go into the garage
- The varnish is best absorbed in the fresh air and unpleasant odors escape quickly.
- Make a 50:50 mix of varnish with mineral spirits (turpentine)
- Using a soft brush apply the varnish to the wood
- Always start brushing the first varnish coat against the grain
- Brush the second coat of varnish along the grain
- Let it dry for 1-2 days depending of the type of varnish
The most resistant are the two-component ones, although the most recommended are water-based varnishes that do not give off strong odors and dry very quickly.
In addition, the brushes are cleaned only with water, without the need for solvents.
How to Treat Wood with Paint
The most durable way to treat a wooden surface is to paint it. Such a layer of paint is relatively long-lasting and very robust against moisture.
Before working on the piece of furniture, all detachable parts, such as buttons and handles, should be removed. Small cracks, holes or chipped surfaces should also be treated beforehand with a special pore filler.
A sanding machine is suitable for treating large areas; inaccessible areas such as table legs or curves should be sanded down manually. After the sanding work, the wood is vacuumed and additionally rubbed with a soft cloth.
How to Treat Wood with Sealant
A light protection against moisture is sufficient for furniture that is not used much. In the garden, rainwater should ideally run off the wooden surfaces.
To treat wood with sealant follow this steps:
- First step before we start to seal the wood we must clean the wood thoroughly
- If the surfaces are absolutely clean and free of dust, start with the protective treatment.
- Oils are put on a lint-free cloth in order to then distribute them evenly on the piece of furniture.
- Use a brush to apply the wood sealant.
- After the specified exposure time, which is usually half an hour, excess product residues are removed.
- One pass is not enough for the most waterproof result possible when you seal wood.
- You should therefore wait for it to dry completely, which usually takes 24 hours.
- Then lightly roughen the material with 0000 steel wool .
- Finally, a second layer is applied to intensify the protective effect of the wood seal.
| Type of Wood | How to Treat Wood |
|---|---|
| Raw Wood | 1. Treat it with Sandpaper 2. Treat it with Varnish |
| Outdoor Wood | 1. Treat it with Sandpaper once a year. 2. Every two years treat it with impregnated or painted with water-based paints. |
| Soft Wood | Treat it with mainly acid based impregnations agents that penetrate the wood deeply and do not remain on the wood surface. |
| Semi Hard-Wood | This type of wood must be treated with specific products that makes it waterproof. Use Water-soluble antiseptics |
| Tropical woods | The necessary treatment for the type of wood is oil. |
| Laminated Wood | Treat it with anti fungal and anti-woodworms products. To make it last longer apply a water impregnations paint. |
| Parquet | First polish the parquet with specific polish products Second step is to apply an antifungal and anti-mold treatment. |
What are the advantages of treating wood?
- Beautifies and protects
Beyond maintaining the aesthetic appearance over time, the use of a wood oil or a saturator in the protection of the wood will revive its original color and enhance the grain of the wood while maintaining its natural appearance
- Stabilizes the wood
Oiling a wood makes it possible to durably improve its dimensional stability, thus reducing the phenomena of deformation (curling, swelling and shrinkage), cracking or splitting of the surface.
- Natural and ecological
In addition, choosing an protective oil means choosing a healthy solution that respects the environment; the composition excludes fungicides, turpentine and any petroleum derivative frequently (paraffin, white spirit, etc.).
- Easy and economical
maintenance Maintenance is facilitated because, once oiled, a wood does not require stripping or prior sanding before renovation: cleaning with black soap followed by simple re-oiling of the surface is sufficient.
Conclusion
We presented you many ways how to treat wood. The decisive factor is the purpose for which the workpiece is then used and what kind of look you want.
Correct pre-treatment is important. For all subsequent techniques, the surface must already be sanded and free of dust and grease so that a good result is achieved.