How to Remove Mold from Wood: Surface vs Deep Mold (Safe Methods by Damage Level)
Mold on wood requires matching the biocide to the mold type and the wood surface condition — because the four mold scenarios that affect indoor and outdoor wood each require a different treatment. Surface mold on sealed wood (green, grey, or black film on a finished surface) is removed with bleach solution at 1:10 dilution and scrubbing. Surface mold on bare or unfinished wood requires hydrogen peroxide at 3% rather than bleach — bleach does not penetrate wood pores and leaves the fungal mycelium intact below the surface while hydrogen peroxide penetrates and kills it. Structural wood rot fungi (dry rot, wet rot) require a penetrating borate-based fungicidal treatment, not surface biocides. Black mold (Stachybotrys chartarum) on wood requires a containment protocol and P100 respirator before any treatment begins. All mold treatment is temporary without addressing the moisture source that allowed growth — mold returns within weeks on wood that remains above 70% relative humidity.
This guide covers the correct concentrations and dwell times for every effective removal method — from vinegar and hydrogen peroxide to diluted bleach and commercial biocides — along with a surface-type selection guide, a mold species identification table, and a structured prevention schedule to stop regrowth.
How Do You Remove Mold from Wood?
What Type of Mold Is on the Wood Surface?
The mold type and the wood surface condition determine the correct biocide. Visual and tactile identification takes under two minutes before any treatment begins.
Green, grey, black, or white film or powdery growth on a finished or painted surface. Finish beneath is intact.
Common species:Penicillium, Cladosporium, Alternaria.
Touch test:Wipes away with light pressure — mold is on top of the film, not in the wood.
Treatment urgency:Moderate — contained to finish; does not damage wood structure.
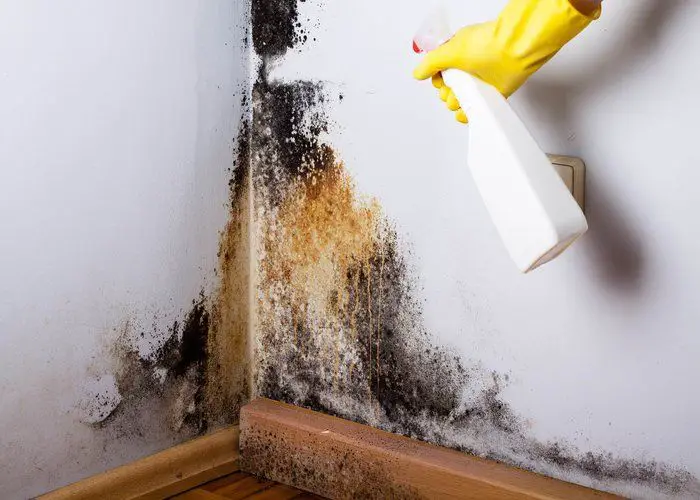
Dark black/greenish-black, slimy or wet appearance. Found in areas with sustained flooding/water damage.
Distinguishing Features:Slimy when wet, powdery when dry. Produces a strong musty odour.
Health Risk:Mycotoxin producer; respiratory/neurological effects at sustained exposure.
Treatment urgency:Highest — isolate immediately, full containment before treatment.
Brown cuboid cracking (“cuboidal fracture”); wood crumbles and loses integrity.
Wet rot appearance:Darkened, soft, spongy wood; compresses under thumb pressure.
Touch test:Wood crumbles or fractures in cubes — fundamental damage present.
Treatment urgency:Highest — structural assessment required; penetrating fungicide needed.
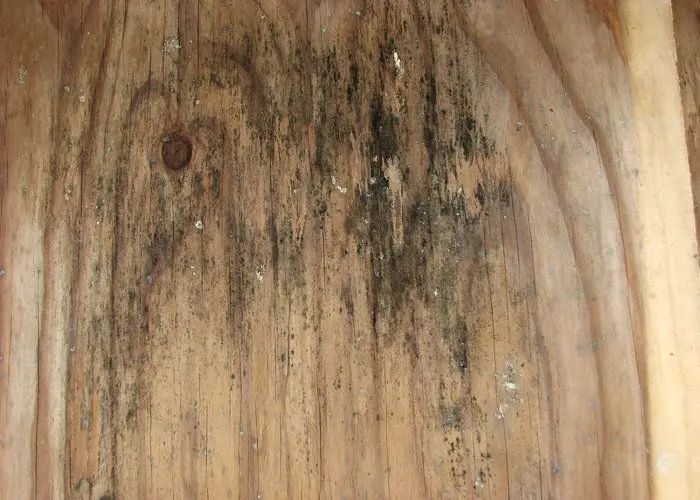
Grey or black discolouration in the wood grain; does NOT wipe away with dry cloth.
Common in:Unfinished furniture stored in damp conditions or wood wet during storage.
Touch test:Discolouration is in the grain — cannot be removed by surface scrubbing alone.
Treatment:Hydrogen peroxide 3% penetrates pores where bleach cannot.
Why Does Bleach Fail to Remove Mold from Bare Unfinished Wood?
Bleach (sodium hypochlorite) is the most commonly recommended mold treatment, but it has a critical limitation on bare and unfinished wood: bleach is a water-based solution with high surface tension that does not penetrate wood pores. When applied to bare wood, the water component soaks in but the active chlorine compound remains on the surface.
The result is visible — the dark mold discolouration disappears because bleach oxidises the pigments — but the fungal mycelium (the root network of the mold) remains alive in the wood pores below the surface. The mold regrows from the intact mycelium within days to weeks.
Hydrogen peroxide at 3% concentration penetrates wood pores because it has lower surface tension and a smaller molecular structure than the sodium hypochlorite compound in bleach. It kills both the surface spores and the mycelium in the accessible pore network. It also does not leave a salt residue (bleach leaves sodium chloride after the reaction) that can draw moisture back into the wood.
The correct rule: bleach on sealed surfaces (it acts on the surface film where the mold is living), hydrogen peroxide on bare wood (it penetrates to where the mycelium is).
What Safety Protection Does Mold Removal from Wood Require?
Tier 1 — Surface mold, small area (under 1 m²)
N95 or FFP2 respirator (not a dust mask—spores are 2–10 microns, below dust mask filtration). Nitrile gloves. Safety goggles. Open windows and work with air flowing away from you. Ventilate for 1 hour after treatment.
Tier 2 — Large area (over 1 m²) or bare wood mold
N95 minimum—P100 preferred. Nitrile gloves + protective sleeves. Safety goggles or full face shield. Bag all materials immediately in sealed plastic. Do not use HVAC during treatment (spreads spores).
Tier 3 — Black mold or structural rot
P100 full-face respirator mandatory. Disposable Tyvek coveralls. Double nitrile gloves. Seal doorways with plastic sheeting and tape. Negative pressure if available. Consider professional assessment for areas over 3 m².
What Are the Key Specifications for Removing Mold from Wood?
The table below provides the precise entity–attribute–value data for every removal agent and condition relevant to mold removal on wood. These values prevent the most common treatment failures: insufficient dwell time, over-diluted solutions, and incorrect application frequency.
| Mold Removal Methods | Description | Value |
|---|---|---|
| White vinegar solution | Concentration for surface mold | Undiluted (100%) or 1:1 with water for light growth |
| White vinegar solution | Dwell time on wood | 60 minutes minimum before wiping |
| Baking soda solution | Concentration | 1 tablespoon per 250 ml water |
| Baking soda solution | Application frequency | At least 2 applications for full removal |
| Hydrogen peroxide solution | Concentration for wood | 3% (standard pharmacy grade) |
| Hydrogen peroxide solution | Dwell time | 10 minutes before scrubbing |
| Bleach solution (chlorine) | Dilution ratio for wood | 1 part bleach : 10 parts water |
| Bleach solution (chlorine) | Contact time | 10–15 minutes |
| Bleach solution (chlorine) | Risk on wood | Potential discolouration on dark or stained wood |
| Detergent + water solution | Ratio | 50 g laundry detergent per 4 litres hot water |
| Tea tree oil solution | Concentration | 1 teaspoon per 500 ml water |
| Tea tree oil solution | Drying method | Leave on surface — do not rinse |
| Indoor humidity target | Mold-preventive range | 30–50% relative humidity |
| Mold-affected area threshold (DIY) | Maximum safe area for self-removal | Less than 1 m² |
| Mold-affected area threshold (professional) | When to call remediation specialist | More than 1 m² or structural penetration |
| Sunlight exposure method | Duration for mild outdoor mold | 2–3 consecutive dry, sunny days |
The protocol requires 60 g of oxalic acid crystals per litre of water — use the calculator below to get the exact dose for your container size, plus the correct amount of baking soda for neutralisation after treatment.
Oxalic Acid Concentration Calculator
Exact doses for wood stain removal — acid, neutraliser, and contact times
Tools and Materials Required to Remove Mold from Wood
- N95 or FFP2 respirator mask — not a standard dust mask
- Nitrile or thick rubber gloves
- Safety glasses or goggles
- White vinegar — undiluted, standard 5% acetic acid concentration
- Baking soda (sodium bicarbonate) — standard grocery-store grade
- Hydrogen peroxide 3% — pharmacy grade
- Household bleach — 5% sodium hypochlorite, diluted 1:10 with water before use
- Tea tree oil — 100% pure (Melaleuca alternifolia)
- Liquid laundry detergent or dish soap
- Clean spray bottle — at least two (one per solution)
- Soft-bristle brush — for textured or carved wood surfaces
- Clean cotton cloths or microfibre rags — multiple
- Stiff scrubbing brush — for unfinished wood or outdoor furniture
- Plastic bag or sealed container — for disposing of contaminated cloths and materials
- HEPA vacuum — for collecting loose spores after dry treatment
How Do You Remove Surface Mold from Sealed or Finished Wood?
Surface mold on polyurethane, lacquer, varnish, or painted wood is the most manageable mold scenario — the fungus is growing on the finish film surface, not in the wood itself. Bleach at 1:10 dilution is the correct biocide for this surface type because it acts on the exterior where the mold is living, and the finish layer protects the wood below from bleach penetration.
STEP 1 Ventilate and put on N95 respirator before entering the room
Open windows to create airflow out of the room before disturbing the mold. Put on N95 respirator, nitrile gloves, and safety goggles before approaching the affected surface. If using a HVAC system: turn it off before starting and keep it off until all surfaces are dry — the system will distribute spores throughout the building if running during treatment.
STEP 2 Vacuum loose spores with a HEPA-filter vacuum
Before applying any liquid, vacuum the mold-affected area with a HEPA-filter vacuum to remove loose spores without releasing them into the air. A standard vacuum without HEPA filtration exhausts fine mold spores through the filter — do not use a standard vacuum on mold. After vacuuming, seal the vacuum bag immediately in a plastic bag.
STEP 3 Apply bleach solution 1:10 — 10 minutes contact
Mix 1 part household bleach (sodium hypochlorite 5%) with 10 parts water. Apply with a spray bottle or cloth to the mold-affected area and allow 10 minutes contact time without wiping — the sodium hypochlorite needs contact time to oxidise the mold cells. The mold discolouration will begin to lighten within this contact period.
STEP 4 Scrub with stiff brush in grain direction and wipe
After 10 minutes, scrub the surface with a stiff-bristle brush in the wood grain direction. Wipe away the dissolved mold with a clean damp cloth — replace the cloth frequently to avoid redistributing spores. Wipe with a second clean cloth dampened with clean water to remove bleach residue. Bleach residue on finished wood can continue oxidising the finish surface if left — final water wipe is not optional.
STEP 5 Dry completely within 24 hours
Dry the treated area with a clean cloth and allow complete drying — increase air circulation with a fan pointed at the surface. The wood must reach below 70% surface humidity before any further treatment. Inspect after 48 hours: if mold discolouration has returned, the mold was in the wood below the finish (sub-finish mold) — proceed to the hydrogen peroxide protocol for bare wood after stripping the local finish.
How Do You Remove Mold from Bare or Unfinished Wood?
Bare, unfinished, or oil-finished wood allows mold mycelium to penetrate into the open pore structure — this is why bleach does not produce a lasting result on bare wood. Hydrogen peroxide at 3% concentration is the correct biocide because it penetrates the wood pore network and kills mycelium below the surface, not just spores on top.
STEP 1 Vacuum and prepare — same protocol as sealed wood
HEPA vacuum first. N95 minimum respirator. Work outdoors or in maximum ventilation for bare wood treatment — hydrogen peroxide releases oxygen during the reaction which can increase airborne spore concentration temporarily during scrubbing.
STEP 2 Apply hydrogen peroxide 3% — spray to saturation, 10–15 minutes
Apply hydrogen peroxide 3% (standard pharmacy concentration) with a spray bottle to the mold-affected area until the wood surface is visibly wet and saturated. Do not wipe or scrub during this contact period — allow the peroxide to penetrate into the wood pores. It will begin to bubble lightly on contact with the mold — this is the oxygen release from the peroxide-mold reaction and confirms active penetration.
STEP 3 Scrub with stiff brush and wipe
After 10–15 minutes, scrub firmly with a stiff natural-bristle brush in the grain direction. For deep grain mold, a second application of hydrogen peroxide after scrubbing allows penetration into the now-opened surface. Wipe with a clean damp cloth. Do not rinse with water — allow the residual peroxide to continue working as the surface dries.
STEP 4 Sand if grey staining persists
After complete drying (24 hours minimum), grey or blue-grey discolouration that persists in the grain is tannin oxidation from the mold's metabolic acids — the same mechanism as water staining on tannin-rich wood. This discolouration requires oxalic acid at 60 g per litre for 15–20 minutes to bleach the oxidised tannin compounds. If discolouration remains after oxalic acid, sand with 80–120 grit in grain direction to remove the stained surface layer.
STEP 5 Seal with mold-inhibiting primer before finishing
After the treated bare wood is completely dry and any sanding is complete, apply two coats of a mold-inhibiting primer before any topcoat finish. Standard primers do not prevent mold recurrence. The mold-inhibiting primer contains a fungistatic biocide that remains active in the dried film — it is the correct final protection step for wood that was previously moldy.
📝 In my restoration workshop, the most instructive mold scenario was a mid-19th century walnut secretaire brought in from storage in an unheated Romanian building. The surface showed grey-green Penicillium growth on the shellac-finished panels, which bleach at 1:10 removed cleanly. However, the interior unfinished oak drawer slides had deep grey discolouration in the grain that persisted after surface cleaning — hydrogen peroxide at 3% applied twice produced visible bubbling on contact, confirming active mycelium in the pores. The grey tannin discolouration required one oxalic acid application at 60g/litre before the oak matched the surrounding unaffected wood.
How Do You Treat Structural Wood Rot Fungi (Dry Rot and Wet Rot)?
Structural wood rot is fundamentally different from surface mold — it is caused by brown rot fungi (Serpula lacrymans for dry rot, Coniophora puteana for wet rot) that digest the cellulose and lignin in the wood fibre itself, causing irreversible structural degradation. Surface biocides including bleach and hydrogen peroxide are ineffective on structural rot because the fungal network extends far beyond the visible damage area, often running through wall cavities, floor joists, and behind plaster.
The structural rot protocol has two mandatory components: penetrating borate-based fungicide treatment for all accessible timber in the affected area (not just the visibly damaged wood — borate must reach the full fungal network), and structural assessment to determine whether affected timber must be replaced. Wood with cuboidal fracturing (dry rot's characteristic crumbling) has lost structural capacity and must be replaced regardless of biocide treatment — fungicide prevents spread but cannot restore degraded wood fibre.
STEP 1 Identify the full extent before treating
Probe the visible rot area with a screwdriver — the soft, crumbling, or spongy zone defines the minimum treatment area. Structural rot typically extends 300–500 mm beyond the visible damage boundary through mycelium strands that are invisible to the naked eye. The treatment area must extend to at least 500 mm beyond the last point of visible damage in every direction. For dry rot, also check for mycelium strands (orange-white cotton-wool appearance) in adjacent wall cavities, flooring, and plaster.
STEP 2 Dry the wood before applying borate fungicide
Borate-based fungicides penetrate wood only when the wood moisture content is below approximately 30% by weight. Wet rot timber may be significantly above this threshold. Remove the moisture source and allow active drying (dehumidifier, increased ventilation) before applying fungicide — applying borate to saturated wood produces minimal penetration and wasted product. Check with a wood moisture meter — below 20% moisture content is the target before treatment.
STEP 3 Apply borate solution to saturation — no rinsing
Apply borate-based wood preservative solution (disodium octaborate tetrahydrate — sold as Tim-bor, Boracare, or generic borate wood preservative) by brush or spray to all accessible timber in the treatment zone. Apply to saturation — the surface should remain visibly wet for at least 5 minutes after application. Do not rinse or wipe — borate must remain in the wood to continue providing long-term fungicidal protection. Apply two coats with 30–60 minutes between coats on dry timber.
STEP 4 Replace structurally compromised timber and seal
Timber with cuboidal fracturing, significant compression under finger pressure, or loss of cross-sectional integrity greater than approximately 30% must be replaced. Treat new replacement timber with borate preservative before installation. After all timber is treated and dry, apply mold-inhibiting primer to all wood surfaces before any finish — the primer's fungistatic coating provides an additional barrier layer against recurrence.
Why Does Mold Return After Treatment — and How Do You Prevent Recurrence?
Mold requires three conditions simultaneously: moisture, an organic food source (wood), and a temperature above approximately 5°C. Wood in a building always provides the organic substrate and temperature. The only controllable variable is moisture. Every mold treatment on wood is temporary unless the moisture source is identified and eliminated — mold will regrow from residual spores (always present in indoor air) within 2–8 weeks if the wood returns to above 70% relative humidity.
The moisture source must be identified before treating the mold. Common sources for indoor wood mold: roof or window leaks producing localised high humidity; plumbing leaks behind or under wood panels and flooring; inadequate ventilation in bathrooms, kitchens, or basements producing sustained condensation; thermal bridging in external walls producing cold spots where condensation forms on wood surfaces; flooding history where wood was not dried completely before being sealed or finished.
After successful mold treatment and drying, the prevention sequence is: fix moisture source → dry wood to below 19% moisture content → apply hydrogen peroxide or bleach treatment → allow full drying 24–48 hours → apply two coats mold-inhibiting primer → apply topcoat finish → maintain relative humidity below 60% in the space with ventilation or dehumidification.
📝 The clearest example of mold recurrence from an unaddressed moisture source was an oak floor client in Bucharest who had treated visible mold twice with bleach in the same corner over 18 months. Each treatment cleared the visual growth for 4–6 weeks before it returned. The actual cause was a thermal bridge in the external corner wall producing condensation on the floor surface at temperatures below 15°C. After sealing the thermal bridge with insulation and applying hydrogen peroxide treatment to the bare oak edges followed by mold-inhibiting primer, there was no recurrence in the following winter season.
How Does the Wood Surface Type Affect Mold Removal?
| Surface Type | Correct Biocide | Additional Steps | Key Constraint |
|---|---|---|---|
| Polyurethane-finished furniture | Bleach 1:10, 10 min contact; scrub; water rinse | HEPA vacuum first; dry completely; no re-sealing needed if finish intact | Do not use undiluted bleach — damages polyurethane at concentrations above 1:5 |
| Lacquer-finished furniture | Bleach 1:10 if finish intact. If mold has penetrated finish: strip locally, hydrogen peroxide, re-lacquer | Lacquer is more sensitive to bleach than polyurethane — test on hidden area first at 1:10 | Bleach can cloud lacquer at extended contact — 10 min maximum, water wipe immediately after |
| Bare / unfinished wood (furniture or structural) | Hydrogen peroxide 3%, 10–15 min contact — not bleach | Sand 80–120 grit if discolouration persists; oxalic acid for tannin staining; mold-inhibiting primer before finish | Bleach removes visual evidence but leaves mycelium intact in pores — mold returns |
| Oil-finished wood | Hydrogen peroxide 3%; re-apply matching oil after treatment and 24h drying | Oil finish is partially porous — mold can penetrate; H₂O₂ correct for same reason as bare wood | Re-oil after treatment — peroxide oxidises the surface oil layer |
| Painted wood (interior) | Bleach 1:10 on painted surface; hydrogen peroxide if paint is peeling or porous | After treatment and drying: apply mold-inhibiting paint (not standard paint) for recurrence prevention | Standard paint does not prevent recurrence — must specify mold-inhibiting formulation |
| Structural timber (joists, beams, framing) | Borate-based penetrating fungicide — surface biocides ineffective for rot fungi | Dry to below 20% moisture before applying; two coats; no rinsing; replace structurally compromised timber | Fix moisture source before treatment or recurrence is certain within weeks |
| Hardwood floor (sealed) | Bleach 1:10 on sealed surface; if mold is between boards or under finish: professional remediation | Mold under parquet = moisture problem from below — fix subfloor moisture first; lifting and re-laying required | Sub-floor mold is not a DIY surface treatment — it requires structural drying intervention |
| Outdoor wood (decking, cladding, fencing) | Bleach 1:10 for surface algae/mold; borate preservative for preventive treatment of bare timber | Pressure washing before biocide; reapply UV-resistant borate-containing exterior finish annually | Outdoor mold recurs seasonally without regular preservative maintenance — one-off treatment is insufficient |
How to Prevent Mold from Returning on Wood: Structured Schedule
Prevention requires addressing the three conditions that support mold growth — moisture, warmth, and organic material — rather than simply cleaning up after each infestation. The table below organises prevention methods by target condition, giving a concrete implementation detail for each.
| Prevention Method | Target Condition | Implementation Detail |
|---|---|---|
| Room ventilation | High indoor humidity | Ventilate at least twice daily; after every shower open window or run extractor for 10 minutes |
| Dehumidifier | Relative humidity above 60% | Maintain indoor humidity at 30–50%; monitor with a hygrometer |
| Waterproofing treatment on wood | Moisture absorption into wood grain | Apply penetrating wood sealer or waterproofing oil annually on outdoor pieces |
| Oil treatment (outdoor furniture) | Moisture and UV degradation | Apply 2–3 times per season on solid wood; skip teak (naturally oily) |
| Indoor furniture positioning | Low airflow behind / under furniture | Maintain minimum 5 cm clearance between furniture and walls |
| Winter storage (outdoor furniture) | Cold-season moisture and spore accumulation | Store in shed or garage; never leave untreated wood furniture outdoors in winter |
| Anti-mold paint | Mold on interior wall surfaces near wood | Apply in bathrooms, basements, and kitchens; reduces spore load near adjacent wood |
The most consistently effective prevention measure for indoor wood surfaces is maintaining relative humidity between 30% and 50%.
A hygrometer placed in any room with a previous mold history provides continuous confirmation that humidity is within the safe range. If humidity regularly exceeds 60% despite ventilation, a dehumidifier running continuously in that room is the appropriate intervention — not periodic cleaning after mold has already formed.
Frequently Asked Questions About Removing Mold from Wood
Is bleach or vinegar better for removing mold from wood?
On sealed finished wood, bleach at 1:10 dilution is more effective than vinegar — sodium hypochlorite is a stronger oxidising biocide than acetic acid at the concentrations involved. Vinegar (acetic acid at 5%) kills surface mold spores of Penicillium and some Cladosporium species but has limited effect on Stachybotrys (black mold) and does not penetrate wood pores. On bare unfinished wood, neither bleach nor vinegar is the correct primary biocide — hydrogen peroxide at 3% is more effective because it penetrates into wood pores where the fungal mycelium is living, while bleach and vinegar both remain on the surface.
How do you know if mold has penetrated into the wood structure or is just on the surface?
Two tests distinguish surface mold from structural penetration. First, rub the mold area firmly with a dry white cloth — if the growth transfers to the cloth completely and the wood beneath appears clean and intact, it is surface mold only. If dark discolouration remains in the grain after rubbing, the mold has penetrated into the wood pores. Second, press the wood firmly with a thumb in the most discoloured area — if the wood compresses, crumbles, or feels soft or spongy, structural degradation (wood rot) is present. Structurally sound wood does not compress under thumb pressure.
Can moldy wood be saved, or does it need to be replaced?
Surface mold on wood — where the mold is growing on the finish or the outer layer of the wood without structural penetration — can always be treated successfully with the correct biocide protocol. The wood is fully salvageable. Wood with structural rot fungi penetration (cuboidal fracturing, spongy compression, significant loss of material) cannot be restored to structural integrity by treatment — the digested cellulose and lignin cannot be replaced. Treatment with borate fungicide stops further spread but the structurally compromised section must be replaced. Furniture pieces with deep structural rot can be repaired with epoxy consolidants for non-load-bearing applications, but structural timber with more than approximately 30% cross-section degradation requires replacement.
Why does mold keep coming back on the same piece of wood after cleaning?
Mold recurs on treated wood for three reasons in order of frequency: the moisture source was not fixed (the most common reason — mold requires sustained moisture above 70% RH and will regrow from airborne spores within weeks if the wood remains damp); the biocide used did not kill the mycelium in the wood pores (bleach on bare wood clears visible growth but leaves viable fungal tissue in pores that regrows); or no mold-inhibiting sealing was applied after treatment. All three must be addressed simultaneously — treatment, moisture correction, and sealing — for a lasting result.
Summary: Key Values for Removing Mold from Wood
Removing mold from wood requires identifying the mold type and wood surface condition before selecting a biocide. Surface mold on sealed finished wood is removed with bleach at 1:10 dilution at 10 minutes contact time followed by scrubbing and water wipe.
Bare or unfinished wood requires hydrogen peroxide at 3% — not bleach — because bleach does not penetrate wood pores and leaves mycelium intact below the surface, causing regrowth. Structural wood rot fungi require penetrating borate-based fungicide applied to saturation on dry timber — surface biocides are ineffective for rot.
Black mold (Stachybotrys) requires full containment protocol with P100 respirator before any treatment, and professional assessment for areas over 3 m². Sunlight does not remove mold from wood — it kills surface spores on portable objects but does not reach the mycelium in wood pores. All mold treatment is temporary without fixing the moisture source that enabled growth — mold returns within 2–8 weeks if wood remains above 70% relative humidity. Seal bare wood with two coats of mold-inhibiting primer after treatment and drying before applying any finish.
→ Hub: How to Remove Wood Finishes and Stains — Complete Guide→ Related: How to Remove Water Stains from Wood→ Related: How to Remove Ash Stains from Wood