How to Change a Miter Saw Blade?
Miter Saw blades are not made to last. At some point they are worn out or dull and have to be replaced. In this article you can read about how to recognize which blades need to be changed and how to change a miter saw blade.
Reasons for changing the miter saw blade:
- the miter saw blade has become blunt
- the miter saw blade is damaged
- saw blade has become rusty
- another material is to be sawed with the saw
- with jigsaws: straight cuts are not made, but curved cuts (or vice versa)
It’s easy to judge that a saw blade has become blunt. If you have to use excessive force when sawing and press the saw into the work piece to get a cut and there is no cut at all when sawing without pressure, the miter saw blade is too blunt and you need change the miter saw blade.
When to change your miter saw blade?
When your miter saw blade begins to wear out, you must change or sharpen your blade to ensure optimum cutting power.
You will quickly realize this when the cut takes longer than usual. Also, according to certain types of materials, it is sometimes well advised to use a specific blade.
Tips for changing the saw blade

Finally, general tips for changing the miter saw blade, because this is an important and responsible activity:
- In any case, disconnect the saw when you want to change the blade.
- Wear gloves when changing blades, as a large number of saw blades are very sharp.
- Secure the blade so that it does not turn when the screw connection is loosened.
- If there is no locking device on the device, simply spread a small, elongated piece of wood between the blade and the guide plate.
- Don’t forget to tighten the screw (s) again. Improper fastening can be life-threatening.
Reading the instruction manual for your saw is the first thing to do before changing your blades.
Indeed, according to, the replacement method depends on the manufacturer and can vary from one model to another.
How To Remove a Miter Saw Blade
The miter saw, also called a “drop saw” or “chop saw,” is an electric saw attached to a base. It is designed to make precise cross sections to an object as framing or molding.
The miter saw is a very useful woodworking tool that is used to cut different types of materials .
This type of saw can be bench or portable and its cutting capacity derives from the power of the motor and from the type of disc or blade that is installed.
A miter saw is called a radial when it has mechanisms to adjust the cutting angle , therefore it has a guide that guarantees to work with precision.
Of course, like the normal miter saw, the radial one can also perform straight cuts.
The standard angle setting is 90 degrees, but many miter saws can reposition the stops quickly to make other desired angles.
After time and normal wear and tear, like the whole blade of the electric saw, the miter saw blade will be dull and become less efficient.
Most hardware stores and home improvement centers sell replacement miter saw blades.
Instructions
1. Unplug the miter saw from the electrical outlet. Place stops or fences on the way. Use a screwdriver to remove the blade guard covering the blade and the retaining blade bolt.
2. Apply the spindle lock to hold the blade in place. Place the short end of the Allen head wrench or hex wrench into the retaining blade bolt.
3. Loosen the bolt by turning it clockwise. The bolt is reverse thread due to the rapid movement of the saw blade during operation.
4. Use the mallet or hammer to tap the long end of the wrench or the hex head Allen wrench to interrupt the connection, if necessary.
Once the bolt is loose, turn it by hand to remove it. Remove the blade and reverse the procedure to replace it with the new saw blade.
How to Change a Miter Saw Blade
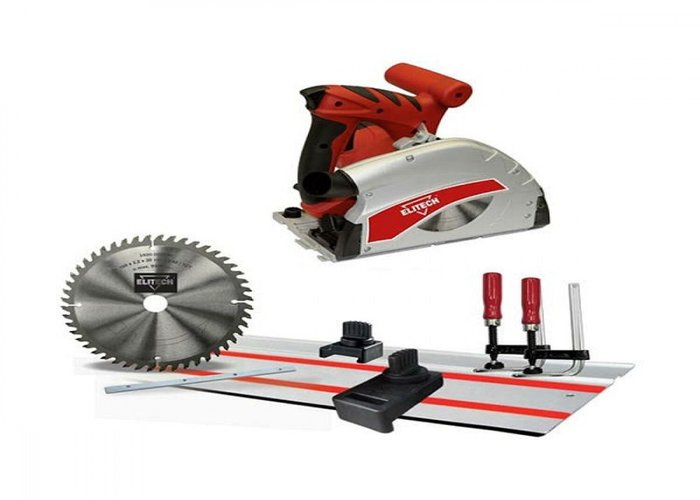
The replacement of the miter saw blade is a general and periodic tool maintenance operation. Changing the miter saw blade is a simple and easy task which require the following tools: an Allen wrench, a screw driver,a bit of scrap wood and a couple of minutes.
Before we start to change the miter saw blade first we require some safety precautions:
- The miter saw must be turned off and unplugged.
- Make sure that it’s impossible for the tool to turn on.
- It is usually dangerous to handle a blade, so just stay focused on the task that must be completed.
1.First, the blade guard must be bypassed, so slightly slide up the guard to have access to the screw holding the miter saw to the guard.
2. Second step is to release the screw to slip further backward the blade guard. To reveal the blade bolt and locking pin of the saw you must position the screw around 170 degrees at the back compared to its initial position.
3. Press down the locking pin of the saw and rotate the blade till it’s locked. Using the Allen wrench remove the blade bolt. In most cases, the blade bolt is reversing threaded, but that’s not always the case.
4. As a result, try and find a sign on the tool for the correct direction to loose the bolt or simply check the saw’s manual beforehand. Remove the flange and change the blade.
5. Put in the new blade in the same manner as you’ve removed the old blade.Change the flange together with the blade bolt, double checking that you just have securely tightened the blade bolt.
6. Slide forward the blade guard and then using the screw driver tighten the screw which holds it to the miter saw.
7. Shift back the guard to its regular position and reengage the tool taking all required safety precautions. Check the correct cutting order and working of the saw by making a couple cuts.
It’s a quick and easy process to replace a miter saw blade, but it should be done with care and by taking certain safety precautions.
It is important to always have a well maintained and sharp blade because it is significantly improve your work results together with your safety.
Change Miter Saw blade in 4 Steps
A saw blade can be very robust and solid: sooner or later it will be necessary to replace it so that high-quality, precise results can be achieved in the future.
It is worth knowing that the change of a miter saw blade runs roughly similar in most current models of renowned manufacturers, but despite all this also on the finer points to make.
It is therefore advisable to use our instructions on how to change the saw blade of a miter saw correctly.
Because this makes it possible to change the miter saw blade in just 4 simple steps.
Before you get there, you should already have the new saw blade within reach.
Nuts and the corresponding small tools also do no harm, because a screw or a washer can get stuck in one place or another, especially with older devices.
Therefore, prevent possible interruptions in good time and keep all the necessary tools in handy.
How to Change Miter Saw Blade Step by Step:
STEP 1
With most miter saws, a so-called saw blade change mode is preset so that you are guaranteed maximum security from the start when you plan to replace the saw blade.
If the locking pin is in the change mode, it is fixed or it is locked.
The lock is a protective function that helps to prevent the saw from being easily switched on in this mode.
If this fuse were still the case, as is the case with particularly old devices, there would be a danger that the saw blade would start to rotate for whatever reason, for example due to a vibration.
If your hand or arm were in the immediate vicinity, this would have striking consequences.
In the first step, therefore, check whether the locking device is set and , for reasons of additional safety, you must also pull the mains plug .
STEP 2
For this part of changing the saw blade, it is essential that you wear your safety gloves.
Because now the time has come when you may come into contact with the sharp teeth of the sheet .
Because most saw blades have double hooks on the individual teeth, it could be possible that they get caught in your finger or in another part of the body and thus cause injuries.
Wearing solid work or safety gloves is therefore essential for this step.
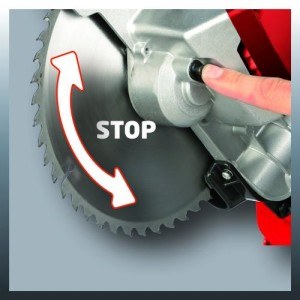
As soon as the locking device is activated and the saw blade no longer rotates or if it is stationary, you can fold up the two brackets on the left and right sides that are in direct connection with the saw blade.
These are also additional safety features that offer a kind of stop function and which are also intended to ensure an additional, secure hold for the saw blade.
As soon as these brackets are folded up or depending on the model, to the side, the saw blade is exposed to a certain extent, so that you now have direct access to the middle bracket.
If you now hold the saw blade in your hand for the next step, it is good that you have put on the safety gloves beforehand.
STEP 3
Turn the wheel, which is in the middle of the saw blade and hold the saw blade with your other hand at the bottom.
As such, the sheet is relatively light, so little effort is required to hold it. As soon as the wheel is loosened on one side and the upper disc is detached, get to work on the other side.
It is important to continue to hold the saw blade from below so that it cannot fall to the ground.
Finally, turn the wheel until the disk underneath has come off so that the saw blade is only in your hand at the end. This is still protected by the solid nature of the safety glove .
Then carefully pull the saw blade down, although it may be the case with one or the other model that it is still held in the middle by an additional bracket.
Gently push this device inwards so that the blade can finally come off . Set the saw blade aside so that it does not pose a danger to you, children who may be playing on site, or pets.
Even better, you cover the saw blade with a soft blanket and mark it as a particular hazard .
Only when the replacement of the saw blade has been completed can the blade ultimately be disposed of adequately.
STEP 4
Now it is a matter of taking the new saw blade, which is already within reach, while still wearing the safety gloves
Make sure that the saw blade does not accidentally slip out of your hand; if necessary, ask a second person for help.
In the next step, turn the disc and the center device onto the saw blade on the left and right so that it is held firmly by them.
Now take a screwdriver to help and check whether the saw blade is actually firmly seated all around.
If this is the case, then you only have to do a few simple steps before you can start working again with the miter saw.
Because now you should not forget to put the two safety spindle pin lock back in its original position so that the saw blade not only sticks, but also ensures a high level of safety.
Resetting the safety anchors is very easy and can be done easily without tools. Because the saw is still in the saw blade change mode, open it now and press the corresponding switch.
If it is still seems difficult to change the miter saw blade, this video might help you!
How to Change a 10 Miter Saw Blade Ryobi
Replacing a Ryobi 10 inch miter saw blade is easy if you follow a few basic concepts. The key to all of this is to make sure that the blade is no larger than 10 inches or thicker than the factory supplied blade.
If it is too large, it can come into contact with the blade guards, and if it is too thick, it will stop the blade bolt from fixing it securely.
Things you need
- 10-inch saw blade
- Oil
Instructions
- Unplug the saw. This is a security consideration and a very good idea.
- Remove the screws in the center of the lower blade guard. Turn the lower blade guard and the cover-up blade bolt. The blade bolt will be exposed.
- Press the spindle lock button and turn the blade bolt until the spindle locks.
- Loosen and remove the blade bolt – clockwise – using the wrench provided.
- Remove the flat washer and the outer washer from the blade. Leave the inner blade washer.
- Apply a little oil to the inner blade washer and the outer blade washer, just where they contact the blade.
- Slide the new saw blade onto the spindle. The teeth should point down at the front.
- Replace the outer washer and the flat washer. They will be aligned using the double “D” apartments.
- Replace the blade bolt – counterclockwise this time – while pressing the spindle lock button.
- Tighten the blade bolt, replace the lower blade guard, replace the screws and tighten them all.
How often is the Miter Saw Blade Replaced?
The replacement or changing of the miter cutting blade must take place whenever the cutting operation shows excessive overheating, smoke and swarf production, as well as an increase in cutting time.
Each time the blade is sharpened, its diameter decreases. It must always be positioned at a certain distance from the cutting plane.
In order to be able to always position it at the same distance, the saw machines have a blade height adjustment.
When this adjustment no longer has sufficient stroke to keep the blade at this distance, it no longer works correctly and must be replaced.
After assembling the new or re-sharpened blade, the pipes must be cut at a very low feed rate; being extremely sharp and thin, at the point of contact, its cutting capacity is very high and therefore promotes rapid sinking into the material.
Pushing the new blade into the tube too quickly entails a greater risk of overheating and the consequent irregular wear of the teeth, an increase in fragility and the risk of breakage due to the very strong localized temperature change.
The initial use of the blade is to be considered a natural and indispensable finishing process of the same.
A blade used with care in the initial phase will have a regular cutting surface, high hardness and consequently longer life.
If you have read all the way up to here, now you know how to change a miter saw blade.