How to Apply Beeswax to Wood: Mixing Ratios, Application Steps, and Wood-Specific Guide
Beeswax is a natural wood finish produced by honeybees and used by woodworkers to protect, nourish, and enhance the appearance of wood surfaces. When you apply beeswax to wood, a thin protective film forms inside the wood pores, reducing moisture absorption and surface abrasion without blocking the wood’s ability to breathe. This guide covers every step of the process — from surface preparation and wax mixing ratios to drying times and reapplication schedules — with precise values for each stage so you can achieve a consistent, professional result.
Key Properties and Values at a Glance
The table below summarises the entity–attribute–value pairs you need before starting any beeswax application project. Having these values clear prevents the most common mistakes: too-thick layers, insufficient drying time, and incorrect wax-to-solvent ratios.
| Wax Type | Attribute | Value |
|---|---|---|
| Beeswax | Physical state at room temp | Solid |
| Beeswax | Melting point | 62–65 °C (144–149 °F) |
| Beeswax | Solvent used in wood finish | Turpentine or mineral spirits |
| Beeswax finish | Drying time per coat | 20–60 minutes |
| Beeswax finish | Number of coats (raw wood) | 2–3 minimum |
| Beeswax finish | Sandpaper grit (final prep) | 180 grit |
| Beeswax + carnauba wax mix | Beeswax quantity | 100 g |
| Beeswax + carnauba wax mix | Turpentine quantity | 400–500 ml |
| Beeswax + carnauba wax mix | Carnauba wax quantity | 50 g |
| Water bath heating | Temperature | 75–100 °C |
| Water bath heating | Duration | 15–20 minutes |
How Do You Apply Beeswax to Wood Step by Step?
The six steps below follow a logical sequence: surface preparation, wax preparation, application, drying, and reapplication. Skipping or rushing any individual step reduces the durability and appearance of the final finish.
Gathering all materials before you start prevents interruptions that can cause uneven application. The following items are needed for a complete beeswax finishing project on bare or previously waxed wood.
- Orbital sander or hand sanding block
- Sandpaper: 80, 120, and 180 grit sheets
- Triangle scraper — for inner corners and tight profiles
- Carving knife or chisel — for filigree details and carved elements
- Clean cotton cloths or lint-free rags (at least 3–4)
- Soft-bristle brush — for carved or textured surfaces
- Polishing fleece bonnet or buffing cloth
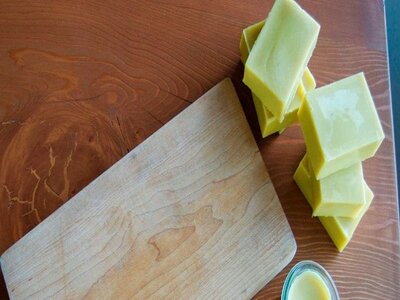
- 100 g beeswax block (yellow beeswax retains the richest colour)
- 50 g carnauba wax (optional, adds hardness and higher gloss)
- 400–500 ml turpentine or odourless mineral spirits
- Double boiler or heat-safe bowl and saucepan for water bath
- Thermometer — to monitor water bath temperature
- Dedicated wood cleaner or plain water (no soaps or coloured cleaners)
Step 1 — Remove All Residue from the Wood Surface
Before beeswax can penetrate wood properly, the surface must be completely free of old paint, varnish, wax residues, oils, and polishes. Any existing coating creates a barrier between the wood pores and the new beeswax layer, preventing absorption and causing the finish to peel or sit unevenly on the surface.
Start by removing thick paint or varnish layers with a paint stripper, heat gun, or spatula. Work in small sections and remove all softened material cleanly before moving to the next area. Once gross residue is removed, clean the entire surface with a wood-specific intensive cleaner diluted in plain water. Do not use soap-based or coloured cleaners.
Allow the wood to dry completely after wet cleaning — typically 2–4 hours in a dry room with good air circulation — before moving to the sanding step.
Step 2 — Sand the Wood Surface to Open the Grain
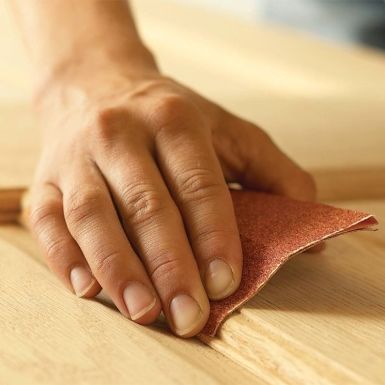
Sanding before beeswax application is not optional. Even if the wood appears clean, a micro-thin film of old wax or oxidised wood fibres sits on the surface and prevents new wax from being absorbed. Sanding removes this film and opens the wood grain so that beeswax can penetrate the pores deeply.
Start with 80 or 120 grit sandpaper to remove any remaining surface contamination and level uneven areas. Progress to 180 grit for the final sanding pass. Work consistently in the direction of the wood grain on flat surfaces. On inner corners, use a triangle scraper to reach areas the sanding block cannot access. For carved or filigree sections, use a carving knife or a shaped scraper to avoid crushing delicate detail.
After the final sanding pass, wipe away all dust with a clean, dry cloth. Any sanding dust left on the surface will mix with the beeswax and create a gritty, uneven finish.
Do you want to remove candle wax from wood? Here is an easy step by step guide to help you!
Step 3 — Prepare and Melt the Beeswax
Beeswax in its natural block form is too hard to apply directly to wood. It must be melted and combined with a solvent to create a workable paste or liquid at room temperature. The melting process uses a water bath — never direct heat — to prevent the wax from overheating and losing its natural properties.
Place 100 g of beeswax and 50 g of carnauba wax (if using) in a heat-safe container inside a saucepan of water. Heat the water to 75–100 °C and maintain that temperature for 15–20 minutes until both waxes have fully melted. Remove the wax container from the water bath and, without allowing it to cool, slowly pour in 400–500 ml of turpentine while stirring continuously. The mixture should become fully homogeneous — uniform in colour and consistency with no streaks.
For wood with large, open pores (oak, ash, walnut), use the lower end of the turpentine range (400 ml) to create a thicker paste that fills pores more effectively. For dense, close-grained wood (maple, cherry, beech), use the full 500 ml for a thinner, more fluid mixture.
Allow the blended wax to cool to room temperature before applying it to wood. Applying warm wax causes the wood surface to absorb the liquid too rapidly in the contact area, leaving stains and an uneven finish.
Step 4 — Apply the Beeswax to the Wood Surface
Beeswax is applied in thin coats. A common mistake is applying too much wax at once — thick layers do not dry or absorb evenly and leave a cloudy, sticky surface that is difficult to polish. The goal is to apply the minimum amount of wax that still covers the surface completely.
Take a clean cotton cloth or lint-free rag and dab a small amount of wax onto it. Apply to the wood surface using small circular movements, working from one end of the surface to the other without leaving gaps. On flat panels, switch to straight strokes following the grain direction once the wax is distributed, pressing firmly to push the wax into the grain.
For carved surfaces, textured panels, or mouldings, use a soft-bristle brush to work the wax into recessed areas where a cloth cannot reach. After working with a brush, wipe the surface with a cloth to remove excess wax sitting on raised areas.
One coat of wax is typically a thin, almost transparent film. You should be able to see the wood grain clearly through it. If the wax looks thick or opaque, you have applied too much — remove the excess immediately with a clean dry cloth before it begins to set.
Step 5 — Allow the Beeswax to Dry and Absorb
Beeswax drying time varies based on ambient temperature, relative humidity, and how open the wood grain is. In most interior conditions (18–22 °C, 40–60% relative humidity), a single coat of beeswax dries to the touch in 20–60 minutes. In cold or humid conditions, drying can extend to 90 minutes or more.
To test whether the wax is ready for the next step, lightly touch the surface with a fingertip. If the surface is not sticky and your fingerprint does not leave a visible impression, the wax has dried sufficiently. Do not proceed to polishing or reapplication while any stickiness remains.
After the wax dries, allow an additional 20–30 minutes for the wax to complete its absorption into the wood pores before polishing. Dense hardwoods absorb more slowly than softwoods; be patient with species like maple or beech.
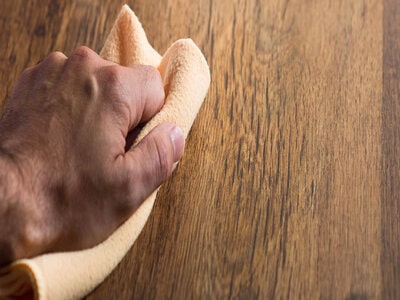
Step 6 — Polish and Reapply Additional Coats
Once the first coat has dried and absorbed, buff the surface with a clean polishing cloth or a polishing fleece bonnet. Use moderate pressure in circular motions initially to work the wax into any low spots, then finish with straight strokes following the grain direction. The surface will develop a low natural sheen — not a high gloss, but a smooth, warm appearance that highlights the wood’s natural figure.
Raw or previously unfinished wood requires at least two full coats of beeswax to achieve adequate protection. After polishing the first coat, allow 30 minutes and then apply a second coat following the same thin-layer technique. A third coat may be necessary on very porous species like oak or ash, or on pieces that will receive heavy daily use such as tabletops or chopping boards.
With paste wax or liquid commercial beeswax products, a second coat applied after polishing the first is almost always necessary to achieve a durable protective film. With solid bar wax dissolved in turpentine at the ratios above, two coats are sufficient for most furniture applications.
Which Types of Wax Are Used on Wood and How Do They Differ?
Not all waxes applied to wood perform identically. The choice of wax type affects hardness, gloss level, durability, and compatibility with different wood species and previous finishes. The table below compares the wax types most commonly used in wood finishing.
| Wax Type | Hardness | Shine Level | Best Use Case |
|---|---|---|---|
| Pure beeswax | Medium | Natural / matte | Antique furniture, toys, food-contact surfaces |
| Beeswax + carnauba blend | Hard | High gloss | Floors, tabletops, high-traffic areas |
| Paste wax (commercial) | Medium | Satin | General furniture maintenance |
| Liquid wax | Soft | Low | Quick maintenance coats on sealed wood |
Yellow beeswax produces the warmest visual effect on wood because its natural golden pigment slightly enhances amber and brown tones in the grain. White beeswax — which is simply bleached yellow beeswax — is preferred on light-coloured woods such as ash, maple, or birch where yellowing is not desired.
Carnauba wax, derived from the leaves of the carnauba palm, has a significantly higher melting point (82–86 °C) than beeswax (62–65 °C). When blended with beeswax at a ratio of one part carnauba to two parts beeswax, carnauba increases the hardness and abrasion resistance of the final finish while still allowing the beeswax to provide the penetrating and nourishing action.
What Are the Advantages and Limitations of Beeswax on Wood?
Understanding what beeswax does well — and where it underperforms relative to other finishes — allows you to choose it appropriately for specific projects and set correct expectations for protection levels.
| Property | Advantage | Limitation |
| Breathability | Wood pores remain open; prevents warping | Does not create a waterproof barrier |
| Toxicity | Food-safe and non-toxic when cured | Raw turpentine (solvent) requires ventilation |
| Repairability | Easy to reapply without stripping the surface | Must reapply every 6–12 months under normal use |
| Appearance | Enhances natural wood grain without plastic look | Yellows slightly on light woods over time |
| Application | No special tools; cotton cloth is sufficient | Requires thorough surface preparation first |
Beeswax does not form a hard surface layer the way lacquer, polyurethane, or shellac do. As a result, it offers lower scratch resistance and will show signs of wear on heavily trafficked surfaces more quickly than film-forming finishes. However, this limitation is also a practical advantage: worn areas can be refreshed locally without the need to strip, sand, and refinish the entire piece.
How Wood Type Affects Beeswax Application?
The porosity, density, and natural oil content of different wood species significantly influence how beeswax absorbs and how many coats are required to build adequate protection.
Open-Grain Hardwoods: Oak, Ash, Walnut
These species have large, visible pores that absorb beeswax quickly and in high quantities. Use a thicker wax paste (lower turpentine ratio) and expect to apply three coats minimum before a consistent finish develops. The first coat will absorb almost completely within 20 minutes on these species.
Close-Grain Hardwoods: Maple, Cherry, Beech
Dense, fine-grained hardwoods absorb wax slowly. A thinner wax mixture (higher turpentine ratio) penetrates more easily. Two coats are typically sufficient. Allow the full 60-minute drying window between coats because slower absorption means more wax remains at the surface where it can become sticky if disturbed too early.
Softwoods: Pine, Spruce, Cedar
Softwoods are highly absorbent and will drink in multiple coats of wax before a surface film develops. Start with a very thin, diluted mixture. Expect to apply three to four coats to pine or spruce before achieving an even protective layer. Cedar, with its natural aromatic oils, may resist absorption slightly more than other softwoods.
Oily Tropical Woods: Teak, Rosewood, Padauk
Natural oils in these species can interfere with beeswax adhesion. Wipe the surface with mineral spirits and allow to dry completely before applying wax. This removes surface oil and opens the grain to accept the beeswax. Only one or two coats are needed because the existing natural oil provides additional protection.
How Do You Reapply Beeswax on Previously Waxed Wood?
Reapply beeswax on previously waxed wood without sanding or stripping the existing finish. Apply a thin coat directly over the old wax layer using the same lint-free cloth technique. One maintenance coat every 6–12 months is sufficient for interior furniture; every 3–4 months for tabletops and high-use surfaces.
Frequently Asked Questions About Applying Beeswax to Wood
Can you apply beeswax over painted or varnished wood without sanding?
You can apply beeswax over a previously painted or varnished surface without sanding if the existing finish is sound, clean, and not flaking. In this situation, the beeswax functions as a surface polish and provides a thin protective layer over the existing finish rather than penetrating the wood. However, the result will not include the deep nourishing benefit that occurs when beeswax penetrates bare wood grain directly.
Where do you source beeswax for wood finishing?
Beeswax for wood finishing is available from organic food stores, craft suppliers, online marketplaces, and directly from local beekeepers. When purchasing, specify raw or cosmetic-grade beeswax rather than food-grade blocks intended for candle-making, as food-grade beeswax may contain additives that affect how it dissolves in turpentine. Organic beeswax is preferable because it is free from pesticide residues that could affect wood finishing results on food-contact surfaces.
How long does a beeswax finish last on wood furniture?
A beeswax finish on interior furniture under normal use lasts approximately 6–12 months before a maintenance coat becomes necessary. You can identify when reapplication is needed by a loss of sheen, a dull or dry appearance to the surface, or by lightly buffing the surface with a clean cloth — if little to no sheen develops from buffing, the wax film has been depleted and a fresh coat is needed.
Is beeswax finish safe for wood in contact with food?
Beeswax, once fully cured, is non-toxic and is classified as food-safe by most food standards agencies. It is used as a common finish on wooden cutting boards, salad bowls, and children’s wooden toys. The carrier solvent (turpentine or mineral spirits) is not food-safe in liquid form, but it fully evaporates during the drying phase before the finish is considered cured. Allow a minimum of 24 hours of full drying and ventilation before using a beeswax-finished item with food contact.
Can beeswax finish be used on exterior wood?
Beeswax is not recommended as a primary finish for exterior wood surfaces exposed to rain, UV radiation, or freeze-thaw cycles. The wax film breaks down rapidly under UV exposure and does not provide adequate moisture resistance against sustained rain contact. For outdoor furniture or decking, exterior oil finishes, exterior water-based stains, or specialised outdoor wax blends formulated with added UV inhibitors are more appropriate choices.
Summary: Key Steps and Values for Applying Beeswax to Wood
Applying beeswax to wood is a reliable, low-toxicity finishing method that enhances natural wood appearance while providing breathable surface protection. Success depends on thorough surface preparation (complete residue removal and 180-grit final sanding), correct wax preparation (water bath at 75–100 °C for 15–20 minutes, 100 g beeswax to 400–500 ml turpentine), thin application in circular strokes using a clean cotton cloth, and adequate drying time (20–60 minutes per coat at room temperature). Raw wood requires a minimum of two coats, with a third coat recommended for porous species or high-use surfaces. Maintained on a 6–12 month schedule, a beeswax finish preserves the natural character of solid wood furniture for decades.