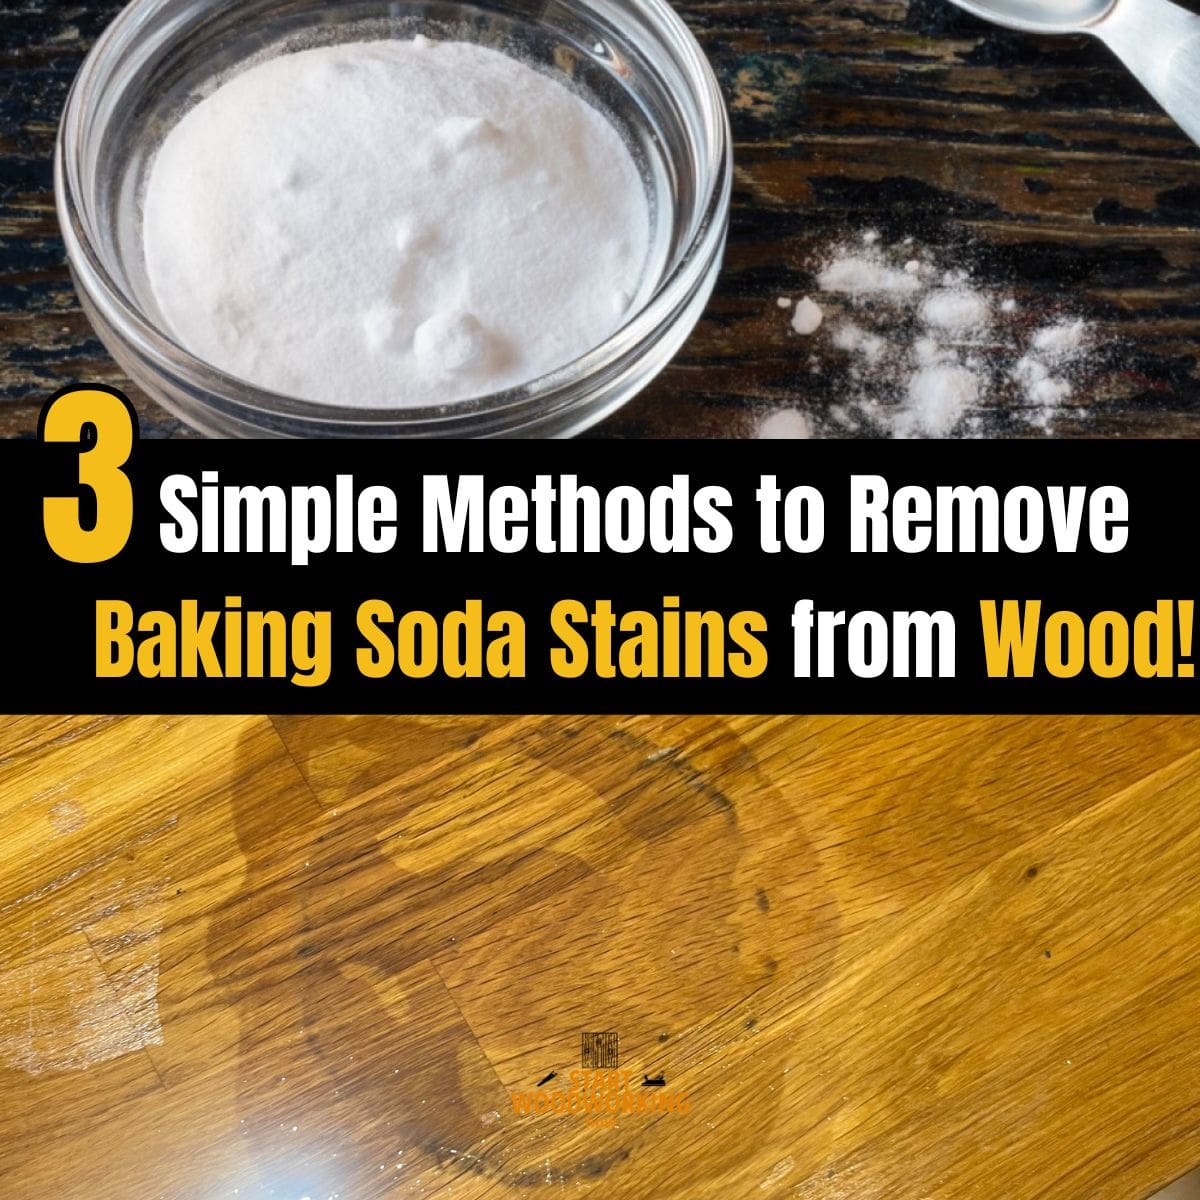
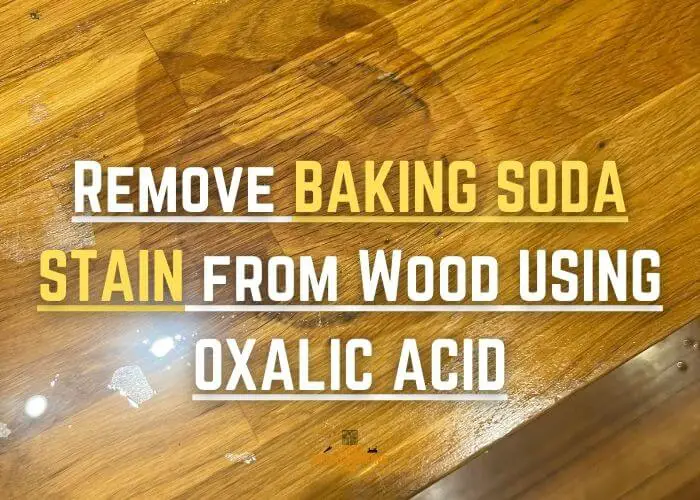
How to Remove Baking Soda Stains from Wood: Neutralisation and Tannin Bleaching Guide
Baking soda (sodium bicarbonate, NaHCO₃) stains wood through two distinct mechanisms that require different treatments. The first and most common is a simple alkaline residue — the white powder or paste left on the wood surface after baking soda is used as a cleaning agent or left in contact with the wood. This residue is removed with diluted white vinegar (1 part to 4 parts water), which neutralises the mild alkalinity (pH 8.3) and dissolves the sodium bicarbonate deposit.
The second mechanism — which occurs on high-tannin species such as oak, walnut, and mahogany — is tannin oxidation: the alkaline pH reaction darkens the tannin compounds in the wood grain, producing a grey-brown discolouration that persists after the surface residue is removed.
What are wood tannins? Tannins are natural polyphenolic compounds found in hardwood species such as oak, walnut, and mahogany. These compounds react chemically with alkaline substances (like baking soda, ash, or ammonia), producing dark discoloration within the wood grain rather than on the surface.
This discolouration requires oxalic acid bleaching, not vinegar alone. The treatment for baking soda stains is the same as for ash stains and alkaline battery leakage — vinegar neutralisation for the residue, oxalic acid for residual tannin discolouration.
This guide covers the three baking soda stain scenarios, the correct treatment sequence for each, and the finish-safe protocol for different wood surface types.
How Do You Remove Baking Soda Stains from Wood?
Which Baking Soda Stain Scenario Do You Have?
Identify your scenario before applying any treatment — the difference between a dry powder residue and a tannin discolouration determines whether vinegar alone resolves the stain or whether oxalic acid is also needed.
Dry Powder Residue
White or chalky powder; dull white patch or dusting on the surface.
Paste Residue
Thicker white smear; gritty texture; often dried in a ring pattern.
Tannin Discolouration
Grey, brown, or dark grain discolouration persisting after residue removal.
What Happens If Baking Soda Is Left on Wood Too Long?
Baking soda left on wood for extended periods (over 30–60 minutes in a wet state) begins to transition from a removable surface residue into a chemical stain. The alkaline pH (8.3) interacts with tannins in the wood, especially in oak, walnut, and mahogany, causing oxidation and permanent grey-brown discoloration in the grain.
Dry powder left briefly (under 30 minutes) typically remains a surface residue and is fully removable with vinegar neutralisation. Wet paste left for hours or overnight increases the risk of tannin reaction and may require oxalic acid bleaching to restore the original wood colour.
Why Baking Soda Stains Wood — and Why Vinegar Is the Correct Treatment?
Baking soda is alkaline (pH 8.3) — milder than ash (pH 9–11 when wet), ammonia (pH 10–12), or potassium hydroxide from alkaline batteries (pH 13–14), but using the same neutralisation chemistry. Like all alkaline substances on wood, it causes two types of damage depending on contact time and the tannin content of the wood species.
Alkaline stains on wood — pH and neutralisation reference (consistent across all alkaline stain guides)
Wood Chemistry: Alkaline Toxicity Scale
Vinegar at 1:4 dilution is the correct neutraliser for baking soda residue because the mild acetic acid reacts with sodium bicarbonate to produce sodium acetate, water, and carbon dioxide (NaHCO₃ + CH₃COOH → CH₃COONa + H₂O + CO₂). The sodium acetate product is water-soluble and easily rinsed away. Unlike stronger alkaline stains (ash, ammonia), baking soda at pH 8.3 does not typically require multiple vinegar applications — a single 2–3 minute contact is usually sufficient to neutralise the residue completely.
Baking Soda vs Ash vs Ammonia on Wood
All three substances are alkaline and cause tannin reactions in wood, but they differ in strength and effect.
- Baking soda (pH 8.3): Mild alkalinity — usually causes only surface residue or light tannin discoloration.
- Wood ash (pH 9–11): Moderate alkalinity — causes stronger and faster tannin darkening, often requiring oxalic acid.
- Ammonia (pH 10–12): Strong alkalinity — rapidly reacts with tannins and can permanently darken wood if not neutralised quickly.
All three require vinegar neutralisation, but stronger alkaline substances are more likely to require oxalic acid bleaching due to deeper tannin oxidation.
What Are the Key Specifications for Removing Baking Soda Stains from Wood?
| Method | Attribute | Value |
|---|---|---|
| Diluted white vinegar (neutralisation) | Dilution ratio | 1 part white vinegar to 4 parts water |
| Vinegar solution | Contact time | 2–3 minutes; single application typically sufficient for baking soda at pH 8.3 |
| Vinegar on polyurethane finish | Safety | Safe at 1:4 dilution; undiluted vinegar can dull polyurethane at extended contact |
| Vinegar on shellac finish | Safe contact limit | 2–3 minutes maximum at 1:4 dilution; shellac is slightly acid-sensitive |
| Vinegar on lacquer finish | Safety | Safe at 1:4 dilution at 2–3 minutes; rinse promptly |
| Dry powder removal | First action | Brush or vacuum dry powder before applying vinegar — prevents spreading alkaline residue when wet |
| Oxalic acid (tannin discolouration) | Concentration | 60 g per litre warm water |
| Oxalic acid | Contact time on bare wood | 15–20 minutes; check at 10 minutes; do not over-bleach |
| Oxalic acid neutralisation | Agent after oxalic acid | Baking soda solution (1 tablespoon per 500 ml water); rinse with clean water after |
| Species most affected by tannin reaction | High-tannin species | Oak, walnut, mahogany, chestnut, cherry — check for grey-brown discolouration after residue removal |
| Species least affected | Low-tannin species | Pine, maple, beech, birch — vinegar neutralisation alone typically resolves the stain |
| Drying time before refinishing | After any water-based treatment | 24 hours; water and vinegar raise wood grain slightly |
| Sanding (required when) | Only when | Tannin discolouration penetrated deep into bare grain after prolonged baking soda paste contact; or when finish was abraded by baking soda paste scrubbing |
The protocol requires 60 g of oxalic acid crystals per litre of water — use the calculator below to get the exact dose for your container size, plus the correct amount of baking soda for neutralisation after treatment.
Oxalic Acid Concentration Calculator
Exact doses for wood stain removal — acid, neutraliser, and contact times
How Do You Remove Baking Soda Residue from Wood?
The primary treatment for all three scenarios begins with the same two-step sequence: remove the physical residue first (dry), then neutralise the alkaline pH with diluted vinegar. The third step — oxalic acid — is only needed when grey-brown tannin discolouration is present after drying.
STEP 1 - Remove dry baking soda powder before applying any liquid
If visible dry powder or dried paste is present on the wood surface, remove it dry first — with a soft brush, dry cloth, or vacuum — before applying vinegar solution.
This prevents two problems: spreading a concentrated alkaline paste across a larger surface area when liquid is applied, and reducing the volume of alkaline material that needs neutralisation. Work across the surface gently to collect the powder without pressing it into open grain or finish texture.
STEP 2 - Apply diluted white vinegar — 2 to 3 minutes contact
Mix one part white vinegar with four parts water. Dampen a clean cloth with this solution and wipe the stained area firmly in the grain direction. Allow 2–3 minutes contact time.
The mild acidity neutralises the residual sodium bicarbonate — on a fresh or light baking soda stain, this single application resolves the discolouration. For dried paste residue with thicker alkaline deposit, apply a second pass of the vinegar solution after wiping the first.
STEP 3 - Rinse with clean damp cloth and dry immediately
Wipe the neutralised area with a clean damp cloth to remove the sodium acetate residue. Dry immediately with a dry cloth — do not allow water to sit on wood. Inspect the surface after drying (at least 30 minutes): the white residue should be completely gone.
If grey-brown discolouration is visible in the grain of an oak, walnut, or mahogany piece, proceed to the oxalic acid step.
STEP 4 - (conditional) Oxalic acid for tannin discolouration on high-tannin species
When grey-brown discolouration persists in the wood grain after vinegar neutralisation and drying — indicating tannin oxidation from the alkaline baking soda contact — apply oxalic acid at 60 g per litre to the affected area. Allow 15–20 minutes contact on bare or oil-finished wood.
The oxalic acid converts the dark iron-tannate compounds to colourless iron oxalate, progressively lightening the discolouration. Check at 10 minutes — the discolouration will lighten visibly within this time on baking soda-caused tannin stains. Stop when the target lightness is reached to avoid over-bleaching.
After oxalic acid treatment: neutralise with baking soda solution (1 tablespoon per 500 ml water), rinse with clean water, and allow 24 hours drying before sanding lightly at 180 grit and refinishing the treated area.
Oxalic acid is not needed for most baking soda stains: Baking soda at pH 8.3 is the mildest alkaline substance that commonly contacts wood — significantly milder than ash (pH 9–11), ammonia (pH 10–12), or alkaline batteries (pH 13–14). On low-tannin species (pine, maple, beech, birch) and on species where baking soda contact was brief, vinegar neutralisation alone resolves the stain completely. Oxalic acid is only needed when tannin oxidation discolouration is confirmed visually after the vinegar treatment and 30-minute drying period. Applying oxalic acid to a wood surface that has no tannin discolouration bleaches the natural wood colour unnecessarily.
How Does the Wood Surface Type Affect Baking Soda Stain Treatment?
| Surface Type | Dry Powder Removal | Vinegar Neutralisation | Oxalic Acid (if tannin stain) |
|---|---|---|---|
| Polyurethane finish (most modern furniture) | Soft brush or dry cloth | Vinegar 1:4 for 2–3 min; safe on polyurethane at this dilution | Strip finish locally before oxalic acid; oxalic acid on sealed finish has limited penetration |
| Lacquer finish | Soft brush; minimal pressure — baking soda abrasion may have scuffed lacquer | Vinegar 1:4 for 2 min max; rinse promptly | Strip finish locally first; re-lacquer after oxalic acid treatment and drying |
| Shellac (antique furniture) | Very soft brush — shellac scratches easily | Vinegar 1:4 for 2 min max; shellac is slightly acid-sensitive — rinse immediately | Denatured alcohol strip locally; oxalic acid; re-shellac after drying |
| Wax finish | Soft brush | Vinegar 1:4; re-apply paste wax after — vinegar removes wax layer | Strip wax with mineral spirits first; oxalic acid; re-wax after drying |
| Oil finish (danish oil, tung oil) | Soft brush | Vinegar 1:4; re-apply matching oil after treatment | Oxalic acid directly on oil-finished wood (oil finish allows penetration); re-oil after drying |
| Bare / unfinished wood | Brush or vacuum | Vinegar 1:4; most effective on bare wood — direct access to residue | Oxalic acid most effective on bare wood; apply directly; sand 120–180 grit after drying; apply finish |
Baking soda paste used as a cleaning abrasive on finished wood: Baking soda paste is frequently recommended in general cleaning guides for wood surfaces. The mild abrasive action of the bicarbonate crystals can scratch polyurethane, lacquer, and wax finishes, leaving a network of fine scratches that appear as a dull patch even after the white residue is removed. On gloss or satin polyurethane finishes, this abrasion dulling requires local refinishing — the scratches cannot be reversed by vinegar treatment. If baking soda paste has been applied and scrubbed on a sealed finish, assess for surface scratching after residue removal before attempting any chemical treatment.
📝 The most instructive baking soda stain scenario in my workshop was an 1890s oak writing desk that a client had cleaned with baking soda paste on the leather inset surround — some paste migrated onto the bare oak frame at the leather edge. The grey-brown tannin discolouration on the oak was intense even from the relatively mild pH 8.3 of baking soda, because the contact had been prolonged over several cleaning sessions. Vinegar neutralisation removed the white residue cleanly, but two oxalic acid applications at 60g per litre were needed before the oak matched the surrounding unaffected panels. The lesson: even baking soda at relatively mild pH can produce significant tannin discolouration on oak if allowed to sit wet over multiple applications.
How Long Does It Take to Remove Baking Soda Stains?
- Surface residue only: 5–10 minutes
- Light tannin discoloration: 20–30 minutes including drying
- Deep tannin stains: 1–2 hours including oxalic acid treatment and drying time
Frequently Asked Questions About Removing Baking Soda Stains from Wood
Why does baking soda stain wood if it is used as a cleaning agent?
Baking soda stains wood through two mechanisms. First, the alkaline residue (pH 8.3) left on the surface after cleaning reacts with wood tannins on high-tannin species — oak, walnut, mahogany — producing a grey-brown discolouration known as tannin oxidation. This is the same mechanism that causes ash stains and ammonia damage on wood. Second, baking soda crystals are mildly abrasive — using baking soda paste as a scrubbing agent on sealed wood finishes creates micro-scratches in the finish film that appear as dull patches. The white powder residue itself is visible because sodium bicarbonate is white and does not dissolve in the oils or waxes present in wood finishes.
Is oxalic acid always needed to remove baking soda stains from wood?
No — oxalic acid is only needed when tannin oxidation discolouration is present: a grey or brown discolouration in the wood grain that remains visible after the white baking soda residue has been removed with diluted vinegar and the wood has dried for 30 minutes. On low-tannin species (pine, maple, beech, birch) and on any species where baking soda contact was brief, diluted white vinegar at 1 part to 4 parts water applied for 2–3 minutes resolves the stain completely. Applying oxalic acid to wood without confirmed tannin discolouration bleaches the natural wood colour unnecessarily.
Can baking soda damage the polyurethane finish on wood furniture?
Yes, in two ways. The mild abrasive crystals in baking soda paste scratch polyurethane finish when scrubbed — producing a network of micro-scratches that appear as dullness or a hazy patch. This finish damage cannot be reversed chemically and requires local sanding and refinishing. Additionally, the alkaline residue (pH 8.3) can cloud or dull polyurethane finish at prolonged contact — the same mechanism as ammonia cleaner damage. Vinegar treatment at 1:4 removes the alkaline residue, but abrasion scratches require mechanical refinishing.
Summary: Key Values for Removing Baking Soda Stains from Wood
Removing baking soda stains from wood requires first removing any dry powder with a brush before applying liquid, then applying diluted white vinegar at 1 part to 4 parts water for 2–3 minutes to neutralise the alkaline sodium bicarbonate residue.
On low-tannin species (pine, maple, beech) and with brief contact, this single step resolves the stain completely.
On high-tannin species (oak, walnut, mahogany, chestnut) where grey-brown discolouration persists in the grain after vinegar treatment and 30-minute drying, apply oxalic acid at 60 g per litre for 15–20 minutes, neutralise with baking soda solution, rinse, dry 24 hours, sand lightly, and refinish.
Oxalic acid is not needed for most baking soda stains — only when tannin discolouration is confirmed. If baking soda paste was scrubbed on a sealed finish, assess for abrasion scratches after residue removal — these require local refinishing rather than chemical treatment.
→ Related: How to Remove Ash Stains from Wood (same alkaline neutralisation protocol) → Related: How to Remove Ammonia Stains from Wood → Related: How to Remove Battery Acid Stains from Wood → Hub: How to Remove Stains from Wood — Complete Guide