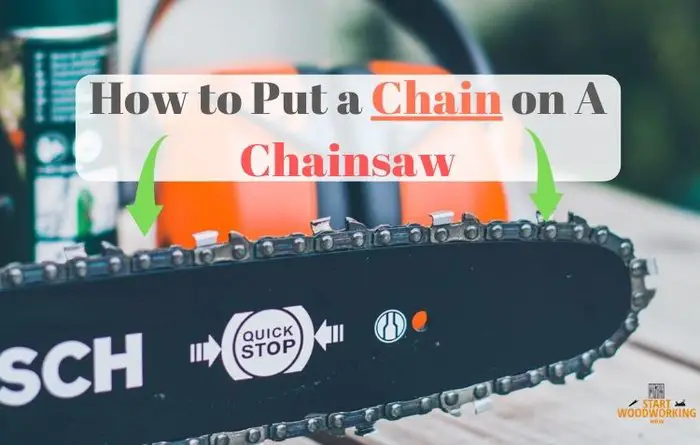
How to Put a Chain on A Chainsaw [Easy Way]
When buying equipment, you will be confronted with the installation of the chain of your chainsaw, but also when you will carry out maintenance or simply when changing this chain if it is worn. Therefore, it is very important to know the sequence and how to put the chain on a chainsaw.
Which way to put a chain on a Chainsaw?
Beginners in particular are often unsure in which direction the chain must be on the chainsaw. An incorrectly attached chain on the chain saw must never occur! In this article you can read how the chain is positioned correctly and what else you have to consider when attaching the chain.
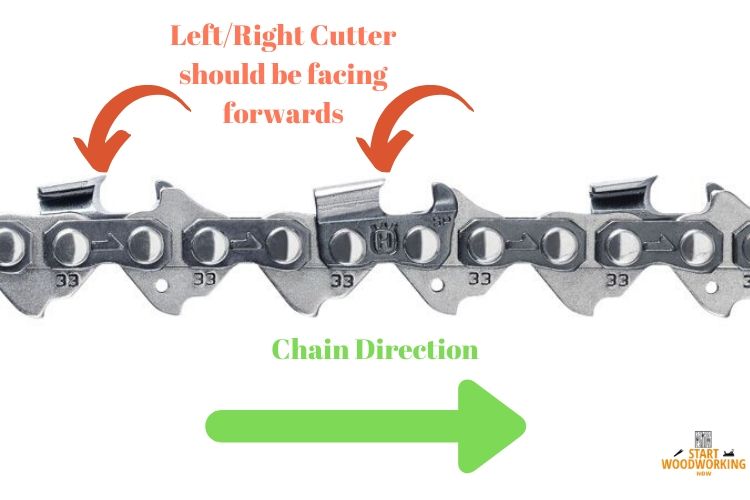
Right direction of the chain
A chain always lies correctly on the chainsaw when the cutting tooth on the top of the rail points forward. This can easily be checked at a glance.
You can also tell that a chain is the wrong way round by the fact that when trying to cut it produces smoke and a black line appears on the wood (or tree).
In this case you MUST check immediately whether the chain is correctly put on the chainsaw!
An incorrectly placed chain can happen to even professionals in a hurry. It happens every now and then. If you notice the problem in good time, there can be no serious damage. But better to check again!
Steps on How to Put a Chain on A Chainsaw
Now place the various tools on board a perfectly flat surface, ideal for your work. Spread an old blanket to safeguard the functionality of both the equipment and the work surface.
Get ready to put a chain on a chainsaw using the following steps:
Step 1. Removal of the chainsaw sprocket cover
- First of all, disconnect the spark plug connector on your thermal chainsaw
- Take a 13 mm pipe wrench .
- Loosen the two bolts that hold the housing and the chain guide bar.
- Set the housing aside with the two clamping bolts .
Step 2. Remove the chainsaw chain tensioner
Here, you now have access to the chain tensioner.
- Unscrew it with a screwdriver.
Make sure that the chain tensioner moves back. - Now unscrew the cover of the chain spool clockwise.
- Do this by loosening the wing nut.
- Then, turn the chain tensioner wheel, located at the level of the bar, to the end.
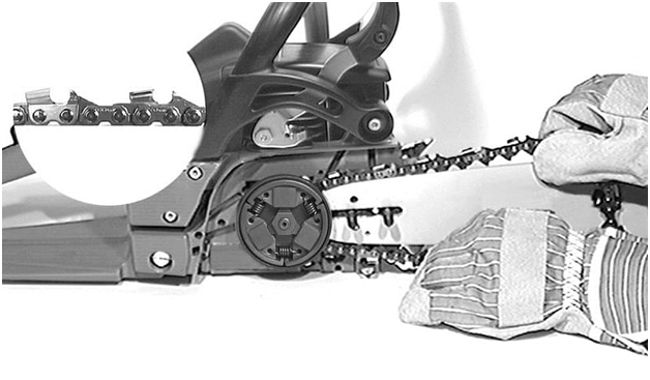
- Always wear safety gloves to avoid the risk of hand injuries.
- Take the chain and guide rail and place the first on the second.
Step 3. Remove of the old chain
- Using the flat screwdriver , loosen the defective chain from its guide bar.
- Remove the guide bar + chain assembly from the motor pulley.
Step 4. Put the new chainsaw chain
- Take the new chain out of its case with its guide and check the direction of rotation of the chain .
- Locate the symbol with the arrow on the guide to help you.
- The cutting teeth should face up and towards the front of the guide.
- Make sure that the chain is properly inserted inside the guide rail bar.
Tip:
You can hold the chain mounted on its guide by hand at ground level to ensure that it is properly installed, if the chain knock out of place and drops the guide, this will mean that the latter was not properly inserted.
- Start by passing the chain around the motor pulley .
- Then install its guide in the location provided.
- Push the guide all the way toward the pulley to lock it.
- Iron the chain around the guide.
Step 5. Put the protective cover of the chainsaw back
- Reassemble the protective cover with one hand while holding the guide and the chain with the other hand, then make sure that it is properly replaced.
- Tighten the two bolts by hand first, then with your 13 mm wrench.
- Do not tighten fully as it is likely that you will have to recalibrate the chain tension afterwards.
Step 6. Chain tension adjustment
- Take the flat screwdriver.
- Locate the adjustment screw below the two bolts you just reinstalled.
- To tension your chain: turn the adjusting screw clockwise.
- To loosen your chain: turn the screw counterclockwise.
- A chain that is too loose can cause the guide to derail with rotation.
- A chain that is too tight can cause accelerated wear of the chain guide, which can even cause smoke if it is not greased.
- Your chain should hang very partially from the guide, allow 1 cm of maximum deviation .
- When you have the correct tension setting, finally tighten the crankcase bolts with a wrench.
Step 7. First start-up of the chainsaw with the new chain
- The chain, driven by the motor pulley, will start to heat, which will cause the guide to expand and therefore create additional tension.
- First check your oil which will allow effective lubrication. The oil tank is located not far from the fuel tank.
- Remember to put the protective case around the guide when you are not using your chainsaw, this will avoid possible cuts or damage to your device depending on where it is stored.
Do you have problems starting your chainsaw? Then you need to see this in-depth guide on how to start a chainsaw and how to fix most chainsaw starting problems. Click Here to see it!
Can you put a Chainsaw Chain on wrong?
Nothing happens if you put a chainsaw chain wrong, because the sawing power is not available. However, the chain should be put on correctly at the latest, otherwise the chain would wear out unnecessarily and can sometimes be damaged.
The chain of the chainsaw, if you carefully consider it, has saw teeth directed in one direction.
Therefore, the correct direction of the saw teeth on the guide bar is very easy to determine: if you place the chainsaw itself in the process of working/cutting, then the row of teeth located on top of the guide bar with sharp edges should be directed towards the end of the guide bar.
At the same time, the row of teeth, which is located below the chainsaw, with sharp edges should look in the opposite direction, in the direction of the drive sprocket.
How to put a chain on a Husqvarna Chainsaw
- The chain can be installed and tensioned by loosening the main screw and putting the links on the drive sprocket and the saw bar.
- It is important to ensure that the tails fall into the groove so that they do not fly off again.
- Before you tension the chain of the Husqvarna chainsaw, it is worth looking at its condition and, if necessary, replace it with another.
- After removing this part, you need to carefully inspect the guide groove along which the links go. It is there that dirt accumulates, absorbing oil and preventing it from pulling the cutting part.
- This place is cleaned with a thin metal object. If such actions are not performed, the oil may not fall onto the lower part of the guide bar, and after installing the chain the links will slip worse, which affects the cutting efficiency.
- To properly tighten the chain on the Husqvarne chainsaw with the engine turn off, the screws securing the cover are first released. After that, the part correcting the tension is rotated.
- If the chain sag from below (even a little), then you need to tighten them. Before you pull the chain on a chainsaw (Huskvarna, for example), you should read the attached documents. Indeed, the mechanisms of different companies have their own differences.
When it comes to chainsaws there are two main types: Gas and Electric Chainsaw. I have written an in depth comparison between these two. Click here to see it!
How should the chain be tensioned on a Husqvarna Chainsaw?
This can be determined by lifting it up. Normally, the shank should be one-third immersed in the groove.
If it came out completely, then the chain needs to be tensioned, if it has got out less than 2 thirds, loosen.
When scrolling, the links should pass freely along the bus. After moving the hand, the chain under normal tension pass a little more by inertia.
If the chain instantly slows down, then this indicates a tension.
How tight should a Chainsaw Chain be?
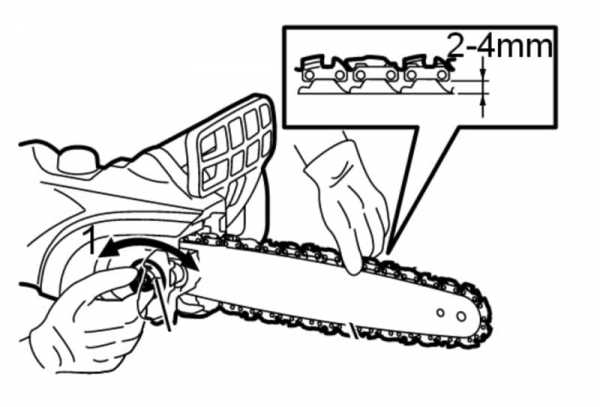
The tension of the chain is very important, because after all it should not come off again when sawing. Tension the chain until it can be lifted 3 to 4 mm above the guide rail, then the chain is optimally tensioned.
The chain of the chainsaw together with the guide bar during operation experience the greatest load, unlike other parts of the chainsaw.
Over time, it lengthens in size due to the boring of gaps in the connecting links. This process occurs with absolutely any type of chain, therefore, when operating a chainsaw, it is necessary to periodically monitor the correct chain tension and its wear.
If the chain is too tightened, then the efficiency of sawing is reduced, the engine and transmission are subjected to increased loads.
The guide rail is very hot due to increased friction, the operation mode of the chainsaw goes to the excessive consumption of the fuel mixture.
How to tension a Chainsaw Chain
Regularly tension the chain on the chainsaw is necessary not only for efficiency, but also for the safety of the worker.
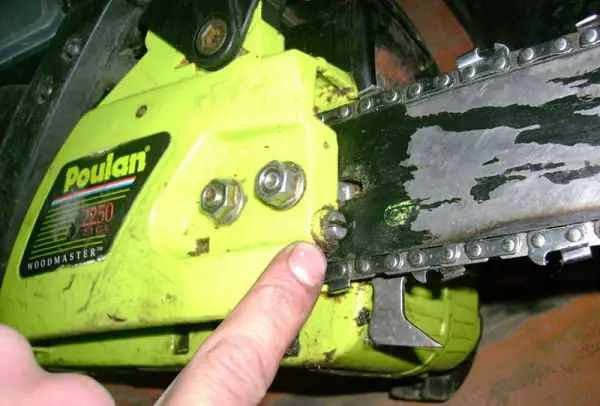
On most devices on the side there is a special screw (tension screw/ adjustment pin) , as in the photo, helping to bring the chain to a normal position.
Tension the saw chain
Step 1. Check the chain tightness
Check how tight the chain is on the guide bar. To do this, place the chain saw on a flat, level surface and check the chain sag on the underside of the rail.
The chain must not sag too much, but should be very easy to move. If the chain has no air at all, it is too tight.
Step 2. Tension the chain
Important: The engine must not run!
Depending on the model, the set screw is attached behind a chain cover or quickly visible. Most chainsaws are equipped with so-called quick releases, which are quickly accessible.
Now loosen the screw (a tool may be necessary here) and pull out the rail or push it in further.
With modern chainsaws, the tension is regulated using a screw, which means that the rail does not have to be moved. This is done using the adjusting screw.
Step 3. Chain Change / Cleaning
If it is also necessary to change the chain, the chain cover must be removed and the chain released. Now the chain can be removed.
It is important that the drive sprocket and the guide rail are cleaned before installing the new chain. Once this has happened, the new chain can be put on and tensioned. Please pay attention to the correct running direction of the chain
Before the chainsaw starts to cut the tree trunk, you should run the chain through a few turns and check the tension again (with the chainsaw switched off). It may therefore be necessary to readjust after tightening the chain.
There are two ways to tension chains : fast and frontal. It is best to stretch the frontal way. If you carry out a front stretch, you need to unscrew the nuts that hold the guide bar, and lift it by the edge.
With a special bolt located on the right, you need to tension the chains until an acceptable tension is obtained, and then raise the guide bar even higher and clamp it. Important!
It is worth remembering that only a cold chain can be pulled. If you tighten the chains that are super heated after operation, then after cooling it can burst and damage the guide bar(according to the laws of physics, hot metal always expands).
If you use the quick tension method, first you need to raise the wing nut handle and loosen it. Then tighten the chain tension screw fully clockwise. Then tighten the wing nut again and lower the handle.