How to Cut Plywood with a Table Saw [Easy Way]
Cutting plywood is more laborious due to the layering of the material. To achieve a high-quality result, you need to know how to cut plywood with a table saw.
Awkward and floppy, cutting large plywood sheets with a table saw can be difficult. There are a number of ways, however, to make cutting plywood sheets easier, more exact, with minimal chipping you should choose the right table saw, which will avoid problems and get parts without chips.
How to Cut Plywood with a Table Saw Step by Step
Step 1: Choose the appropriate blade.
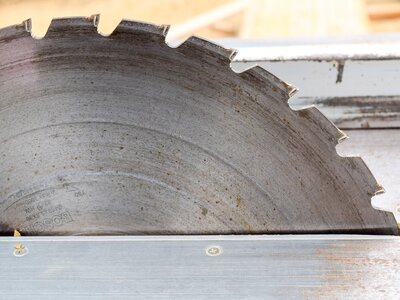
To get the most straight plywood cut when working with a table saw, you will have to purchase a special blade with a large number of teeth, for example, buy an 80 TPI saw blade for plywood (80 teeth per inch).
Most of the “native” table saw blades are only suitable for rough cuts, which will not give you neat cut edges.
As an alternative to purchasing a saw blade, you can place a gap-free saw insert under the plywood to be cut. To make it, simply gently place a whole sheet of plywood on the table with the saw in operation, making sure that the plywood does not slip or fall out of your hands.
When the table saw has completely cut through the plywood (the blade should be raised high enough), fix the cut sheet on the table with a vise.
A self-made plate will no longer allow the underside of the table sawn sheets to split, since there will be no gap between the table saw and the saw hole in the table. You will damage one sheet of plywood to get the job done well, so it only makes sense if you need to saw a lot of plywood.
Sharpening your table saw blade will become so easy if you follow this step by step guide!
Step 2: Clean the table saw blade
First, keep the table saw blade clean and polished. Rust and debris can cause friction that will inhibit the cut of plywood. Ripping is running the blade along the grain of the wood. A cross section goes through the grain.
Since plywood is a material made from multiple layers of wood bonded together, usually with each layer at right angles to the next, there is no specific grain direction. In this case, a rip cut would be cut to length and a cross cut would be cut.
Do you have a jigsaw blade? Here is another tutorial how to change your jigsaw blade!
Step 3: Raise the table saw blade to cut properly
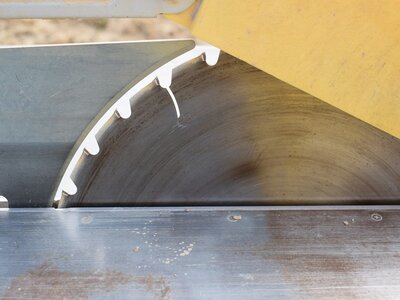
Raising the blade changes the direction in which the teeth will enter the plywood. When the blade is raised slightly so that the teeth only lightly pass the plywood, the teeth enter the plywood surface at an angle. By raising the blade a little higher, you can get a perpendicular cut, which will produce a smoother plywood surface.
Do not raise the table saw blade more than 1 inch (2.5 cm) above the plywood to be cut. A raised blade can provide a smoother cut, but it is also more dangerous. Use extreme caution when cutting with a raised blade.
Make sure the blade is at the correct height for cutting. A good rule of thumb: the height of the blade should fit one tooth above the depth of the plywood being cut. After cutting, wait until the blade comes to a complete stop before leaning over to pick up the wood.
Step 4: Lay the plywood against the table saw fence
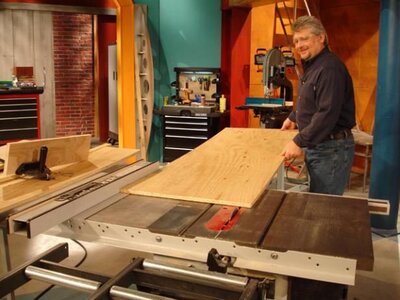
When cutting a large sheet of plywood on a table saw, use an exit table or a roller stand to support the table when it comes off the saw. Place the best edge of the plywood against the fence and push the corner of the board into the fence to keep it against the fence throughout the cut.
Use a miter gauge for cross cutting
Do not use a fence when making a cross cut. The plywood will bond between the fence and the blade. Instead, use a cross cut miter gauge. Attach a sacrificial guide to the miter gauge to help hold the board even while cutting.
Step 5: Provide supports for the entire plywood sheet.
Large pieces of plywood can be heavy. When cutting them on a table saw, make sure they can be kept flat before you start the cut. Stabilize the sheet with easels or ask a friend to help you hold it firmly.
Having supports for the entire sheet allows you to maintain a constant feed rate, that is, the speed with which you pass the wood through the saw.
You can also use a circular saw to cut large plywood sheets into more manageable sizes.
Step 6: Apply masking tape to the cut mark.
Use a low tack tape, such as painters tape, on both sides of your plywood. This procedure will help keep the plywood fibers in place and prevent the edges from chipping. Once you have finished cutting, peel off the tape slowly to avoid splintering.
Before you start cutting the plywood with a table saw, a tape-tape reinforced with fiberglass or aluminum is glued to the plywood. The requirements for its width are as follows: on both sides of the cutting line there should be a margin of 1.5-2.0 cm.
It is better to pasting, pressing the tape with a dry cloth, avoiding the formation of wrinkles and gluing.
Step 7: Cut the plywood with the best face looking up.
Lay the plywood sheet out on the table saw with the best side facing up. The table saw teeth will enter the blade from the top and exit from the bottom. Wood chips can occur where teeth come out, so keep your best face up.
Step 8: Start to cut the plywood with a table saw
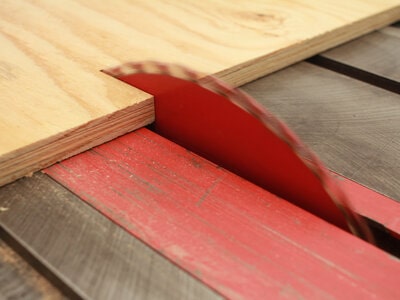
Hold the blade stable and keep it pressed firmly against the guide, the straight edge of the table saw. Use both hands to guide the plywood through the blade.
First use the hand closest to the blade to push the plywood forward through the blade. Use the hand that is farthest from the blade to push the plywood toward the cut line.
As you get closer to the end of the cut, change the position of your hands so that you have one hand on either side of the blade. Carefully push the rest of the foil through the blade. Work carefully when using the table saw. Keep your hands away from the blade.
Use a roller stand to support the board as it moves through the cut. Position the roller bracket so that it is just below the level of the plywood. Make sure the roller bracket is in the proper position to actually support the board as it is pulled apart. After cutting, wait until the blade comes to a complete stop before leaning over to pick up the wood.
Tools for cutting plywood
| Table saw | A table saw equipped with a sharp wood blade makes proper cuts to the plywood. However, the difficult handling of the 4-by-8-foot (1.21-by-2.43-meter) blade and ¾-inch (1.90-centimeter) plywood weighing 70 to 100 pounds (31 to 45 kilograms), requires supports and extension boards surrounding the table saw to support the blade as it passes over the table. By cutting a rectangular slot in a board for an equal and mountable piece, a special plinth can be made for plywood and sheet. |
| Circular saw | A handheld circular saw comes with a blade that can also cut plywood. Typically, the plywood blade is placed on two parallel trestles, and the guide of the saw follows the line previously drawn on the wood. |
| Vertical plate saw | Another saw, the vertical plate saw, has a frame that contains the wood like the circular saw, and a guide is attached that passes through it. This saw takes up less space and requires little space to make a full cut. However, it only has rough cuts and tends to get a lot of punctures. Some vertical panel saws have different interchangeable cutting tools, such as a floating router, sheer insert laminates, floating saw, and a razor. |
| Router | A router with a straight part, an experimental part and a ruler ensures a clean cut of the plywood. The part sizes match the standard thicknesses of plywood and the skirting board finishes of the wood can also be used. |
How to Cut Plywood with a Table Saw without Splintering
In order to cut plywood without splintering, you can use a table saw. There are several techniques to help you achieve high-quality plywood cut:
Step 1: Use the correct blade and use it properly.
This should come as no surprise, but the blade that comes with your circular saw, miter saw, or table saw will not give you the cuts you are looking for. These blades will work for rough cuts in construction grade softwood, but to work with hardwoods and blade products you need to upgrade.
For circular saws, take a $ 15-20 carbide tipped blade designed for plywood. For table and miter saws, invest in an 80 TPI plywood blade, one designed for cross cuts (miter saw) or ripping (table saw).
Here is a list with 32 types of saws and where should you use each one of them!
Step 2: Zero clearance
The best thing you can do to cut without splintering plywood is to use a zero clearance insert. This closes the gap around the blade in the throat plate or shoe. In a table saw, you can buy a blank aftermarket insert, or you can easily make one.
For the circular saw, place a thin piece of plywood or compressed hardboard into your saw shoe, then lower the blade to cut a free scratch groove.
The principle of this technique is to keep the distance between the blade sole and the pressure plate as low as possible. This avoids breaking off the top layer of the plywood. This effect can be achieved by attaching a cover plate to the tool sole.
The pad has a slot to keep the ability to cut along the intended line. Thanks to this, the teeth are guaranteed to cut small chips and do not break the plywood.
Step 3: Use adhesive tapes
To protect the back of the plywood, tape is glued along the cutting line. This method helps to prevent large pieces from breaking off, which is especially effective if the decision is made to use a hand or electric jigsaw. However, not all adhesive tape is suitable for this purpose. For example, masking tape in this case will be completely useless due to the small margin of safety.
Step 4: Raise the height of the blade.
Typically, to avoid kickback with power tools, set the blade so that it comes out of the plywood right in the throat, the valleys between the teeth. By lifting the blade, you can change the direction that the teeth actually enter the plywood, going from an angled cut to a near perpendicular cut.
Tips on how to cut plywood without splintering using a table saw :
- Plywood sheets are cut on the floor with absolute support;
- It is necessary to adjust the cutting depth, which can affect the level of cut quality;
- In the longitudinal direction of the cut, a long straight object is used as a guiding tool;
- Before making a cut, you should check the guide;
- Recommended cutting at high speed, which should not be changed;
- When cutting with a table saw, the blade must be selected with the largest number of teeth;
- The cross-cut is advised to be made with adhesive tape.
Conclusion
Working well with your plywood panels is essential to have a perfect piece of furniture. Cutting plywood is tricky and requires special attention. By following these steps, you will know how to cut plywood with a table saw.

