How to Remove Burn Marks from Wood: Diagnosis, Sanding, and Finish Repair by Burn Depth
Removing burn marks from wood requires first diagnosing the burn depth — because the correct repair method depends entirely on whether the heat has damaged only the finish film, scorched the surface wood fibres, or penetrated deep into the grain as structural char. A finish-level scorch — where the polyurethane, lacquer, or wax finish has discoloured or blistered but the wood underneath is undamaged — is repaired by heat re-fusion or fine abrasion of the finish layer alone.
A surface char — where the top 0.5–1 mm of wood fibres have carbonised — is removed by progressive sanding from 80 to 180 grit followed by local refinishing. A deep char — where carbonisation has penetrated beyond 1 mm — requires sanding from 60 grit or planing, with full local refinishing after.
Methods that add substances to the burn (mayonnaise, toothpaste, baking soda, lemon juice, cigarette ash) do not remove carbon from wood — carbon (the black residue in burn marks — is a stable, non-reactive material formed when wood fibres are thermally decomposed at high temperature) is chemically inert at room temperature and can only be removed by mechanical abrasion.
This limitation is similar to glue removal where incorrect substances produce no result — see How to Remove Glue from Wood for adhesive-specific removal methods.
This guide covers the burn depth diagnosis test, the correct method and grit sequence for each depth level, and the local refinishing protocol for blending repaired areas into surrounding finish without resanding the entire surface.
How Do You Remove Burn Marks from Wood?
Because burn marks affect wood at different structural depths, applying a single removal method without diagnosis leads either to incomplete carbon removal or unnecessary damage to intact wood or finish layers. The sections below map each burn depth level to its correct repair method, ensuring the removal approach matches the actual material damage.
→ Related: How to Remove Ash Stains from Wood
→ For a complete overview of all wood surface repair: How to Remove Wood Finishes and Stains
What Are the Three Burn Depth Levels and Which Method Does Each Require?
Burn marks on wood fall into three distinct depth categories. The visual appearance and a simple tactile test determine which category applies and therefore which repair method is appropriate. Using a heavy abrasion method on a finish-level scorch destroys a sound finish unnecessarily; using a light touch on a deep char produces no result.
How Do You Diagnose the Burn Depth Before Starting Repair?
The diagnosis test takes under 2 minutes and prevents applying the wrong method. Work on a small inconspicuous area of the burn perimeter to avoid extending damage.
Burn Depth Diagnosis — 3-Step Test
Can You Remove Burn Marks from Wood Without Sanding?
Removing burn marks without sanding depends entirely on burn depth.
| Burn Type | Can It Be Removed Without Sanding? | Method |
|---|---|---|
| Finish scorch (Level 1) | YES | Heat re-fusion or #0000 steel wool with wax |
| Surface char (Level 2) | PARTIAL | Light abrasion required; sanding unavoidable |
| Deep char (Level 3) | NO | Requires aggressive sanding or material removal |
Finish-level damage affects only the surface coating and can be repaired without removing wood material. However, once carbonised wood fibres are present, mechanical abrasion is the only method capable of removing the affected layer.
| Scenario | Answer |
|---|---|
| Finish scorch | YES |
| Surface char | PARTIAL |
| Deep char | NO |
What Are the Key Specifications for Removing Burn Marks from Wood?
| Method | Attribute | Value |
|---|---|---|
| Level 1 — iron heat re-fusion (polyurethane/lacquer) | Iron setting | Lowest (silk); no steam; continuous movement; single cotton cloth |
| Level 1 — #0000 steel wool on wax finish | Lubrication | Paste wax applied first; rub in grain direction only; never circular |
| Level 1 — oxalic acid for residual brown tannin discolouration | Concentration | 60 g per litre; 15 min contact on bare wood after finish removal |
| Level 2 — sandpaper starting grit | Starting grit for surface char (0.3–1 mm) | 80–100 grit |
| Level 2 — sandpaper progression | Grit sequence | 80 → 120 → 180 grit |
| Level 3 — sandpaper starting grit (deep char, 1.5+ mm) | Starting grit | 60 grit |
| Level 3 — sandpaper progression | Grit sequence | 60 → 80 → 120 → 180 grit |
| Carbon removal confirmation test | Method | Mineral spirits wipe — no black transfer on white cloth = all carbon removed |
| Sanding direction | All levels | Always along the grain — never circular, never cross-grain |
| Oxalic acid for brown discolouration after sanding | Use case | Tannin oxidation residue on oak, walnut, cherry after char removal |
| Local refinishing — feathering distance | Sand radius beyond repair area | 2–3 cm beyond visible repair boundary with 220 grit |
| Stain matching before refinishing | Required when | When sanded area is visibly lighter than surrounding wood after bleaching |
| Deep char — structural assessment | Method | Press firmly in burn centre — if wood compresses or crumbles, structural repair needed before cosmetic |
The protocol requires 60 g of oxalic acid crystals per litre of water — use the calculator below to get the exact dose for your container size, plus the correct amount of baking soda for neutralisation after treatment.
Oxalic Acid Concentration Calculator
Exact doses for wood stain removal — acid, neutraliser, and contact times
Why Do Mayonnaise, Toothpaste, Baking Soda, and Lemon Juice Fail on Burn Marks?
Carbon — the primary component of a burn mark — is one of the most chemically inert materials found in a household context. It does not dissolve in oil, acid, water, or mild abrasives at room temperature. The only effective removal method is physical: mechanical abrasion removes the carbonised wood fibre layer entirely.
Mayonnaise and cooking oil can slightly mask a very light finish-level scorch by filling micro-voids in the damaged finish with oil and temporarily restoring light transmission — the same masking mechanism as their (temporary) effect on white alcohol stains. They do not remove carbon and the improvement disappears when the oil evaporates or is wiped away.
Toothpaste and baking soda are mild abrasives. On a Level 1 finish scorch, the abrasion can smooth the disrupted finish surface and reduce the visible dark mark — the same mechanism as using #0000 steel wool, but less controlled and more likely to create uneven finish texture on wood. On Level 2 and Level 3 char, the abrasion is far too gentle to reach the depth of the carbonised wood fibres.
Cigarette ash and lemon juice — cigarette ash has a similar composition to wood ash (calcium carbonates, potassium carbonate) with no chemical reactivity toward carbon. Lemon juice (citric acid at 5–6%) has no oxidising capacity to break down carbon compounds at room temperature. Neither substance interacts chemically with burn carbon.
The correct approach for any carbon removal is mechanical. For Level 1 finish damage, the abrasion is micro-scale: heat re-fusion or #0000 steel wool. For Level 2 and 3, the abrasion is macroscale: progressive sandpaper from the appropriate starting grit.
How Do You Remove a Level 1 Finish Scorch from Wood?
A Level 1 finish scorch has damaged only the finish film — polyurethane, lacquer, wax, or varnish — without affecting the wood fibres beneath. The repair method matches the finish type rather than the burn severity, because the goal is to re-fuse or re-level the finish film rather than remove wood material.
Polyurethane and lacquer finish — heat re-fusion method
Place a single dry cotton cloth over the scorched area. Set a clothes iron to its lowest setting (no steam) and move it continuously in slow, circular strokes over the cloth. The controlled heat re-fuses the disrupted finish film, eliminating the blistered or opaque appearance.
Check every 10–15 seconds by lifting the cloth. Stop as soon as the scorch mark fades — excessive heat creates new damage. After treatment, apply paste wax to the repaired area and buff to restore uniform sheen.
If the heat method does not fully resolve a Level 1 scorch — common on older or thinner polyurethane where the finish is partially degraded — proceed to the #0000 steel wool and paste wax method: apply a small amount of paste wax to the mark, rub with #0000 steel wool along the grain direction with light pressure, wipe clean, and apply a fresh wax coat to the full panel surface.
Wax finish — #0000 steel wool and paste wax
On wax-finished surfaces, heat re-fusion is not appropriate — the iron temperature melts the wax layer rather than re-fusing it. Apply paste wax to the scorched area and rub with #0000 steel wool in the grain direction only. The ultra-fine steel wool micro-abrades the discoloured wax surface while the fresh wax fills the voids. Wipe clean and apply a new thin wax coat to the entire panel, then buff for uniform appearance.
When Level 1 diagnosis was incorrect — finish removed, bare wood visible
If heat treatment or steel wool work reveals that the discolouration persists after the finish surface is addressed, the burn has reached the wood fibres and is actually a Level 2 surface char. Proceed to the Level 2 sanding method below. Apply oxalic acid at 60 g per litre for 15 minutes to the exposed bare wood if a brown or grey tannin discolouration remains after initial light sanding — this is common on oak, walnut, and cherry where heat oxidises the tannins.
📝Across multiple restoration projects, the diagnosis step consistently prevents the most common mistake — treating surface char as finish damage. These methods waste time and can push carbon residue slightly deeper into an already disrupted finish surface. My standard first action is the fingernail scratch test: if it produces black powder, I know immediately I'm dealing with charred wood fibres, not finish damage, and the sanding sequence begins. On shellac-finished antique pieces where a Level 1 scorch is confirmed, #0000 steel wool with beeswax is my consistent approach — the iron method risks disturbing the shellac at the temperatures needed to re-fuse lacquer or polyurethane.
How Do You Remove a Level 2 Surface Char from Wood by Sanding?
A Level 2 surface char has carbonised the top 0.3–1.5 mm of wood fibres. The carbon-blackened material must be physically removed by sanding — it cannot be bleached, dissolved, or absorbed away. The sanding process removes the charred layer progressively until bare, unaffected wood colour appears across the entire burn area.
STEP 1 Remove the finish over the burn area first
If the burned area has a sealed finish — polyurethane, lacquer, varnish — the finish must be removed from the repair zone before sanding the wood. The finish clogs sandpaper very rapidly if sanded through directly and prevents even penetration to the charred wood beneath.
Before sanding through a sealed surface, the finish layer must be removed to prevent clogging and uneven abrasion — see How to Remove Polyurethane from Wood for the correct stripping method.
Apply chemical stripper at the appropriate dwell time for the finish type, or use a heat gun to lift the finish locally before sanding. Feather the finish removal 2–3 cm beyond the visible burn boundary to create a smooth transition zone for the new finish coat.
STEP 2 Sand from 80 grit in the grain direction
Begin sanding with 80 grit in the grain direction, using even pressure across the entire burn area. Do not concentrate on the darkest centre first — uneven pressure creates a depression that is visible in raking light after refinishing.
Work in overlapping strokes that cover the full width of the repair zone on each pass. The black carbonised material will appear on the sandpaper surface and as dust — this is normal and confirms removal is progressing.
STEP 3 Test for complete carbon removal with mineral spirits
After each 80-grit pass, wipe the sanded area with a mineral spirits-dampened white cloth. If black or dark grey material transfers to the cloth, carbonised wood fibre remains and further sanding is needed. A clean white cloth with no black transfer confirms the char layer has been fully removed.
Do not progress to finer grits until the mineral spirits wipe test confirms clean. Moving to 120 grit with remaining char means the char gets progressively harder to remove as the grit becomes less aggressive.
STEP 4 Progress to 120 then 180 grit
After the mineral spirits test confirms full char removal, progress to 120 grit to remove the 80-grit scratch marks. Sand the full repair zone and the 2–3 cm feathering margin. Wipe with a tack cloth. Progress to 180 grit for the final surface preparation pass.
At 180 grit, the wood surface should be smooth, uniform in colour (no dark areas), and ready for staining if colour matching is required before refinishing.
STEP 5 Oxalic acid for residual brown discolouration
After full char removal, a brown or grey-brown discolouration sometimes remains in the wood — particularly on oak, walnut, cherry, and other high-tannin species. This is not remaining carbon but tannin oxidation caused by the heat —this discoloration mechanism is similar to water stains caused by iron–tannin reactions — see How to Remove Water Stains from Wood for comparison and treatment differences.
Apply oxalic acid at 60 g per litre to the affected area for 15 minutes, neutralise with baking soda solution, allow 24 hours drying, then sand lightly at 180 grit before applying matching stain and finish coat.
How Do You Remove a Level 3 Deep Char from Wood?
A Level 3 deep char has penetrated over 1.5 mm into the wood fibres, producing structural weakening alongside cosmetic damage. Before any cosmetic repair is attempted, assess the structural integrity of the burned area: press firmly in the burn centre — if the wood compresses, crumbles, or feels soft or spongy, the carbonised zone extends to a depth that may compromise the load-bearing capacity of the piece, particularly on table tops, chair legs, and structural panel edges. In these cases, a structural assessment and potential timber replacement should precede cosmetic repair.
Where structural integrity is confirmed, the process is identical to Level 2 but begins at a coarser starting grit to reach the undamaged wood beneath the deeper char zone.
| Deep Char Depth | Starting Grit | Intermediate | Final | Additional Treatment |
|---|---|---|---|---|
| 1.5–3 mm estimated depth | 60 grit | 80 → 120 grit | 180 grit | Oxalic acid if tannin discolouration remains |
| 3–5 mm estimated depth | 40–60 grit + belt sander on flat surfaces | 80 → 120 grit | 180 grit | Stain match likely required before refinishing |
| Over 5 mm / structural compromise | Timber replacement or Dutchman inlay | — | — | Structural assessment; cosmetic repair alone insufficient |
Dutchman inlay for deep localised burns: On antique or veneer surfaces where sanding to depth would destroy the surface, a Dutchman inlay is the professional repair approach. A matching piece of wood is cut to fit the burn zone, inlaid flush with the surface, and finished to match the surrounding grain.
This requires grain-matching skill and is more demanding than sanding, but preserves the surrounding undamaged wood and is the only practical approach for burns on veneer where the thin surface layer cannot sustain aggressive sanding.
How Do You Refinish the Repaired Area to Match the Surrounding Surface?
Blending a locally repaired burn area into the surrounding finish is the most technically demanding part of burn mark removal — an excellent sanding job is wasted if the refinish coat creates a visible boundary, sheen variation, or colour mismatch. The process depends on whether the surrounding finish is still intact or has been fully stripped.
When the surrounding finish is intact — spot repair
Feather the sanded repair zone into the surrounding finish by sanding the surrounding finish lightly with 220 grit at the 2–3 cm margin — this creates a gradual transition rather than a sharp step between the repaired bare wood and the intact finish. If a stain is needed to match the wood colour, apply it to the bare wood area only and allow full cure time before the finish coat.
Apply the finish coat starting at the centre of the repair and working outward in the feathered zone with a small brush or cotton cloth — the new finish coat blends into the existing finish at the feathered margin.
When the full panel was stripped — full refinish
If burn removal required stripping a full panel or large surface area of finish, a full refinish across the entire surface produces the most uniform result. Apply the finish in the same number of coats as the original, allowing full cure time between coats, with a light 220-grit sanding pass between each coat to remove dust nibs and improve adhesion of subsequent coats.
How Does the Wood Surface Type Affect Burn Mark Removal?
| Surface Type | Level 1 Method | Level 2–3 Method | Key Constraint |
|---|---|---|---|
| Polyurethane finish (modern furniture) | Iron heat re-fusion; #0000 steel wool + wax | Strip local finish → 80–180 grit → spot refinish | Feather finish removal 2–3 cm beyond burn to avoid visible boundary |
| Lacquer finish | Iron heat re-fusion (lowest setting only); #0000 steel wool | Solvent strip locally → 80–180 grit → spot lacquer coat | Lacquer thinner for local stripping — acetone-safe on lacquer only for removal |
| Shellac / spirit varnish (antique) | #0000 steel wool + paste wax; no heat on shellac | Denatured alcohol strip locally → 80–180 grit → re-shellac | Never use iron on shellac — heat damages shellac permanently; use steel wool |
| Wax finish (beeswax, paste wax) | #0000 steel wool + new wax coat — no heat | Strip wax with mineral spirits → 80–180 grit → re-wax | Heat melts wax layer rather than re-fusing it |
| Oil finish (danish oil, tung oil) | Light 220-grit sand → re-oil | 80–180 grit → matching oil coat after sanding | Re-apply oil after any sanding; allow full cure time before use |
| Bare / unfinished wood | 80–120 grit directly | 60–80 grit for deep char; 80 grit for surface char; 180 grit final | No finish to protect — work directly on wood; apply new finish after |
| Veneer (0.6–2 mm) | #0000 steel wool extremely carefully; no sanding | Dutchman inlay for Level 2–3 — sanding cuts through veneer | Veneer too thin for any sanding beyond 220 grit at the surface; Level 2–3 burns typically require inlay |
| Hardwood floor (sealed) | Iron method on sound finish; #0000 steel wool | Drum sander (professional) for Level 2–3 on floors; full board refinish | Spot sanding a floor requires full board refinish to avoid visible boundary lines |
📝 The mineral spirits wipe test is the most valuable quality check I use during burn mark repair. On one oak dining table with a cigarette burn, after what appeared to be complete 80-grit removal the visual inspection suggested the mark was gone — but the mineral spirits wipe produced a faint grey-black transfer on the cloth. Two more 80-grit passes and a second wipe test came back clean. Without the test I would have moved to 120 grit over remaining carbon, which would have sealed it under a progressively smoother surface and made it reappear under the new finish coat. The oxalic acid step after sanding was also needed on that piece — typical of the tannin reaction in oak.
When Burn Removal Methods Fail (And Why)?
Carbonised wood acts as a physical barrier. The bleach cannot reach or react with the underlying fibres until the charcoal layer is mechanically removed.
Oil fills surface irregularities and temporarily darkens the surrounding wood to "hide" the burn. It does not remove carbon and prevents future finish adhesion.
Carbon remains embedded in deeper vessel elements. The mark will "ghost" through or reappear prominently once a liquid finish is applied.
Residual carbon dust often becomes invisible on dry wood. A spirits wipe mimics the look of a finish, revealing hidden char before it's too late to sand.
Cross-grain abrasion creates "swirl marks" that catch the light. This damages surface uniformity and makes the repaired area stand out from the original wood grain.
Frequently Asked Questions About Removing Burn Marks from Wood
Why do mayonnaise and toothpaste not permanently remove burn marks from wood?
Carbon — the primary component of a burn mark — is chemically inert at room temperature and does not dissolve in oil, acid, water, or mild abrasives. Mayonnaise and cooking oil temporarily mask very light finish-level scorch marks by filling micro-voids in the damaged finish with oil, restoring light transmission and making the mark appear lighter.
When the oil evaporates or is wiped away, the original discolouration returns. Toothpaste and baking soda are mild abrasives that can smooth a disrupted finish surface at Level 1 but cannot reach the depth of carbonised wood fibres in Level 2 and 3 burns. The only permanent removal method is mechanical — abrasion with sandpaper that physically removes the charred wood layer.
How do you tell if a burn has damaged the wood or just the finish?
Scratch the centre of the burn mark firmly with a fingernail or plastic pick. If the dark material scratches away as a black powder or dark residue, the char has reached the wood fibres — this is a Level 2 surface char requiring sanding. If the dark area is completely hard and glassy (no powder when scratched) and the texture around it appears blistered or bubbled, the damage is likely confined to the finish film — a Level 1 finish scorch repairable without sanding into the wood.
A soft or spongy feel under firm fingertip pressure in the burn centre indicates a Level 3 deep char with structural weakening.
How do you remove a burn mark from wood without sanding the entire surface?
Level 1 finish scorch: repair locally with heat re-fusion (iron on lowest setting, no steam, single cotton cloth) or #0000 steel wool with paste wax — no sanding required. Level 2 surface char: sand only the burned area plus a 2–3 cm feathering margin, apply matching stain if needed, and spot-refinish with a small brush.
The repaired area must be feathered at 220 grit into the surrounding intact finish to avoid a visible boundary. A spot repair blends seamlessly when the finish type, sheen level, and colour are matched accurately. Full surface resanding is only necessary when the burn is very large, when the surrounding finish is already deteriorated, or on floors where spot repairs create visible panel variations.
Can wood bleach remove a burn mark from wood?
Wood bleach — oxalic acid or A/B two-part bleach (sodium hydroxide and hydrogen peroxide) — does not remove carbon from burn marks. It is effective for treating the tannin oxidation discolouration that remains after the charred wood fibres have been removed by sanding.
On high-tannin species such as oak, walnut, and cherry, a brown or grey-brown residual stain often persists in the bare wood after the black char has been sanded away — this is caused by heat-driven oxidation of the wood's tannins rather than carbon residue.
Oxalic acid at 60 g per litre applied for 15–20 minutes resolves this discolouration effectively. Applying wood bleach to an unsanded burn mark produces no visible improvement because the carbon layer prevents bleach penetration.
Summary: Key Values for Removing Burn Marks from Wood
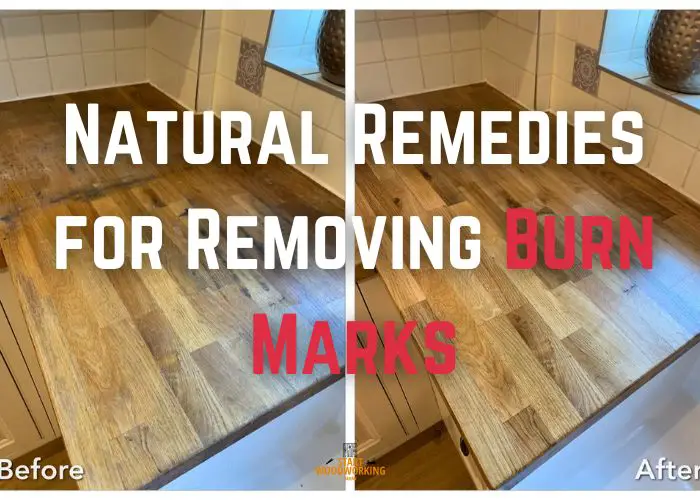
Removing burn marks from wood begins with diagnosing the depth: finish scorch (Level 1) is identified by a hard, glassy surface that scratches without producing powder and blistered finish around the mark; surface char (Level 2) produces black powder when scratched and solid wood beneath; deep char (Level 3) feels soft or crumbly under firm pressure. Level 1 is repaired by heat re-fusion with a clothes iron on lowest setting through a cotton cloth, or #0000 steel wool with paste wax on wax finishes — no sanding into wood. Level 2 is repaired by stripping local finish, sanding from 80 to 120 to 180 grit in grain direction, confirming complete carbon removal with a mineral spirits wipe test (clean white cloth), applying oxalic acid at 60 g per litre if tannin discolouration remains, and spot-refinishing with 2–3 cm feathering margin. Level 3 requires starting at 60 grit and a structural integrity assessment before cosmetic repair. Mayonnaise, toothpaste, baking soda, and lemon juice do not remove carbon from wood and produce at best temporary masking of finish-level marks.
→ Related: How to Remove Ash Stains from Wood
→ Related: How to Remove Water Stains from Wood
→ Hub: How to Remove Wood Finishes and Stains — Complete Guide