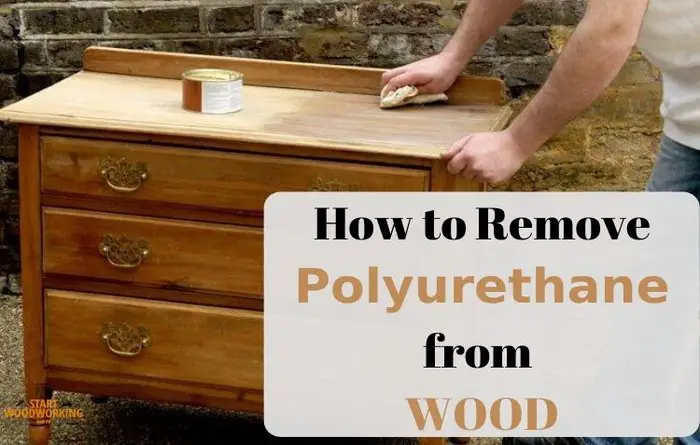
How to Remove Polyurethane from Wood: Chemical Strippers, Sanding, and No-Sand Methods
Polyurethane is a synthetic resin finish applied to wood surfaces to create a hard, durable, moisture-resistant film. Removing polyurethane from wood is necessary when the finish has worn unevenly, cracked, peeled, or yellowed, or when you need to strip the surface before applying a new finish. The removal process uses chemical paint strippers, mechanical sanding, or a combination of both, depending on the surface type, the number of polyurethane layers, and the ventilation available in your workspace. This guide provides exact product types, dwell times, grit sequences, and safety requirements for every removal scenario.
What Is Polyurethane and Why Is It Difficult to Remove from Wood?
Polyurethane is a film-forming finish that cures by cross-linking polymer chains into a hard, continuous surface layer over wood. Unlike penetrating finishes such as oil or wax, polyurethane does not absorb into wood pores — it sits on top of the wood as a plastic-like coating. This cross-linked structure is chemically resistant to most common solvents and physically resistant to abrasion, which makes it effective as a protective finish and challenging to remove completely.
Oil-based polyurethane forms a harder, more chemically resistant film than water-based polyurethane and requires stronger strippers or more aggressive sanding to remove. Two-component polyurethane — used on parquet floors and industrial furniture — is the most chemically resistant type and requires long dwell times (up to 12 hours) even with professional-grade gel strippers.
Understanding which type of polyurethane is on your surface — oil-based, water-based, or two-component — determines which removal method and dwell time to use before scraping begins.
What Are the Technical Specifications for Polyurethane Removal?
The table below lists the entity–attribute–value pairs that determine the correct process for each removal scenario. Review these before selecting a product or method.
| Methods for Polyurethane Removal | Attribute | Value |
|---|---|---|
| Chemical paint stripper (methylene chloride) | Working time on surface | 15 minutes max |
| Chemical paint stripper (methylene chloride) | Ventilation requirement | Fully ventilated area + KN95 mask + rubber gloves |
| Water-based paint stripper | Working time on surface | 30–60 minutes |
| Water-based paint stripper | Ventilation requirement | Low — suitable for poorly ventilated spaces |
| Soy-based paint stripper | Working time on surface | 1–8 hours (slower volatility) |
| Soy-based paint stripper | Quantity required vs. chemical | 25–50% more product per m² |
| Gel stripper (2-component polyurethane) | Dwell time to dissolve finish | Up to 12 hours |
| Gel stripper (solvent-based enamel) | Dwell time to dissolve finish | 5 minutes |
| Gel stripper (acrylic / nitro paint) | Dwell time to dissolve finish | 15 minutes |
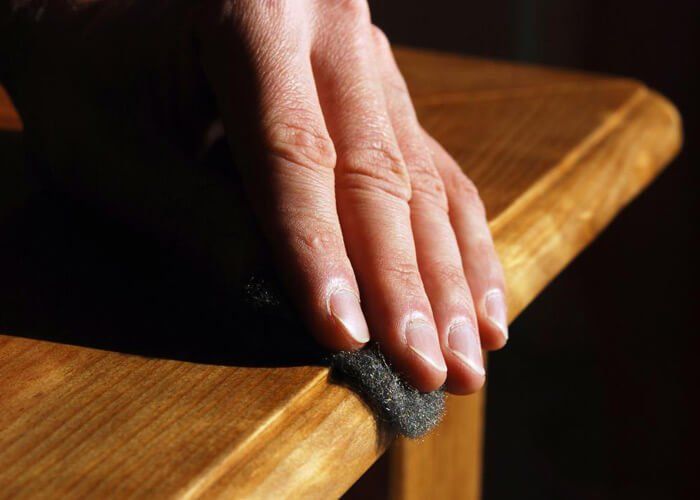
| Steel wool for residue removal | Recommended grade | #0000 (ultra-fine) |
| Working area per session | Maximum size | 1 m × 1 m |
| Sandpaper for initial poly removal | Starting grit | 36 grit |
| Sandpaper for surface smoothing | Final grit | 120–180 grit |
| Post-strip water wash drying time | Before re-coating | 24 hours minimum |
| Mineralized alcohol (white spirit) | Best substrate | Polyurethane-coated laminate surfaces |
What Tools and Materials Do You Need to Remove Polyurethane?
Gathering the correct tools and protective equipment before starting prevents mid-process interruptions. The following items cover all removal methods described in this guide.
- Chemical paint stripper — methylene chloride type for heavy-duty removal in ventilated areas
- Water-based paint stripper — for indoor use or areas with limited ventilation
- Soy-based / ecological stripper — for environmentally sensitive applications
- Gel stripper (paste form) — for vertical surfaces, carved profiles, and 2-component polyurethane
- Mineralized alcohol (white spirit) — for laminate surfaces with polyurethane coating
- Natural bristle brush — for applying stripper in an even, controlled layer
- Plastic scraper — for flat surfaces; does not scratch underlying wood
- Metal floor scraper — for wood floors only
- Fine steel wool #0000 — for removing residue from grooves, cracks, and carved details
- Waxed paper — to cover stripper and slow evaporation in dry or warm conditions
- Sandpaper: 36, 60, 80, 120, 180 grit sheets
- KN95 respirator mask — required when using methylene chloride or mineralized alcohol
- Safety glasses / goggles
- Thick rubber gloves — chemical-resistant, not latex
- Long-sleeved shirt and long trousers
- Plastic container or old rags for collecting stripped material
- Nitro thinner or clean water — for surface wash after stripping
How to Remove Polyurethane from Wood Furniture: Step-by-Step
Step 1 — Choose the Correct Stripper for Your Work Environment

Before selecting a product, assess your work area. If you can move the furniture outdoors or to a garage with open doors, a methylene chloride chemical stripper is the fastest option. If you are working indoors with windows open but limited air exchange, choose a water-based stripper. If you are removing polyurethane from furniture made for a child’s room or a food-preparation area, use a soy-based stripper to eliminate residual chemical concerns.
For polyurethane-coated laminate surfaces, use mineralized alcohol (white spirit) rather than any paste or gel stripper. Chemical strippers can dissolve or delaminate the substrate layer under the polyurethane on laminate products.
Methylene chloride strippers require a KN95 respirator mask, chemical-resistant rubber gloves, and a fully ventilated workspace before application.
Methylene chloride is classified as a Group 1 carcinogen by IARC. The EPA requires ventilation controls and PPE for all consumer applications.
- If you are concerned that the surface may contain lead paint, it is better to use paint strippers rather than sand it or use heat guns. In fact, if heated, lead is even more toxic.
Step 2 — Prepare the Work Area and Protective Equipment
Move furniture to your chosen work area. Place a drop cloth or old towels underneath to catch stripper drips and stripped material. If working outdoors, position the furniture out of direct sunlight — UV heat accelerates evaporation of the stripper before it can fully penetrate the polyurethane layer.
Put on your protective equipment before opening the stripper container: chemical-resistant rubber gloves, safety glasses or goggles, a KN95 respirator (mandatory for methylene chloride and mineralized alcohol), and long-sleeved clothing covering all skin. Turn on a fan directed away from your face if working indoors.
Step 3 — Apply the Paint Stripper and Allow to Dwell
Using a natural bristle brush, apply the stripper in a thick, even coat over one section of the surface. Work in sections no larger than 1 m × 1 m so the stripper does not begin to dry before you can scrape it. Apply in one direction — do not brush back and forth — to maintain an even film thickness.
If the working environment is warm or dry (above 25 °C or below 40% relative humidity), lay a sheet of waxed paper over the applied stripper immediately after brushing. The waxed paper slows evaporation and keeps the stripper active for the full dwell period. This is especially important with methylene chloride products, which evaporate rapidly.
Allow the stripper to dwell for the time specified for your product type: 15 minutes for methylene chloride, 30–60 minutes for water-based, 1–8 hours for soy-based, and up to 12 hours for gel stripper on 2-component polyurethane parquet. The surface is ready to scrape when the polyurethane layer visibly bubbles, wrinkles, or lifts from the wood.
Step 4 — Scrape Off the Lifted Polyurethane
Hold the plastic scraper at a low angle (approximately 20–30 degrees) to the surface and slide it firmly along the wood grain direction. The loosened polyurethane will come away in sheets or ribbons. Deposit the stripped material directly into a plastic container or onto a rag — do not allow it to fall onto untreated areas of the surface.
For inner corners, tight profiles, and carved details where the flat scraper cannot reach, use #0000 steel wool in a pushing or circular motion after applying a fresh layer of stripper. Steel wool is aggressive enough to dislodge residue from tight areas without gouging the wood fibres the way a metal scraper edge would.
If polyurethane residue remains after the first scrape, do not sand the surface between applications. Sanding at this stage embeds loosened polyurethane particles back into the wood grain, making the next stripper application less effective. Apply a second coat of stripper directly over the residue, allow the full dwell time again, then scrape a second time.
Step 5 — Clean the Surface After Stripping
Once all polyurethane has been removed, clean the surface to neutralise the stripper chemistry and remove any remaining residue. For chemical and gel strippers, wipe the surface with a rag dampened with nitro thinner or mineral spirits. For water-based strippers, clean with plain water using a damp rag or sponge.
If you use water for the final clean, allow the wood to dry for a minimum of 24 hours before proceeding to sanding or applying a new finish. Water raises the wood grain and temporarily makes it feel rough — do not sand while the wood is still damp, as this creates fibre tearing and an uneven surface.
Step 6 — Sand the Surface to Bare Wood
After the surface is dry, sand the wood to remove any microscopic polyurethane residue remaining in the grain and to prepare the surface for a new finish. Begin with the coarsest grit appropriate for the polyurethane thickness remaining, then progress through finer grits.
| Sandpaper Grit | Stage | Purpose |
|---|---|---|
| 36 grit | Initial removal | Strips thick, old, or multi-layer polyurethane from bare wood |
| 60–80 grit | Intermediate | Removes remaining poly residue after coarse pass |
| 120 grit | Surface levelling | Smooths scratches left by coarser grits |
| 180 grit | Final pass | Prepares wood for new finish application |
| #0000 steel wool | Detail work | Removes residue from cracks, grooves, and carved profiles |
Sand in the direction of the wood grain on flat surfaces. After each grit change, wipe away dust with a tack cloth before continuing. The surface is ready for refinishing when it is uniformly bare, smooth to the touch, and shows no shiny spots — shiny areas indicate polyurethane film still present.
Which Paint Stripper Type Works Best for Polyurethane Removal?
For most indoor applications, a water-based paint stripper is the best choice for polyurethane removal. It requires 30–60 minutes of dwell time, poses low toxicity, and is safe in poorly ventilated spaces. For large outdoor surfaces with thick multi-layer coatings, methylene chloride strippers are faster, working in 15 minutes.
Choosing the wrong stripper type is the most common reason polyurethane removal projects fail or take excessively long. The table below compares all five stripper types across the attributes that matter most for a woodworking removal project.
| Stripper Type | Speed | Toxicity | Eco-Friendly | Best For |
|---|---|---|---|---|
| Methylene chloride (chemical) | Fast — 15 min | High | No | Thick multi-layer polyurethane, large surfaces |
| Water-based stripper | Slow — 30–60 min | Low | Moderate | Indoor use, poor ventilation, lead-paint concerns |
| Soy-based / ecological | Slow — 1–8 hrs | Very low | Yes | Environmentally sensitive projects, children’s furniture |
| Gel stripper (paste) | Variable 5 min–12 hrs | Medium | No | Vertical surfaces, carved details, 2-component poly |
| Mineralized alcohol (white spirit) | Medium | Low–Medium | No | Laminate surfaces, light polyurethane coatings |
Methylene chloride strippers work by breaking the cross-linked polymer chains of the polyurethane coating within 15 minutes of contact. Their speed makes them efficient for large surfaces and thick coatings, but their high vapour pressure means toxic fumes accumulate quickly in enclosed spaces.
Water-based and soy-based strippers use milder active agents and rely on longer contact time rather than chemical aggression. Gel paste strippers are specifically formulated to cling to vertical or irregular surfaces without running off during the required dwell time.
How to Remove Polyurethane from Wood Floors?
Removing polyurethane from wood floors requires a drum floor sander, a metal floor scraper, and a water-based or chemical stripper applied in 3–4 m² sections. The process differs from furniture removal in scale, tool requirements, and preparation time.
[See the complete guide: How to Remove Polyurethane from Wood Floors →]
Polyurethane Removal by Surface Type: Method Selection Guide
The correct removal method depends not only on the type of stripper available but also on the specific surface being stripped. The table below maps surface types to optimal methods and the key consideration for each.
| Surface Type | Recommended Method | Key Consideration |
|---|---|---|
| Flat furniture panel | Chemical or water-based stripper + plastic scraper | Work in 1 m × 1 m sections; do not sand between coats |
| Wood floor | Water-based stripper + metal floor scraper + floor sander | Remove all furniture first; ventilate fully; 24 hr dry before re-coating |
| Carved / profiled surface | Gel paste stripper + #0000 steel wool + brush | Use paste to maintain contact on vertical and curved areas |
| Laminate surface | Mineralized alcohol (white spirit) | Safe for laminate substrate; chemical strippers may delaminate surface |
| Lead-paint-suspect surface | Chemical or water-based stripper (NOT sanding or heat) | Sanding and heat guns volatilise lead — use stripper only |
How to Remove Polyurethane from Wood Without Sanding?
Removing polyurethane without sanding relies entirely on chemical dissolution. The stripper must soften the polyurethane film sufficiently to allow it to be scraped or wiped away cleanly, leaving bare wood underneath with no mechanical abrasion.
[See the complete guide: How to Remove Polyurethane from Wood Without Sanding? →]
How Do You Identify Polyurethane Finish on Wood Before Stripping?
To confirm a surface has a polyurethane finish before selecting a stripper, apply a few drops of denatured alcohol on an inconspicuous area and rub with a cloth. Polyurethane is alcohol-resistant and will not soften or smear. Shellac and lacquer dissolve within 30 seconds of alcohol contact.
How Do You Safely Dispose of Chemical Strippers and Stripped Material?
Dispose of rags, steel wool, and containers with chemical stripper residue by submerging them in water in a sealed container. Take to a hazardous waste facility — do not pour into drains or household bins. Dry chemical-soaked materials can self-ignite through exothermic oxidation.
For a complete overview of all wood finish removal methods, see: [How to Remove Wood Finishes →]
Frequently Asked Questions About Removing Polyurethane from Wood
Can paint thinner alone remove polyurethane from wood?
Paint thinner alone is not effective at removing cured polyurethane from wood. Cured polyurethane forms a cross-linked polymer film that standard paint thinners cannot dissolve at room temperature. Paint thinner can be used as a cleaning agent after a dedicated stripper has already lifted the polyurethane, to remove residual stripper chemistry from the wood surface before sanding. For active removal, a purpose-formulated paint stripper containing methylene chloride, N-methylpyrrolidone, or benzyl alcohol is required.
Does vinegar remove polyurethane from wood?
Vinegar can soften and partially degrade a polyurethane finish over extended contact time due to its acidity (pH approximately 2.4), but it is not a practical or efficient removal agent for a full polyurethane coating. Vinegar may be used to spot-treat small areas of thin or degraded polyurethane, but for a complete removal — restoring bare wood ready for refinishing — a dedicated chemical, water-based, or gel stripper is required.
How many coats of stripper does thick polyurethane require?
Thick polyurethane — typically three or more original application coats, or old polyurethane that has been refinished over without stripping — usually requires two to three applications of stripper to remove completely. Apply each coat fully, allow the complete dwell time, scrape, and inspect before applying the next. Do not sand between applications, as this embeds loosened material and reduces the effectiveness of subsequent stripper applications.
Is it necessary to sand after using a chemical stripper?
Yes, in most cases a light sanding pass is necessary after chemical stripping, even if no visible polyurethane remains. Chemical strippers leave a thin residue layer and slightly raise wood fibres during the process. A sanding sequence starting at 120 grit and finishing at 180 grit removes this residue and creates the clean, slightly open-pored surface that new finishes require for proper adhesion.
What is the safest way to remove polyurethane indoors?
The safest indoor polyurethane removal method uses a water-based or soy-based paint stripper with all windows open and a fan positioned to exhaust fumes from the room. Water-based strippers have low volatile organic compound (VOC) emissions and do not require a respirator in most conditions, although rubber gloves and safety glasses should always be worn. Allow the full dwell time specified by the product — water-based strippers are slower but achieve complete removal without the health risks associated with methylene chloride.
Summary: Choosing the Right Method to Remove Polyurethane from Wood
Removing polyurethane from wood requires matching the stripper type to the work environment, the polyurethane type, and the surface being stripped. Chemical strippers containing methylene chloride are the fastest option for well-ventilated areas and thick coatings, with a working window of 15 minutes per section.
Water-based strippers are the correct choice for indoor use with limited ventilation, requiring 30–60 minutes of dwell time. Soy-based strippers are the safest option for environmentally sensitive projects, requiring 1–8 hours.
Gel paste strippers are essential for vertical surfaces and 2-component polyurethane floors, where dwell times can reach 12 hours. After stripping, always clean the surface thoroughly, allow 24 hours of drying if water was used, and complete a grit-progressive sanding sequence from 36 grit to 180 grit before applying any new finish.