How to Remove Polyurethane from Wood Without Sanding?
Removing polyurethane from wood without sanding relies entirely on chemical dissolution — a stripper penetrates and breaks the cross-linked polymer chains of the cured finish, which is then scraped away using a plastic scraper and steel wool, leaving bare wood without any mechanical abrasion. The method works best on surfaces with one to two polyurethane layers in good condition, on wood where the grain cannot tolerate drum or orbital sanding (carved profiles, veneers, antique pieces), and in workspaces where dust generation must be avoided.
This guide covers chemical stripper selection, exact dwell times, scraping technique, surface cleaning, and the conditions under which chemical-only removal produces a result clean enough for direct refinishing — with no sanding required at any stage.
How Do You Remove Polyurethane from Wood Without Sanding?
→ For the complete polyurethane removal process including mechanical sanding, see: How to Remove Polyurethane from Wood
→ For floor-specific removal with drum sanders, see: How to Remove Polyurethane from Wood Floors
What Are the Key Specifications for Removing Polyurethane Without Sanding?
The table below lists all entity–attribute–value pairs needed before selecting a product and beginning the removal process. These values determine dwell time, product quantity, safety equipment, and surface readiness criteria.
| Entity / Product | Attribute | Value |
|---|---|---|
| Gel stripper (solvent-based) | Dwell time — standard poly | 15–30 minutes |
| Gel stripper (2-component poly) | Dwell time | Up to 12 hours |
| Water-based stripper | Dwell time | 30–60 minutes |
| Soy-based / ecological stripper | Dwell time | 1–8 hours |
| Methylene chloride stripper | Dwell time | 15 minutes maximum |
| Stripper application area per session | Maximum section size | 0.5–1 m² |
| Steel wool for residue removal | Grade required | #0000 (ultra-fine) |
| Plastic scraper angle | Scraping angle to surface | 20–30 degrees |
| Post-strip wash (water-based stripper) | Drying time before refinishing | 24 hours minimum |
| Post-strip wash (chemical stripper) | Solvent for surface wipe | Mineral spirits or nitro thinner |
| Waxed paper cover (warm conditions) | Temperature threshold for use | Above 22°C / 72°F |
| Carved / profiled surfaces | Residue removal tool | #0000 steel wool + fresh stripper coat |
| Layered poly (3+ coats) | Stripper applications required | 2–3 applications minimum |
| Ventilation requirement (gel / solvent) | Minimum air exchange | Open windows + fan exhausting outward |
When Does Removing Polyurethane Without Sanding Work — and When Does It Fail?
Chemical-only polyurethane removal produces a surface clean enough for direct refinishing when the existing finish is one to two coats thick, the polyurethane is in recognisable condition (not deeply crazed or physically delaminated), and the correct stripper type is matched to the polyurethane chemistry. It does not work — or produces unreliable results — in the following situations:
| Situation | Chemical-Only Result | Correct Approach |
|---|---|---|
| 1–2 coat standard oil-modified poly | Complete removal in 1–2 applications | Chemical stripping only ✓ |
| 1–2 coat water-based poly | Complete removal in 1 application | Chemical stripping only ✓ |
| 3+ coats (multiple refinish layers) | Partial — requires 3+ applications | Chemical + light sanding recommended |
| 2-component (2K) polyurethane | Complete only with gel stripper, 6–12 hr dwell | Gel stripper only — standard strippers ineffective |
| Engineered wood veneer | Safe — no sanding risk to veneer | Chemical stripping only ✓ (do not sand) |
| Carved or profiled wood | Complete with steel wool for recesses | Chemical stripping + #0000 steel wool ✓ |
| Severely degraded / flaking poly | Inconsistent — loose areas come off, bonded areas resist | Physical scraping + chemical + sanding |
| Lead-paint substrate under poly | Safe — no dust generated | Chemical stripping only ✓ (never sand lead) |
📝 In my own workshop, I’ve found chemical-only stripping most reliable on antique oak furniture with carved profiles — specifically using Citristrip gel, which I leave on for 45–60 minutes rather than the minimum 30. On pieces like these I never sand, because the patina in the recesses is part of what makes the restoration authentic. A drum sander or even an orbital would erase that in seconds.
What Materials Do You Need to Remove Polyurethane Without Sanding?
The no-sand method uses fewer tools than mechanical removal but requires the correct stripper type for the polyurethane chemistry on your surface. Using the wrong stripper — particularly a standard liquid stripper on 2-component polyurethane — results in no visible softening even after extended dwell time.
- Gel stripper (paste form) — preferred for all no-sand applications; clings to vertical and curved surfaces without running; maintains active contact for longer dwell times
- Water-based stripper — for indoor use with limited ventilation; requires 30–60 minutes dwell; lower fume output than solvent-based gels
- Soy-based / ecological stripper — for food-contact surfaces, children’s furniture, or confined spaces; dwell time 1–8 hours; no hazardous fumes
- Methylene chloride stripper — fastest acting (15 min); use only in fully ventilated areas with KN95 mask; classified Group 1 carcinogen — mandatory PPE at all times
- Natural bristle brush — for applying gel stripper in an even, controlled layer
- Plastic scraper — for flat surfaces; does not scratch underlying wood as a metal scraper would
- #0000 ultra-fine steel wool — for removing softened polyurethane residue from grooves, carved profiles, and mouldings
- Waxed paper or plastic film — to cover applied stripper in warm or dry conditions above 22°C, slowing evaporation during dwell
- Mineral spirits or nitro thinner — for surface wash after solvent-based strippers
- Clean cotton rags (3–4 minimum) — for surface wiping after stripping
- KN95 respirator mask — required for methylene chloride and solvent gel strippers
- Chemical-resistant rubber gloves — not latex; all stripper types
- Safety glasses
How Do You Remove Polyurethane from Wood Without Sanding Step by Step?
The five steps below cover the complete chemical-only removal process. Each step must be completed in sequence — particularly the dwell time in Step 3, which is the most common point of failure when woodworkers check the surface too early and begin scraping before the stripper has fully penetrated the polyurethane layer.
STEP 1 – Identify the Polyurethane Type Before Selecting a Stripper
Not all polyurethane finishes respond to the same stripper. Selecting the wrong product results in wasted dwell time and incomplete removal. Use the following tests before purchasing a stripper:
Oil-based vs water-based test: Rub a small area with a cloth dampened with denatured alcohol. Water-based polyurethane softens or becomes tacky within 60 seconds; oil-based polyurethane is unaffected by alcohol. This distinction matters because water-based poly requires shorter dwell times — a standard water-based stripper at 30 minutes removes it completely; oil-based poly resists water-based strippers and requires a solvent gel or methylene chloride product.
2-component (2K) polyurethane identification: 2K polyurethane is most commonly found on parquet floors, commercial furniture, and kitchen cabinetry finished after 2000. If standard solvent strippers show no softening after 30 minutes of dwell time, the finish is almost certainly 2K — switch to a gel stripper with a 6–12 hour dwell time.
STEP 2 – Prepare the Surface and Work Area
Move the piece to your work area and protect the surrounding surfaces with a drop cloth. If working on an in-place surface (built-in cabinetry, a door frame), tape plastic sheeting to protect adjacent walls and floors from stripper drips.
Put on protective equipment before opening any stripper container: chemical-resistant rubber gloves, safety glasses, and a KN95 respirator if using solvent or methylene chloride products. Open all windows and position a fan to exhaust air away from your face and out of the room.
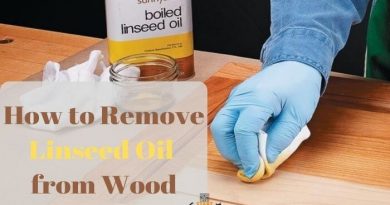
If the surface has visible wax buildup on top of the polyurethane from a previous maintenance product, wipe the surface with mineral spirits first and allow to dry for 10 minutes. Surface wax blocks stripper penetration — removing it first allows the stripper to reach the polyurethane layer faster and more evenly.
STEP 3 – Apply the Stripper and Allow the Full Dwell Time
Using a natural bristle brush, apply the stripper in a thick, even coat across one section no larger than 0.5–1 m². Apply in one direction only — do not brush back and forth, as this creates an uneven film thickness that dries unevenly. The coat should be visibly thick: approximately 2–3 mm for gel products, or a generous wet coat for liquid strippers.
If the ambient temperature is above 22°C or the room is dry (below 40% relative humidity), immediately cover the applied stripper with a sheet of waxed paper or plastic film. This slows evaporation and keeps the chemistry active for the full dwell period. This step is critical with methylene chloride products, which evaporate rapidly at room temperature.
Allow the stripper to dwell for the full time indicated for your product type — do not check early:
- Methylene chloride / fast solvent gel: 15 minutes — the finish will visibly bubble or wrinkle when ready
- Standard solvent gel: 15–30 minutes — check at 15 minutes; if the finish has not softened to the scraper, re-cover and wait the full 30 minutes
- Water-based stripper: 30–60 minutes
- Soy-based / ecological stripper: 1–8 hours — check at 2 hours; dwell until the finish is fully soft
- Gel stripper on 2K polyurethane: 6–12 hours — do not check before 6 hours
The surface is ready to scrape when the polyurethane layer visibly bubbles, wrinkles, changes colour, or lifts from the wood surface. If none of these signs are present at the end of the dwell time, the stripper has dried out or is not matched to the polyurethane type — re-apply a fresh coat rather than scraping.
STEP 4 – Scrape and Remove the Softened Polyurethane
Hold a plastic scraper at 20–30 degrees to the surface and slide it firmly along the wood grain direction. The softened polyurethane will come away in sheets, ribbons, or a gel-like mass. Deposit all stripped material onto a rag or into a plastic bag — do not allow it to fall onto untreated sections of the surface, as it will re-adhere.
For inner corners, tight profiles, carved details, and mouldings, use #0000 ultra-fine steel wool in a pushing or circular motion immediately after applying a fresh thin coat of stripper to the recessed area. The steel wool conforms to irregular shapes and dislodges softened residue from areas the flat scraper cannot reach. Replace steel wool frequently — a clogged ball re-deposits stripped material rather than removing it.
After the first scrape, inspect the surface in a raking light (a lamp held near the surface at a low angle). Any areas that remain shiny indicate polyurethane still present. Apply a second stripper coat to those areas only, allow the full dwell time, and scrape again. Repeat until no shiny areas remain and the surface has a uniform, dull, open-grain appearance.
📝A few years ago I refinished a solid pine children’s wardrobe that had three coats of water-based polyurethane — the parents specifically asked for no chemical solvents given it was going back into a child’s room. I used a soy-based gel stripper, applied two coats with a 4-hour dwell each time, and scraped with a plastic scraper. It took longer than a solvent product would have, but the room stayed safe to occupy during the process and the pine surface came out clean enough to take a natural oil finish directly, no sanding needed.
STEP 5 – Clean the Surface and Assess for Refinishing
Once all polyurethane has been removed, neutralise the stripper chemistry and clean the surface before applying any new finish. The cleaning method depends on the stripper type used:
Solvent gel or methylene chloride strippers: Wipe the surface with a clean rag dampened with mineral spirits or nitro thinner. Work in the grain direction. Use a fresh section of rag for each pass — a saturated rag re-deposits dissolved residue. Allow to dry for 30–60 minutes at room temperature before assessing.
Water-based strippers: Wipe with a damp cloth and clean water. Do not saturate — use the minimum water needed to remove stripper residue. Allow a minimum of 24 hours drying time before assessing or refinishing. Water temporarily raises the wood grain; attempting to refinish before full drying produces an uneven finish.
After cleaning and drying, assess the surface in raking light. A surface ready for direct refinishing without sanding has three characteristics: no shiny areas (all polyurethane removed), a uniform open-grain texture, and no visible residue or stripper film. If the surface shows any remaining sheen, apply one more stripper coat to those spots.
If the surface feels rough from raised grain after water-based stripping but no polyurethane remains, a single light pass with 220-grit sandpaper — grain direction only, light pressure — smooths the raised fibres without constituting a full sanding process.
For a complete overview of all wood finish removal methods, see: [How to Remove Wood Finishes →]
Which Surfaces Benefit Most from Chemical-Only Polyurethane Removal?
The no-sand method is not universally applicable — it is the correct primary method for specific surface types and the wrong choice for others. The table below maps surface type to recommendation and key reason.
| Surface Type | No-Sand Method | Reason |
|---|---|---|
| Carved or turned wood | ✓ Ideal | Sanding crushes detail; steel wool conforms to profiles |
| Engineered wood / thin veneer | ✓ Required | Veneer too thin for orbital or drum sanding |
| Antique furniture | ✓ Preferred | Preserves patina; avoids altering surface plane |
| Flat panel furniture (1–2 poly coats) | ✓ Works well | Fast, dust-free result in single application |
| Flat panel furniture (3+ poly coats) | ⚠ Partial | Multiple applications needed; chemical + light finish sanding more efficient |
| Wood floors (solid hardwood) | ⚠ Slow | Large area makes chemical-only impractical; drum sander is faster and more consistent |
| Lead-paint-substrate surfaces | ✓ Required | Sanding and heat guns volatilise lead — chemical stripping is the only safe method |
Frequently Asked Questions About Removing Polyurethane Without Sanding
Does paint thinner remove polyurethane from wood without sanding?
Paint thinner does not remove cured polyurethane from wood. Cured polyurethane forms a cross-linked polymer film that standard paint thinners cannot dissolve at room temperature.
Paint thinner can be used as a cleaning agent after a dedicated stripper has already lifted and removed the polyurethane, to clean residual stripper chemistry from the wood surface. For active removal, a purpose-formulated stripper containing methylene chloride, N-methylpyrrolidone (NMP), or benzyl alcohol is required.
Can you use vinegar to remove polyurethane from wood without sanding?
Vinegar can soften and partially degrade a thin or degraded polyurethane finish over extended contact time due to its acidity, but it is not a reliable or complete removal method for a full polyurethane coating. Vinegar may be used to spot-treat very thin, worn polyurethane on small areas, but it leaves residue in the wood grain and does not produce a surface clean enough for refinishing. For complete removal without sanding, a dedicated gel or water-based stripper is required.
How many stripper applications does thick polyurethane require without sanding?
Thick polyurethane — three or more original application coats, or old polyurethane that has been refinished multiple times without prior stripping — requires two to three stripper applications to remove completely without sanding. Apply each coat fully, allow the complete dwell time, scrape, and inspect the surface in raking light before applying the next coat. Do not sand between applications.
Is the surface ready to refinish immediately after chemical stripping without sanding?
After chemical stripping with a solvent-based product, the surface is ready to refinish after a 30–60 minute drying period following the mineral spirits wipe. After water-based stripping, a minimum of 24 hours drying is required before any new finish can be applied.
In both cases, assess the surface in raking light — no shiny spots should remain, and the grain should feel uniformly open. If any roughness is present from raised grain after water-based stripping, a single light pass with 220-grit sandpaper addresses it without constituting a full sanding stage.
What is the best stripper for removing polyurethane from carved wood without sanding?
Gel paste stripper is the best product for removing polyurethane from carved wood without sanding. Gel does not run off vertical or curved surfaces during the dwell period the way liquid strippers do, maintaining active contact with recessed areas throughout the full dwell time.
After scraping flat areas with a plastic scraper, use #0000 steel wool applied with fresh gel to remove residue from grooves and carved details. Soy-based gel strippers are preferable for carved antique pieces where the dwell time needs to be extended without risk to the wood surface.
Summary: Key Values for Removing Polyurethane from Wood Without Sanding
Removing polyurethane from wood without sanding relies on matching the stripper type to the polyurethane chemistry and allowing the full dwell time before scraping.
Gel paste strippers at 15–30 minutes are the correct first choice for carved and profiled surfaces; water-based strippers at 30–60 minutes are appropriate for indoor work with limited ventilation; soy-based strippers at 1–8 hours are the safest option for food-contact or children’s furniture; gel strippers at up to 12 hours are required for 2-component polyurethane.
Apply in sections no larger than 0.5–1 m², cover with waxed paper above 22°C, scrape at 20–30 degrees with a plastic scraper, use #0000 steel wool for carved areas, and clean with mineral spirits or water according to the stripper type. Never sand between applications. After a 30-minute to 24-hour drying period depending on stripper type, the surface is ready for direct refinishing.