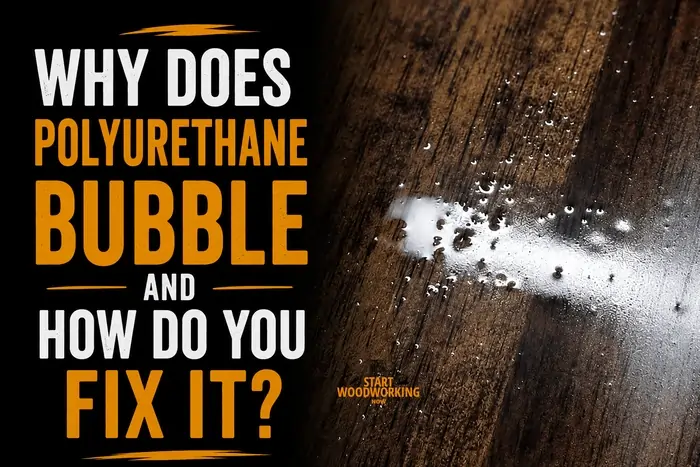
Why Does Polyurethane Bubble and How Do You Fix It?
Polyurethane bubbles form when air enters the finish during application and cannot escape before the surface skins over. The cause determines whether the fix is a light sand or a complete strip. Most bubble problems resolve with one corrective recoat.
Bubbles left in a cured finish telegraph through every subsequent coat. They grow in number with each additional layer applied over them. Identifying the cause before recoating prevents the compounding effect that turns a one-session fix into a full strip.
Polyurethane bubble problems are part of the complete wood finish troubleshooting and removal reference — covering all finish failure types, chemical strippers, and post-strip refinishing protocols.
Four mechanisms produce polyurethane bubbles:
- Air introduced into the finish — shaking the can or agitating the finish before application loads it with air that brushes out as bubbles
- Overbrushing — working the finish after it has begun to skin produces bubbles that cannot pop before the surface sets
- Solvent flash — high temperature or a very thin coat causes solvent to evaporate faster than bubbles can release
- Surface off-gassing — resinous wood species, freshly sealed knots, or a contaminated substrate release gas into the wet finish from below
Navigate to your scenario
→ Bubbles appeared while brushing (wet finish)? — Why Does Polyurethane Bubble While Brushing? ↓
→ Bubbles appeared after the finish dried? — Why Does Polyurethane Have Bubbles After It Dries? ↓
→ Bubbles in every coat, same spot? — Why Does Polyurethane Bubble in the Same Spot? ↓
→ Need to fix existing bubbles now? — How Do You Fix Polyurethane Bubbles? ↓
Applying a new coat over bubbled polyurethane without sanding embeds the bubbles permanently. Sand flat with 320-grit before every recoat — whether the previous coat bubbled or not.
Why Does Polyurethane Bubble?
Polyurethane bubbles when air introduced into the finish — through shaking, overbrushing, or off-gassing — becomes trapped in the film before the surface tension can release it. Application temperature above 80°F accelerates surface skinning and prevents trapped air from escaping.
Bubble Cause Diagnosis Table
| Cause | When It Appears | Location Pattern | Fixable Without Stripping? |
|---|---|---|---|
| Shaken can | During first brush strokes | Even distribution, small uniform bubbles | Yes — sand and recoat correctly |
| Overbrushing | While brushing, mid-application | Random, larger bubbles | Yes — sand and recoat with correct technique |
| High temperature | After first strokes, within minutes | Small dense bubbles, whole surface | Yes — sand, recoat in cooler conditions |
| Surface off-gassing | During application near knots or resin | Concentrated near specific spots | Yes — seal with shellac, recoat |
| Dirty or dry brush | First strokes | First-stroke lines only | Yes — sand, switch brush |
| Second coat too soon | On second coat | Throughout second coat | Yes — sand both coats lightly, recoat thinned |
| Water-based over oil-based | Immediately after application | Dense micro-bubbles, whole surface | Sometimes — depends on severity |
Why Does Polyurethane Bubble While Brushing?
Polyurethane bubbles while brushing when the finish contains dissolved air, when the brush is overworked, or when temperature causes the surface to skin faster than bubbles can pop. The most common cause is shaking the can before use.
Shaking a polyurethane can [introduces] thousands of air micro-bubbles into the finish. Those bubbles [transfer directly] to the wood surface via the brush. At normal application temperature, small bubbles [should pop] within 5–10 minutes as the finish levels.
Overbrushing [re-opens] the skinning surface and [introduces] fresh air into the film. Each return stroke over a partially skinned area [creates] bubbles that [cannot escape] before the film sets.
The correct brushing technique:
- Load the brush fully but without dripping
- Apply in long strokes following the grain
- Tip off at the end of each stroke — drag the brush tip lightly back through the wet finish
- Do not return to an area that has started to skin (more than 2–3 minutes after application)
📝In workshop application over 15 years, shaking the can is the single cause I see most consistently from woodworkers who are frustrated by bubbles despite correct technique elsewhere. Stirring gently with a wooden stick for 60 seconds produces a bubble-free finish every time. I have never had a bubble problem from stirring.
Why Does Polyurethane Have Bubbles After It Dries?
Polyurethane bubbles that remain after drying were trapped before the surface skinned over. They indicate that air escaped from the film slowly enough to form a dome but not fast enough to release completely. High application temperature is the most common cause of post-dry bubbles.
Bubbles present after drying [indicate] air was [trapped in] the film during the open stage. High temperature [accelerates] surface skinning. Accelerated skinning [traps] air before bubbles [can release] through the wet surface.
At application temperatures above 80°F (27°C), oil-based polyurethane’s open time [shortens to] under 3 minutes per section. Bubbles that form during brushing [cannot pop] in that window. They [remain] as domes in the cured film.
Secondary cause: A coat applied too thinly [flash-evaporates] at the surface. Flash evaporation [skins the film] before it has leveled. Any trapped air [stays] as a permanent bubble dome in the hardened finish.
Fix for post-dry bubbles: → If bubbles are light (you can barely feel them): sand with 320-grit until the surface is flat and smooth, wipe with a tack cloth, apply next coat thinned 10%, maintain below 75°F → If bubbles are heavy (the surface is rough to the touch): sand with 220-grit first, then 320-grit, wipe clean, recoat in correct conditions → If bubbles cover more than 40% of the surface: [stripping the finish back to bare wood] and restarting produces a better result than attempting to sand through multiple bubble layers
Why Does Polyurethane Bubble in the Same Spot?
Polyurethane that bubbles in the same spot every coat is encountering off-gassing from the wood substrate at that location. Resin pockets, knots, and pitch streaks in pine and other resinous species release gas into the wet finish from below, producing bubbles that reappear regardless of application technique.
Resinous wood [releases] volatile compounds [through] the surface when covered by a film finish. Those compounds [push up through] the wet polyurethane and [create] bubbles above the gas release point. Re-coating without sealing [produces] the same bubbles in the same location.
Fix — Off-Gassing:
- Sand back the affected area to bare wood with 120-grit
- Clean with mineral spirits — allow to dry 30 minutes
- Apply one coat of shellac (dewaxed, 2 lb cut) to the affected area — shellac [seals] resin pockets [by] forming a vapour barrier
- Allow shellac to dry 45 minutes
- Sand lightly with 220-grit — shellac [sands easily] and [does not require] a full cure window
- Apply polyurethane over the shellac-sealed area — off-gassing [cannot penetrate] through a shellac barrier
Why shellac works: Shellac [forms] a dense, vapour-impermeable film at 2 lb cut. Polyurethane [adheres reliably] over dewaxed shellac. This combination [is the only reliable fix] for resin-pocket off-gassing.
Does Stirring vs. Shaking Polyurethane Affect Bubbling?
Stirring causes no bubbles. Shaking causes thousands. This is the single most impactful variable in polyurethane bubble prevention.
Shaking a polyurethane can [introduces] micro-air bubbles [throughout] the entire volume of finish. Those bubbles [persist] in the finish for 15–20 minutes after shaking stops. Brushing during that window [transfers] all of those bubbles [directly to] the wood surface.
Stirring with a flat wooden stick for 60 seconds [combines] the settled solids [without introducing] air into the finish. Settled polyurethane [should be stirred], never shaken, regardless of manufacturer instructions on the label.
What to do if you accidentally shook the can: Allow the finish to sit undisturbed for 20–30 minutes before opening. Most micro-bubbles [rise and release] through the surface during that settling period. Do not apply until the finish [appears clear and still] when viewed from the side.
Does Temperature Affect Polyurethane Bubbling?
Temperature above 80°F (27°C) shortens open time and traps bubbles permanently. Temperature below 60°F (15°C) extends open time but slows curing. The optimal application range is 65–75°F.
High temperature [accelerates] solvent evaporation [at] the polyurethane surface. Faster evaporation [shortens] the window for bubbles to self-level and pop. Bubbles that form at 80°F+ [become permanent] in the film within 2–3 minutes.
Applying to wood that is warmer than the room air [worsens this effect]. Wood [absorbs and stores] radiant heat. A board that sat in direct sunlight for 2 hours [may reach] 95–100°F surface temperature even in a 70°F room. That surface [skins polyurethane] almost immediately on contact.
Check before applying: Press the back of your hand to the wood surface. If the surface [feels warm], wait until it [reaches] room temperature before applying finish.
How Do You Fix Polyurethane Bubbles?
Fix for polyurethane bubbles depends on bubble severity and whether the finish is still wet or fully cured. Wet bubbles require no action — allow to self-level. Cured bubbles require sanding flat before recoating.
If the finish is still wet (bubbles appeared while brushing):
- Stop brushing immediately
- Tip off the entire section with a single light pass of the brush tip — drag only, no loading
- Do not return to the surface for any reason
- Allow full dry time — bubbles that formed in a correctly applied coat [self-level and pop] within 5–10 minutes in normal conditions
If the finish has dried with light bubbles:
- Sand with 320-grit — long strokes following the grain — until the surface [feels smooth] under your fingertips
- Wipe with a tack cloth — remove all sanding dust
- Apply next coat thinned 10% with mineral spirits (oil-based) or water (water-based)
- Maintain 65–75°F and below 55% RH during application and drying
If the finish has dried with heavy bubbles (rough surface):
- Sand with 220-grit to remove the worst of the texture
- Progress to 320-grit for final levelling
- Wipe with a tack cloth
- Apply thinned coat in correct conditions
If every coat bubbles despite correct technique: The problem [is in] the substrate, not the technique. Check for:
- Resin pockets or knots → seal with shellac (see [Why Does Polyurethane Bubble in the Same Spot?])
- Surface contamination → [remove all wax or oil contamination before applying finish]
- Wood moisture content above 12% → allow additional drying time before finishing
How Do You Prevent Polyurethane Bubbles?
Seven preparation and application steps prevent polyurethane bubbles in all standard woodworking scenarios.
- Stir, never shake — stir gently for 60 seconds with a flat stick before every use
- Let stirred finish settle — wait 5 minutes after stirring before loading the brush
- Use a quality brush — natural bristle (China bristle) for oil-based, synthetic (nylon/polyester) for water-based — cheap brushes [introduce] air through [their] loose filament bundles
- Thin the first coat — 10% mineral spirits for oil-based, 10% water for water-based — thinned finish [has more time] to self-level before skinning
- Maintain correct temperature — 65–75°F for both finish and wood surface — above 80°F [skins the finish] before bubbles [can escape]
- Tip off every stroke — drag the brush tip lightly back through each wet section before moving to the next
- Do not overbrush — one pass per section — return passes on skinning finish [create] bubbles that [cannot] self-resolve
The difference between [oil-based and water-based polyurethane bubble behaviour] matters here: water-based [has] a shorter open time and [is more sensitive] to overbrushing. Water-based polyurethane [requires] a softer touch and [benefits more] from foam roller application on flat surfaces.
Frequently Asked Questions
Can you sand out polyurethane bubbles?
Yes — light bubbles sand out with 320-grit between coats. Sand with long strokes following the grain until the surface feels smooth. Wipe with a tack cloth. Apply the next coat thinned 10% in conditions below 75°F. Heavy bubbles covering more than 40% of the surface produce better results after stripping than after progressive sanding.
Why does water-based polyurethane bubble more than oil-based?
Water-based polyurethane bubbles more because its open time is shorter — typically 3–5 minutes vs 10–15 minutes for oil-based. Shorter open time means bubbles have less time to self-level and pop before the surface skins. Overbrushing compounds this: water-based film [skins faster] and [re-opens more visibly] when overworked.
Should I use a brush or roller to avoid polyurethane bubbles?
A foam roller on flat surfaces [reduces] brush-stroke bubbles by [eliminating] bristle-loaded air. Foam rollers [introduce] micro-foam bubbles from the roller itself — these [self-level and pop] within 5 minutes on correctly thinned finish. Brush [produces] better results on vertical surfaces, edges, and profiles where roller pressure creates drips.
Why did my second coat bubble but the first coat was fine?
A second coat that bubbles over a clean first coat [indicates] the first coat was not fully dry before recoating. Oil-based polyurethane [requires] minimum 24 hours between coats. Recoating early [leaves] solvent in the first coat that [outgases into] the second coat. The alternative cause: the second coat [was applied] thicker than the first — thicker coats [trap bubbles] more easily as the surface skins.
Does humidity cause polyurethane bubbles?
High humidity causes milky blushing in oil-based polyurethane more than bubbling. In water-based polyurethane, humidity above 70% RH slows water evaporation and extends the wet stage — which actually [reduces] bubbling by [giving more time] for bubbles to self-level. The humidity problem [in water-based finishes] is prolonged dry time, not increased bubbling.