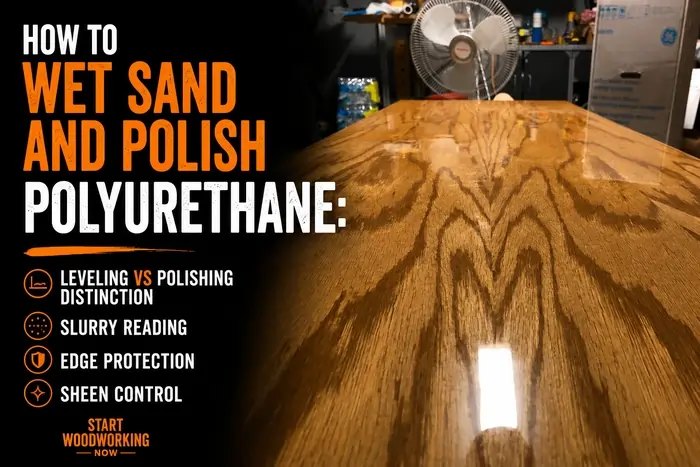
How to Wet Sand and Polish Polyurethane: Leveling vs Polishing Distinction, Slurry Reading, Edge Protection, and Sheen Control
Wet sanding and polishing polyurethane — called rub-out — transforms a good brush-applied finish into a surface that looks professionally sprayed. The process has two distinct stages that must not be confused: leveling removes surface texture (orange peel, brush marks, dust nibs) until the surface is geometrically flat; polishing removes the scratch pattern left by leveling until the surface is optically clear. Most DIY rub-out failures come from skipping or rushing the leveling stage and attempting to polish a surface that still has texture — polishing compounds can only remove scratches from the previous abrasive, not surface irregularities.
Navigate to your question
→ What is rub-out and when is the finish ready? → Cure timing and film thickness check ↓
→ What grit sequence do I use? → Leveling vs polishing and the full progression ↓
→ How do I avoid sanding through the finish? → Slurry reading, edge protection, haze test ↓
→ How do I polish after wet sanding? → Compound sequence and lubricant selection ↓
→ How do I achieve satin vs gloss result? → Pumice, rottenstone, compound — each produces a specific sheen ↓
This guide is part of the complete wood finishing guide. For the full polyurethane application protocol before rub-out: How to Apply Polyurethane →
What Is Rub-Out and When Is the Polyurethane Ready to Wet Sand?
Rub-out is the final stage of finishing — sanding the cured polyurethane film with progressively finer abrasives and polishing compounds to eliminate surface imperfections and achieve the target sheen level. It is done only on the final coat, after full cure, and requires sufficient film thickness to absorb the material removal without exposing bare wood.
Cure Timing Before Wet Sand
Oil-based poly: Minimum 30 days at room temperature. OB poly continues cross-linking for 30 days — softer areas in an under-cured film sand away faster than harder areas, producing an unleveled result.
Water-based poly: Minimum 7 days. WB poly’s coalescence-based cure completes faster. At day 7 it is as fully cured as it will be for rub-out purposes.
Film Thickness Check — Before Starting
Minimum for full grit progression (400→2000): approximately 4 mils dry film. Each grit pass removes 0.3–0.5 mils. 3 full coats of OB poly ≈ 6 mils dry — adequate. 2 coats ≈ 4 mils — borderline.
Visual check: Hold the piece under raking light. If you can clearly see the wood grain through the finish — the film is potentially thin. Sand only from 1500-grit upward on thin films.
The Leveling vs Polishing Distinction — Why Most Rub-Outs Fail
Leveling is a cutting operation. You are removing polyurethane film material to flatten the surface geometrically — eliminating orange peel, brush marks, dust nibs, and any surface texture. The surface should look uniformly dull after leveling, with no visible texture under raking light. This stage uses 400-grit (for rough surfaces) through 600-grit.
Polishing is a scratch-removal operation. You are replacing the coarse scratch pattern left by leveling with progressively finer scratches until the scratches are too small to scatter light — producing gloss. This stage uses 800-grit through 2000-grit and polishing compounds.
Polishing over an incompletely leveled surface produces a shiny surface that still has texture — you can see orange peel or marks reflecting in the gloss. The only fix at that point is to go back to coarser grit and restart leveling. Check leveling completion by drying the surface and examining under raking light before advancing to polishing grits.
What Grit Sequence Do You Use for Wet Sanding Polyurethane?
The starting grit depends on the severity of the surface imperfections. The ending grit before polishing determines how much polishing work remains. Never skip more than one grit step — each grit must remove the scratch pattern left by the previous grit before advancing.
| Grit | Operation | When to Use | Confirm Before Advancing |
|---|---|---|---|
| 400-grit | Leveling — aggressive | Heavy orange peel, significant brush marks, pronounced dust nibs. Use on thick films (4+ mils) only. | All orange peel gone under raking light. Surface uniformly dull. |
| 600-grit | Leveling — standard | Most brushed poly finishes. Starting grit for surfaces with minor texture. Used after 400 to reduce scratch depth. | 400-grit scratch pattern gone. Surface uniformly dull. |
| 800-grit | Transition — leveling → polishing | After complete leveling. Reduces scratch depth before fine polishing. | 600-grit scratch pattern gone. Surface slightly less dull. |
| 1000–1200-grit | Polishing — fine | Reducing scratch depth toward transparent film. Surface begins to develop faint sheen when wet. | 800-grit scratches gone. Fog-glass appearance. |
| 1500–2000-grit | Polishing — ultra-fine | Final wet sand before compound polishing. At 2000-grit, scratches are invisible to the naked eye — surface appears almost clear when wet. | 1200-grit scratches gone. Surface looks glassy when wet. |
Lubricant selection: For oil-based poly: mineral spirits is the best lubricant — it softens the film surface very slightly, allowing the abrasive to cut more cleanly and carrying the slurry away effectively. For water-based poly: 2–3 drops of dish soap in clean water. Mineral spirits can attack WB poly at the molecular level during wet sanding — stick to soapy water. Both poly types: rubbing oil (Behlen or equivalent) works as a neutral alternative for either finish type.
How Do You Avoid Sanding Through the Finish?
Sand-through is the most common rub-out failure. It happens most often at edges, corners, and at the start of each new area before the correct pressure is established. Three techniques together prevent it: slurry reading, edge protocol, and the haze test.
Sand-Through Repair Protocol
If sand-through has occurred (bare wood or primer visible, colour change in the spot): stop sanding immediately. Allow the surface to dry completely.
Apply one very thin coat of polyurethane to the damaged area only, slightly overlapping the good finish around it. Use a small brush and apply with a light hand — do not build up material, just seal the bare wood. Allow to cure fully (24 hours for OB, 4 hours for WB). Resume sanding from 600-grit, feathering into the surrounding area. If the repair is visible after this: apply one more thin full coat to the entire surface, cure, and resume rub-out from the beginning.
How Do You Polish Polyurethane After Wet Sanding?
Polishing removes the 2000-grit scratch pattern and produces transparency and gloss. Apply polishing compound to a small area, work in overlapping passes with a foam pad or soft cloth, and wipe clean before the compound dries.
- Clean the surface completely before polishing. All sanding residue must be removed. Wipe with a microfibre cloth, then a cloth dampened with mineral spirits (OB poly) or clean water (WB poly). Any grit particles left from wet sanding will create scratches when the polishing compound is applied over them.
- Apply compound to one section at a time (approximately 30×30cm). Apply a small amount of compound directly to the surface or to the applicator pad. Do not apply compound to the entire surface — it dries out before you can work it.
- Work the compound with circular or overlapping passes. Apply moderate pressure. The compound [removes] the fine scratch pattern left by 2000-grit. As you work, the compound [changes] consistency from opaque paste to a thin film — this signals it is almost exhausted. Wipe off the residue with a clean cloth before it dries completely.
- Inspect the worked area under raking light before moving to the next section. The area should be uniformly glossy with no visible scratches or haze. Any remaining haze means the compound is not finished — apply more compound and continue.
- For two-step polishing (coarse then fine compound): complete the coarse compound on the entire surface first. Wipe completely clean. Apply the fine compound. The coarse removes 2000-grit scratches; the fine removes coarse-compound scratches and adds final clarity and depth to the gloss.
Water-Based Poly Rub-Out — The Continuous Wet Requirement
Water-based polyurethane dries faster during wet sanding than oil-based — the soapy water lubricant evaporates more quickly than mineral spirits. If the lubricant dries between passes on WB poly, fine abrasive particles redeposit on the surface rather than being carried away in the slurry. This leaves random micro-scratches that produce a non-uniform haze after polishing.
Fix: Keep the surface continuously wet throughout wet sanding of WB poly — re-wet every 30–45 seconds. Work smaller sections (15×15cm) rather than larger areas. This continuous wet requirement is the primary practical difference between OB and WB poly rub-out.
Final wet-sanding is the closing step of the full polyurethane application — the polyurethane application protocol covering the path from first coat to final polish.
How Do You Achieve Satin, Semi-Gloss, and High Gloss?
Sheen level is determined by the final abrasive material, not by the polyurethane product itself. You can produce satin, semi-gloss, or high gloss from the same gloss polyurethane by choosing the correct final step.
Polyurethane’s yellowing problem is concentrated in white cabinet applications adjacent to gas ranges — the chemistry of which is unique to aromatic polyurethane and oil-based finishes.
Frequently Asked Questions
Do you wet sand between every coat of polyurethane?
No — wet sanding is for the final coat only. Between coats: dry sand with 320-grit (not 220-grit) to knock down dust nibs and improve adhesion — do not wet sand intermediate coats. Wet sanding intermediate coats removes too much material and risks exposing bare wood. Wet sanding is a finishing operation performed only after the final coat has fully cured.
Can you use automotive polishing compound on polyurethane?
Yes — automotive rubbing compounds and polish work excellently on cured polyurethane. Automotive products are formulated for hard, abrasion-resistant clear coats with properties similar to oil-based polyurethane. Products like 3M Finesse-It II, Meguiar’s Ultimate Compound, and 3M Perfect-It produce excellent results on polyurethane. Apply with a foam pad (by hand or with a random orbit polisher at low speed). Use a two-step system: rubbing compound first to remove grit scratches, finishing polish second to achieve maximum clarity.
How do I know if the surface is level enough to stop and start polishing?
Dry the surface completely and examine under a single strong raking light (bright lamp held at a very low angle). The leveling is complete when: the entire surface appears uniformly dull with no shiny spots, no orange peel texture is visible, and no brush marks or dust nibs create a raised profile. If you can still see texture in the raking light — even subtle texture — leveling is not complete. Return to 400 or 600-grit and continue leveling.
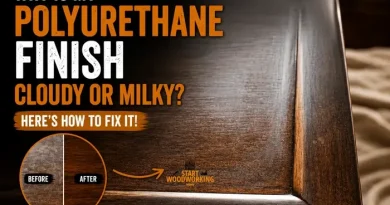
Why does my surface look cloudy after wet sanding even though I followed the grit sequence?
Three causes: (1) Sanding residue not completely cleaned before polishing — grit particles from the last sanding stage scratched the surface during polishing. Fix: clean more thoroughly before applying compound. (2) The polishing compound dried on the surface before being worked completely — produces a filmy haze. Fix: work smaller sections, remove compound while still slightly moist. (3) The lubricant dried during wet sanding (especially WB poly) — particles redeposited on the surface. Fix: re-wet with soapy water and sand the cloudy area again from 1500-grit.
Cloudy areas can be sanded through if light enough — the polyurethane cloudy diagnosis covering when wet-sanding is appropriate vs the heat-fusion fix.
Is rub-out worth doing on a satin polyurethane finish?
For surface smoothness: yes — even satin poly benefits from wet sanding to 600-grit to remove dust nibs and brush marks. The tactile improvement (smoother feel) is significant and worth the 20-minute effort. For sheen improvement on satin: moderate benefit only. Satin poly contains flatting agents (matting beads) that produce the satin sheen regardless of how smooth the surface is — you cannot polish satin poly to high gloss by surface work alone. To change sheen level dramatically, you need to change the polyurethane product to a different sheen grade.