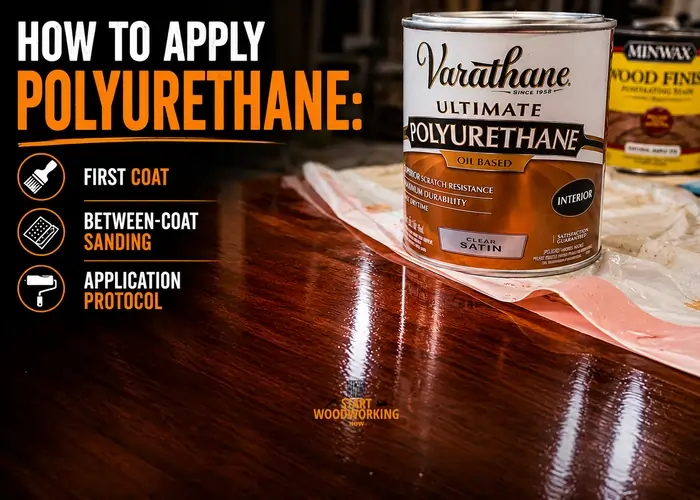
How to Apply Polyurethane: First Coat, Between-Coat Sanding, and Application Protocol
Applying polyurethane correctly requires three things in the right order: a properly prepared surface, correct environmental conditions, and the right technique for the coat you are applying. The first coat behaves differently from subsequent coats — it must be thinned to penetrate bare grain rather than sit on top of it. Every failure mode in polyurethane application traces back to one of these three variables.
This article is part of the complete wood finishing guide — covering finish selection, application, troubleshooting, and refinishing for all finish types and species.
Polyurethane application has four stages:
- Surface preparation — sanded to correct grit, dust-free, at correct moisture content and temperature
- First coat application — thinned 10%, applied thin, grain direction only
- Between-coat sanding — 320-grit on oil-based, 220-grit on water-based, tack cloth
- Subsequent coats — full-strength, thin passes, feathered edges
Navigate to your question
→ Not sure which polyurethane to buy? → Oil-based vs water-based — which should you use? ↓
→ First time applying polyurethane? → How to apply the first coat ↓
→ How long between coats? → Recoat timing and cure windows ↓
→ Brush marks, bubbles, or uneven finish? → Common application problems ↓
Surface dryness at 24 hours is not full cure. Oil-based polyurethane reaches its rated hardness at 30 days. Using a dining table surface before the 30-day mark produces scratches and impressions that would not appear on a fully cured film.
What Do You Need to Prepare Before Applying Polyurethane?
Three conditions must be confirmed before any polyurethane is applied: surface sanded to the correct grit and completely dust-free, workspace temperature between 65–75°F with humidity below 65% RH, and wood moisture content below 12%. Any condition outside these ranges produces a finish failure regardless of application technique.
Should You Use Oil-Based or Water-Based Polyurethane?
Oil-based polyurethane provides maximum abrasion resistance — 300–500 Taber cycles — and an amber tone that enhances warm-coloured wood species. Water-based polyurethane dries clear without yellowing, has lower VOC content, and dries faster between coats.
For light-coloured species (maple, birch, white paint), water-based is the correct choice. For floors and dining tables where maximum hardness is the priority, oil-based remains the more durable option.
| Property | Oil-Based | Water-Based |
|---|---|---|
| Abrasion resistance | 300–500 Taber cycles | 200–350 Taber cycles |
| Colour effect | Warm amber — deepens over time | Crystal clear — no yellowing |
| VOC content | 250–400 g/L | 50–150 g/L |
| Touch dry | 24 hours | 2–4 hours |
| Recoat window | 24 hours minimum | 4–6 hours |
| Full cure | 30 days | 7–14 days |
| Application tool | Natural bristle (china bristle) | Synthetic bristle or foam |
| Best for | Floors, dining tables, oak, walnut | Maple, birch, painted cabinets, children’s furniture Allow 7 days full cure before children’s use |
How Do You Apply the First Coat of Polyurethane?
The first coat of polyurethane on bare wood must be thinned — 10% with mineral spirits for oil-based, 10% with water for water-based. A thinned first coat penetrates the wood grain before forming a surface film, producing a base that subsequent full-strength coats adhere to more strongly than an unthinned first coat would.
Unthinned polyurethane [sits on top of] bare grain rather than [penetrating] it. The surface film [forms] before the finish [has entered] the grain structure. Subsequent coats [bond] to this film surface — mechanically only, not chemically bonded to the wood. A thinned first coat [creates] a partially penetrated base layer that subsequent coats [bond] to at a molecular level, producing better long-term adhesion.
📝The most consistent variable I have observed between polyurethane finishes that hold for 10+ years and those that peel or check within 3–5 years is the first coat. Thinned first coat = foundation. Unthinned first coat on bare wood = surface film with no grip below it. The difference is invisible at application and visible only when the finish fails years later.
First Coat Application Protocol
- Thin the polyurethane. Pour a working amount into a separate container. Add 10% mineral spirits (oil-based) or 10% water (water-based). Stir gently for 30 seconds. Never thin directly in the original can — contamination risk.
- Confirm conditions. Temperature 65–75°F, humidity below 65% RH. Check the actual surface temperature — not just room air. Apply a thermometer to the wood surface; if it reads more than 5°F below room temperature, allow the piece to warm further.
- Load the brush correctly. Dip 1 inch of bristle into the polyurethane. Press once against the side of the container — not both sides. Over-pressing removes too much finish. An underfilled brush produces drag marks; an overfilled brush produces drips.
- Apply in the grain direction only. Long, flowing strokes from end to end of the surface. Maintain wet edge — work in sections and overlap by 2–3 cm while the previous polyurethane stroke is still wet. Do not go back over areas that have begun to skin.
- Tip off each stroke. At the end of every brush stroke, lift the brush gradually while it is still moving — the bristle tips lightly touch the surface. This technique levels brush marks and releases trapped air. Hold the brush at 45° for tipping off, not 90°.
- Work in a raking light. Position a lamp at a low angle across the surface. This reveals holidays (missed spots), runs, and brush marks while the finish is still workable. Fix immediately — do not touch areas that have begun to skin.
- Allow full dry time before assessing. The first thinned coat appears flat and non-shiny when dry — this is correct. Full sheen develops on subsequent coats. Do not sand the first coat until it is completely dry — oil-based: 24 hours minimum, water-based: 4 hours minimum at 65–75°F.
How Do You Sand Between Coats of Polyurethane?
Sand between polyurethane coats with 320-grit for oil-based and 220-grit for water-based. Sanding removes dust nibs, levelling ridges, and creates mechanical adhesion for the next coat. Sand with the grain using light, even pressure — the goal is a uniformly dull surface, not removal of the coat. Wipe with a tack cloth before applying the next coat.
Between-coat sanding [removes] the texture produced by dust landing in wet finish and by brush marks that did not level fully. 320-grit on oil-based [produces] fine scratches that the next coat [fills] completely — the scratches [create] mechanical adhesion without [cutting through] the coat below. Sanding with 220-grit on oil-based [cuts too aggressively] — it can [cut through] thin areas of the first coat to bare wood, producing light spots in the finished surface.
Between-Coat Sanding Protocol
- Confirm the coat is fully dry — firm to the touch with no tackiness. Oil-based: minimum 24 hours at 65–75°F. Water-based: minimum 4–6 hours.
- Sand with 320-grit (oil-based) or 220-grit (water-based) using a sanding block — not bare hand. A block distributes pressure evenly and prevents fingertip dig marks in the soft finish.
- Sand with the grain using light, even pressure. The entire surface should become uniformly dull — any shiny areas remaining mean those spots were not sanded and will have poor adhesion to the next coat.
- Check for white powder or gummy residue on the sandpaper. White powder = correctly cured coat sanding correctly. Gummy or stringy residue = coat is not fully dry — stop and allow more dry time.
- Vacuum the surface. Follow immediately with a tack cloth — wipe in grain direction, light pressure. Replace the tack cloth when it shows significant dust loading. Leaving dust on the surface between coats creates rough texture that compounds with each coat.
- Apply the next coat within 72 hours of sanding — the mechanical adhesion from sanding reduces over time as the fine scratches fill with ambient dust.
Do Not Sand the Final Coat
The final coat of polyurethane is not sanded — it is the surface finish. Sanding the final coat removes sheen and produces a dull, hazy surface that requires polishing to restore. Exception: if there are significant dust nibs in the final coat, sand with 400-grit using extremely light pressure and follow with automotive polishing compound to restore sheen.
How Many Coats of Polyurethane Do You Need?
Two coats is the absolute minimum for furniture — one coat provides insufficient film thickness for any meaningful protection. Three coats is the standard for dining tables, desks, and floors. Each coat adds approximately 1–1.5 mils of dry film. Three coats of oil-based polyurethane at 3–4.5 mils total dry film thickness produces 300–500 Taber cycle abrasion resistance — the rated value for this finish type.
| Surface / Use | Minimum Coats | Recommended | Why |
|---|---|---|---|
| General furniture | 2 | 2–3 | Low contact — 2 sufficient for decorative pieces |
| Dining table or desk | 3 | 3 | Daily contact requires 3+ mils dry film to reach rated hardness |
| Hardwood floor | 3 | 3–4 | Floor-grade formulation + extra coat extends refinish interval to 7–10 years |
| Recoat over existing finish | 1 | 1–2 | Restoring film thickness — existing coats still present below |
Buying too little finish mid-project means a colour or batch mismatch when you return for more; buying far too much wastes money on a product with a limited shelf life once opened. The calculator below estimates how much you actually need from your surface area, finish type, and coat count — with a waste margin built in.
This tool is part of the complete wood finishing guide. Coverage varies by finish type because each lays down a different film thickness per coat — a penetrating oil stretches much further than a film-building polyurethane.
Finishing Calculator
How Much Finish Do You Need?
Estimate how much finish to buy based on your surface area, finish type, and number of coats — including a waste margin.
Enter your details and tap Calculate
Estimates assume smooth, sealed wood. Bare, porous, or rough wood absorbs more on the first coat — buy slightly extra. Coverage rates are typical manufacturer averages and vary by brand and application method.
How Long Do You Wait Between Coats of Polyurethane?
Oil-based polyurethane requires a minimum 24-hour wait between coats at 65–75°F. Water-based requires 4–6 hours. These are recoat windows — the minimum time for the previous coat to cure enough to accept sanding and a new coat without intercoat adhesion failure. They are not the same as full cure time, which is 30 days for oil-based and 7–14 days for water-based.
Recoating too soon [traps] uncured solvent beneath the new coat. The combined layers [cure] more slowly than either coat alone. At extreme early recoating — under 8 hours for oil-based — the two coats [merge] into a system that [may never harden] completely, producing permanent soft spots.
| Stage | Oil-Based | Water-Based | What It Means |
|---|---|---|---|
| Touch dry | 24 hours | 2–4 hours | Surface feels dry but film still curing internally |
| Sand and recoat | 24 hours minimum | 4–6 hours minimum | Can accept 320/220-grit sanding and new coat |
| Light use | 72 hours | 24 hours | Light objects placed on surface without dragging |
| Full cure / hard use | 30 days | 7–14 days | Rated hardness reached. Safe for daily use, cleaning, dragging objects |
Temperature Effect on Recoat Timing
Every 10°F (6°C) drop below 65°F approximately doubles the recoat time for oil-based polyurethane. At 55°F: 48 hours minimum between coats. At 45°F: the finish cures so slowly that recoating at any interval risks trapping uncured solvent. Below 50°F: do not apply oil-based polyurethane — move the piece to a heated space and allow 24 hours for the surface temperature to stabilise before application.
Why Does My Polyurethane Have Brush Marks, Bubbles, or Uneven Sheen?
Brush marks, bubbles, and uneven sheen each indicate a different application error. Brush marks come from working over partially skinned areas or using too little finish on the brush. Bubbles come from shaking the can, using the wrong brush type, or applying too thick a coat in warm conditions. Uneven sheen comes from inconsistent sanding between coats or applying the final coat over an insufficiently sanded surface.
Frequently Asked Questions
Can you apply polyurethane with a roller?
Yes — a short-nap (3mm) foam roller on flat horizontal surfaces produces fewer brush marks than a brush and is significantly faster on large areas. Use a foam roller for tabletops and floors; follow immediately with a brush tip-off pass to pop any bubbles introduced by the roller. Do not use a foam roller on vertical surfaces — runs form too quickly. Do not use a textured roller — it introduces air bubbles into every roll stroke.
Do you need to sand wood before applying polyurethane?
Yes — on bare wood, sand to 150–180-grit before the first coat. On a previously finished surface, scuff with 220-grit. Without sanding, polyurethane has no mechanical adhesion to the surface. On bare wood, unsanded grain produces a rough, fibrous texture that shows through all subsequent coats. On a previously finished surface, applying polyurethane over an unsanded gloss film produces delamination within weeks.
Can you apply polyurethane over an existing polyurethane finish?
Yes — scuff the existing finish with 220-grit, clean with a tack cloth, and apply the new coat. Run the cross-hatch adhesion test first: score a 2×2 cm grid through the finish, press masking tape firmly, peel sharply — zero finish on tape confirms adhesion is intact and recoating is appropriate. If finish lifts on the tape, the existing coat has failed adhesion and must be stripped before recoating.
Why does polyurethane look yellow?
Oil-based polyurethane yellows because the linseed or soybean oil in its formulation continues to oxidise after cure, progressively shifting the film toward amber. This is normal and expected — on warm-toned species (oak, walnut, cherry), it enhances the natural colour. On light species (maple, birch) or over white paint, it produces an unwanted yellow-orange cast. Solution: use water-based polyurethane, which does not contain oxidising oils and remains clear indefinitely.
How do you clean a polyurethane brush?
Clean oil-based polyurethane brushes with mineral spirits immediately after use — do not allow the finish to cure in the bristles. Work mineral spirits through the bristles in a container, repeat with fresh mineral spirits until the solvent runs clear, then wash with dish soap and warm water. Dry with bristles pointing down; store wrapped in paper or hanging. Water-based polyurethane cleans with water and soap — wash immediately after use. Polyurethane of any type cured in a brush is permanent and the brush cannot be salvaged.
Can you apply polyurethane outside?
Interior-grade polyurethane should not be applied to outdoor surfaces — it lacks UV stabilisers and flexible resins designed for thermal cycling. It chalks, cracks, and peels within one outdoor season regardless of application quality. For outdoor furniture, use spar varnish (exterior-grade, flexible resins with UV absorbers) or exterior-rated water-based polyurethane with UV inhibitors. For oily tropical hardwoods outdoors (teak, IPE), hardwax oil or teak oil is a more appropriate product than any polyurethane.
If you’re choosing between polyurethane and lacquer for the same project, the application differs entirely — the polyurethane vs lacquer chemistry comparison covering compatibility and use cases.