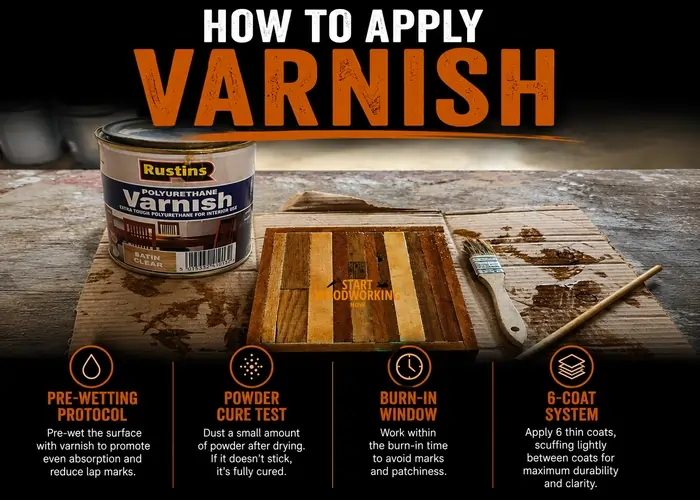
How to Apply Varnish: Pre-Wetting Protocol, Powder Cure Test, Burn-In Window, 6-Coat System
Applying varnish to a professional standard requires controlling four variables that most guides underemphasise: cure confirmation between coats (the powder test), air entrapment before and during application (never shake the can), dust during the long open time (20–45 minutes vs lacquer’s 5), and coat-by-coat film build strategy. A 3-coat varnish application produces adequate protection. A 6-coat application with correct preparation at each stage produces depth of finish that 3 coats cannot achieve on open-grain wood — the grain fills completely and the finish has visible depth rather than a surface-level shine.
Navigate to your question
→ What prep does bare wood need before varnish? → Grit, pre-wetting for WB varnish, brush prep ↓
→ How do I apply without brush marks or bubbles? → Tipping-off, wet edge, dust control ↓
→ How many coats and how do I sand between them? → Coat system, burn-in window, powder test ↓
→ Spar varnish vs interior varnish — what’s the difference? → Long-oil vs short-oil, when each is required ↓
→ My varnish has bubbles, sags, or fisheyes — how do I fix it? → Failure diagnosis and fixes ↓
This guide is part of the complete wood finishing guide. For varnish definitions and types: What Is Varnish? →
⚠ Ventilation Required — Oil-Based Varnish
Oil-based alkyd varnish and spar varnish contain 250–400 g/L VOC from petroleum-derived solvents. Apply with adequate ventilation — cross-ventilation at both ends of the workspace, not just a single open window. An organic vapour respirator (OV/P100) is recommended for extended indoor application. Water-based varnish: 50–150 g/L VOC — lower exposure risk.
What Do You Need to Prepare Before Applying Varnish?
Sand bare wood to 220-grit for oil-based varnish. For water-based varnish: pre-wet the surface first, allow to dry, then re-sand to 220-grit — this eliminates the rough grain raising that happens on the first water-based coat.
The Water-Based Varnish Pre-Wetting Protocol — Eliminates Grain Raising
Water-based varnish [raises] wood grain on the first coat because water [causes] wood fibres to swell. Without preparation, the first coat produces a sandpaper-rough surface that requires heavy sanding — sometimes removing most of that first coat.
Protocol: Before any water-based varnish, wipe the sanded bare wood with a clean cloth dampened with clean water. Allow to dry completely (1–2 hours). The grain raises — the surface feels rough like fine sandpaper. Re-sand lightly with 220-grit to knock down the raised fibres. Now apply water-based varnish: the grain has already been pre-raised and knocked down, so the first coat dries smooth.
This step takes 10 minutes and eliminates the rough first coat that surprises most DIY varnishers. Not required for oil-based varnish — mineral spirits do not raise grain significantly.
Varnish Preparation
Never shake the can. Shaking introduces microbubbles into high-viscosity varnish that cannot escape during the open time — they cure as craters. Always stir with a flat stick using a figure-eight motion at the bottom of the container. Decant the amount needed into a clean container, stir again, then apply.
If varnish has settled (colour or cloudiness at the bottom): stir gently for 3–5 minutes until uniform before decanting.
Brush Preparation
China bristle for oil-based (natural hog hair, flagged tips). Nylon/polyester for water-based (natural bristle absorbs water and goes limp).
Before use: flex bristles firmly and “slap” the brush against your palm to remove loose bristles that would otherwise end up in the varnish. For a new brush: wash in the appropriate solvent first to remove manufacturing residue.
Environment
Temperature: 15–25°C. Below 10°C, varnish viscosity becomes very high and open time extends significantly — brush marks may not level.
Dust control: Lightly mist the floor around the workpiece with water before applying varnish. This damps airborne dust and prevents it from settling in the wet finish during the long open time. Work in still air — no fans, no open doors with drafts.
Thinning: First coat only — thin oil-based varnish 10–15% with odorless mineral spirits. This improves flow and penetration into bare wood. Second coat: thin 5–10%. Third coat and beyond: full strength. Water-based varnish: do not thin unless the manufacturer’s TDS specifies — thinning with water affects film formation quality.
How Do You Apply Varnish Without Brush Marks?
Varnish’s long open time (20–45 minutes) compared to lacquer’s 5 minutes means you have more time to work — but also more time for dust to settle and for lap marks to form where sections overlap. The tipping-off technique and wet-edge discipline together eliminate brush marks on flat surfaces.
- Load the brush to half the bristle length. Drain one side lightly against the container rim — do not scrape both sides dry. Apply with even pressure across the grain first to distribute varnish evenly, then stroke with the grain to lay it off.
- Work in manageable sections from one end of the surface to the other. On a tabletop: one board width at a time, applying each strip from end to end without stopping mid-surface. Do not cover more area than you can tip off before the varnish begins to skin (typically 10–20 minutes at 20°C).
- Tip off immediately after each section. Unload the brush (drag bristles once against container rim). Hold the brush at 15–20 degrees to the surface. Draw the bristle tips lightly from one end of the section to the other in one continuous pass. This removes brush marks and equalises film thickness across the section.
- Maintain the wet edge. Start each new strip at the far end and brush back into the wet edge of the previous strip. The fresh varnish merges seamlessly into the wet edge without a lap mark. Never start a new strip at the wet edge and brush away from it — this creates a visible overlap line.
- Do not rework varnish that has started to skin. After approximately 15–20 minutes at 20°C, the surface begins to skin as the solvent evaporates. Any brush contact with skinning varnish produces permanent drag marks. If you missed a section: leave it, allow full cure, sand lightly with 320-grit, and apply a thin coat over the missed area before the next full coat.
- On vertical surfaces: cross-brush first, then tip off vertically. Apply varnish in horizontal strokes across the grain (prevents runs from concentrating along the grain). Then tip off with a vertical stroke from bottom to top. The horizontal application distributes evenly; the vertical tip-off lays the film in the grain direction.
If a Bug Lands in Wet Varnish — Do Not Remove It
Attempting to remove an insect from wet varnish creates a far larger defect than the bug itself — the brush disturbs the wet film around the insect, producing a halo of distortion that is visible after curing. Leave the insect in place and allow the coat to cure fully. The insect integrates with the cured film. Sand out between coats with 320-grit: the insect sands away cleanly without damaging the surrounding finish. Prevention: mist the floor, work in still air, place a light source away from the workpiece to attract insects away from your work area.
Varnish brush mark prevention uses the same tipping-off technique as polyurethane — for the dense polyurethane brush mark protocol, see the polyurethane brush mark prevention with thinning ratios.
How Many Coats of Varnish Do You Need — and How Do You Sand Between Them?
Three coats is adequate protection for furniture. Six coats is the professional standard for full grain filling and depth of finish on open-grain species. Between every coat, confirm cure before sanding — the powder test is the only reliable method.
The Powder Test — Confirms Cure Before You Sand
Sand a small hidden area with 320-grit before sanding the full surface. The residue tells you whether the varnish is cured:
Dry white powder → varnish is cured. Safe to sand the full surface.
Gummy residue / clogs the paper → varnish is not cured. Allow another 4–8 hours and retest. Sanding uncured varnish clogs the paper, tears the film surface, and creates ridges that are worse than what you started with.
| Coat | Dilution | Purpose | Sanding After |
|---|---|---|---|
| Coat 1 (sealer) | 25–30% mineral spirits | Deep penetration into bare grain — establishes adhesion | 220-grit — aggressive. Level all nibs and grain roughness. This coat takes the most sanding. |
| Coat 2 (build) | 10% mineral spirits | First true film build — starts to fill open grain | 320-grit — remove nibs only |
| Coats 3–4 (main) | Full strength | Primary film build — fills grain progressively | 320-grit between each — nibs only |
| Coat 5 (penultimate) | Full strength | Near-final build — any remaining grain pores filled | 400-grit — very light, level only |
| Coat 6 (finish) | Full strength | Final surface — leave to cure 7 days, then wet-sand + steel wool if required | 400-wet sand + 0000 steel wool after full cure for satin result |
The Burn-In Window — Stronger Bond Than Sanding
Varnish applied within the burn-in window (4–24 hours after the previous coat at 20°C, while the previous coat is firm but still slightly soft) partially dissolves into the previous coat — creating a chemical bond stronger than mechanical adhesion from sanding alone.
Test for burn-in window: Press a fingernail into a hidden area firmly for 3 seconds. No permanent mark = coat is firm enough to recoat. Slight warmth but no impression = ideal burn-in state. Clear impression = too soft, wait another 4 hours.
Missed the burn-in window (coat has been cured 24+ hours): sand with 320-grit to create mechanical adhesion before the next coat. Both methods work — burn-in produces a superior chemical bond; sanding produces adequate mechanical adhesion.
What Is the Difference Between Interior Varnish, Spar Varnish, and Polyurethane Varnish?
The critical distinction is the oil-to-resin ratio (oil length) in the alkyd formulation — and this ratio determines whether the varnish can flex with exterior wood movement or will crack.
Never Use Interior Varnish on Exterior Wood
Interior varnish’s short-oil alkyd film [cannot] flex with the seasonal wood movement on exterior surfaces. Exterior wood [expands] 3–10% across the grain between summer and winter. The rigid interior varnish film [cracks] and [delaminates] within one season, allowing water to enter under the film — accelerating decay far faster than unfinished wood. Always use spar varnish or a dedicated exterior-grade product on any wood exposed to weather.
If you are thinking, “What should I choose for my woodworking project between varnish and polyurethane – the varnish vs. polyurethane comparison covers the curing mechanism, hardness of each, and removal protocol.
How Do You Diagnose and Fix Common Varnish Problems?
Frequently Asked Questions
What is the correct grit to use between coats of varnish?
After the sealer coat (first, thinned coat): 220-grit. This coat takes the most sanding — the grain is still partially open and nibs are numerous. Between subsequent full-strength coats: 320-grit. Never use 220-grit on a full-strength coat — it cuts too aggressively and can sand through the thin varnish layer on edges and profiles. Final coat after full cure: 400-grit wet-sand with mineral spirits lubricant, then 0000 steel wool for satin result.
Can you apply water-based varnish over oil-based varnish?
Yes — after the oil-based varnish has fully cured (minimum 7 days) and is sanded to a uniform dull surface with 320-grit. Water-based varnish over oil-based can be tricky — the water in the WB product can cause adhesion issues if the oil-based varnish is not fully cured. Test on a sample first: the WB varnish should level smoothly and not bead or fisheye over the sanded OB surface. Generally, staying within one product type (OB over OB or WB over WB) produces more predictable results. Check finish compatibility →
How long does varnish take to fully cure?
Touch-dry: 4–8 hours for oil-based at 20°C. Recoat window: 12–24 hours (confirm with powder test). Handling strength: 3–7 days. Full cure for maximum hardness: 30 days for oil-based alkyd. Water-based: touch-dry 1–3 hours, recoat 4–6 hours, full cure 7–14 days. Full cure matters for: placing objects on the surface, using cleaning products, and doing final wet-sanding. The 30-day cure completion for oil-based is why wet-sanding and polishing is delayed — at 7 days the surface is still cross-linking and wet-sanding can disturb this.
Why is my varnish still tacky after 24 hours?
Three main causes: temperature below 15°C (move to warmer space, allow 48h), humidity above 80% RH (dehumidify the space), or coat applied too thick (solvent cannot fully escape through a thick film). The powder test confirms the state: if sanding produces a gummy smear rather than white powder, the varnish is not cured. Allow more time in warm dry conditions before attempting to sand. Persistent tackiness after 72+ hours in warm conditions may indicate expired or degraded varnish.
How do you apply varnish to outdoor wood?
Use spar varnish (marine/exterior grade) only — never interior varnish on exterior wood. Prepare the surface by sanding to 120-grit (outdoor wood does not need fine preparation), clean with oxalic acid solution to remove any weathering grey, allow to dry completely. Apply the first coat thinned 25% for deep penetration. Allow 24 hours between coats in good weather (above 10°C, no rain forecast). Apply minimum 4 coats — professional marine application uses 6–8 coats for maximum protection. Re-apply a maintenance coat annually before the previous coat fails (when water no longer beads). Applying over existing failed varnish: sand back to bare wood first — new varnish over flaking varnish has nothing to bond to.