How to Remove Danish Oil from Wood: Cure State Protocol, Chemical Stripping, and Sanding Guide
Danish oil is a blend of approximately two-thirds drying oil (tung oil or boiled linseed oil) and one-third varnish (alkyd resin or polyurethane). These two components behave completely differently during removal. The varnish component forms a thin surface film that chemical strippers dissolve. The oil component polymerises by atmospheric oxidation inside the wood fibres — once fully cured, no solvent dissolves it. This distinction determines the entire removal protocol: the correct method depends entirely on how long the danish oil has been on the wood. Uncured danish oil (under 72 hours) is soluble in mineral spirits and removes with cloth wiping. Partially cured danish oil (3–14 days) requires naphtha or chemical stripper to penetrate the forming polymer. Fully cured danish oil (over 14 days at room temperature; over 30 days in cold conditions) cannot be removed chemically — only sanding removes the oil-impregnated wood fibre layer. Mineral spirits has no effect on fully polymerised danish oil, as confirmed by manufacturer testing with month-long mineral spirits soaks showing zero dissolution.
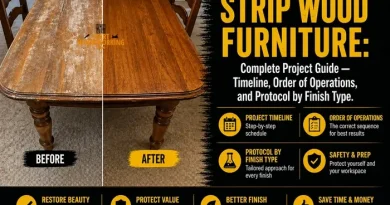
This guide covers the two-component chemistry of danish oil, the cure state identification test, the correct protocol for each cure state, the sanding sequence for fully cured oil, the spontaneous combustion risk with used rags, and compatibility with new finishes after removal.
→ Related: How to Remove Linseed Oil from Wood (same oil component, no varnish fraction)→ Hub: How to Remove Wood Finishes — Complete Guide
How Do You Remove Danish Oil from Wood?
Why Does Cure State Determine the Removal Method for Danish Oil?
Danish oil is not a single-chemistry product. It contains two fundamentally different components that cure by different mechanisms and respond to different removal approaches.
How Do You Identify the Cure State of Danish Oil?
The mineral spirits cloth test identifies the cure state before selecting the removal protocol. The test takes under 2 minutes.
Apply mineral spirits to a white cotton cloth and wipe the danish oil surface firmly for 30 seconds. Inspect the cloth:
- Yellow or amber transfer: oil is uncured or partially cured — soluble fraction still present. Mineral spirits or naphtha protocol applies.
- No transfer, cloth remains white: oil is fully cured and insoluble. Sanding is the only effective removal method. Apply chemical stripper only if the objective is to remove the varnish surface layer before sanding.
What Are the Key Specifications for Removing Danish Oil from Wood?
| Method | Attribute | Value |
|---|---|---|
| Mineral spirits on uncured danish oil | Effectiveness and contact time | Highly effective under 72 hours. Apply Danish oil to cloth, 5–10 minutes contact per section, wipe firmly in grain direction. Replace cloth when amber/yellow transfer appears. 2–4 passes for complete removal. |
| Mineral spirits on fully cured danish oil | Effectiveness | Zero. Polymerised drying oil cross-linked to wood fibres does not dissolve in mineral spirits. Confirmed by manufacturer-recommended month-long soaking producing no dissolution. Do not attempt chemical removal on fully cured danish oil. |
| Naphtha on partially cured danish oil | Effectiveness and contact time | Partially effective on 3–14 day cure state. More aggressive than mineral spirits — apply with cloth, 10–15 minutes contact under plastic film to prevent evaporation. Removes oil from surface pores; deeper pores require follow-up sanding. |
| Chemical gel stripper (citrus or methylene chloride) | What it removes | Dissolves the varnish fraction (alkyd/polyurethane ~33% of danish oil) at all cure states. Does NOT dissolve polymerised oil component. Apply 2–3 mm layer, cover with plastic film, allow 20–30 minutes dwell (citrus) or 10–15 minutes (methylene chloride). Scrape with plastic scraper. Wipe clean with naphtha. |
| Chemical stripper after fully cured danish oil | Role | Removes the varnish surface layer only — useful as a pre-sanding step to reduce sanding load and improve sandpaper performance. Does not remove polymerised oil from pores. Sand after stripping regardless. |
| Sanding — starting grit for fully cured danish oil | Starting grit by porosity | Dense, low-porosity hardwoods (maple, cherry): 80 grit. Medium porosity (oak, walnut, ash): 80 grit. Open-grain / high porosity (pine, softwoods): 100 grit — oil penetrates less deeply on resinous softwoods. |
| Sanding progression | Full grit sequence | 80 grit → 100 grit → 120 grit → 150 grit → 180 grit. Do not skip grits — each grit removes the scratches from the previous. 80 grit scratches are visible at 150 grit if 100 is skipped. |
| Sanding depth — oil-impregnated layer thickness | Typical depth by species | Open-grain species (oak, ash, pine): 0.5–1.0 mm removed. Close-grain species (maple, cherry, beech): 0.2–0.4 mm removed. Multiple danish oil coats increase depth. Inspect under raking light — oil-impregnated wood appears darker; stop sanding when colour matches unfinished areas. |
| Dark pores after sanding | Cause and solution | Oil absorbed into deep pores of open-grain species may persist after surface sanding. Dark pores on oak after sanding: oxalic acid 60 g/litre for 10–15 minutes can lighten tannin-oil oxidation products. Allow 24 hours drying before testing new finish adhesion. |
| Spontaneous combustion risk | Time to ignition | Folded/crumpled rags with danish oil, tung oil, or linseed oil can reach ignition temperature within 1–4 hours through exothermic oxidation. Lay rags flat in single layer outdoors minimum 24 hours, or submerge in sealed metal container with water. Never pile, fold, or place in indoor bin. |
| New finish after oil removal | Adhesion test before applying | After sanding, apply 1 coat of intended new finish on a hidden area. After 24 hours, test adhesion with cross-hatch tape pull (ISO 2409). If coating lifts — residual oil in deep pores preventing adhesion. Apply dewaxed shellac (Zinsser SealCoat) as barrier before new finish. |
| Danish oil vs. linseed oil at removal | Key difference | Linseed oil alone has no varnish component — chemical stripper has less effect on it than on danish oil. Danish oil’s varnish fraction (~33%) responds to stripper, making partial-cure stripping more productive than on pure linseed oil. Fully cured both require sanding. |
How Do You Remove Uncured Danish Oil (Under 72 Hours)?
Uncured danish oil is in its most removable state — the polymerisation reaction has not yet produced insoluble cross-linked polymer chains. Mineral spirits dissolves the oil rapidly and completely if applied within the 72-hour window. The objective is to capture as much oil as possible with the first application before it bonds further to the wood fibres.
STEP 1 Apply mineral spirits generously — cover the entire surface
Apply mineral spirits liberally to the entire danish oil surface using a clean cloth. Unlike wax removal where minimal solvent is used, uncured danish oil requires generous application — the mineral spirits must saturate the oil layer before wiping so that the dissolved oil is captured in the cloth rather than re-deposited.
Work in sections of 0.4–0.5 m² maximum. Allow 5–10 minutes contact time per section, keeping the surface visibly wet throughout the dwell period. Cover sections not yet being treated to prevent premature evaporation and further curing.
STEP 2 Wipe firmly with fresh cloths — replace frequently
Wipe each section with firm, even pressure in the grain direction. The cloth will pick up the yellow-amber dissolved oil visibly. Replace the cloth with a clean section when it shows uniform colour saturation — a saturated cloth redistributes dissolved oil back onto the surface rather than removing it.
For a freshly applied single coat on a typical dining table, 3–5 cloth changes are typical for complete removal. For multiple coats or high-porosity species (pine, ash, oak), increase to 5–8 cloth changes.
STEP 3 Repeat 2–4 passes — confirm with cloth test
After the first pass, allow 5 minutes and apply a second mineral spirits pass. The second pass captures oil that the first pass mobilised but did not fully remove from the pores. Continue until the mineral spirits cloth shows no yellow transfer after 30 seconds of firm wiping on a clean area. For uncured single-coat danish oil, 2–3 passes typically achieve this. For multiple coats, 3–5 passes are needed.
Dispose of rags immediately and correctly: Used cloths contain dissolved danish oil which continues to oxidise after removal from the wood. Lay every cloth completely flat in a single layer outdoors on a non-combustible surface for minimum 24 hours before placing in a bin. Alternatively, fully submerge used cloths in a metal container filled with water, seal the lid, and dispose with household hazardous waste. A bin fire caused by piled danish oil rags is a serious documented risk — multiple woodworking shop fires are attributed to this each year.
How Do You Remove Partially Cured Danish Oil (3–14 Days)?
Between 3 and 14 days, danish oil is in a transitional cure state. The oil polymer chains are forming but cross-linking is incomplete — meaning that strong solvents and chemical strippers can still disrupt the forming polymer network and loosen the oil from the wood fibres, at least at the surface.
Complete removal from deep pores is not achievable chemically at this stage; sanding to 80–100 grit after chemical treatment is required for a fully oil-free surface.
STEP 1 Apply chemical gel stripper — 20–30 minutes dwell under plastic film
Apply a generous 2–3 mm layer of chemical gel stripper across the surface. Citrus-based gel strippers (Citristrip, Eco-Solutions) are suitable for indoor use and have good dwell time — their slower evaporation rate gives more time for penetration into the forming polymer layer.
Methylene chloride-based strippers (Zip Strip) are more aggressive but require outdoor use and respirator protection. Cover the stripper with plastic sheeting to prevent evaporation and extend active penetration. Allow 20–30 minutes dwell for citrus; 10–15 minutes for methylene chloride.
STEP 2 Scrape — work with plastic scraper at 30–45 degrees
After the dwell period, the surface should appear softened and wrinkled. Scrape with a plastic scraper at 30–45 degrees in the grain direction. The lifted material will be a brown-amber gel of dissolved varnish fraction and loosened oil.
Collect and dispose of the scraped material — it contains oil and is combustion-risk material. Wipe the surface clean with a naphtha-dampened cloth immediately after scraping to remove stripper residue before it dries and re-hardens.
STEP 3 Sand 80–100 grit — remove oil-impregnated surface layer
After stripping and 2–3 hours of drying, sand the surface with 80 grit in the grain direction. The stripping has removed the varnish surface layer and loosened surface-level oil, but oil that penetrated below the first 0.1–0.2 mm of the wood fibre layer remains polymerised in place.
Sanding through this layer — typically 0.3–0.5 mm removal on most species — reaches oil-free wood below. Progress to 100 grit, then 120 grit, then 180 grit finish pass. Inspect under raking light between passes: oil-impregnated wood appears slightly darker than the surrounding sanded areas.
How Do You Remove Fully Cured Danish Oil (Over 14 Days)?
Fully cured danish oil cannot be removed chemically. The polymerisation reaction is complete, and the cross-linked oil polymer is permanently bonded to the wood cellulose fibres. Sanding is the only effective removal method. This is the most common scenario — most requests to remove danish oil involve furniture or floors that were finished weeks, months, or years ago.
OPTIONAL Chemical stripper for varnish surface layer — pre-sanding preparation
Although chemical stripper cannot remove the polymerised oil, it dissolves the varnish fraction that forms a thin surface film on the wood. Removing this varnish layer before sanding reduces sandpaper clogging and improves cutting efficiency.
This step is optional but reduces total sandpaper consumption by approximately 30–40% on multi-coat danish oil applications. Apply as in the partial cure method, allow 20–30 minutes, scrape, wipe with naphtha, allow 2 hours drying before sanding.
STEP 1 Sand 80 grit — remove oil-impregnated wood layer
Begin with 80 grit sandpaper. Use a random orbital sander for flat surfaces — hand sanding on a flat surface risks creating low and high spots that telegraph through subsequent finishes. Work in the grain direction with consistent, overlapping passes.
The colour of the sanding dust is a key indicator: oil-impregnated wood produces darker dust than clean wood. Continue sanding until the dust is consistently the natural pale colour of the wood species. For open-grain species (oak, ash), this typically requires removing 0.5–1.0 mm of surface wood. For close-grain species (maple, cherry), 0.2–0.4 mm is typical.
STEP 2 Progress through 100 → 120 → 180 grit
After 80 grit removes the oil layer, progress through 100, 120, and 180 grit in sequence. Each grit removes the scratch marks from the previous grit — do not skip grits, as 80-grit scratches are visible in the final finish if 100 grit is omitted.
Wipe the surface clean between grits with a dry tack cloth to remove sanding dust before progressing to the next grit. At 180 grit the surface should be smooth, pale, and uniform in colour with no dark patches indicating remaining oil.
STEP 3 Address dark pores with oxalic acid if needed
Open-grain species — particularly oak, ash, and walnut — have large pores that absorbed danish oil deeply during the original application. After sanding, these pores may still appear dark despite the surface wood being oil-free. If dark pores persist after 180-grit sanding, apply oxalic acid at 60 g/litre to the surface and allow 10–15 minutes contact.
Oxalic acid converts the dark iron-tannate and oil oxidation compounds in the pores to colourless iron oxalate. Rinse with clean water, allow 24 hours drying, and test new finish adhesion before proceeding.
The protocol requires 60 g of oxalic acid crystals per litre of water — use the calculator below to get the exact dose for your container size, plus the correct amount of baking soda for neutralisation after treatment.
Oxalic Acid Concentration Calculator
Exact doses for wood stain removal — acid, neutraliser, and contact times
📝 The most instructive cure state scenario I encountered in my restoration workshop was a solid walnut writing desk finished with Colron Danish Oil approximately 6 weeks before the client decided to change to a polyurethane finish. Three applications of chemical stripper over two days removed the varnish surface layer and lightened the surface visibly — but the mineral spirits cloth test after stripping showed zero transfer, confirming the oil was fully polymerised. Sanding was required starting at 80 grit. The walnut required approximately 0.4–0.5 mm removal — 80 grit for surface removal, 100, 120, and 180 grit progression. Oxalic acid treatment was needed on the open pore areas of the crotch figure where oil had concentrated, leaving visible dark patches after 180 grit sanding.
How Does the Wood Species and Surface Type Affect Danish Oil Removal?
| Surface / Species | Penetration Depth | Removal Specifics | Key Constraint |
|---|---|---|---|
| Oak, ash (open-grain hardwood) | Deep — large pores absorb significant oil volume. 0.5–1.0 mm sanding required for fully cured oil. | Oxalic acid often needed after sanding for persistent dark pores. Pre-sanding chemical stripper reduces load. | High tannin content reacts with oil oxidation products to produce dark iron-tannate compounds in pores. Oxalic acid is the correct treatment — not bleach, which damages oak fibres. |
| Walnut, mahogany (medium-grain) | Medium — 0.3–0.6 mm sanding for fully cured oil. Natural dark colour may mask remaining oil discolouration. | Use raking light to identify boundaries between oil-impregnated and clean wood during sanding. Dark wood makes visual inspection harder. | Species natural colour can make it difficult to confirm complete removal by visual inspection alone. Use new finish adhesion test after sanding before committing to final finish. |
| Pine, spruce (softwoods) | Variable — resinous softwoods partially resist oil penetration due to natural resin. 0.2–0.5 mm typically. | 80 grit on fully cured oil. Resin pockets may cause uneven sanding — manual attention at resin areas. | Softwood sands faster than hardwood — risk of over-sanding and uneven surface. Use light pressure and random orbital sander. |
| Maple, cherry (close-grain hardwood) | Shallow — 0.2–0.4 mm for fully cured oil. Dense grain limits penetration. | Easier removal — less oil penetration means less sanding required. 100 grit starting point often sufficient. | Highly visible scratching on maple — do not skip grit sequences. Any cross-grain scratches from 80 or 100 grit must be removed with 120 and 180 before finishing. |
| Kitchen worktops / dining tables | Often multiple danish oil coats over years — deep penetration and multiple varnish layers. | Pre-sanding chemical stripper highly recommended to remove varnish buildup before sanding. Start with 80 grit regardless. | Food contact surfaces — ensure all chemical stripper residue is removed before sanding. Naphtha wipe after stripping, allow full drying before sanding. |
| Turned objects (bowls, handles) | Danish oil applied by flooding on turned items — deep penetration, especially on end-grain areas. | End-grain sections absorb far more oil than long grain — require deeper sanding (0.5–1.5 mm on end grain vs. 0.2–0.5 mm on long grain of same piece). | Lathe sanding for turned pieces. End-grain darkness after sanding often persists — oxalic acid for turned bowls with visible end-grain darkening. |
Why checking the cure state before starting saves significant time: The three most common mistakes when removing danish oil — all caused by not identifying cure state first — are: (1) applying mineral spirits to fully cured oil and spending hours with no result, (2) sanding uncured or partially cured oil which clogs sandpaper immediately and smears oil deeper into pores, (3) applying chemical stripper expecting complete removal on fully cured oil and then finding a persistent oil-contaminated surface. The 30-second mineral spirits cloth test before starting prevents all three scenarios.
📝 The spontaneous combustion risk is not theoretical — I witnessed a near-incident in my workshop early in my career when a cloth used with Watco Danish Oil was left folded on the workbench. Within approximately two hours, the cloth was too hot to hold and showed early signs of scorching at the fold points. Since then, every cloth used with any drying oil is laid completely flat on the concrete floor outside the workshop for 24 hours before disposal, and I keep a metal container with water specifically for emergency cloth submersion if a cloth has been inadvertently left folded indoors.
Frequently Asked Questions About Removing Danish Oil from Wood
Can mineral spirits remove fully cured danish oil?
No. Mineral spirits dissolves uncured and partially cured danish oil (under approximately 14 days at room temperature) but has no effect on fully polymerised danish oil. The drying oil component of danish oil — tung oil or boiled linseed oil, approximately two-thirds of the formulation — polymerises through atmospheric oxidation into a cross-linked polymer permanently bonded to wood cellulose fibres. No petroleum solvent dissolves a fully cured cross-linked drying oil polymer.
This was confirmed directly by the Watco manufacturer, who recommended mineral spirits soaking for removing cured danish oil from equipment — a month-long test showed zero dissolution. For fully cured danish oil, sanding is the only removal method.
What does chemical stripper remove from danish oil?
Chemical stripper dissolves the varnish fraction of danish oil — the approximately one-third alkyd resin or polyurethane component that forms a thin semi-film on the wood surface. It does not dissolve the polymerised oil component in the wood fibres. After stripping fully cured danish oil, the surface appears lighter but the oil-impregnated wood layer below is intact and unchanged. Stripping before sanding is useful because it removes the varnish surface film, reducing sandpaper clogging and improving 80-grit cutting efficiency — but it does not eliminate the sanding requirement.
How deep do you need to sand to remove danish oil?
The sanding depth depends on the wood species porosity, the number of danish oil coats applied, and the application method. For open-grain hardwoods (oak, ash, walnut) with 2–3 coats, typically 0.5–1.0 mm of surface wood must be removed. For close-grain hardwoods (maple, cherry) the same treatment requires 0.2–0.4 mm. Starting at 80 grit and sanding until the dust colour changes from dark amber to the natural pale colour of the wood species is the reliable indicator of complete removal — visual inspection alone is more reliable than a fixed depth target because oil penetration varies significantly by application method and number of coats.
Is there a fire risk when removing danish oil?
Yes — this is a serious and documented risk. Rags and cloths used with danish oil, tung oil, or any drying oil undergo exothermic oxidation as the oil begins to polymerise. A crumpled or folded rag can generate sufficient heat to reach ignition temperature within 1–4 hours without any external flame source. Multiple woodworking shop fires have been attributed to improperly disposed drying oil rags. Every used cloth must be laid completely flat in a single layer outdoors for minimum 24 hours, or fully submerged in a sealed metal container with water before disposal. Never fold, pile, or place drying oil rags in an indoor bin.
Summary: Key Values for Removing Danish Oil from Wood
Danish oil is a blend of drying oil (~66%) and varnish (~33%). The cure state of the oil determines the removal method completely — identify it first with the mineral spirits cloth test before starting. Uncured danish oil (under 72 hours, amber cloth transfer) dissolves in mineral spirits — 2–4 passes with fresh cloths, 5–10 minutes contact each.
Partially cured (3–14 days, faint transfer) requires chemical gel stripper for the varnish layer followed by sanding 80–100 grit for the partially polymerised oil layer.
Fully cured danish oil (over 14 days, zero cloth transfer) cannot be removed chemically — only sanding removes the polymerised oil by removing the oil-impregnated wood fibre layer, typically 0.3–1.0 mm depth by species and porosity. Chemical stripper on fully cured oil removes the varnish surface film only, not the polymerised oil — useful as a pre-sanding preparation step but not a substitute for sanding.
Dark pores on high-tannin species after sanding respond to oxalic acid 60 g/litre for 10–15 minutes. All used rags must be laid flat outdoors or submerged in water — spontaneous combustion risk within 1–4 hours of folded rag storage.
→ Related: How to Remove Linseed Oil from Wood→ Related: How to Remove Oil-Based Stain from Wood→ Hub: How to Remove Wood Finishes — Complete Guide