How to Apply Danish Oil: Step-by-Step Protocol, Coat Count, and Compatibility Guide
Applying danish oil correctly comes down to one rule that most guides understate: wipe off all excess within 20–30 minutes of application. Danish oil that is not wiped stays liquid on the wood surface, oxidises slowly, and produces a permanently sticky film that no amount of additional drying time will harden. Every other application variable matters less than this one.
Navigate to your question
→ What does danish oil actually do to wood? → Mechanism and properties ↓
→ What grit and prep before applying? → Preparation protocol ↓
→ How do I apply it step by step? → Complete application method ↓
→ How many coats do I need? → Coat count and saturation test ↓
→ Why is my danish oil still tacky? → Causes and fixes ↓
→ Can I put polyurethane over danish oil? → Compatible topcoat options ↓
This article is part of the complete wood finishing guide covering finish selection, application, and troubleshooting for all finish types and species.
Danish oil is a penetrating finish — it cures inside the wood grain, not on top of it. This single property makes it the most forgiving finish for beginners: there are no brush marks, no drips, no runs, and application errors are corrected by wiping with mineral spirits before the oil cures. It is also why danish oil is unsuitable for dining tables and hardwood floors — it provides no surface film to resist abrasion and spills.
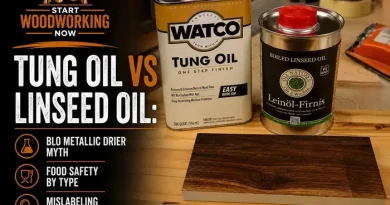
Danish oil is not pure tung oil or pure linseed oil. It is a blended formulation — typically tung or linseed oil combined with a small quantity of varnish resin and mineral spirits. The varnish component provides slightly more surface protection than pure oil alone and accelerates curing. This is why “danish oil” behaves differently from the pure oils it is often confused with.
What Does Danish Oil Do to Wood?
Danish oil penetrates the wood grain and cures within the cell structure, enhancing the natural colour and figure while providing moderate moisture and stain resistance. It does not form a surface film — the protection comes from inside the wood. The result is a natural, low-sheen appearance that feels like the wood itself rather than a coating on top of it.
Danish oil [contains] a blend of tung or linseed oil, varnish resin, and mineral spirits. The oil component [penetrates] the wood grain and [cures] by oxidative polymerisation — the oil molecules [link] together in the presence of atmospheric oxygen and metallic drier compounds. The varnish component [remains] near the surface and [provides] a small amount of additional protection. The mineral spirits [carry] the oil into the grain and [evaporate] as the oil cures.
If food safety matters for your project, pure tung oil is the correct choice over any danish oil product — the danish oil vs pure tung oil composition comparison.
📝Danish oil is my default recommendation for furniture pieces that need to show off the wood rather than be protected from daily abuse. On a walnut sideboard, oak coffee table, or cherry display cabinet — pieces that are admired more than they are used — danish oil produces an appearance that three coats of polyurethane cannot replicate. The wood looks alive rather than sealed under glass. The trade-off is maintenance: oil needs renewal every year or two on working surfaces, while polyurethane needs attention only when it fails.
| Property | Danish Oil | Hardwax Oil | Oil-Based Poly |
|---|---|---|---|
| Film formed | None — penetrating only | None — penetrating only | Yes — surface film |
| Durability (tabletop) | Low-Medium | Medium-High | Maximum |
| Spot repair | Invisible | Invisible | Visible until aged |
| Application skill | Beginner-friendly | Beginner-friendly | Intermediate |
| Maintenance interval | 1–2 years | 2–4 years | 5–10 years |
| Best for | Furniture, decorative pieces | Floors, furniture, high-use | Floors, dining tables |
How Do You Prepare Wood Before Applying Danish Oil?
Sand bare wood to 150-grit — not finer. Grits above 150 (180, 220) close the grain pores and reduce oil absorption significantly, producing uneven penetration that shows as blotchy colour variation. Remove all dust with a vacuum followed by a tack cloth. Confirm wood moisture content is below 12% before applying.
Previously Finished Surface — Strip First
Danish oil cannot penetrate through any existing film finish — polyurethane, varnish, lacquer, shellac, or paint. If a previous film finish is present, it must be stripped to bare wood before danish oil will absorb. Applying danish oil over a film finish produces a surface coat that stays permanently soft because the oil has no grain to penetrate into. Complete finish removal guide →
How Do You Apply Danish Oil Step by Step?
Apply danish oil liberally with a lint-free cloth, allow 15–20 minutes for the wood to absorb what it can, then wipe off all remaining oil firmly. The wood should look slightly enriched but not wet. Any oil still visible on the surface after wiping must be removed — surface oil that is not wiped cures into a sticky, semi-hardened film that takes weeks to fully harden and never reaches acceptable hardness.
Complete Application Protocol
- Pour a small amount of danish oil onto a lint-free cloth — cotton cloth or mutton cloth, not synthetic fibre. Synthetic fibre absorbs oil unevenly and can leave lint in the wet surface. Fold the cloth into a manageable pad. Do not pour danish oil directly onto the wood — it is difficult to distribute evenly from a puddle.
- Apply generously, working with the grain. The wood should look wet — this is correct. Work in manageable sections (30–40 cm) on large surfaces. On the first coat, the wood absorbs oil rapidly — you will likely need to reload the cloth 2–3 times per section on dry bare wood.
- Allow 15–20 minutes penetration time. During this window, inspect the surface. Areas where oil has been fully absorbed and the wood looks dry need a second application to that section — apply more oil, work it in, allow further penetration. End-grain areas (the ends of boards) absorb oil far more rapidly than face grain — these will need extra oil applied 2–3 times during the penetration window.
- Wipe off ALL remaining oil with a dry cloth. This is the most important step. Wipe firmly in the grain direction until no oil transfers to a fresh dry cloth pressed on the surface. If the wood still looks wet after wiping — wipe again with a fresh cloth. “Wet” appearance after wiping means excess oil remains.
- Inspect under raking light. Hold a lamp at a low angle across the surface. Any pooled or unabsorbed oil shows as a reflection. Wipe these areas immediately. Areas missed during the wipe-off are the most common cause of the tacky patches that appear in a dried danish oil finish.
- Dispose of used cloths safely. Spread flat outdoors on a non-combustible surface (concrete, gravel) until fully dry, then dispose. Or submerge in a sealed metal container with water. Do not bundle, fold, or leave in an enclosed bin — spontaneous combustion risk.
- Allow minimum 6–8 hours before second coat at 65–75°F. Confirm dryness by touch — the surface should feel smooth and dry with no tackiness. If any tackiness remains, wait a further 2–4 hours before assessing again.
The Visual Test — Have You Wiped Enough?
✓ Correct — proceed
Wood looks slightly darker and enriched. No reflection from raking light. Fresh dry cloth pressed on surface stays clean. Grain texture visible.
✕ Wipe again
Wood looks wet, shiny, or has visible oil patches. Raking light shows reflections. Fresh cloth picks up oil. Any of these = wipe more.
How Many Coats of Danish Oil Does Wood Need?
Three coats is the standard for furniture. The first coat saturates the grain — most of it is absorbed completely. The second coat begins to build minimal surface enrichment. The third coat provides the characteristic danish oil sheen and adequate protection for low-to-medium contact surfaces.
Additional coats beyond three produce diminishing returns — the grain is already saturated and excess oil sits at the surface requiring removal.
| Coat | What It Does | Dry Time Before Next Coat |
|---|---|---|
| First coat | Saturates bare grain — almost entirely absorbed. Wood will not look finished yet. | 6–8 hours at 65–75°F |
| Second coat | Begins to enrich colour. Some absorption still occurs but slower than coat 1. | 8–12 hours |
| Third coat | Final colour depth and sheen. Very little absorption — wipe firmly after short penetration time. | Allow 24 hours before use |
| Optional: wax topcoat | Paste wax over fully cured danish oil adds surface protection and enhances sheen. Apply after 5–7 days full cure. | Buff after 5–10 min haze |
On very porous species (oak, ash, open-grain hardwoods), a fourth coat may be warranted — apply, allow 10 minutes penetration, and wipe firmly. On close-grained species (maple, cherry, birch), the grain absorbs less oil and three coats is sufficient — sometimes two if the piece is purely decorative.
Why Is My Danish Oil Still Tacky After 24 Hours?
A tacky danish oil finish has one cause in the vast majority of cases: excess oil was not wiped off after application. Oil that remains on the surface oxidises very slowly — unlike oil that has penetrated the grain, surface oil has limited oxygen exposure and cures in weeks rather than days, often never reaching full hardness. The fix depends on how recently the oil was applied.
| Scenario | Cause | Fix |
|---|---|---|
| Tacky within 2–6 hours of application | Excess oil not wiped — still curing on surface | Wipe firmly with mineral spirits on clean cloth, 2–3 passes. Remove all excess immediately. |
| Tacky after 24–48 hours | Excess oil partially cured — now sticky film on surface | Wipe with mineral spirits — 3+ passes on clean rags. If still tacky after 2 days: naphtha wipe, then light sand with 320-grit to remove the partially cured film layer. |
| Tacky after 72+ hours on oily species (teak, rosewood) | Natural wood terpenes inhibit metallic driers in danish oil | Sand off danish oil completely. Use hardwax oil with mandatory acetone pre-wipe instead. |
| Tacky in cold workshop (below 15°C) | Temperature below threshold for oxidative cure | Move piece to heated space (above 18°C). Allow 48–72 hours additional cure time. Check again. |
For a complete guide to tacky oil finish diagnosis and all causes including temperature, stacked coats, and product-specific issues: Why Is My Oil Finish Not Drying? →
What Can You Apply Over Danish Oil Once It Has Cured?
Paste wax applied over fully cured danish oil (minimum 5–7 days after last coat) is the most common and most effective combination — the wax adds surface protection, enhances sheen, and is easily renewed. Oil-based polyurethane can be applied over fully cured danish oil with strict timing requirements. Water-based products and stains cannot be applied over danish oil at any stage.
Food contact surfaces: Danish oil is not food-safe — metallic driers (cobalt, manganese naphthenate) are not certified for food contact. For cutting boards and food-preparation surfaces, use food-safe mineral oil instead.
For all finish-over-finish compatibility combinations including danish oil: Finish Compatibility Checker — 182 combinations →
Frequently Asked Questions
Is danish oil food safe?
Danish oil is not considered food-safe due to its metallic drier compounds (cobalt and manganese salts) and mineral spirits carrier. Once fully cured — minimum 30 days — the risk is reduced but danish oil is not recommended for cutting boards, salad bowls, or surfaces in direct regular food contact. For food-contact surfaces, use food-safe mineral oil, walnut oil, or pure (not polymerised) tung oil. Danish oil is acceptable for surfaces that are used for food occasionally and wiped clean, such as a dining table or kitchen worktop — the fully cured film has no meaningful food safety risk at that level of contact.
Can you apply danish oil with a brush?
Yes — a brush works on carved surfaces, turned profiles, and spindles where a cloth cannot reach all areas. Use a cheap natural-bristle brush and apply generously, working the oil into recesses. The wipe-off step is the same regardless of application method — after the penetration window, use a cloth to remove all excess from flat surfaces and a smaller cloth or old toothbrush for recesses. On flat surfaces, a cloth is faster and produces more even application than a brush.
How long does danish oil take to dry between coats?
6–8 hours between first and second coat at 65–75°F (18–24°C). 8–12 hours between second and third coat — the grain is already saturated and the oil cures more slowly on the less-absorbent surface. Temperature below 15°C extends these times significantly — at 10°C, allow 24+ hours between coats and confirm dryness by touch before reapplying. The surface should feel completely smooth and dry with zero tackiness before the next coat is applied.
How do you maintain a danish oil finish?
Wipe the surface clean with a damp cloth — no soaking, no abrasive cleaners. When the surface begins to look dry or loses its enriched colour (typically after 12–24 months on furniture in regular use), apply a single maintenance coat using the same protocol as the original application: apply, allow 15 minutes, wipe off all excess. No sanding required between maintenance coats. If a paste wax topcoat was applied, renew the wax first with a fresh thin layer and buff — this often restores appearance without needing to re-oil.
Can you use danish oil on oak?
Yes — oak and danish oil produce excellent results. Oak’s open, ring-porous grain absorbs danish oil evenly, producing deep colour enrichment and good penetration with every coat. Specific warnings for oak: never use steel wool during preparation or between coats — even fine grade 0000 steel wool leaves iron fragments in oak grain that react with the tannins in the oil to produce permanent black staining. Use only synthetic grey Scotch-Brite pads for any light abrasion on oak. Some woodworkers also pre-treat oak with a diluted oxalic acid wash before danish oil to neutralise any grey weathering or iron staining from previous hardware.
Is danish oil suitable for outdoor wood?
Standard danish oil is not formulated for outdoor use — it lacks UV stabilisers and the oil-to-varnish ratio is insufficient for the moisture cycling and UV exposure of outdoor conditions. It will grey, dry out, and require reapplication more frequently than purpose-made outdoor products. For outdoor hardwood furniture, use exterior-grade hardwax oil (Osmo UV Protection, Rubio Monocoat Exterior) or teak oil for oily tropical species. If you have used danish oil on outdoor wood and want to maintain it, reapply every 3–6 months in outdoor conditions — significantly more frequently than the 12–24 month interval for indoor furniture.