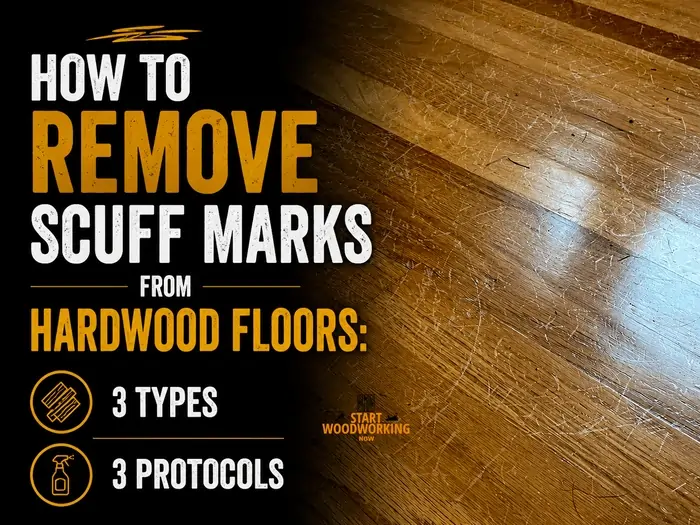
How to Remove Scuff Marks from Hardwood Floors: 3 Types, 3 Protocols
Scuff marks on hardwood floors are not all the same problem. Three distinct mechanisms produce marks that look similar but respond to completely different treatments. Rubber and sole deposits — the most common type, from shoe soles, rubber furniture feet, and mat backing — are surface adhesions where the rubber compound has transferred to the finish surface without damaging the finish film. They dissolve with mineral spirits or a rubber eraser in under 60 seconds because the rubber compound sits on top of the finish rather than inside it. Finish abrasion scuffs — light scratches that have dulled the finish surface in a linear pattern — have damaged the surface layer of the polyurethane or varnish film but have not penetrated to bare wood. These respond to 0000 steel wool with paste wax or, for deeper surface abrasion, a localised screen-and-recoat with compatible finish. Deep mechanical damage — white lines from furniture dragging, gouges that have cut through the finish to bare wood — have breached the finish film entirely and require either board-level refinishing or, in severe cases, board replacement. Applying a rubber eraser to a finish abrasion scuff produces no useful result. Applying mineral spirits to deep mechanical damage also produces no result and wastes time identifying the cause. The 15-second identification test — pressing a finger firmly across the mark — distinguishes surface deposits (mark smears or moves) from finish damage (mark is fixed and cannot be moved) and immediately directs the correct treatment. The most important rule for scuff mark repair on hardwood floors: any intervention that removes the scuff must be compatible with the existing finish chemistry. Applying water-based touch-up over an oil-based floor finish creates a visible adhesion boundary. Applying solvent-based touch-up over a water-based finish risks softening the existing film. Identify the floor finish type before any product touches the floor.
This guide covers the three scuff mark mechanisms and the 15-second identification test, the protocol for each type in order from least to most intervention, the floor finish type identification and compatibility rules for any repair product, the screen-and-recoat process for finish abrasion, the decision between spot repair and full refinishing, and the prevention protocol that eliminates most scuff marks before they occur.
How Do You Remove Scuff Marks from Hardwood Floors?
- Run the 15-second identification test first. Press a dry fingertip firmly across the mark and drag it. If the mark smears, moves, or transfers to your finger = rubber or sole deposit on the finish surface. Clean with a rubber pencil eraser or mineral spirits on a cloth — 30 seconds, done. If the mark does not move at all = finish damage or bare wood exposure. Proceed to Step 2.
- For surface deposits — eraser first, mineral spirits second. A clean rubber pencil eraser (not a coloured one) dragged across rubber sole deposits removes them without any solvent or product on the finish. If the eraser is insufficient: mineral spirits on a white cloth, press and hold 30 seconds, lift and inspect. Mineral spirits dissolves rubber and sole compounds without damaging polyurethane, varnish, or oil finishes.
- For light finish abrasion (dulled, scratched finish surface, wood intact) — 0000 steel wool with paste wax. Rub 0000 steel wool along the grain direction across the dulled area using light, even pressure. The ultra-fine abrasive levels the micro-scratches in the finish surface. Apply a small amount of clear paste wax to the buffed area and buff in circular motion with a clean cloth. The wax fills the micro-abrasions and restores sheen. Match the original sheen level — use a matte wax for matte floors, gloss paste wax for gloss floors.
- For deeper finish abrasion (visible scratch into finish film, no bare wood) — screen-and-recoat the affected boards. When 0000 steel wool does not restore the appearance, the scratch has cut deeper into the finish film and requires a fresh topcoat. Screen the affected area at 150 grit, clean thoroughly, apply a thin compatible topcoat. The critical requirement: the new topcoat must be the same chemistry as the existing floor finish (water-based over water-based, oil-based over oil-based) or adhesion failure creates a visible repair boundary.
- For deep mechanical damage reaching bare wood — assess individual board refinishing. White marks from sharp furniture dragging, gouges, or cuts that expose bare wood cannot be repaired with a topcoat — the bare wood area absorbs finish differently from the surrounding coated area. Options: sand the affected board only (using an edge sander or hand-sanding block), re-seal with compatible finish, feather the edges. If more than 15–20% of any board has bare wood exposure: board replacement is more efficient than repair.
→ Hub: How to Remove Wood Finishes — Complete Guide
→ Remove polyurethane from floors: How to Remove Polyurethane from Wood Floors
→ Refinish hardwood floors: How to Refinish Hardwood Floors
→ Identify existing floor finish: How to Identify Wood Finish
The Three Scuff Mark Mechanisms — Why the Same Mark Requires Different Treatments
Identify Your Floor Finish Before Any Repair — Compatibility Is Non-Negotiable
Any repair product applied to a hardwood floor must be chemically compatible with the existing finish. The most common mistake in hardwood floor scuff repair is applying a water-based touch-up to an oil-based floor, or an oil-based product to a water-based floor. Both create a visible repair boundary — the new product cures differently, reflects light differently, and often cannot adhere correctly to the existing film.
Quick Floor Finish Identification — Three Tests, Under 5 Minutes
For the full sequential solvent test (blade scrape → mineral spirits → denatured alcohol → lacquer thinner): Use the interactive Wood Finish Identifier →
Type 1 Protocol — Removing Surface Deposits (Rubber, Sole, Mat Backing)
Type 2 Protocol — Repairing Finish Abrasion Scuffs
Finish abrasion scuffs have scratched the surface layer of the polyurethane or varnish film. The depth of the abrasion determines whether 0000 steel wool with wax resolves it, or whether a fresh topcoat is needed. The rule: if the abrasion is visible under overhead lighting, use the steel wool and wax method first. If the abrasion produces a white or frosted appearance visible even under raking light and the steel wool method does not restore appearance fully, a screen-and-recoat is required.
Light Finish Abrasion — 0000 Steel Wool and Paste Wax
Deeper Finish Abrasion — Screen-and-Recoat Protocol
Screen-and-recoat applies a fresh thin topcoat over the entire existing floor (or section) after light abrasion to create a new bondable surface. It does not remove the existing finish — it adds to it. The key requirement is chemical compatibility between the existing finish and the new topcoat.
Type 3 — Deep Damage Reaching Bare Wood: Strip vs Repair Assessment
Individual Board Repair — When Appropriate
- Damage is isolated to 1–3 boards
- The board is solid hardwood (min. 18mm) — enough wear layer
- Damage does not extend to the full board width
- The floor finish can be identified to match new topcoat
- A slight boundary between repaired and original boards is acceptable
Process: hand-sand the affected board (150→180→220 grit), seal with matching finish, feather edges. Expect a slight visible difference that diminishes over time.
Full Refinish or Board Replacement — Required When
- More than 4–5 boards affected across the room
- Engineered floor: wear layer below 2mm (no room to sand)
- Damage is at a high-visibility location (room centre, main doorway)
- The board shows structural damage (split, broken tongue)
- A visible repair boundary is not acceptable
Full refinish guide: How to Refinish Hardwood Floors →
What Are the Key Specifications for Hardwood Floor Scuff Repair?
| Entity / Variable | Attribute | Value and Detail |
|---|---|---|
| 0000 steel wool vs synthetic pad — which to use per finish type | Finish compatibility for abrasion pads | Oil-based polyurethane and varnish: 0000 steel wool is safe — no water-sensitivity that would cause steel to rust in the finish. Water-based polyurethane: do NOT use steel wool — fine steel particles embed in the finish film and rust, producing brown specks within days. Use a synthetic finishing pad (Scotch-Brite ultra-fine grey, 3M 7448 equivalent) — same micro-abrasive action without rust risk. Wax finish: 0000 steel wool with additional wax application — the steel wool removes the damaged wax surface layer and the fresh wax application restores it. Hardwax oil: 0000 steel wool + matching hardwax oil touch-up on the abraded area. |
| Cross-hatch adhesion test parameters | When screen-and-recoat is appropriate vs full strip | Cross-hatch test: 6 parallel cuts 3mm apart in each direction through the finish to the wood, masking tape firmly applied and sharply peeled. Zero lift = adhesion intact, screen-and-recoat appropriate. Any lift = full strip required. Additional disqualifiers for screen-and-recoat: finish is peeling or bubbling anywhere in the room; finish has worn through to bare wood; the existing finish chemistry is unknown and cannot be confirmed (chemistry mismatch risk); more than 20% of the floor shows wear-through. Screen-and-recoat is appropriate for floors where the finish is intact, the surface is dull or shows surface abrasion marks, and the adhesion test passes. Full strip is required for anything beyond this. |
| Sheen level matching in repair | How to match sheen after spot repair or screen-and-recoat | Sheen levels for polyurethane floor finishes: matte (5–15 gloss units), satin (25–40 GU), semi-gloss (45–60 GU), gloss (70–90 GU). A repair product at the wrong sheen level is visible as a spot even when the chemistry matches. For paste wax repair: Johnson Paste Wax = high sheen; Minwax Paste Finishing Wax = medium sheen; Briwax matte = low sheen. For screen-and-recoat: use the same finish brand and sheen level that the floor was originally finished with. If the original product is unknown: take a photo of the floor finish in raking light to a flooring supplier — experienced staff can identify the approximate sheen level from the photo. |
| Water-based topcoat over oil-based existing finish — compatibility window | Minimum cure wait for cross-system application | Applying water-based topcoat over oil-based floor finish is technically possible but requires strict conditions: minimum 72 hours cure of the oil-based finish (longer for older, thicker builds — up to 30 days for full cure), complete deglossing at 150 grit, and a compatibility test in a hidden area 24 hours before full application. Even with these precautions, the aesthetic result may not match — water-based topcoat has a cooler, clearer sheen that looks different from the amber-toned oil-based below. For most repair scenarios: stay within the same chemistry. Cross-system application is appropriate only when deliberately converting the floor finish from oil-based to water-based over the full room. |
| Spot repair vs full section screen-and-recoat — when spot fails | Why visible repair boundaries form and how to prevent them | Spot recoating a single board or small area on a floor almost always produces a visible boundary — the new topcoat has a slightly different sheen and light-reflection pattern than the aged surrounding finish even when the chemistry matches. The aged finish has a patina from foot traffic and cleaning products that the new coat does not replicate immediately. The minimum repair unit that avoids visible boundaries: full board width from wall to wall, or full room. If a scuff is on the edge of a board at a joint line: the repair must extend to the next joint line on each side at minimum. Full room screen-and-recoat is the only repair that is invisible — it creates a uniform new surface across all boards simultaneously. |
| Hardwax oil floors — specific scuff repair protocol | Why hardwax oil floors are repairable board-by-board unlike polyurethane | Hardwax oil (Rubio Monocoat, Osmo Polyx-Oil, Bona Craft Oil) penetrates into wood rather than forming a surface film. This penetrating characteristic means individual boards can be sanded and re-oiled without creating a visible boundary — the re-oiled board blends with adjacent boards as the oil penetrates consistently. Protocol for scuffed hardwax oil board: sand the affected board lightly with 150 grit (hand-sanding block, not orbital — maintains board level), remove dust with vacuum and tack cloth, apply matching hardwax oil to that board only with a cloth in grain direction, allow 30–45 minutes penetration, buff off excess. No boundary line visible because the finish is in the wood, not on it. This is one of the key advantages of hardwax oil over polyurethane on floors with furniture. |
Prevention — Eliminating the Causes Before Scuffs Occur
The call I get most often on hardwood floor scuffs goes like this: someone has grey or black marks from rubber furniture feet, applies mineral spirits to one mark, it disappears in 30 seconds, then they discover there are 40 more marks across the room from two years of the same furniture. The mineral spirits treatment is correct — but running it on 40 individual marks one at a time is slow. The efficient approach is to screen-and-recoat the full room, which removes all the surface abrasion simultaneously and applies a fresh topcoat over the full floor. The room is back to new condition in one day, not 40 spot-repair sessions that never quite match.
The repair that consistently produces the worst result is the partial board recoat — applying polyurethane to the damaged section of one board using a small brush. The boundary line where the new finish meets the old is visible in almost all cases because the old finish has an aged patina that the new coat does not match. The minimum repair unit is always the full board. On floors with wide planks where the visual gap between the repaired board and adjacent boards is large: full room screen-and-recoat is the only repair that is genuinely invisible. The labour cost of a screen-and-recoat on an average room is 3–4 hours — less than the time spent on partial repairs that end up being redone.
Frequently Asked Questions About Scuff Marks on Hardwood Floors
How do you remove black scuff marks from hardwood floors?
Black scuff marks on hardwood floors are almost always rubber or sole deposits (Type 1) — black rubber compound from shoe soles or rubber furniture feet transferred to the finish surface without damaging the finish film. The 15-second test confirms this: press a fingertip across the mark. If it smears or moves, it is a surface deposit. Remove with a clean rubber pencil eraser dragged along the grain — this resolves the majority of black scuff marks in under 60 seconds. For marks that resist the eraser: mineral spirits on a white cloth, pressed onto the mark for 30–45 seconds, lifts the rubber compound cleanly. If the black mark does not move when pressed and has a linear scratched appearance: it is finish abrasion. Treat with 0000 steel wool (oil-based floors) or synthetic finishing pad (water-based floors) along the grain, followed by matching paste wax.
Can you use a Magic Eraser on hardwood floors?
Magic Erasers (melamine foam) are a micro-abrasive — they work by physically sanding the surface they contact. On hardwood floors, they remove scuff marks by abrading the finish surface, not by dissolving the deposit. The result is a dulled patch where the finish surface has been abraded, which is visible as a matte spot on a satin or gloss floor. Magic Erasers are not recommended for hardwood floor scuff marks because they solve the deposit problem while creating a finish abrasion problem. Use a rubber eraser for deposits and 0000 steel wool for abrasion — both are more appropriate tools for their respective problems than a multi-purpose abrasive pad.
Why do scuff marks keep coming back in the same spot?
Recurring scuff marks in the same location indicate a consistent source: a specific furniture foot with a rubber base, a regular traffic path where rubber-soled shoes are worn, or a mat with rubber backing that contacts the floor at that location. Treating the scuff mark removes the deposit but does not remove the source — the next contact with the same furniture foot or the same shoe produces the same mark. Identifying and addressing the source is the only permanent fix. Check the furniture foot at the recurring location — if it has a rubber base or a damaged felt pad with embedded grit, replace it. If the location is a traffic path: add an entrance mat or change the footwear policy for that area.
Summary — Key Values for Scuff Mark Removal from Hardwood Floors
Three scuff types require different treatments. Type 1 (surface deposit — mark smears when pressed): rubber eraser first, mineral spirits 30–45 seconds if eraser insufficient. Do not use acetone, lacquer thinner, or WD-40. Type 2 (finish abrasion — mark fixed, slight roughness): 0000 steel wool along grain (oil-based floors) or synthetic finishing pad (water-based — 0000 steel wool leaves rust marks), 4–6 passes, paste wax in matching sheen level.
If steel wool insufficient: screen-and-recoat full section at 150 grit + compatible topcoat. Type 3 (bare wood exposure — fingernail catches on mark edge): individual board sanding + recoat for 1–3 isolated boards; full refinish when more boards affected or engineered floor wear layer under 2mm.
Identify floor finish before any repair: plastic bag rub test (squeak = oil-based, glides = water-based), mineral spirits test (hazes = wax), sheen and amber colour check. Screen-and-recoat compatibility: never apply water-based over oil-based without 72h cure wait + degloss + compatibility test. Minimum repair unit = full board width to avoid visible boundary; full room = only invisible repair. Adhesion test (cross-hatch) required before any recoat — failed adhesion requires full strip. Hardwax oil floors: individual board repair possible without visible boundary due to penetrating nature of finish. Prevention: felt pads on all furniture feet replaced every 6–12 months, cotton-backed rugs only, pH-neutral floor cleaner, no rubber-backed mats, no steam mops.
→ Remove polyurethane from floors completely: How to Remove Polyurethane from Wood Floors
→ Refinish hardwood floors (full project): How to Refinish Hardwood Floors
→ Identify floor finish type: How to Identify Wood Finish
→ Hub: How to Remove Wood Finishes — Complete Guide