
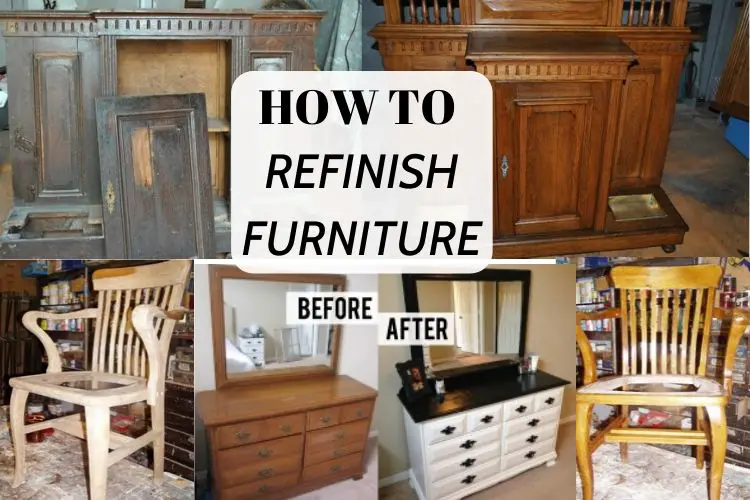
How to Refinish Furniture: Diagnostic Assessment, Stripping Decision, and Finish Selection Guide by Construction Type
Refinishing furniture begins with a diagnostic assessment, not with sandpaper. Most furniture brought to a workshop for “refinishing” does not require full stripping — the majority of cases are resolved by cleaning and a single recoat of the same finish type, saving hours of work and preserving the wood’s original patina. The mineral spirits diagnostic test identifies which intervention the piece actually needs within two minutes: wiping mineral spirits onto the surface temporarily saturates the existing finish. If the wood looks good under mineral spirits, all it needs is a wipe-on clear coat — not stripping. Only when the finish is peeling, crazed, deeply damaged, or chemically incompatible with the desired new finish does full stripping become necessary. The construction type of the furniture — solid hardwood, veneer over substrate, or MDF/particleboard — determines the sanding approach, because veneer (typically 0.3–0.6 mm thick on mass-produced furniture) is easily sanded through with an orbital sander, and MDF should not be sanded at all before finishing.
This guide covers the diagnostic assessment for determining the correct intervention level, the three refinishing pathways (refresh, repair, full refinish), construction type identification and its constraints, finish identification tests for compatibility planning, the full stripping and preparation sequence for solid wood, veneer-safe sanding, structural repair before stripping, and the finish selection matrix by use requirements.
How Do You Refinish Furniture?
→ Complete stripping guides: Remove Polyurethane · Remove Lacquer · Remove Shellac · Remove Varnish→ Post-stripping preparation: How to Refinish Wood After Stripping→ Hub: How to Remove Wood Finishes — Complete Guide
How Do You Decide Whether Furniture Needs Full Stripping or Only a Refresh?
The most expensive error in furniture refinishing is unnecessary stripping — removing a sound original finish that could have been cleaned and recoated. Stripping removes the wood’s accumulated patina, takes hours of chemical and mechanical work, and exposes veneer to damage risk. Before stripping anything, the mineral spirits diagnostic test identifies the correct intervention level in two minutes.
The Mineral Spirits Diagnostic Test
Apply mineral spirits to a clean cloth and wipe it over a 15×15 cm test area on the piece. Mineral spirits temporarily saturates the existing finish, showing how the piece will look with a fresh clear coat applied over it — without actually applying anything that changes or damages the surface. Mineral spirits evaporates within 5–10 minutes, leaving the surface exactly as it was.
If the surface looks attractive under mineral spirits — even colour, visible grain, no obvious damage — the finish is sound and the piece can be refreshed without stripping. If the surface shows crazing, white spots that don’t saturate, deep scratches through to bare wood, lifting edges, or peeling in multiple areas, the finish needs full removal.
What Construction Type Is the Furniture? (Determines Every Sanding Decision)
The material under the surface finish determines how aggressively the surface can be sanded and which stripping method is safe. Identifying construction type before starting prevents the most destructive furniture refinishing mistakes — sanding through veneer, destroying MDF structure with water-based stripper, or misidentifying manufactured wood as solid hardwood.
What Are the Key Specifications for Furniture Refinishing?
| Decision | Attribute | Value |
|---|---|---|
| Mineral spirits diagnostic test | Method and interpretation | Apply mineral spirits to cloth, wipe 15×15 cm area. If surface looks good = refresh only (recoat). If damage visible, peeling, crazing = full strip required. Evaporates in 5–10 min without damaging surface. |
| Structural repairs — when to perform | Sequence relative to stripping | Before stripping. Loose joints are reglued more accurately when the piece is still finished — surfaces are sealed against moisture and adhesive. Veneer patches and epoxy fills stain-match more easily with the reference colour still present. Doing repairs after stripping requires working on open, absorbent grain that can be contaminated by glue and epoxy. |
| Loose joint regluing | Method for disassembly | Apply heat (heat gun 60–80°C) or steam to soften hide glue (common on antique furniture). PVA-glued joints: inject water with needle syringe, allow 10–20 minutes softening. Do not force joints — splitting is irreversible. After disassembly, remove all old glue residue before regluing with fresh PVA or hide glue. |
| Veneer sand-through risk | How to detect approach to substrate | When sanding veneer, the dust colour shifts from the wood species colour to a pale cream or grey — this is the substrate material beginning to show. Stop immediately if dust colour changes. Veneer penetration depth: sand until finish is removed (visible colour change in dust from stain disappearing), then stop. Never progress beyond this point on thin veneer. |
| Existing finish identification — denatured alcohol test | Shellac identification | Apply denatured alcohol to cotton swab, rub on hidden area for 30 seconds. Softens/dissolves = shellac. No effect = lacquer, polyurethane, or varnish. Shellac over shellac is always compatible — no stripping needed for recoat. |
| Existing finish identification — lacquer thinner test | Lacquer identification | Apply lacquer thinner to cotton swab, rub hidden area. Dissolves within 15 seconds = lacquer. No effect after 30 seconds = polyurethane or varnish. Lacquer over lacquer is always compatible for recoat. |
| Existing finish identification — polyurethane vs. varnish | Distinction method | Both resist alcohol and lacquer thinner. Polyurethane: very clear, high gloss, plastic feel. Alkyd varnish: slightly amber, softer surface feel, often on older pieces. Practical distinction: both require chemical stripping (gel stripper) for removal. Both accept polyurethane recoat after scuff-sanding if sound. |
| Scuff sand and recoat (refresh) — compatibility rule | When safe without stripping | Same finish family over same finish family is always safe: poly over poly, lacquer over lacquer, shellac over shellac, oil over oil. Do NOT apply: oil-based finish over water-based (adhesion failure), any finish over wax (delamination), lacquer over polyurethane (poor adhesion). When unknown: apply dewaxed shellac wash coat as universal bridge before new topcoat. |
| Epoxy putty for structural and veneer repairs | Application method | Knead equal parts epoxy putty by hand until uniform colour (3–5 minutes). Apply to repair within 5–10 minute working window. Overfill slightly — epoxy shrinks slightly. After full cure (1–4 hours): shape with utility knife, sand flush 120→180 grit. Stain with gel stain using small artist’s brush — epoxy absorbs stain differently than wood, requiring multiple thin layers. Wipe off excess with mineral spirits-dampened cloth to adjust depth. |
| Lead paint risk — furniture made before 1978 | Testing and precautions | Any furniture finished before approximately 1978 may contain lead-based paint. Test with commercial lead test kit (swab changes colour on contact with lead) before any sanding. If lead present: do not sand without full lead-safe containment (HEPA vacuum, respirator, Tyvek suit). Chemical stripping is safer than sanding with lead paint — produces less airborne dust. |
| Raising grain deliberately before stain — pre-wetting | When and method | Before water-based stain on new or stripped wood: lightly dampen surface with water-dampened cloth, allow 30 minutes to raise grain, dry fully, sand 180 grit to remove raised fibres. Then apply stain. This pre-raise eliminates the grain swell that would otherwise occur when water-based stain is applied, preventing rough texture under the topcoat. |
Why Must Structural Repairs Be Made Before Stripping?
Most refinishing guides describe structural repairs as an afterthought — something to do “if needed” after stripping. The professional sequence is opposite: all structural repairs are made before stripping begins, for three specific reasons.
First, regluing loose joints and reattaching loose veneer requires applying adhesive between two surfaces. On sealed, finished wood, the glue bond forms cleanly at the joint interface — the finish prevents glue from being absorbed by the surrounding wood grain, making cleanup easier and the bond more predictable. On stripped bare wood, PVA or hide glue is absorbed into the open grain on both sides of the joint, creating staining and requiring more careful cleaning.
Second, colour and grain matching for epoxy putty repairs, veneer patches, and filler is dramatically easier when the original stain colour is still present. The reference colour is immediately visible, and small amounts of gel stain can be mixed to match. After stripping, the bare wood is a different colour than the finished piece will be — all repair material must be matched to an anticipated final colour that doesn’t yet exist, which requires significantly more experience to achieve accurately.
Third, working on a structurally compromised piece after stripping risks further damage. A wobbly joint stressed during sanding or a lifting veneer edge caught by a scraper causes damage that would not have occurred if the repair had been made first.
📝 The mineral spirits diagnostic test has saved me from unnecessary stripping on at least a third of the restoration pieces that arrive in my workshop described by clients as “needing a full refinish.” The most instructive case was a 1960s teak sideboard that the owner believed was completely destroyed — the original oil finish appeared dull, spotted, and lifeless. After wiping mineral spirits on the surface, the teak grain and colour appeared almost perfect beneath the temporary saturation — the piece had simply accumulated 60 years of surface grime. Two hours of cleaning with diluted Murphy Oil Soap, followed by a single wipe-on coat of teak oil, produced a result that satisfied the client completely without any stripping, sanding, or chemical exposure to the original finish.
How Do You Strip and Prepare Solid Wood Furniture for Refinishing?
For solid hardwood or softwood furniture confirmed to require full stripping (peeling, crazed, or incompatible finish), the complete removal and preparation sequence is documented in detail in the dedicated guides linked below. This section covers the sequence overview and solid wood-specific considerations.
STEP 1 Remove hardware — all metal before chemical contact
Remove every piece of hardware — hinges, handles, locks, casters — before applying any chemical stripper. Metal hardware in contact with strippers (especially alkaline strippers) can corrode and stain the surrounding wood. Brass hardware in contact with sodium hydroxide stripper produces a permanent dark stain on oak and walnut from a tannic acid-metal reaction. Keep hardware labelled in bags for reinstallation.
STEP 2 Apply chemical stripper appropriate to the existing finish
The existing finish type (identified by solvent tests above) determines the stripper choice. Polyurethane and varnish: gel stripper (citrus or methylene chloride). Lacquer: lacquer thinner wipe is sufficient — no gel stripper needed. Shellac: denatured alcohol — no gel stripper needed. Paint over wood: methylene chloride stripper for fastest removal. Full protocols with dwell times, scraping technique, and cleanup in the dedicated removal guides linked at the top of this article.
STEP 3 Neutralise and allow 24 hours drying
After stripping, neutralise the stripper residue before sanding. Alkaline strippers: diluted vinegar (1:10). Citrus strippers: baking soda solution plus mineral spirits wipe. Methylene chloride: mineral spirits wipe. Allow 24 hours drying. Full protocol in the post-stripping guide.
STEP 4 Sand progressively — 80/100 → 120 → 150 → 180 grit
After 24 hours drying post-neutralisation, sand progressively with grain direction only. Starting grit depends on surface condition after stripping: rough or grain raised = 80 grit. Mostly smooth = 100–120 grit start. Vacuum and tack cloth between every grit change. No steel wool on tannin-rich species. Final grit depends on finish: oil finish = 150, polyurethane/stain = 180, lacquer = 220.
STEP 5 Water drop test — confirm readiness
Apply 2–3 drops of water to the final sanded surface. Absorbs in under 30 seconds = ready for stain or finish. Beads or remains at 60 seconds = contamination present. Additional mineral spirits wipe, then re-sand 150 grit, then re-test. Full protocol in the post-stripping guide.
How Do You Refinish Veneered Furniture Without Sanding Through the Veneer?
Veneer refinishing has one non-negotiable constraint that makes it completely different from solid wood: the total depth that can be removed by sanding is approximately 0.1–0.2 mm on modern thin veneer — less than the thickness of two sheets of copy paper. An orbital sander removes this depth in seconds. The technique must be adjusted accordingly at every stage.
Chemical stripping is preferable to sanding on veneer
For veneered furniture, chemical gel stripper removes the finish layer without removing any wood material — it dissolves the finish but does not abrade the veneer surface. This preserves the maximum remaining veneer thickness for the life of the piece. Apply citrus gel stripper (preferred over methylene chloride on veneer — gentler on the adhesive layer holding veneer to substrate), allow full dwell, scrape carefully with a plastic scraper only (never metal on veneer), wipe clean.
Hand sanding only — with grain, light pressure
After chemical stripping, hand sand only with 120 grit wrapped around a flat sanding block — never foam block (too conforming, misses high spots) and never random orbital. Sand in the grain direction with light, consistent pressure. The objective is to remove raised grain and any finish residue — not to remove wood. When the sanded dust colour matches the natural wood species colour (the finish stain colour has been removed), stop. Do not continue sanding past this point on thin veneer.
How to detect imminent sand-through on veneer: When sanding, watch the dust colour continuously. Veneer dust initially contains the stain colour — brown, amber, red, or dark. As you approach the finish-wood boundary, the dust shifts to the natural pale colour of the species underneath. When you reach the substrate (MDF, particleboard, or plywood core), the dust colour shifts again — to a distinct cream or grey. This second shift means you have sanded through the veneer. The surface now shows substrate material that cannot be stained to match the surrounding veneer. If this occurs on a small area: epoxy putty fill, grain simulation with gel stain and artist brush. If it occurs over a large area: consult a professional furniture restorer.
📝The veneer sand-through detection method through dust colour monitoring has prevented irreversible damage on several pieces in my workshop. The clearest case was a 1970s walnut-veneered dining table where I was stripping a heavy polyurethane topcoat applied by a previous refinisher. The dust from hand sanding at 120 grit was consistently dark walnut brown through the first several passes. On the fourth pass in one corner, the dust shifted abruptly to a pale cream — the particleboard substrate was beginning to show through approximately 0.4 mm of remaining walnut veneer. I stopped immediately. That corner required a gel stain touch-up rather than further sanding to even the colour with the fully stripped areas.
What Is the Correct New Finish for Refinished Furniture?
Finish selection is determined by three factors: the intended use of the piece (exposure to liquids, heat, and abrasion), the desired aesthetic (gloss level, natural vs. plastic appearance), and the reversibility requirements (antique value, future re-refinishing).
Defaulting to oil-based polyurethane regardless of these factors — the most common advice in general refinishing guides — produces sub-optimal results for low-traffic decorative pieces and is inappropriate for pieces with antique or conservation value.
| Furniture Type / Use | Recommended Finish | Why | Not Recommended |
|---|---|---|---|
| Dining table (daily liquid and heat exposure) | Oil-based polyurethane (semi-gloss or satin). 3 coats minimum. Or catalyzed lacquer if spraying is possible. | Maximum resistance to spills, heat from dishes, and cleaning agents. Oil-based poly provides a harder, more durable film than water-based at comparable cost. | Wax finish, oil finish, shellac — all too soft for daily dining use and damaged by liquid spills. |
| Coffee table (moderate use, aesthetics important) | Oil-based polyurethane satin, or Danish oil under hard wax oil (like Osmo Polyx). | Balance between protection and natural appearance. Hard wax oil provides good coffee mug and wine glass resistance while retaining the natural wood feel that polyurethane lacks. | Pure wax finish — inadequate for liquid and ring marks. Shellac — damaged by alcohol in drinks. |
| Bedroom furniture (low traffic, minimal liquid) | Water-based polyurethane, wipe-on oil finish, or hard wax oil. All appropriate. | Low traffic allows lighter finishes. Water-based poly is faster drying, lower odour, and non-yellowing on light-coloured species (maple, ash). Oil finish provides the most natural feel. | No specific exclusions for bedroom pieces with normal use. |
| Children’s furniture (safety requirements) | Water-based polyurethane (fully cured — non-toxic after cure), beeswax (food-safe natural wax), or hard wax oil specifically labelled food-safe when cured. | Children chew and mouth furniture — finishes must be non-toxic after curing. Most finishes are safe once fully cured, but water-based poly, beeswax, and food-safe hard wax oil have the clearest safety profiles. | Lead-based products (any vintage paint), linseed-based Danish oil (not food-safe — contains varnish), shellac flakes dissolved in denatured alcohol (solvent toxicity before cure). |
| Antique furniture (conservation) | Shellac (dewaxed or traditional) or period-appropriate oil finish. Shellac for pieces from pre-1900 period originally finished with shellac. | Reversibility is paramount on antique pieces — any future conservator must be able to remove the finish without damaging the wood or patina. Shellac dissolves in denatured alcohol (fully reversible). Polyurethane is effectively permanent. | Polyurethane (permanent, not period-appropriate). Strip chemical strippers on antiques — consult a conservation specialist before any intervention on valuable pieces. |
| Outdoor furniture | Spar varnish (marine varnish) for UV and moisture resistance. Teak oil for teak specifically. Exterior-rated hard wax oil for garden furniture. | Interior polyurethane degrades under UV within 1–2 seasons outdoors. Spar varnish contains UV absorbers and flexible alkyd resin that accommodates wood movement from moisture changes. | Interior polyurethane, interior lacquer, shellac — none have adequate UV or moisture resistance for exterior exposure. |
| Workshop furniture (heavy use, tools, liquids) | Danish oil or boiled linseed oil — easy to reapply when worn. Or nothing — bare hardwood. | Workshop surfaces experience heavy abuse that would damage any film finish quickly. Penetrating oil is easily maintained by wiping on a fresh coat when the surface dries out. A damaged oil finish is refreshed in 15 minutes; a damaged polyurethane film requires stripping and recoating. | Film finishes (polyurethane, lacquer) — damaged quickly by tool impacts and solvents, expensive to maintain. |
📝 The finish selection matrix matters most in the antique context. A cherry Hepplewhite card table from approximately 1800 was brought to my workshop by a client who wanted it “refinished to look new.” After explaining that applying polyurethane would make an 1800 piece look like a 1990 reproduction and would permanently compromise its value, I instead cleaned the existing shellac finish with diluted denatured alcohol, repaired two small cracks with tinted shellac flakes, and applied a final thin shellac coat that restored the sheen while preserving the 220 years of patina. The piece retained both its aesthetic character and its future reversibility for any conservator who might work on it next.
Frequently Asked Questions About Refinishing Furniture
Do you always need to strip furniture before refinishing?
No — the majority of furniture can be refreshed without stripping. The mineral spirits diagnostic test reveals whether the existing finish is sound enough for a refresh: if the wood looks good under mineral spirits (temporary saturation), all that is needed is cleaning and a fresh coat of the same finish type applied over a scuff-sanded surface. Full stripping is only required when the finish is peeling, crazed, or chemically incompatible with the desired new finish. Unnecessary stripping removes the wood’s patina, takes hours of work, and risks veneer damage on non-solid-wood pieces.
How do you know if furniture is solid wood or veneer?
Four tests confirm construction type. Weight test: veneered substrate (MDF, particleboard) is heavier than solid hardwood of the same volume — if a piece seems heavier than expected for its apparent wood type, it is likely veneer over dense substrate. Knock test: solid wood produces a dull, non-resonant knock; veneered substrate produces a slightly hollow resonance. Edge inspection: solid wood shows consistent end grain at cut edges; veneer shows a thin surface layer over a different core material, often visible as a slightly different colour stripe at the corner. Grain repetition: book-matched veneer panels show symmetrical grain patterns that appear reflected — solid wood grain is irregular and unique across adjacent panels.
What grit sandpaper should you use for furniture refinishing?
The starting grit depends on construction type and surface condition. Solid hardwood after chemical stripping: 80–100 grit to remove remaining finish and raised grain, then 120, 150, 180. Solid wood for scuff-and-recoat (no stripping): 220–320 grit to key the surface only. Veneer after chemical stripping: 120 grit maximum, hand sanding only with grain, progress to 150 and 180. MDF: 220 grit scuff sand only — no progressive grits needed or useful. Always sand with the grain direction. Skipping a grit creates scratches in the surface that show under finish — the previous grit’s scratch marks must be removed by each successive grit before progressing.
Summary: Key Values for Refinishing Furniture
Refinishing furniture begins with a mineral spirits diagnostic test to determine whether full stripping is actually required — most furniture needs only cleaning and a fresh coat, not stripping. Construction type (solid hardwood, veneer, MDF) determines every sanding decision: veneer requires hand sanding only at 120 grit maximum with no orbital sander; MDF requires no stripping and only scuff-sanding before primer and paint.
Structural repairs — loose joints, veneer lifting, missing wood — must be completed before stripping begins: reference colour for stain matching is still present, and adhesive behaves better on sealed wood. When stripping is confirmed necessary, identify the existing finish first (denatured alcohol for shellac, lacquer thinner for lacquer) to select the correct removal method and confirm compatibility with the new finish.
Full stripping sequence — chemical stripper, neutralisation, progressive sanding 80→180 grit, water drop readiness test — is covered in the post-stripping refinishing guide. Finish selection is determined by use requirements: polyurethane for dining and high-traffic surfaces; hard wax oil for natural-feel moderate traffic; shellac for antiques requiring reversibility; spar varnish for outdoor pieces.
→ All stripping guides: Polyurethane · Lacquer · Shellac · Varnish · Paint→ Post-stripping preparation: How to Refinish Wood After Stripping→ Hub: How to Remove Wood Finishes — Complete Guide