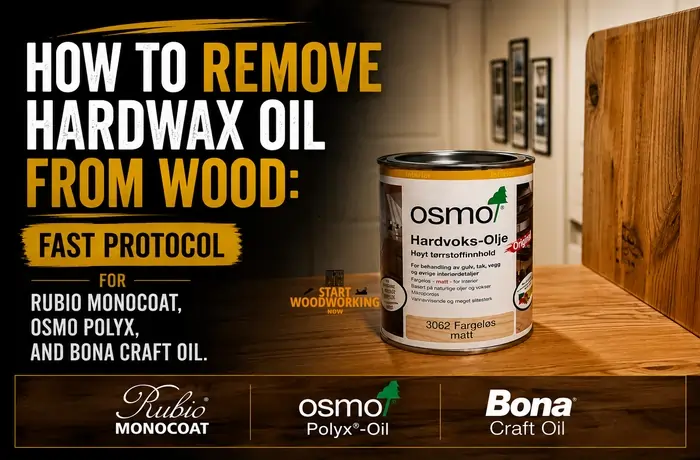
How to Remove Hardwax Oil from Wood: Two-Stage Protocol for Rubio Monocoat, Osmo Polyx, and Bona Craft Oil
Most hardwax oil removal failures happen because people treat Rubio Monocoat or Osmo Polyx like polyurethane. Standard paint strippers remove the surface wax but leave cured oil deep inside the wood grain. The next finish then peels, fisheyes, or fails to bond. Proper removal requires a two-stage process: dissolve the wax component first, then sand out the polymerized oil beneath it.
This guide covers what hardwax oil contains and why it behaves differently from pure penetrating oils and pure wax finishes, the three scenarios for “removing” hardwax oil (cleaning, maintenance re-coat, and complete removal), the identification test, the two-stage complete removal protocol, the sanding sequence, brand-specific protocols for Rubio Monocoat, Osmo Polyx-Oil, and Bona Craft Oil, and the common failure modes.
How Do You Remove Hardwax Oil from Wood?
- Confirm you have hardwax oil — not pure penetrating oil or pure wax. Hardwax oil (Rubio Monocoat, Osmo Polyx-Oil, Bona Craft Oil) leaves a very low sheen surface with a slight waxy feel but clear wood grain visible. Water drops bead but do not bead as firmly as on polyurethane. Mineral spirits on a cloth picks up a small amount of waxy residue — more than bare wood but less than a dedicated wax finish.
- Decide: maintenance recoat or complete removal? If the wood surface is worn, dull, or has scratched areas but the hardwax oil is otherwise intact — a maintenance recoat is possible without complete removal (see brand-specific protocols below). Complete removal is only necessary when switching to a different finish type (polyurethane, lacquer, varnish) or when the wood has severe staining or damage that requires starting from bare wood.
- Stage 1 — Dissolve the wax component with naphtha. Apply naphtha (petroleum naphtha, available as “lighter fluid” or “paint thinner”) to a white cloth. Firm wipe passes — 3 to 5 passes, replacing cloth as wax transfers. Naphtha dissolves the carnauba and hard wax component in hardwax oil finishes. Mineral spirits is less effective than naphtha for this step — the harder waxes used in Osmo and Rubio resist mineral spirits better than they resist naphtha.
- Stage 2 — Sand to remove the oil component from wood fibres. Sanding is not optional — it is the only way to remove the polymerised oil that has penetrated into the wood grain. Starting grit: 40–60 grit for heavy builds or old hardwax oil; 80 grit for lighter or more recent applications. Progress through 80→100→120 grit. Confirm clean pores with the water drop test: water must absorb within 30 seconds on bare wood before any new finish is applied.
- Do NOT use NMP gel stripper as the primary removal method. NMP gel is designed for film-forming finishes (polyurethane, varnish). It may soften and remove the surface wax in hardwax oil but leaves the oil component cross-linked in the grain — the next finish applied over this will fail. Sand after any chemical step regardless.
→ Remove danish oil (similar but different): How to Remove Danish Oil from Wood
→ Remove wax finish specifically: How to Remove Wax Finish from Wood
→ Remove linseed oil: How to Remove Linseed Oil from Wood
→ Hub: How to Remove Wood Finishes — Complete Guide
Can You Remove Hardwax Oil Without Sanding?
No. Solvents can dissolve the wax component of hardwax oil, but the cured oil inside the wood fibres cannot be chemically removed. Complete removal always requires sanding below the depth of oil penetration after the wax layer has been dissolved with naphtha. Skipping sanding leaves oil-saturated wood fibres that prevent polyurethane, lacquer, varnish, or paint from bonding correctly.
What Hardwax Oil Contains — Why Removal Is Different
Understanding the composition of hardwax oil explains every aspect of the removal protocol. Hardwax oil is a formulated blend of two component types with different physical states and removal behaviours:
The oil component is a drying oil — typically a blend of linseed oil, tung oil, sunflower oil, and/or modified plant-based oils, often including small quantities of non-drying soybean oil as a carrier. The drying oils penetrate into the wood fibres and cure by oxidative polymerization — the same mechanism as alkyd varnish, but without the resin component that forms a distinct film on the surface.
After cure (4–7 days at 20°C, full cure 14–21 days), the oil component is a cross-linked solid polymer integrated into the wood grain structure at a depth of approximately 15–40 microns. This cross-linked oil cannot be re-dissolved by any solvent.
The wax component consists of hard waxes — carnauba wax (the hardest natural wax, from the Brazilian palm Copernicia prunifera), candelilla wax, beeswax, and/or synthetic micro-crystalline or Fischer-Tropsch waxes in various combinations. These waxes solidify on the wood surface and in the uppermost grain layer as the finish cools during application.
The wax component provides the surface sheen, water beading, and initial scratch resistance. It is a solid at room temperature but can be dissolved by naphtha or melted by heat above 65–85°C depending on wax type.
Wax Component — Removable Chemically
- Carnauba wax, candelilla wax, beeswax, synthetic waxes
- Located: on surface and in uppermost 5–10 microns
- Melting point: 65–85°C (carnauba highest, beeswax lowest)
- Soluble in: naphtha (best), mineral spirits (partial)
- Removal: 3–5 naphtha wipe passes on cloth
- Test: cloth picks up waxy white residue
Oil Component — Sanding Required
- Linseed oil, tung oil, sunflower oil, modified plant oils
- Located: 15–40 microns inside wood grain structure
- Cured by: oxidative polymerization (cross-linked, irreversible)
- Soluble in: nothing — cross-linked polymer cannot be dissolved
- NMP gel: reaches surface wax but not the oil in grain
- Removal: sanding to below the depth of oil penetration
Why NMP gel does not work on hardwax oil:
NMP gel is an effective stripper for film-forming finishes (polyurethane, varnish) because it swells the cross-linked polymer network from the top surface inward, eventually breaking substrate adhesion. Hardwax oil has no discrete surface film to swell — the oil component is distributed throughout the wood grain structure, not sitting on top of it as a film.
NMP may remove the surface wax component, but this represents perhaps 15–20% of the hardwax oil finish. The oil component in the grain is completely unaffected by NMP at any dwell time. Any new film-forming finish applied over a hardwax oil surface that has only had the surface wax removed (but oil remains in grain) will fail: the film cannot bond to oil-saturated wood fibres.
Three Scenarios — Cleaning, Maintenance Recoat, or Complete Removal?
Identifying Hardwax Oil on a Wood Surface
🔬 How to Confirm Hardwax Oil vs. Other Penetrating Finishes
Hardwax oil is sometimes confused with pure oil finishes (danish oil, linseed oil) or pure wax finishes. The combination of the following tests Hardwax Oil vs. Other Penetrating Finishes confirms true hardwax oil chemistry.
| Test | Hardwax Oil Result | Pure Oil Result | Pure Wax Result | Polyurethane Result |
|---|---|---|---|---|
| Blade scrape | No plastic shavings — blade reaches wood grain. No film on surface. | Same — no film | Soft waxy smear — slightly different from hardwax oil. | White plastic shavings — film present. |
| Water drop test | Beads for 15–60 seconds, then slowly absorbs. Moderate water resistance. | Absorbs in under 30 seconds — low water resistance. | Beads for several minutes — high wax water resistance. | Beads indefinitely — film repels water. |
| Mineral spirits cloth (30 sec) | Small waxy white residue on cloth — less than pure wax, more than bare wood. | Very slight oily residue or none. | Significant waxy film on cloth. | Nothing on cloth. |
| Naphtha cloth (30 sec) | Visible waxy white residue on cloth — confirms wax component present. | Minimal or no residue. | Significant waxy residue — more than hardwax oil. | Nothing on cloth. |
| Surface feel | Slight waxy drag when rubbing with finger. Not slippery. Warm, organic feel. Low to very low sheen. | Dry to slightly oily. No drag. Very low sheen. | Distinct waxy drag. Polished feel. Low-medium sheen. | Hard, glassy. No drag. Satin to gloss sheen. |
What Solvent Removes Hardwax Oil?
Naphtha (VM&P naphtha or lighter fluid) is the most effective solvent for removing the wax component of hardwax oil finishes like Rubio Monocoat and Osmo Polyx-Oil.
Mineral spirits can soften softer waxes but struggles with harder carnauba-rich formulations. Acetone flashes off too quickly to dissolve wax effectively, and citrus gel strippers remove only surface residue while leaving cured oil inside the wood grain.
| Solvent | Effectiveness on Hardwax Oil | What It Actually Removes |
|---|---|---|
| Naphtha | High | Wax component only |
| Mineral spirits | Moderate | Partial wax removal |
| Acetone | Low | Surface contamination only |
| Citristrip / NMP gel | Low | Softens surface wax only |
| Paint thinner | Moderate | Depends on composition |
Complete Removal Protocol — Stage 1 and Stage 2
Stage 1 — Removing the Wax Component with Naphtha
Naphtha fire safety:
Naphtha has a flash point of approximately −1°C — it ignites easily at room temperature. Remove all ignition sources before opening (no gas flames, pilot lights, sparks). Work with cross-ventilation (open window + door to create air flow).
Used cloths soaked in naphtha: spread flat outdoors to dry completely before disposal — do not crumple or bundle wet cloths (spontaneous combustion risk if oil from the hardwax oil finish is also present on the cloth).
Stage 2 — Sanding to Remove the Oil Component
After Stage 1 (wax removed), the wood surface contains polymerised oil integrated into the grain structure to a depth into the upper wood fibres. This oil cannot be chemically removed. Sanding to below the depth of oil penetration is the only method.
Determining starting grit by surface condition:
| Surface Condition | Starting Grit | Rationale |
|---|---|---|
| Fresh single-coat hardwax oil (under 1 year) | 80 grit | Shallow oil penetration — 80 grit removes sufficient material without excessive material removal |
| Established single-coat (1–5 years) | 60–80 grit | Oil penetration is deeper and more uniform — start aggressive |
| Multiple recoat history or old hardwax oil (5+ years) | 40–60 grit | Oil has built up in grain over multiple applications — deeper penetration |
| Grey weathered exterior hardwax oil | 40 grit | UV degradation and moisture cycling drive oil deep into grain AND surface is grey-oxidised — aggressive start required |
| Rubio Monocoat specifically (very deep penetration) | 40–60 grit | Rubio Monocoat is specifically engineered for deep one-coat penetration — 2C formulations penetrate deeper than standard hardwax oils |
Complete sanding sequence for hardwax oil removal:
How to confirm complete oil removal — the water drop test:
Apply 3–4 drops of water to the sanded surface. Time absorption.
Under 30 seconds: pores are open and oil-free — ready for new finish.
30–90 seconds: oil residue still present in grain — sand 1–2 more passes at current grit before re-testing.
Over 90 seconds: significant oil remaining — sand additional pass and re-test.
This test is more reliable than visual assessment — oil-filled grain can appear clean to the eye but still prevent adhesion of new finish.
What Are the Key Specifications for Hardwax Oil Removal?
| Entity / Variable | Attribute | Value and Detail |
|---|---|---|
| Naphtha vs mineral spirits effectiveness | Which dissolves hardwax oil wax component more effectively | Naphtha is significantly more effective than mineral spirits for the hard waxes used in modern hardwax oil formulations. Carnauba wax (Osmo primary wax) has a melting point of ~82°C and dissolves more completely in naphtha than in mineral spirits at room temperature. Mineral spirits is adequate for soft waxes (beeswax, paste wax) but insufficient for full carnauba removal. In practice: 3–5 naphtha passes achieve the same result as 7–10 mineral spirits passes on hardwax oil products. Use naphtha for Stage 1 on any hardwax oil with high carnauba content. |
| Oil penetration depth per product | How deep oil component penetrates and starting sanding grit implication | Rubio Monocoat: engineered for maximum penetration — approximately 25–40 microns. Requires starting at 40–60 grit. Osmo Polyx-Oil: 15–25 microns penetration — starting at 60–80 grit is usually sufficient. Bona Craft Oil: 15–20 microns — start at 80 grit. Standard “hardwax oil” brands (Manns, Treatex): variable, typically 15–25 microns. The penetration depth is not a fixed number — it increases with wood porosity (pine absorbs deeper than oak) and with number of coats applied historically. |
| NMP gel on hardwax oil | Why NMP gel is ineffective and what it does remove | NMP gel at 45–90 minutes under plastic film will dissolve the surface wax component of hardwax oil — this represents approximately 15–20% of the finish. The oil component remains fully cross-linked in the wood grain and is not affected by NMP at any dwell time. Using NMP on hardwax oil produces a surface that appears clean (wax removed) but still has oil in grain. Any new film-forming finish (polyurethane, varnish, lacquer) applied over this surface will fail within weeks as the film cannot bond to the oil-saturated grain. Sanding after NMP is still required. |
| Compatibility for maintenance recoat | Whether different hardwax oil brands can be applied over each other | Same brand: always compatible (Rubio over Rubio, Osmo over Osmo). Cross-brand: potentially problematic. The wax blends in different products contain different ratios of carnauba, synthetic wax, and microcrystalline wax — these can be incompatible at the surface. Reported failures: Osmo applied over Rubio has been documented to produce adhesion failure by several floor finishing contractors. The safest approach: if switching brands for a maintenance recoat, remove wax component with naphtha and light-sand at 120–150 grit before applying the new hardwax brand. |
| Heat gun for wax removal | Whether heat accelerates wax component removal | Heat gun at 150–200°C softens and partially melts the wax component, making subsequent naphtha wipe more effective. Useful on floors or large flat surfaces where the naphtha wipe is the rate-limiting step. Technique: heat gun moving slowly, 5–8 cm from surface, followed immediately by naphtha wipe while surface is still warm. Caution: excessive heat (above 220°C) can scorch pine and other softwoods. Not recommended on veneered surfaces — heat can lift veneer adhesive. |
| Grey weathered exterior hardwax oil | Additional steps required for outdoor weathered surfaces | Exterior hardwax oil on decks, garden furniture, or cladding that has greyed due to UV and moisture exposure requires two additional steps before Stage 1 naphtha: (1) Pressure washing to remove loose grey oxidised surface layer and embedded dirt. Allow 48–72 hours to dry completely. (2) Wood brightener (oxalic acid solution, 60g/L) if the wood has iron-tannate darkening or grey-black areas. Apply, allow 15 minutes, rinse, dry. Then proceed with Stage 1 naphtha + Stage 2 sanding as for interior hardwax oil removal. |
| Floors with bevelled edges (V-groove profile) | How V-groove bevels complicate hardwax oil sanding removal | Many hardwax oil floors use boards with bevelled (chamfered or V-groove) edges. Drum sanders and belt sanders cannot sand the bevelled edge profile. Options: (1) Hand-sand the bevels with folded 80–120 grit sandpaper — time-consuming on large floors. (2) Random orbital sander at 80 grit on the bevels — effective but slow. (3) Oscillating multi-tool with sanding attachment for the angle. On floors with bevelled edges, the bevels are often left with old hardwax oil while the face is sanded — this creates a colour differential after re-finishing. Plan for full bevel sanding before applying any new finish. |
| Drying time before re-finishing after removal | Wait time after Stage 1 and Stage 2 before applying new finish | After Stage 1 (naphtha): 30–60 minutes for naphtha evaporation before sanding. After Stage 2 (sanding): sand dust removal only required — no curing wait. Confirm with water drop test (under 30 seconds absorption). If applying water-based finish: allow 24 hours after final sanding to ensure any residual moisture from the sanding process has left the grain (sanding generates some friction heat and micro-moisture). If applying hardwax oil as new finish: apply same day after final sanding for optimal penetration — the fresh-sanded, oil-free surface has maximum porosity and absorbs new hardwax oil most efficiently. |
Brand-Specific Protocols — Rubio Monocoat, Osmo Polyx-Oil, and Bona Craft Oil
The three major hardwax oil brands each have recommended products for cleaning, maintenance re-coat, and complete surface preparation. Using brand-specific products for maintenance and re-coat is significantly more efficient than complete removal and is appropriate when switching finish is not the goal.
Maintenance Recoat Without Full Removal — When This Is the Correct Approach
For Scenario 2 (maintenance recoat), complete removal is unnecessary and counterproductive — it removes material from the wood surface with each sanding cycle, reducing the wood’s refinishing lifespan. The maintenance recoat approach is appropriate when:
- The existing hardwax oil is from the same brand as the recoat product
- Wear is cosmetic (dull areas, loss of sheen) but the oil component is still intact and protecting the wood
- No severe staining, deep scratches, or pet urine damage is present
- The surface passes the water test at 60–90 seconds (some water resistance remaining)
Maintenance recoat protocol (same-brand, light wear):
📝The most common mistake I see with hardwax oil removal is clients who have applied NMP gel stripper (the standard tool for polyurethane) to their Osmo or Rubio floor and then wonder why the new polyurethane peels within weeks. The NMP removed the surface wax — the floor looked stripped, clean, and ready for finishing. But the oil component in the grain was completely unaffected, and when the polyurethane was applied, it couldn’t bond. The first scratch revealed a separation line between the poly film and the wood surface. The repair required sanding everything back to 60 grit to remove the poly and the underlying oil simultaneously. The water drop test would have caught this before applying the poly — a clean, oil-free surface absorbs water in under 30 seconds. At 2 minutes, that floor wasn’t ready regardless of what it looked like. The two-stage protocol (naphtha + sanding) and the water test together take maybe 30 extra minutes and prevent that outcome entirely.
7 Common Mistakes When Removing Hardwax Oil
- Using paint stripper alone — gel strippers remove surface wax but leave cured oil inside the wood grain.
- Skipping sanding after naphtha — the wood still contains polymerised oil that prevents new finish adhesion.
- Applying polyurethane over partially removed hardwax oil — produces peeling and delamination within weeks or months.
- Sanding too fine before refinishing — grits above 150 can close the wood pores and reduce penetration of new oil finishes.
- Using too much maintenance oil during recoating — excess product cures as a sticky or cloudy surface film.
- Mixing different hardwax oil brands without preparation — incompatible wax blends can cause adhesion problems.
- Ignoring the water drop test — wood can look visually clean while still containing enough oil to cause finish failure.
Why Polyurethane Fails Over Hardwax Oil
Polyurethane bonds mechanically and chemically to clean wood fibres. Hardwax oil saturates those fibres with cured oil, preventing polyurethane from anchoring correctly. Even after the surface wax has been removed, residual oil inside the grain creates a weak boundary layer between the wood and the polyurethane film. The result is edge peeling, scratching, fisheyes, or full delamination.
This is why sanding is mandatory before applying polyurethane over Rubio Monocoat, Osmo Polyx-Oil, Bona Craft Oil, or any other hardwax oil finish.
Frequently Asked Questions About Removing Hardwax Oil
Can you apply polyurethane over hardwax oil without removing it?
No — polyurethane cannot reliably bond to a surface with oil in the grain. The urethane cross-linking in polyurethane requires adhesion to the wood substrate, not to an oil layer. Even if the surface wax has been removed with naphtha, the oil component in the grain prevents the polyurethane from reaching the wood fibre. The result is a polyurethane film that appears intact initially but delamínates progressively as the floor is used, particularly at edges where the film is thinnest. Complete removal (Stage 1 naphtha + Stage 2 sanding, confirmed with water drop test under 30 seconds) is required before applying any film-forming finish over a hardwax oil surface.
How many sanding cycles can a hardwax oil floor withstand before replacement?
Solid hardwood floors (18–20mm total thickness) with 6–8mm wear layer above the tongue-and-groove: can typically withstand 3–5 complete sanding cycles over their lifetime, with 0.5–1mm removed per cycle. Engineered hardwood with 3–5mm veneer: 1–2 complete sanding cycles maximum. The advantage of hardwax oil maintenance recoating (without full sanding) is that it extends the period between full sanding cycles — a well-maintained hardwax oil floor can go 8–12 years between full sanding cycles with regular maintenance recoats.
Why does hardwax oil turn yellow or cloudy after application?
The most common cause is over-application — applying more hardwax oil than the wood can absorb. The excess product that cannot penetrate into the grain remains on the surface as a wax film. As this surface film cures, it produces a yellow or cloudy appearance, particularly visible on light-coloured woods. The fix: apply naphtha to dissolve the surface excess immediately if the application is still fresh (under 24 hours). If fully cured: light naphtha wipe to remove the surface layer, then light buff with 150 grit screen pad. Prevention: apply less than you think you need — approximately 20–30 ml/m² maximum on most hardwood species.
Summary: Key Values for Removing Hardwax Oil from Wood
Hardwax oil is a two-component finish: wax component (carnauba, beeswax, synthetic hard wax — on surface and in top 5–10 microns) and oil component (linseed, tung, plant oils — penetrated into the upper wood fibres, cross-linked, irreversible). Three scenarios: cleaning (brand cleaner), maintenance recoat (120–150 grit screen + thin recoat, same brand only), complete removal (two-stage protocol).
NMP gel fails on hardwax oil — removes surface wax only, oil remains in grain, new finish applied over this fails.
Stage 1 — naphtha wipe (3–5 passes, clean cloth test confirms wax removed). Allow 30–60 min evaporation. Stage 2 — sanding: Rubio Monocoat 40–60 grit start; Osmo 60–80 grit start; Bona Craft Oil 80 grit start. Progress 40/60→80→100→120 grit. Water drop test confirms clean pores (absorbs under 30 sec).
Brand compatibility: same-brand recoat compatible; cross-brand (Osmo over Rubio) requires Stage 1+2 complete removal first. Maintenance recoat: less is more — 20–30 ml/m² maximum; excess creates yellow/cloudy surface film. Foot traffic after maintenance recoat: 24h (socks), 48–72h (furniture with felt pads), 5–7 days (area rugs).
→ Remove danish oil (similar protocol): How to Remove Danish Oil from Wood
→ Remove wax finish: How to Remove Wax Finish from Wood
→ Remove linseed oil: How to Remove Linseed Oil from Wood
→ Identify what finish is on your wood: How to Identify Wood Finish
→ Hub: How to Remove Wood Finishes — Complete Guide