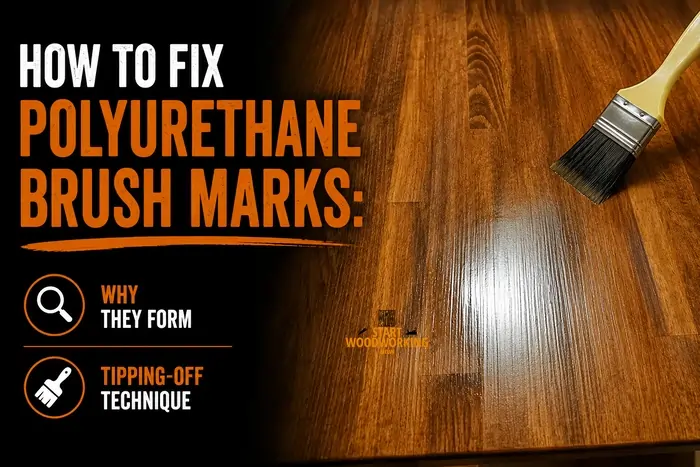
How to Fix Polyurethane Brush Marks: Why They Form, Tipping-Off Technique
Brush marks in polyurethane form when the finish builds ridges faster than surface tension can level them. Every brushed coat of polyurethane is initially marked — the question is whether the finish has enough open time and low enough viscosity to self-level before it begins to skin. Oil-based polyurethane has an 8–12 minute leveling window at 70°F. Water-based polyurethane has a 2–4 minute window. Brush marks that exceed the coating thickness cannot level regardless of technique — which is why coat thickness controls the result more than brush quality or stroke direction.
This guide is part of the complete wood finishing guide. For full application protocol: How to Apply Polyurethane →
Navigate to your question
→ Why do brush marks form — what is actually happening? → Leveling window and viscosity explained ↓
→ How do I prevent marks before they form? → Brush selection, thinning, grit — the correct values ↓
→ What brush technique produces a smooth result? → Tipping-off method step by step ↓
→ My poly dried with marks — how do I fix it? → Sand + recoat protocol by severity ↓
→ Is there a mark-free alternative to brushing? → Wipe-on polyurethane technique ↓
The fixes are specific to whether the marks are still wet (re-flow possible) or dried (mechanical removal required), and whether the finish is oil-based or water-based — the two types produce different mark profiles and require different remediation approaches. Applying a second coat over dried brush marks without sanding first makes them worse, not better — each coat locks in the ridges from the previous one.
Why Do Brush Marks Form in Polyurethane — What Is Actually Happening?
Brush marks are ridges left when bristles push finish to the sides of each stroke. Whether these ridges persist or disappear depends on a single physical relationship: if the ridge height is significantly greater than the coating thickness, surface tension cannot pull the ridge flat before the finish skins. A coat applied at 3–4 mils wet thickness leaves ridges 0.5–1 mil high — surface tension can level these within the open time. A coat applied at 6–8 mils wet thickness leaves ridges 2–3 mils high — these will not level regardless of how slowly you work.
Polyurethane [levels] through surface tension — the finish surface [contracts] to minimize its surface area, pulling ridges flat. This leveling [requires] a minimum open time: the finish must remain fluid enough for flow before the cross-linking reaction or solvent evaporation increases viscosity to the point where flow stops.
Oil-Based Polyurethane
Leveling window: 8–12 minutes at 70°F (21°C)
Mark profile: Rounded ridges with smooth edges — can sometimes be re-flowed while still wet
Mark appearance when dry: Visible raised lines, catch raking light, feel rough to fingertip
Water-Based Polyurethane
Leveling window: 2–4 minutes at 70°F — extremely short
Mark profile: Sharper edges, dry before re-flow is possible. Appear as sheen variation (directional shine) rather than raised ridges
Mark appearance when dry: Streaks of different sheen level — visible as light vs dark bands, not as texture
The Four Conditions That Prevent Leveling
1. Coat too thick. Ridge height exceeds coating thickness — surface tension cannot overcome gravity on a tall ridge. Every brush mark problem is partly a coat thickness problem.
2. Temperature too low. Below 65°F, polyurethane viscosity increases significantly and flow rate slows — marks set before the leveling window closes. The finish looks level when wet but dries marked.
3. Air movement too strong. Fans or open windows accelerate solvent evaporation from the surface, shortening the leveling window. Apply in still air with adequate ventilation from below or behind, not blowing across the wet surface.
4. Back-brushing over skinned finish. When the brush re-enters finish that has already begun to skin (typically 2–5 minutes after application), the bristles drag the skinned surface layer into ridges that are too viscous to re-level. These are the most visible and pronounced brush marks.
How Do You Prevent Brush Marks Before They Form?
Brush mark prevention is controlled by four variables in order of importance: coat thickness (thin coats always; never exceed 3–4 mils wet), viscosity at application temperature, brush quality, and thinning ratio. Sanding between coats is not a prevention strategy — it is a remediation strategy for marks already formed.
| Variable | Common Mistake | Correct Value |
|---|---|---|
| Coat thickness | Heavy coats to “build faster” | 3–4 mils wet maximum. Each pass loads the brush once and covers one board width — do not reload and re-apply to the same area |
| Thinning — first coat | Straight from the can | Oil-based: thin 10% with odorless mineral spirits for first coat only. Water-based: do not thin — manufacturer-formulated for direct application; thinning reduces film formation |
| Between-coat sanding | 220-grit between coats | 320-grit between coats. 220-grit leaves visible scratch marks that telegraph through subsequent coats. 220-grit is correct for bare wood before the first coat — not between film coats |
| Application temperature | Cold garage or workshop | 65–75°F (18–24°C). If workspace is below 65°F: bring the workpiece and the can of poly to a warmer space — do not attempt to compensate with extra thinning |
| Brush type | Any available brush | Oil-based: China bristle (natural hog hair) with flagged (split) tips. Water-based: synthetic nylon/polyester. Foam brush: acceptable for small areas, adds micro-bubbles on large surfaces |
The thinned first coat protocol that prevents brush marks is part of the full polyurethane application — the polyurethane application protocol with environmental requirements.
Warm the Can — The Viscosity Fix That Costs Nothing
Polyurethane viscosity drops significantly with temperature. If your workshop is 65°F and the poly can has been sitting there overnight, warm the sealed can in a bowl of warm (not hot) water for 10 minutes before opening. The warmer poly flows more readily from the brush and levels faster — without altering the thinning ratio or diluting the resin solids. Do not use boiling water or heat the open can — warm tap water is sufficient and safe.
What Brush Technique Produces a Mark-Free Polyurethane Surface?
The tipping-off technique — applying finish with a loaded brush then immediately smoothing with an unloaded brush at a low angle in a single uninterrupted pass — is the standard professional method for mark-free brushed polyurethane. It separates the application stroke (which delivers the finish) from the leveling stroke (which smooths it), so neither stroke has to do both jobs simultaneously.
- Load the brush fully. Dip half the bristle length into the poly. Drag one side of the brush lightly against the container rim to remove drips — do not wipe both sides (keeps the other side fully loaded). A fully loaded brush delivers a consistent, even amount of finish per stroke.
- Apply in single passes with the grain from one end to the other. Start your stroke at one end of the board — not in the middle. Move in one continuous motion to the other end. Lift the brush at the far end without stopping mid-surface. Do not overlap previous strokes while the finish is still fully wet — the brush will pull finish from the wet area into the newly applied area unevenly.
- Cover the entire surface in one session. On a tabletop: work in strips the width of one board. Complete each strip from end to end before moving to the next. Do not pause mid-strip.
- Unload the brush completely. Once all finish is applied, drag the bristles firmly against the container rim four to five times — removing 80–90% of the remaining finish from the brush. The brush should feel almost dry.
- Tip off — the leveling pass. Hold the unloaded brush at 15–20 degrees to the surface (nearly flat). Starting at one end of the surface, drag the bristle tips lightly in a single continuous pass to the opposite end without lifting or stopping. Apply minimal downward pressure — the bristle tips should barely touch the surface. This pass unifies ridges, eliminates trapped air, and equalises the film thickness across the surface.
- Do not touch the surface again until the coat is fully dry. Any additional brush contact after tipping-off reintroduces marks into finish that has already begun to level. Leave it and evaluate after drying.
The Back-Brushing Problem — Why It Always Makes Marks Worse
Back-brushing — dragging the brush back over finish already applied in the same session — is the most common single cause of severe, irreversible brush marks. Polyurethane begins to skin within 2–5 minutes of application as the surface molecules start cross-linking. A brush dragged back through this skinned layer pulls it into ridges that are too viscous to flow back flat. The ridges have sharp, torn edges rather than the smooth rounded profile of normal brush marks.
Fix: If you missed a section while working, leave it. Apply a correctly thinned second coat after full drying — the missed area will be covered without the irreversible ridge damage that back-brushing produces.
📝On a solid walnut dining table that required three coats of oil-based satin polyurethane, I switched from a synthetic brush to a 3-inch China bristle brush and added the tipping-off pass on coat two. The difference between coat one (no tip-off, synthetic) and coat two (tip-off, China bristle) under raking light was decisive — coat one had directional texture throughout; coat two appeared smooth with no visible mark direction. The tipping-off technique takes two minutes per coat on a standard tabletop and completely changes the result.
How Do You Fix Brush Marks in a Dried Polyurethane Coat?
The fix depends on severity. Light surface marks (barely visible, no texture to fingertip) require light sanding and a correctly applied next coat. Deep marks (clearly visible ridges, rough texture) require sanding back to flat before recoating. Marks on the final coat require the most work — depending on depth, either wet sanding and polishing, or complete re-coating.
Why 320-Grit — Not 220-Grit — Between Coats
220-grit sandpaper cuts aggressive enough scratches into cured polyurethane that the scratch pattern telegraphs through the next coat as a visible haze on high-gloss finishes under raking light. 320-grit removes nibs and dust contamination — the actual goal of between-coat sanding — without leaving visible scratch marks. 220-grit is the correct grit for bare wood before the first coat, where the scratches provide tooth for the first coat to grip. Once a film coat is established, use 320-grit or finer for all subsequent sanding.
When Should You Switch to Wipe-On Polyurethane Instead of Brushing?
Wipe-on polyurethane — oil-based polyurethane thinned 50:50 with odorless mineral spirits and applied with a lint-free cloth — produces a mark-free result with the same film chemistry as brushed polyurethane. The finish is identical; only the application method and coat thickness change. Each wipe-on coat is approximately 0.5–1 mil wet versus 3–4 mils for a brushed coat — requiring 5–8 coats instead of 3 to achieve the same film build. The durability is identical at the same total film thickness.
When wipe-on is the better choice:
- Turnings, carvings, and complex profiles — areas where brush pressure creates pooling in recesses and marks on curved surfaces. A cloth conforms to the surface; a brush does not.
- Vertical surfaces — a thin wipe-on coat does not run or sag. A brushed coat on a vertical surface at room temperature in a warm workshop will sag before it begins to skin.
- Repairs over an existing smooth finish — a wipe-on coat blends into the existing finish surface with minimal risk of new brush marks at the repair boundary.
- When brushing technique is not consistent enough to produce level results — wipe-on removes technique as a variable entirely.
How to apply wipe-on polyurethane:
- Thin oil-based poly 50:50 with odorless mineral spirits. Mix thoroughly.
- Fold a lint-free cloth (old t-shirt material works well) into a flat pad.
- Apply a small amount of mixture to the cloth — the cloth should be damp, not wet.
- Wipe in long strokes with the grain. Apply light, even pressure across the surface.
- Allow 2–4 hours between coats (shorter dry time due to high solvent content).
- Apply 5–8 coats for equivalent film build to 3 brushed coats. No sanding required between coats unless the surface develops nibs.
Commercial wipe-on poly products (Minwax Wipe-On Poly, General Finishes Wipe-On Poly) are pre-thinned to approximately 50:50 and ready to use. They are the same product as regular oil-based poly thinned at home — there is no performance difference.
If brush marks remain a recurring problem, switching to a different finish family may be the right answer — lacquer sprays without brush marks — the polyurethane vs lacquer comparison covering application method.
Frequently Asked Questions
Can you apply a second coat over brush marks without sanding?
No — applying a second coat over dried brush marks locks the ridges in under the new coat. Each additional unsanded coat increases the total ridge height and makes the surface progressively more textured, not smoother. Sand with 320-grit after every coat that has dried with visible marks before applying the next coat. The sanding flattens the ridges to the level of the surrounding finish, giving the new coat a flat, mark-free substrate to level over.
Do foam brushes leave fewer marks than bristle brushes?
For small surfaces and detail work — yes. Foam does not leave bristle-track marks. However, foam brushes introduce micro-bubbles through air incorporation as they flex during application. On large flat surfaces, these micro-bubbles create a dimpled texture (called orange peel) that is different from but as problematic as bristle marks. For large surfaces, a China bristle brush with the tipping-off technique produces better results than foam. For small items, mouldings, or vertical edges, foam applicators are excellent and mark-free.
How much should you thin polyurethane to reduce brush marks?
Oil-based polyurethane: thin the first coat 10% with odorless mineral spirits. Do not thin subsequent coats unless the temperature is below 65°F. Over-thinning (more than 15–20%) reduces resin solids per coat, requiring additional coats to achieve the same film build, and can cause the finish to run on vertical surfaces. Water-based polyurethane: do not thin. Water-based poly is formulated for direct application — thinning with water disrupts the emulsion chemistry and reduces film formation quality.
Why does the first coat always look worse than the second?
The first coat penetrates into the wood grain rather than lying entirely on the surface — open grain pores pull the finish down, creating an uneven film thickness. Areas over open pores thin out as the finish absorbs; areas between pores receive the full coat thickness. This differential absorption produces texture in the first coat regardless of brush technique. After sanding the first coat flat with 320-grit, the second coat has a uniform substrate (the first coat fills the pores) and levels significantly more smoothly. The first coat is always a sealing coat — evaluate finish quality from the second coat onwards.
What causes streaks in water-based polyurethane that brushing doesn’t fix?
Water-based poly streaks are sheen variations rather than physical ridges — areas where the finish dried at different rates or with different thicknesses show as lighter or darker bands under light. They occur because water-based poly’s 2–4 minute leveling window is too short for traditional back-and-forth brush application on medium and large surfaces. Fix: switch to a foam pad applicator (not foam brush) or a microfibre applicator pad, which deposits finish more uniformly than bristle brushes on water-based products. Apply in single passes with the grain, never back-brush, and complete the entire surface within 90 seconds of starting. Alternatively, switch to oil-based poly, which has a 3× longer leveling window.