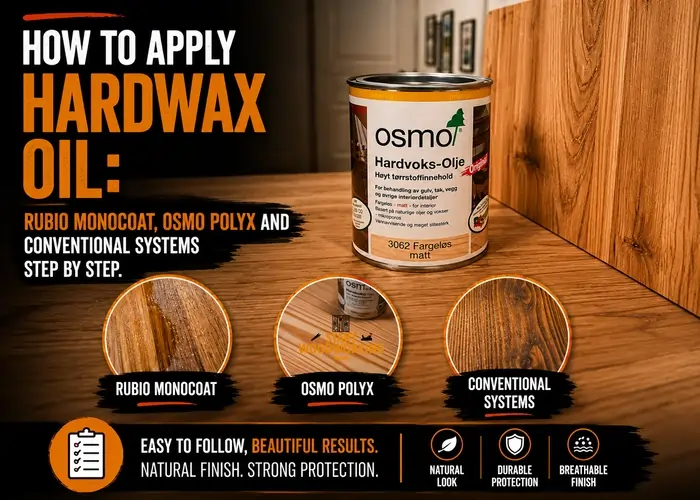
How to Apply Hardwax Oil: Rubio Monocoat, Osmo Polyx and Conventional Systems Step by Step
Applying hardwax oil correctly depends on two variables that most guides do not distinguish: which product you are using, and what the product’s wipe-off window is. Rubio Monocoat requires excess removal within 5–10 minutes of application. Osmo Polyx requires removal within 15–20 minutes. A generic hardwax oil gives you 15–30 minutes. Applying the same technique to all three produces incorrect results on two of them — sticky patches from Rubio left too long, under-penetration from Osmo wiped too soon.
This article is part of the complete wood finishing guide — covering selection, application, and troubleshooting for all finish types and species.
Navigate to your question
→ How is hardwax oil different from danish oil? → Composition and key differences ↓
→ What prep is needed before applying? → Grit, species protocol ↓
→ How do I apply it — wipe-off windows, buffing? → Step-by-step protocol ↓
→ How long between coats and why buff? → Timing and buffing explained ↓
→ My hardwax oil is sticky or not drying — why? → Failure diagnosis and fixes ↓
→ How do I maintain it long-term? → Maintenance coat protocol ↓
This distinction matters because hardwax oil is not a single product — it is a category containing two fundamentally different chemistries. Products using reactive oil technology (Rubio Monocoat) bond covalently to wood cellulose and cure in a single coat. Products using conventional oil-plus-wax technology (Osmo Polyx, Bona Craft Oil, Treatex) penetrate conventionally and require two coats. The application protocol differs between these systems.
⚠ Spontaneous Combustion — Same Risk as Danish Oil
Hardwax oil cloths generate heat through oxidative curing and can ignite without external flame. After every application: spread used cloths flat on a non-combustible surface outdoors until fully dry, or submerge in a sealed metal container filled with water. Never bundle or fold oil-saturated cloths. This applies to every oxidising oil — hardwax oil, danish oil, tung oil, boiled linseed oil. The mechanism and full disposal protocol are explained in why oil-soaked rags spontaneously combust.
The single most common hardwax oil failure is applying too much product. Unlike polyurethane — where a thicker coat builds more film — hardwax oil that exceeds the wood’s absorption capacity stays on the surface and cures there as a sticky, semi-hardened film. Less product, applied thinly, produces better protection than more product applied thickly.
What Makes Hardwax Oil Different from Danish Oil and Polyurethane?
Hardwax oil combines penetrating oil and wax in a single product — the oil component enters the wood grain and the wax component deposits near the surface. This produces a finish that is more water-resistant and more durable than danish oil alone, while remaining invisible as a film. The wax provides a secondary protective layer above the oil-saturated grain without forming a continuous surface film that can chip or peel.
The two technologies differ at the chemical level. Reactive oil systems (Rubio Monocoat) use a modified oil that forms covalent bonds with the hydroxyl groups in wood cellulose — the same reaction that creates hydrogen bonds between cellulose fibres. This chemistry means one layer of oil molecules bonds permanently to the wood surface.
Adding more coats does not add protection — on fully saturated wood, additional coats of reactive oil sit on the surface and cure as sticky residue. Conventional oil-plus-wax systems (Osmo Polyx, Bona, Treatex) penetrate the grain through conventional capillary action, requiring two coats to achieve full saturation and wax deposition.
Choosing between hardwax oil and danish oil for furniture is mostly a question of refresh interval and water resistance — the full hardwax oil vs danish oil comparison covering cost per m² and maintenance.
How Do You Prepare Wood Before Applying Hardwax Oil?
Sand bare wood to 120-grit as the final preparation grit — not 150. Hardwax oil contains a wax component that deposits in the wood pores as the oil cures. A 120-grit surface has larger pore openings than a 150-grit surface, allowing the wax component to enter and deposit correctly. Sanding to 150 or finer before hardwax oil reduces wax deposition, producing a finish with less water beading and lower stain resistance than the product is rated for.
Species-Specific Spread Rates — Why They Differ 3-4×
Open-grain ring-porous species (oak, ash, chestnut) absorb hardwax oil at 3–4 times the rate of closed-grain diffuse-porous species (maple, birch, cherry). Osmo Polyx rates oak at approximately 8–12 m²/litre vs. 15–20 m²/litre for maple. This means the same application technique produces a heavier coat on oak than on maple — requiring more aggressive wipe-off on oak to prevent excess. Apply slightly more product to closed-grain species initially; they absorb slower and the first pass may look patchy before the oil fully distributes.
How Do You Apply Hardwax Oil Step by Step?
Apply a thin coat of hardwax oil in a figure-8 pattern to initially distribute the product across a 1–2 m² section, then complete with long grain-direction strokes to level. Allow the product’s specific wipe-off window to pass, then remove all excess firmly. The entire coat — application and wipe-off — should use the minimum product that produces full surface coverage, not the maximum the cloth can carry.
Complete Application Protocol
- Bring product to temperature. Confirm tin is at 18–20°C. Stir slowly for 60 seconds — wax settles at the bottom of the tin and must be fully distributed. Do not shake — shaking introduces air. Stir from the bottom of the tin upward.
- Prepare sections. For Rubio Monocoat: work 1–2 m² sections maximum. For Osmo/conventional: 3–4 m² sections. Complete each section fully (apply and wipe) before moving to the next — do not apply across the entire surface and then wipe, as the wipe-off window will expire before you return to the start.
- Apply with a microfibre pad, lint-free cloth, or short-nap roller. Load the applicator lightly — the correct amount is less than you expect. On first application: a correctly loaded pad should feel almost dry on the wood surface. Pour a small amount onto the pad rather than directly onto the wood.
- Initial spread: figure-8 pattern. Work the oil into the grain using a circular or figure-8 motion for the first pass across the section. This drives the oil laterally into the pores across the grain — the wax component deposits in cross-grain pores that a grain-direction-only pass would miss. Do not press hard — moderate pressure, consistent coverage.
- Final levelling: grain direction. Immediately after the figure-8 pass, complete the section with long strokes following the grain. This levels any excess and ensures an even surface. The surface should look uniformly wet but not pooled.
- Wait for the product-specific absorption window. Rubio Monocoat: 3–5 minutes. Osmo Polyx / conventional: 10–15 minutes. Do not exceed the wipe-off window — see timing table below.
- Wipe off all excess with a clean dry cloth. Wipe firmly across the grain first, then with the grain. The surface should feel slightly smooth and dry, not slippery. Use the raking light test: a lamp at low angle across the surface reveals any remaining wet oil patches. These must be removed. No pooling, no wet patches.
- Dispose of cloths safely — flat and dry outdoors, or in sealed metal container with water. Move to the next section and repeat.
| Product | Absorption Window | Max Wipe-Off Window | If Exceeded |
|---|---|---|---|
| Rubio Monocoat | 3–5 min | 5–10 min maximum | Reactive oil begins cross-linking — excess cannot be wiped; sanding required |
| Osmo Polyx | 10–15 min | 15–20 min maximum | Wax starts to set — wiping becomes difficult, may smear rather than remove |
| Generic hardwax oil | 10–20 min | 15–30 min maximum | Check manufacturer TDS — wipe-off time varies by formulation |
Rubio Monocoat Part B Activator — What It Does
Part B is a catalytic hardener that accelerates the covalent bonding reaction in Rubio Monocoat. Mixed at 3% by volume with Part A (5% on aged or porous wood), it reduces full cure time from 5–7 days to 2–3 days without affecting final hardness. The mixing ratio is critical — excess Part B beyond 5% does not accelerate further and can produce a slightly cloudy surface from unreacted hardener. Part B is optional for surfaces with no time constraints. It is recommended for floors where foot traffic cannot be avoided for 5–7 days.
How Long Do You Wait Between Coats and Why Do You Need to Buff?
For conventional hardwax oil (Osmo, Bona, Treatex), wait minimum 12–24 hours between first and second coat before buffing and recoating.
Buffing after the first coat with a white polishing pad breaks the wax crystal structure that forms on the surface as the first coat cures — unbroken wax crystals produce a dull, slightly opaque appearance. Buffing before the second coat produces the characteristic hardwax oil sheen.
As hardwax oil cures, the wax component deposits near the surface and undergoes crystallisation — the same process that produces the white haze on the surface of a newly waxed car. On a freshly cured first coat, this crystallisation is visible as a slight milkiness or dull haze.
Buffing with a white polishing pad (not an abrasive pad — white pads are non-scratching) mechanically disrupts the crystal structure, producing microscopic reorientation of the wax molecules. This reorientation [produces] the even, low-reflectance sheen characteristic of the hardwax oil look.
| Stage | Rubio Monocoat | Osmo / Conventional |
|---|---|---|
| After first coat | Allow 24h. Buff lightly with white pad. Application complete — no second coat. | Allow 12–24h. Buff with white polishing pad. Then apply second coat. |
| After second coat | Not applicable. | Allow 24h. Final buff with white pad. Surface ready for light use. |
| Full cure / hard use | Without Part B: 5–7 days. With Part B: 2–3 days. | 5–7 days. Rugs and heavy furniture: 7–14 days. |
📝I apply hardwax oil almost exclusively for furniture clients who want the natural look without the recoating commitment of polyurethane. The buffing step is the one instruction most DIYers skip because it seems unnecessary after the surface looks dry. It is not — the sheen difference between buffed and unbuffed hardwax oil is visible. Buffed: warm, consistent, low-reflectance glow. Unbuffed: flat, slightly milky, uneven. 5 minutes with a white pad changes the result completely.
Why Is My Hardwax Oil Sticky, Patchy, or Not Drying?
Sticky hardwax oil almost always means excess was not removed within the wipe-off window. The fix depends on how recently the product was applied — within the wipe-off window, wiping removes it; after the window closes, sanding is required. Patchy appearance after drying means the wood was not uniformly prepared or the product was not evenly distributed before wipe-off.
Sticky, patchy hardwax oil is usually an over-application problem — same diagnosis as danish oil failure — the oil finish drying failure with the universal mineral spirits rescue.
| Problem | Cause | Fix |
|---|---|---|
| Sticky patches after 24h | Excess not removed within wipe-off window | Sand with 120-grit to remove partially cured excess. Reapply with correct wipe-off timing. |
| Patchy sheen / uneven colour | Inconsistent surface preparation (burnished spots from over-sanding) OR uneven application before wipe-off | Re-sand entire surface uniformly to 120-grit. Reapply using figure-8 initial distribution. Work smaller sections. |
| Product not penetrating / beading | Previous wax contamination blocking pores | Remove wax with mineral spirits (3 passes). Naphtha evaporation test confirms removal. Re-sand lightly, reapply. |
| Very slow curing (still soft after 48h) | Cold product or cold workspace (below 15°C) | Move to heated space above 18°C. Allow 48–72 additional hours. Do not reapply or sand until fully cured. |
| Milky haze after drying (not on Rubio) | Wax crystallisation on surface — not buffed after first coat | Buff with white polishing pad (no abrasive). Milky haze resolves. Do not re-sand. |
How Do You Maintain a Hardwax Oil Finish?
Hardwax oil maintenance is the main practical advantage over polyurethane: spot repairs are invisible, and maintenance coats are applied without sanding. When the surface shows wear, dryness, or reduced water-beading, clean thoroughly and apply a maintenance oil coat using the same wipe-off protocol as the original application. No stripping, no sanding, no section boundaries visible in the result.
Rubio Monocoat maintenance: use Rubio Maintenance Oil or Universal Maintenance Oil — not Part A reapplication. Rubio’s maintenance product is formulated to bond over the existing reactive oil layer.
Re-applying Part A over a cured surface produces excess that cannot penetrate the already-bonded layer. Osmo maintenance: use Osmo Wash and Care for routine cleaning, Osmo Polyx (full application) for surface renewal every 2–4 years depending on traffic.
Maintenance Interval by Traffic Level
Hardwood floor — high traffic
Every 1–2 years with maintenance oil coat
Hardwood floor — low traffic
Every 2–4 years depending on wear indicators
Furniture — regular use
Every 2–3 years or when water no longer beads
Kitchen worktop
Every 6–12 months — highest contact and moisture
Frequently Asked Questions
Can you apply hardwax oil over polyurethane?
No — hardwax oil cannot penetrate through any cured film finish. Polyurethane seals the wood grain completely. Hardwax oil applied over polyurethane sits on the film surface and cures as an unabsorbed sticky layer. The polyurethane must be stripped to bare wood before hardwax oil can be applied. If stripping is not possible, maintain the polyurethane with compatible polyurethane recoat products rather than switching to hardwax oil. Check full compatibility →
Can you apply hardwax oil to veneer?
Yes, with a modified protocol. Veneer thickness is typically 0.5–1 mm — the same thickness as the first coat of hardwax oil on solid wood. Apply one very thin coat only, and wipe off excess even more aggressively than you would on solid wood. Do not apply a second coat on veneer — the substrate cannot absorb it and excess will sit on the surface as sticky residue. Do not wet-sand or sand between coats on veneer — any sanding through the veneer to the substrate beneath is irreparable.
Is hardwax oil food safe?
Several hardwax oil products carry food-safe certifications once fully cured — Rubio Monocoat has USDA approval and certifications for food-contact surfaces. Osmo Polyx has certifications for wood toys and surfaces that come into indirect food contact. Check the specific product’s Technical Data Sheet for food-contact certification before using on kitchen worktops, dining tables, or children’s furniture. Products with certification will state it explicitly — do not assume all hardwax oils are food-safe.
How do you apply hardwax oil to a floor?
Large floors use a flat applicator pad on a handle — same principle as a flat floor mop. Apply thinly across one board width at a time, working in the grain direction of the boards. Use a buffing machine with a white pad for floors larger than 15 m² — hand-buffing a full room is not practical. For Rubio Monocoat on floors, a random orbital sander with a white pad distributes the product and works it into the grain simultaneously during the application phase. Follow the brand-specific TDS for floor application — floor coverage rates differ from furniture rates.
Can you apply Rubio Monocoat over Osmo or vice versa?
Do not mix brands without testing. Rubio Monocoat’s reactive oil technology is not compatible with conventional hardwax oil maintenance products — Rubio maintenance products are specifically formulated to bond over Rubio’s reactive oil layer. Applying Osmo maintenance over a Rubio surface does not bond the same way and may produce uneven sheen or poor adhesion. For maintenance of a Rubio finish: use Rubio Maintenance Oil. For Osmo: use Osmo Wash and Care (routine) or Osmo Polyx (surface renewal). Keep the system consistent within one brand.
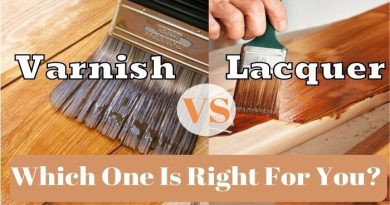
What is the difference between hardwax oil and danish oil?
Danish oil is a blend of tung or linseed oil, varnish resin, and mineral spirits — it produces a penetrating finish with minimal wax content and relatively low surface water resistance. Hardwax oil combines oil and wax specifically formulated to deposit the wax component near the wood surface, producing higher water resistance and better stain resistance than danish oil. Hardwax oil also has longer service intervals (2–4 years vs 1–2 years for danish oil) and is suitable for floor applications where danish oil alone is insufficient. For furniture where maximum natural appearance matters more than maintenance intervals, danish oil produces a comparable result at lower cost.
Hardwax oil cannot be topcoated with polyurethane or lacquer — the wax layer prevents adhesion — the polyurethane application protocol covering wax contamination test confirms this requirement.