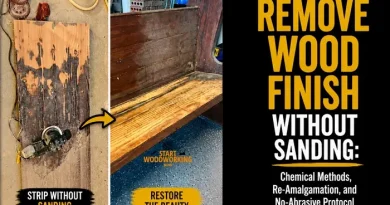
Strip vs Recoat Wood Finish Decision Tool
Whether to strip wood finish to bare wood or simply recoat over the existing surface depends on one thing: whether the existing finish has intact adhesion. A finish that looks dull, scratched, or worn is not the same as a finish that has failed. The cross-hatch adhesion test determines which situation you have in under three minutes.
Stripping unnecessarily removes material from the wood surface — critical on veneer, where sanding depth is limited to fractions of a millimetre. Recoating without stripping when adhesion has failed produces a new finish that peels from below, often within weeks.
This tool is part of the complete wood finish removal and refinishing reference — covering identification, stripping, and post-stripping protocols for all finish types.
Recoating over failed adhesion always produces peeling. No topcoat compensates for a compromised base layer — regardless of how well it is applied or how good the product is.
When Do You Have to Strip Wood Before Refinishing?
Stripping to bare wood is required in five situations: peeling or flaking anywhere on the surface, cross-hatch adhesion test failure, tacky or uncured existing finish, alligatored or crazed film, or a finish chemistry change that is incompatible with the existing surface — such as switching from a wax or oil finish to a film finish.
Stripping is not always the most destructive option. On a surface with widespread adhesion failure or contamination, stripping to bare wood and refinishing correctly [produces] a result that [lasts] 15–20 years. Recoating over compromised adhesion [produces] a result that [fails] within months.
What Is the Cross-Hatch Test and How Do You Do It?
The cross-hatch test scores a 2×2 cm grid through the finish to bare wood, applies masking tape firmly over the grid, then peels the tape sharply at 90°. Zero finish on the tape confirms intact adhesion — any finish lifting on the tape indicates adhesion failure and requires stripping before recoating.
The cross-hatch test [measures] adhesion strength between finish layers and between finish and substrate. Tape [applies] uniform tensile force across the scored area. If adhesion [is] intact, the finish [stays] bonded to the wood despite the cut edges — tape [removes] only loose fragments at the cut lines. If adhesion [has] failed, the tape [lifts] the finish in sheets between the score lines.
📝I run the cross-hatch test on every surface before committing to screen-and-recoat. A finish that has passed for three cycles — over 10 years — sometimes fails on the fourth test because silicone from furniture polish has migrated into the film over the years. The test takes 3 minutes. Discovering adhesion failure after applying a fresh coat takes weeks of peeling and full re-stripping.
Cross-Hatch Test Protocol
- Select a test area in a representative location — avoid edges, joints, and already-damaged areas. Use an intact area that looks like the majority of the surface.
- Score 6 parallel lines through the finish down to bare wood, 1–2 mm apart, using a utility knife or sharp blade. The lines should cover approximately 2 cm total width.
- Score 6 more parallel lines at 90° to the first set, same spacing — creating a 6×6 grid of small squares.
- Press masking tape firmly over the entire grid. Rub with a fingernail to ensure full contact — air pockets under the tape produce false negatives.
- Peel the tape in one sharp motion at 90° to the surface. Do not peel slowly — slow peeling reduces the tensile force and can produce a false pass.
- Inspect the tape under good light. Zero finish squares on the tape = adhesion intact = screen-and-recoat eligible. Any finish squares on the tape = adhesion compromised = strip required.
Can You Recoat a Floor Without Sanding to Bare Wood?
Yes — hardwood floors with intact adhesion and worn-through traffic areas are the standard case for screen-and-recoat without sanding to bare wood. A buffer with a 60–80 grit screen disc abrades the entire floor surface uniformly and the new polyurethane coat bonds to the abraded existing film. This restores protection and appearance without removing wood material.
Screen-and-recoat [uses] a screen disc rather than sandpaper. Screen disc [is] an abrasive mesh that [scratches] the finish surface without cutting into it. The result [is] a uniformly dulled surface — ideal mechanical adhesion for a new coat — without removing the finish film or touching the wood below. A drum sander [cuts] through the finish to bare wood in a single pass and [is] the correct tool for full stripping, not for screen-and-recoat.
The 20% threshold determines whether screen-and-recoat is appropriate: if worn-through areas cover less than 20% of the floor and the remaining 80% has intact adhesion, screen-and-recoat produces a uniform result. If worn areas exceed 20%, the colour and sheen differential between heavily-worn and intact areas produces visible patchwork in the new coat regardless of technique.
| Condition | Approach | Wood Removed | Result |
|---|---|---|---|
| Intact film, dull or scratched, cross-hatch passes | Screen-and-recoat | None — only finish surface abraded | Uniform sheen, restored protection |
| Worn through in traffic areas, under 20%, rest intact | Screen-and-recoat | None | Uniform result if worn area under 20% |
| Worn through in traffic areas, over 20% | Full sand + recoat | Finish layer + thin wood layer | Even result — colour differential too large for screen-and-recoat |
| Peeling, cross-hatch failure, or finish incompatibility | Strip to bare wood | Full finish layer removed | Bare wood — correct preparation for any new finish system |
What Happens If You Recoat Without Stripping When Adhesion Has Failed?
Recoating over failed adhesion produces a finish that peels from below — typically within 2–8 weeks. The new topcoat bonds to the existing finish, not to the wood. When the existing finish releases from the substrate, it takes the new coat with it. The failure is always more extensive than the original damage because the new coat has sealed in the problem across a wider area.
The new topcoat [bonds] to the surface of the existing finish. The existing finish [is] what has failed — it [no longer has] adequate adhesion to the substrate. Adding a new coat [adds] additional film weight above the compromised layer. The combined weight and the stress of thermal expansion and contraction [accelerates] the existing adhesion failure. The new coat [peels] in larger sheets than the original peel because it [covers] a wider area.
The same outcome [occurs] when recoating over wax contamination. The new coat [adheres] to the wax surface temporarily. Within weeks, the wax migration — wax continuously moves toward the surface as temperature fluctuates — [breaks down] the mechanical bond. The finish [peels] in sheets, often taking the existing wax coat with it, exposing bare wood in a worse state than the original surface.
When Adhesion Failure Is Discovered After Recoating
If peeling begins after a recoat was applied over failed adhesion, both the new coat and the remaining old coat must be stripped before any further finishing. Attempting to spot-repair newly peeled areas produces the same failure at every repair boundary — the problem is systemic, not localised. Strip entirely, identify the original cause of adhesion failure, correct it, and refinish from bare wood.
Frequently Asked Questions
Do I need to strip wood before applying polyurethane?
Only if the existing finish has failed adhesion or is incompatible with polyurethane. An intact, well-adhered film finish — polyurethane, varnish, or lacquer — does not require stripping before a fresh polyurethane coat. Scuff-sand with 220-grit, clean with a tack cloth, and apply the new coat. Stripping is required when the cross-hatch test fails, when peeling or flaking is present, when the existing surface is wax or waxed shellac, or when switching to a different finish chemistry.
How do I know if my floor needs to be stripped or can be screen-and-recoated?
Run the cross-hatch adhesion test on the intact areas of the floor — not on the worn patches. If zero finish lifts on the tape, the floor is a screen-and-recoat candidate. If finish lifts on the tape, stripping is required. Also check whether worn-through areas exceed 20% of the total floor surface — if so, the colour and sheen differential between worn and intact zones is too large for screen-and-recoat to produce a uniform result, and full sanding is needed.
Can I paint over wood without stripping the existing finish?
Yes — with the correct preparation. If the existing finish is intact and passes the cross-hatch test, you can apply paint over it with bonding primer. Scuff-sand to 220-grit, apply a bonding primer (Zinsser Bulls Eye 1-2-3 or equivalent), and paint over the primer. If the existing surface is wax finish, waxed shellac, or wax-sealed chalk paint, the wax must be completely removed before any primer or paint will adhere. If the cross-hatch test fails, strip to bare wood before painting.
What is the difference between screen-and-recoat and sanding?
Screen-and-recoat uses a buffer machine with a 60–80 grit mesh screen disc that scratches the surface of the existing finish without cutting through it to bare wood. This creates mechanical adhesion for the new coat without removing wood material — critical on veneer and on floors where each refinish cycle removes a thin layer. Sanding uses abrasive paper that cuts through the finish film and into the wood surface. Sanding is required when stripping to bare wood. Screen-and-recoat is appropriate when the existing finish has good adhesion and only surface restoration is needed.
How many times can you screen-and-recoat hardwood floors before stripping?
Most solid hardwood floors (18–20 mm thick) can be screen-and-recoated 3–5 times between full sandings. Screen-and-recoat removes no wood material — only the surface of the finish — so it does not reduce floor thickness. However, each cycle builds additional film thickness above the wood. After 3–5 screen-and-recoat cycles, the accumulated finish film may become thick enough to crack or peel at its own weight, and full stripping is required to remove the old film system before starting fresh.
Do you need to remove old varnish before applying polyurethane?
Not always. Polyurethane applies successfully over intact, well-adhered alkyd varnish that passes the cross-hatch test. Scuff-sand the varnish with 220-grit, clean with tack cloth, and apply oil-based polyurethane in thin coats. For water-based polyurethane over alkyd varnish, a dewaxed shellac barrier coat (SealCoat) between the varnish and the polyurethane improves adhesion reliability. Stripping is required only when the varnish has failed adhesion, is peeling, or is heavily alligatored.