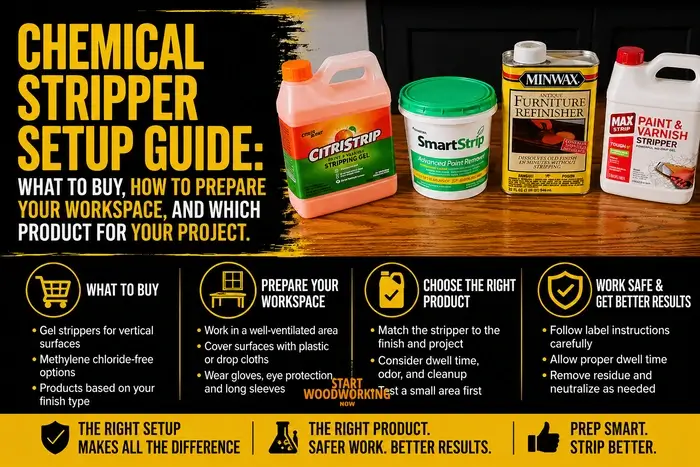
Chemical Stripper Setup Guide: What to Buy, How to Prepare Your Workspace, and Which Product for Your Project
Before applying any chemical stripper, three purchases and one workspace setup determine whether the project runs smoothly and safely: the correct glove material for the specific product you are using (not all gloves work with all strippers — the product’s active ingredient determines which glove material is required), adequate ventilation in the workspace (different products have different requirements ranging from “open window” to “outdoors only”), and the correct disposal container for the residue when the job is done. This guide covers the product selection decisions, the PPE shopping list specific to each stripper type, and the workspace setup sequence — so that by the time you open the stripper container, everything is in place. For detailed health and occupational safety information beyond the practical setup scope of this guide, the authoritative sources are OSHA (osha.gov), the US EPA (epa.gov), and the product’s Safety Data Sheet (SDS), which the manufacturer is legally required to provide.
- OSHA — workplace chemical safety: osha.gov/chemicaldata
- EPA — chemical regulatory status: epa.gov/saferchoice
- Product SDS — search “[product name] safety data sheet” — manufacturers are legally required to publish these
- Poison Control (US): 1-800-222-1222 | (UK): 111 | (EU): 112
This guide covers what to read on a product label before buying, which PPE products to purchase for each stripper type, how to set up the workspace for each product category, the correct container and labelling for residue disposal, and when the project scope requires professional rather than DIY stripping.
→ Active ingredient comparison and stripping performance: How to Choose a Chemical Stripper→ Full stripping project: How to Strip Wood Furniture — Complete Project Guide→ Hub: How to Remove Wood Finishes — Complete Guide
What Do You Need Before Starting Chemical Stripping?
Step 1 — What to Read on the Product Label Before Buying
Most stripper product labels are designed for marketing, not for PPE decisions. The label tells you what the product is designed to do (strip multiple coats, safe on surfaces, citrus-based) but not what PPE the active ingredient requires. The Safety Data Sheet (SDS) — not the product label — contains the information needed for equipment decisions.
How to find the SDS for any stripper product
Search “[product name] safety data sheet” or “[product name] SDS.” Manufacturers are legally required to provide these documents. Look at Section 3 (Composition) to identify the active ingredients and their concentrations. Section 8 (Exposure Controls / Personal Protection) lists the manufacturer’s PPE recommendations — compare these against the information in this guide, as some SDS documents list minimum rather than optimal protection.
What the active ingredient tells you
N-Methyl-2-pyrrolidone (NMP) or 1-Methyl-2-pyrrolidinone above 30% of the formula: the product’s stripping action relies primarily on NMP. This applies to Citristrip, Smart Strip, and most products labelled “citrus-based,” “safer choice,” or “no methylene chloride.” The citrus (d-limonene) component is a fragrance co-solvent — NMP is the working ingredient. This classification is relevant for glove selection: NMP penetrates standard nitrile, requiring a different glove material (see below).
Benzyl alcohol as the primary solvent: product works by a different mechanism, and standard nitrile gloves are adequate. Back to Nature Multi-Strip is the main consumer product in this category.
Dichloromethane or methylene chloride: banned for consumer sale in the US (EPA 2019) and restricted for consumer use in the EU (2019). If you encounter a product with this ingredient through commercial channels: outdoor use only. The product’s SDS and OSHA guidance at osha.gov are the correct reference for use requirements — this falls outside the scope of DIY stripping for most projects.
Sodium hydroxide or potassium hydroxide: caustic/alkaline stripper. Works well on oil-based paint; not recommended for oak, walnut, mahogany, or cherry (causes dark staining from tannin reaction).
Step 2 — PPE Shopping List by Product Type
NMP-Based Strippers
EVOH/PE laminate gloves (Silver Shield by North Safety, or 4H gloves by Safety4). These are thin, dexterous, and available online for €5–10 per pair. Alternatively: butyl rubber gloves (black, thick, available at safety suppliers and online). NMP penetrates standard nitrile — Some SDS documents list nitrile gloves as a minimum level of protection. However, permeation data for NMP indicates that higher-barrier materials (such as EVOH/PE laminate or butyl rubber) provide longer breakthrough times. For extended contact work, these higher-barrier materials are commonly recommended in occupational safety guidance. Always follow the SDS and manufacturer guidance for your specific product.
Eye protection:Safety glasses (standard). Goggles if working overhead.
Respiratory:Cross-ventilation using an outward-facing fan and a separate air intake opening is typically recommended to reduce vapour buildup. In professional settings, ventilation is sometimes described in terms of air changes per hour (ACH), but this is not directly measurable in most home environments. The practical goal is continuous airflow that removes vapours from the workspace.
NMP and pregnancy:NMP is classified under certain regulatory frameworks related to reproductive health (for example, California Prop 65 and EU SVHC listings). If this is a concern, consider alternatives like benzyl alcohol–based strippers. If this applies to you or someone in your household, benzyl alcohol gel is the functionally similar alternative with no such classification.
Benzyl Alcohol Strippers
Standard nitrile gloves (0.3 mm minimum thickness — not the thin disposable variety). Neoprene for prolonged use sessions.
Eye protection:Safety glasses.
Respiratory:For some products, basic ventilation such as an open window may be sufficient under light-use conditions, but effectiveness depends on room size, airflow, and duration of use. Always refer to the product’s SDS.
Why this matters:Benzyl alcohol is the correct choice for: indoor workshops with limited ventilation, veneered furniture (no water carrier in the formula), situations where NMP’s regulatory classification is a concern, and anyone who wants the simplest PPE requirements. Performance is similar to NMP on single-coat polyurethane.
MCl / Methylene Chloride
Banned for consumer sale in the US (EPA 2019). Restricted for consumer use in EU (2019). Available through some commercial channels for professional use.
Professional context:The complete safety requirements for MCl use exceed the scope of a DIY stripping guide. OSHA’s methylene chloride standard (29 CFR 1910.1052) is the authoritative reference: osha.gov/methylene-chloride.
For DIY projects:Benzyl alcohol gel at extended dwell (3–4 hours under plastic film)— the exact contact time for your specific finish and stripper combination — and which combinations produce no result at all — is in the chemical stripper dwell times reference, which is the practical alternative for most DIY stripping tasks where MCl would previously have been used.
Caustic / Alkaline Strippers
Neoprene gloves (0.5 mm minimum) or heavy rubber gloves. Caustic solutions damage thin nitrile at extended contact.
Eye protection:Chemical splash goggles — not standard safety glasses. Side protection is required for caustic splatter.
Wood species restriction:Do not use on oak, walnut, mahogany, or cherry — the alkaline chemistry reacts with tannins in these species and causes dark permanent staining. Safe on pine, spruce, birch, and maple.
After use:Neutralise the wood surface with diluted white vinegar (1 part vinegar, 10 parts water), rinse with clean water, allow 24–48 hours drying before sanding.
Glove Selection — The One Decision That Matters Most for NMP
The product label on most NMP-based strippers specifies nitrile or neoprene gloves. The SDS permeation data for NMP, however, shows that nitrile provides very limited barrier time before NMP begins penetrating through the material. The correct glove for NMP work is a higher-barrier material — and the good news is that it costs the same as a box of nitrile disposables.
These are industrial safety products, not standard hardware store items. A pack of 10 pairs typically costs $50–70/€40–60 — which is often less than other workshop consumables required for a full stripping project. These thin, dexterous gloves can be worn under regular work gloves to provide additional mechanical protection during heavy scraping.
Setup Specifications by Stripper Type
| Product Type | Gloves Required | Eye Protection | Ventilation | Clothing | Special Requirements |
|---|---|---|---|---|---|
| NMP gel (Citristrip, Smart Strip) | EVOH/PE laminate (Silver Shield) or butyl rubber. NOT standard nitrile. | Safety glasses. Goggles overhead. | Cross-flow: fan exhausting outward + opposite air intake. Min 4–6 ACH. | Long sleeves. Wash skin contact immediately. | If pregnancy or fertility is a concern, choose benzyl alcohol instead. Consult healthcare provider. |
| Benzyl alcohol (Back to Nature) | Nitrile 0.3 mm minimum. Neoprene for extended sessions. | Safety glasses. | One open window adequate. | Standard workshop clothing. | No restrictions on reproductive health grounds. Safe on veneer (no water carrier). |
| Lacquer thinner | Nitrile or neoprene. | Safety glasses. | Fan exhausting outward. No ignition sources. | Normal clothing. | Flammable. Remove all ignition sources before opening container: pilot lights, switched outlets, no smoking. Dry saturated cloths flat outdoors before disposal. |
| Denatured alcohol | Nitrile. | Safety glasses. | Cross-ventilation. | Normal clothing. | Flammable. Same ignition source removal as lacquer thinner. |
| Caustic / NaOH | Neoprene 0.5mm+ or heavy rubber. Not thin nitrile. | Chemical splash goggles mandatory. | Cross-ventilation for brush application. | PVC/rubber apron. Long sleeves. | Not on oak/walnut/mahogany/cherry. Neutralise wood after: vinegar 1:10, rinse, 24–48h dry. |
Step 3 — Workspace Setup Before Opening the Container
- Place window fan in one window, set to exhaust outward (blowing air out of room).
- Open a second window or door on the opposite side of the room for air intake.
- Lay 100-micron plastic sheet on floor, 60cm perimeter beyond piece.
- Put on Silver Shield or butyl rubber gloves before opening container.
- Have labelled disposal container ready with lid.
- Open one window — natural airflow is sufficient.
- Lay plastic sheet on floor.
- Put on nitrile gloves (0.3mm) and safety glasses.
- Have labelled disposal container ready.
- No other requirements — lowest setup burden of any stripping product.
- Check the room: any pilot lights? Turn off the gas appliance or move work area. Any switched electrical outlets? Cover with tape.
- No smoking within 3 metres during the entire session.
- Fan exhausting outward — vapour is heavier than air, accumulates at floor level.
- Lay plastic sheet on floor.
- Nitrile gloves and safety glasses.
- Work on a flat outdoor surface where natural air movement can carry vapours away.
- Position work surface upwind of your working position.
- Plastic sheet under piece for drip management.
- Appropriate PPE per product SDS.
- For MCl specifically: full requirements are at osha.gov/methylene-chloride.
Pre-1978 Painted Furniture — Lead Test Before Any Work
Furniture and woodwork painted before approximately 1978 may contain lead-based paint. A lead test swab (available at hardware stores for $2-5/€3–5) applied to a scratched area of the painted surface gives a result in 30 seconds. Pink or red = lead detected.
If the test is positive, the removal method changes: chemical stripping only (gel stripper rather than mechanical sanding), specific respiratory protection, and specific disposal requirements. The detailed protocols for lead paint removal are covered by the EPA at epa.gov/lead and by the product manufacturer of Dumond Peel Away 1, which is specifically designed for lead paint encapsulation.
For any significant lead paint project, consulting a certified Lead Renovator is worth considering — the certification program exists precisely because the health implications require specific training.
Step 4 — Disposal Container Setup
Chemical stripper gel combined with dissolved finish (polyurethane, lacquer, paint) cannot be disposed of in regular household waste or poured down any drain. It is regulated waste that municipal waste systems are not designed to process. Setting up the disposal container before starting the project avoids the practical problem of having a large quantity of dissolved-finish-laden gel with nowhere to put it at the end of a session.
What to prepare
A metal tin (a used paint tin with a lid works well) or a heavy-duty plastic container with a lid. Label it clearly before starting: product name + “dissolved finish residue” + date. This becomes the container for all scraped material throughout the project.
Where to dispose
Local Household Hazardous Waste (HHW) collection facilities accept these materials free of charge in most municipalities. To find your nearest facility: in the US, search at earth911.com or epa.gov/recycle. In the EU: contact your local Town Hall or equivalent municipal authority — most counties have designated drop-off points. In the UK: local Household Waste Recycling Centres (HWRCs) accept chemical waste.
Saturated cloths and rags
Rags saturated with lacquer thinner or denatured alcohol present a fire risk if bundled together while wet (solvent evaporation concentrates heat in the centre of the pile). Spread cloths flat on a non-combustible outdoor surface and allow to dry completely before placing in regular waste.
When to Use a Professional Instead of DIY Stripping
Chemical stripping is a DIY-accessible task for most furniture and woodworking projects. However, three specific project types are better handled by professionals:
Lead paint confirmed on large areas (full room of trim, multiple large panels): the containment, PPE, and disposal requirements for significant lead removal projects are substantial. Certified Lead Renovators have the equipment and disposal channels that make large lead-paint projects practical. The EPA RRP (Renovation, Repair and Painting) program certification exists for exactly this scope.
Commercial furniture with unknown finish chemistry (conversion varnish, catalyzed lacquer on large pieces): full removal of conversion varnish on a large piece can require multiple applications and considerable time investment. A professional finishing shop has industrial stripping equipment (heated dip tanks, pressure washers) that makes large-scale catalyzed finish removal practical where DIY chemical approaches are slow.
Antique furniture with uncertain conservation requirements: if a piece may have collector or museum value, consult a professional conservator before applying any chemical. The American Institute for Conservation (AIC) maintains a finder at culturalheritage.org.
From the workshop: The glove selection question became practical when I switched from standard nitrile to Silver Shield EVOH/PE gloves for all NMP-containing strippers about three years ago, after reading the product’s permeation data in the SDS during a workshop safety review. The Silver Shield gloves are noticeably thinner and more dexterous than the butyl rubber option — I can feel the scraper feedback through them clearly, which matters during the edge-test phase of a strip job. They cost about €6 per pair at an industrial safety supplier in Suceava. The practical difference from a workshop perspective: I go through about 2–3 pairs per full furniture stripping day, so the cost difference from nitrile is minimal. What changed is the confidence that the primary protection barrier is actually doing the job the SDS says it should do.
Frequently Asked Questions About Chemical Stripper Setup
Do I need a respirator for Citristrip?
For most DIY use with adequate cross-flow ventilation (fan exhausting outward plus a second opening for air intake), Citristrip does not require a respirator. Glove material is a key consideration for NMP-based strippers due to skin exposure risk. However, appropriate ventilation and, where necessary, respiratory protection should also be considered based on the product’s SDS and the specific workspace conditions. For small or poorly ventilated rooms, or for prolonged sessions over several hours, an OV/P100 half-face respirator adds an appropriate layer of protection. Check the specific product’s SDS Section 8 for the manufacturer’s recommendation for your use conditions.
Can I use regular kitchen gloves (yellow rubber) for stripping?
Standard yellow household rubber gloves are made from natural latex or thick nitrile, and provide reasonable protection for caustic strippers and short-contact work with benzyl alcohol. For NMP-based strippers, however, the barrier material matters specifically — EVOH/PE laminate (Silver Shield) or butyl rubber are the correct choices based on the permeation data in the NMP product SDS. If in doubt, check the product’s SDS Section 8 for the glove recommendation, or switch to a benzyl alcohol product (Back to Nature Multi-Strip) which works with standard nitrile or rubber gloves.
Where can I dispose of leftover stripper and dissolved finish residue?
Local Household Hazardous Waste (HHW) facilities accept these materials free of charge. To find your nearest facility: US — earth911.com or epa.gov/recycle. EU — contact your local municipality or primărie. UK — Household Waste Recycling Centre (HWRC). Never pour down any drain. Leftover stripper in a sealed original container can usually be kept for future projects if stored in a cool, dry location away from ignition sources — check the product label for storage guidance.
Summary: Pre-Stripping Setup Checklist
Before opening any stripper container: read SDS Section 3 to confirm active ingredient. NMP-based (most citrus-branded): buy Silver Shield EVOH/PE or butyl rubber gloves before starting — standard nitrile is not adequate for NMP. Benzyl alcohol (Back to Nature): standard nitrile 0.3mm adequate, open window ventilation sufficient, safest option for indoor workshops and situations where NMP’s regulatory classification is a concern.
Lacquer thinner and denatured alcohol: remove all ignition sources before opening container — flammable. Caustic: neoprene gloves 0.5mm + chemical splash goggles, not on oak/walnut/mahogany/cherry. Workspace setup: plastic sheet perimeter, ventilation appropriate to product, disposal container labelled and ready. Pre-1978 painted furniture: lead test swab first — if positive, chemical-only stripping and refer to EPA guidance. Disposal: all stripper residue is household hazardous waste — HHW facility, free, never drain disposal.
→ Choose the right stripper for your finish type: How to Choose a Chemical Stripper→ Complete stripping project: How to Strip Wood Furniture→ Remove polyurethane: How to Remove Polyurethane from Wood→ Hub: How to Remove Wood Finishes — Complete Guide