4 Effective Methods to Get Rid of Ammonia Stains from Wood
- Ventilate the Area: Ensure the room is well-ventilated by opening windows or using a fan.
- Wear Protective Gear: Put on gloves to protect your hands from cleaning solutions.
- Blot the Stain: If the ammonia spill is fresh, blot up as much as possible with a clean, dry cloth.
- Neutralize the Ammonia: Apply a small amount of white vinegar to a cloth and gently dab the stain to neutralize the ammonia spill.
- Prepare a Mild Cleaning Solution: Mix a few drops of mild dish soap with a cup of water.
- Clean the Stain: Dip a soft cloth into the soapy water and wring out excess. Gently rub the spilled ammonia stain in the direction of the wood grain.
- Wipe with a Damp Cloth: Rinse the soap off with a cloth dampened with clean water.
- Dry the Wood: Immediately dry the area with a clean towel to prevent water damage.
- Buff the Wood: Once dry, gently buff the wood with a soft, dry cloth to restore shine.
| Source of Ammonia Stains | TYPE OF STAIN | IMPACT ON WOOD | EFFECTIVE TREATMENT |
|---|---|---|---|
| Cleaning Products | Chemical Stain | Surface Discoloration | Using Vinegar and Water or Baking Soda Paste |
| Pet Accidents | Organic Stain | Deep Penetration | Hydrogen peroxide |
| Direct Ammonia Spillage | Corrosive Damage | Destructive Change in Texture and Color | Lemon Juice or Vinegar |
Homemade Solutions for Fresh Ammonia Stain Removal
Using Vinegar and Water

- White vinegar
- Water
- Soft cloth
Step 1: Prepare the White Vinegar Solution
First, I mix a solution of white vinegar and water. The ideal ratio is typically one part vinegar to one part water, which provides enough acidity to help neutralize the ammonia without being too harsh on the wood. I always use distilled white vinegar to avoid any potential residue or staining from other types of vinegar.
Step 2: Test the Solution
Before applying the solution to the entire stained area, I find an inconspicuous spot on the wood to test. This ensures that the vinegar won’t harm the wood’s finish or color. I apply a small amount, wait a few minutes, and then check the result. If there’s no damage to the wood, I proceed to the next step.
Step 3: Apply the Solution to the Stain
Using a soft cloth, I dampen it with the vinegar solution and gently dab it onto the ammonia stain. It’s important not to oversaturate the wood, as excess moisture can cause damage. I apply just enough to cover the ammonia spillage and let it sit for a few minutes to allow the vinegar to neutralize the ammonia.
Step 4: Wipe and Rinse the Area
After letting the solution sit, I use a clean, damp cloth to wipe the area, removing the vinegar solution along with any lifted ammonia stain. I make sure to follow the grain of the wood to avoid any additional scratches or damage.
Step 5: Dry the Wood Surface
Immediately after rinsing, I take a dry, soft cloth and thoroughly dry the area. It’s crucial to remove all moisture to prevent warping, swelling, or further damage to the wood.
Step 6: Buff the Wood
Once the wood is dry, I take a fresh cloth and gently buff the surface where the stain was. This helps to restore the wood’s natural luster and ensures that there are no residues left from the cleaning process.
Step 7: Assess the Need for Further Treatment
If the stain is still visible after these steps, I may repeat the process or consider a different approach, such as using a wood brightener or lightly sanding the area if the finish allows for it. For deep stains, refinishing may be necessary.
Applying Baking Soda Paste

For more stubborn stains, a baking soda cleaning paste can be quite effective.
- Baking soda
- Water
- Clean cloth or soft-bristle brush
Step 1: Create the Baking Soda Paste
To start, I take about 1 tablespoon of baking soda and add just enough water to create a thick paste. The consistency should be similar to toothpaste; not too runny, so it can stay on the ammonia spot without dripping off.
Step 2: Test the Paste on the Wood
Before applying the paste to the entire stain, I always test it on a small, inconspicuous area of the wood. This is to ensure that the baking soda won’t harm the finish or color of the wood. After applying a small amount, I wait for a few minutes, then wipe it off and check for any adverse effects.
Step 3: Apply the Baking Soda Paste to the Ammonia Spot
Once I’ve confirmed the paste won’t damage the wood, I apply it directly to the ammonia stain, using a clean cloth or soft-bristle brush, I apply the baking soda paste liberally over the entire ammonia stain, ensuring full coverage. I try to make the paste layer at least 1/4 inch thick.
I gently rub the paste into the stain in a circular motion. This helps the mild abrasive nature of the baking soda to lift the stain from the wood. It’s important to be gentle to avoid scratching the wood’s surface.
Step 5: Allow the Paste to Sit
After rubbing the paste in, I let it sit on the stain for about 30 to 60 minutes. This gives the baking soda time to absorb and neutralize the ammonia, which can help lift the stain out of the wood. As it dries, it will turn white and powdery. Drying allows it to fully neutralize the ammonia.
Step 6: Wipe Away the Paste
Using a damp cloth, I carefully wipe away the baking soda paste. I’m careful to remove all of the paste, as any residue left on the wood could attract moisture or cause further staining. I take care not to scrub too aggressively on delicate wood.
Step 7: Rinse with Clean Water
After removing the paste, I take a clean, damp cloth and lightly rinse the area to ensure no baking soda remains on the wood. Again, I’m careful not to oversaturate the wood to prevent water damage. I rinse with clean water to remove all traces of the paste.
Step 8: Dry the Wood Thoroughly
Immediately following the rinse, I use a dry, soft towel to thoroughly dry the area. It’s crucial to remove all moisture to prevent swelling, warping, or further damage to the wood. I blot gently rather than rub to avoid any potential for scratching the wood’s surface.
Step 9: Assess the Stain and Repeat if Necessary
After the wood is dry and buffed, I assess the stain. If it is still visible, I may repeat the process, being careful not to overdo it and cause damage to the wood. If the stain persists after a second application, I consider alternative methods, such as using a wood bleach or consulting with a professional for more severe cases.
Step 10: Apply Wood Conditioner or Finish if Needed
If the wood’s finish appears dull or damaged after the stain removal process, I may apply a wood conditioner or reapply a matching finish to restore the wood’s protective layer and aesthetic appeal.
Once the stain is removed, I do some very light sanding followed by applying new stain and finish coats as needed to restore the wood’s appearance.
Using Lemon Juice
- Fresh lemons for squeezing
- Cotton ball or soft cloth
- Baking Soda
- Pinch of Salt
Step 1: Prepare the Lemon Juice Solution
I start by squeezing fresh lemon juice to ensure I’m using a pure and strong solution. I avoid bottled lemon juice as it may contain additives that could affect the wood. If the stain is large or I’m treating multiple areas, I make sure to have enough juice on hand.
Step 2: Test the Lemon Juice on the Wood
Before applying the lemon juice to the stained area, I test it on an inconspicuous spot. Natural wood finishes can react differently to acidic substances, so this step is crucial to avoid causing more damage. I apply a small amount of lemon juice, wait a few minutes, then wipe it off to check the result.
Step 3: Apply the Lemon Juice to the Stain
If the test spot shows no adverse reaction, I proceed by applying lemon juice directly to the ammonia stain. I use a cotton ball or soft cloth to dab the juice onto the wood, ensuring the entire stain is covered but avoiding over-saturation.
Step 4: Allow the Lemon Juice to Work
After application, I let the lemon juice sit on the stain for a few minutes. The acid in the lemon juice works to gently bleach the stain. For a more potent effect, I sometimes sprinkle a bit of salt onto the lemon juice before it dries, as salt can act as a mild abrasive and help lift the stain.
Once the lemon juice has had time to penetrate the stain, I use a damp cloth to wipe it away. I’m careful to remove all traces of lemon juice and salt to avoid attracting moisture or leaving residue.
Step 6: Rinse and Dry the Wood Surface
Next, I rinse the area with a clean, slightly damp cloth to ensure no lemon juice remains on the wood. It’s important to be gentle and not to use too much water, which could damage the wood.
Immediately after rinsing, I thoroughly dry the area with a soft, clean towel. Wood can warp or discolor if left damp, so I make sure no moisture is left behind.
Step 7: Evaluate the Stain Removal
After the wood is dry and buffed, I assess the effectiveness of the lemon juice treatment. If the stain is still visible, I may consider repeating the process, but with caution, as repeated exposure to acid could potentially damage the wood’s finish over time.
Step 8: Neutralize Any Remaining Acidity
If I’ve repeated the treatment or if I’m concerned about the wood’s reaction to the acidity, I might neutralize the area with a mild baking soda and water solution (a teaspoon of baking soda to a cup of water). I apply this gently with a cloth, then rinse and dry as before.
Step 9: Apply Wood Conditioner or Refinish if Necessary
Depending on the wood’s finish and the severity of the original stain, it might be necessary to apply a wood conditioner or reapply a finish to the treated area to match the rest of the piece. This helps to seal the wood and restore its protective layer.
| Cleaning Solution | Ingredient Ratio | Best Used For | Precautions |
|---|---|---|---|
| Vinegar Solution | 1:1 vinegar to water | Light to moderate stains | Test for finish compatibility |
| Baking Soda Paste | To form a paste | Stubborn surface stains | Rinse thoroughly after use |
| Hydrogen Peroxide | Direct application | Deep stains and bacteria | Spot test to avoid bleaching |
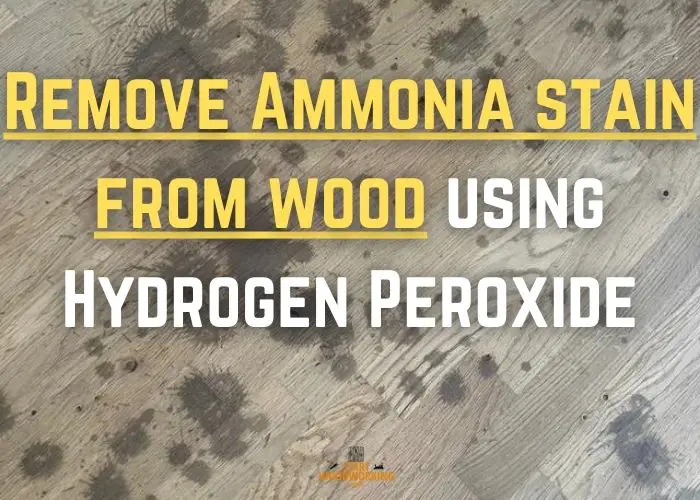
Remove Stubborn Ammonia Stains using Hydrogen Peroxide
- 3% hydrogen peroxide solution
- Cotton swab
- Mild detergent
- Clean cloth
- White cloth
- Wood conditioner or polish
- Water
- White vinegar
- Fine-grit sandpaper
Step 1: Choose the Right Hydrogen Peroxide
I use a 3% hydrogen peroxide solution, which is commonly available and safe for use on most wood surfaces. Higher concentrations can be more aggressive and may damage the wood or its finish.
Step 2: Test the Hydrogen Peroxide on the Wood
Before applying hydrogen peroxide to the stained area, I always test it on a hidden part of the wood to ensure it doesn’t cause damage or discoloration. I apply a small amount with a cotton swab, wait for it to dry, and observe any changes.
Step 3: Clean the Wood Surface
Before treating the stain, I clean the wood surface to remove any dirt or grime. This helps the hydrogen peroxide to work directly on the stain without interference. I use a mild detergent diluted in water, wipe the surface gently with a soft cloth, and then dry it thoroughly.
Step 4: Apply Hydrogen Peroxide to the Stain
Using a clean cloth or a cotton ball, I apply hydrogen peroxide directly onto the ammonia stain. I take care not to saturate the wood, as excessive moisture can cause damage.
Step 5: Cover the Stain with a Clean Cloth
After applying hydrogen peroxide, I cover the stained area with a clean, white cloth to prevent evaporation and to keep the area moist. This allows the hydrogen peroxide to penetrate the stain more effectively.
Step 6: Allow Time for the Hydrogen Peroxide to Work
I leave the cloth in place and let the hydrogen peroxide sit on the stain for several hours, or even overnight. The time needed can vary depending on the severity of the stain and the type of wood.
Step 7: Remove the Cloth and Check the Stain
After the waiting period, I remove the cloth and check the progress. If the stain has lightened or disappeared, I gently wipe the area with a damp cloth to remove any residue.
Step 8: Dry the Wood Completely
Immediately after wiping the area clean, I dry the wood thoroughly with a soft towel. It’s important to ensure that no moisture remains on the wood’s surface, as this could lead to further damage or warping.
Step 9: Repeat the Process if Necessary
If the stain is still visible after the first application, I may need to repeat the process. I apply a fresh amount of hydrogen peroxide, cover it again with a clean cloth, and allow it to sit. However, I am always cautious with multiple applications to avoid over-bleaching or damaging the wood.
Step 10: Neutralize the Treated Area
Once the stain removal is successful, I sometimes neutralize the area by wiping it down with a damp cloth that’s been dipped in a mixture of water and a small amount of white vinegar. This step ensures that any residual hydrogen peroxide is neutralized, which could otherwise continue to affect the wood over time.
Step 11: Assess the Wood’s Finish
After the stain has been treated and the area neutralized, I check the wood’s finish. If the hydrogen peroxide has lightened the finish or if it appears uneven, I may need to sand the area lightly with fine-grit sandpaper and reapply a matching finish to restore the original appearance of the wood.
Step 12: Apply a Wood Conditioner or Polish
To replenish the natural oils in the wood and to give it a protective shine, I apply a wood conditioner or polish, following the manufacturer’s instructions. This helps to seal the wood and protect it from future stains and damage.
Preventing Future Ammonia Stains on Wood
- Immediate Cleaning: I always wipe up spills immediately with a clean, dry cloth to avoid seepage into the wood.
- Use of Coasters and Mats: To protect from accidental spills, I place coasters under beverages and mats under vases or plant pots.
- Proper Chemical Storage: I ensure chemicals like ammonia are stored securely and away from wood items to prevent accidental spills.
- Regular Maintenance: I clean my wood surfaces with a damp cloth and mild detergent, then dry them promptly to maintain the integrity of the wood.
- Surface Sealants: I apply a high-quality sealer or varnish to create a protective barrier against potential stains.
- Avoid Direct Application: When using ammonia-containing products, I avoid direct application to the wood and ensure adequate ventilation.
- Furniture Pads: I affix felt pads underneath furniture legs to avoid scratches that could make the wood more vulnerable to stains.
- Optimal Humidity: I monitor humidity levels; too much moisture can compromise the protective finish.
When to Call a Professional
As an experienced woodcare professional, I’ve seen first-hand how expert intervention can revitalize and save wood pieces that otherwise might have been considered beyond repair.
If you’re facing a wood stain scenario that goes beyond surface-level, it’s time to consider when to seek professional help. This is especially true for antique or high-value wood pieces where any mistake could devalue the item.
Professionals are equipped with tools and products not typically available to the consumer, providing a level of treatment that’s hard to match at home.
| Scenario | DIY Approach | Professional Intervention |
|---|---|---|
| Light Surface Stains | Home remedies and over-the-counter cleaners | Not typically necessary |
| Deep Penetrative Stains | Preliminary cleaning with gentle products | Recommended for expert re-finishing |
| Antique Wood | Surface dusting and careful cleaning | Essential to maintain historical integrity |
| Large Spill Areas | Immediate blotting and surface treatment | Advise if stains persist or wood warps |
To eliminate discoloration caused by ammonia on wooden cabinets, consider using a wood bleach like oxalic acid following the manufacturer’s instructions. Always ensure the area is well-ventilated and wear protective equipment, as wood bleach can be hazardous.
Urine stains, which often contain ammonia, may require a two-step process for extraction from hardwood floors. Begin by applying a hydrogen peroxide-based cleaner and follow up with sanding and refinishing if the stain has penetrated deeply.
A professional wood restorer or a furniture specialist who has experience with stain removal and wood surface treatment would be the best option to consult for stubborn ammonia-related wood stains.