
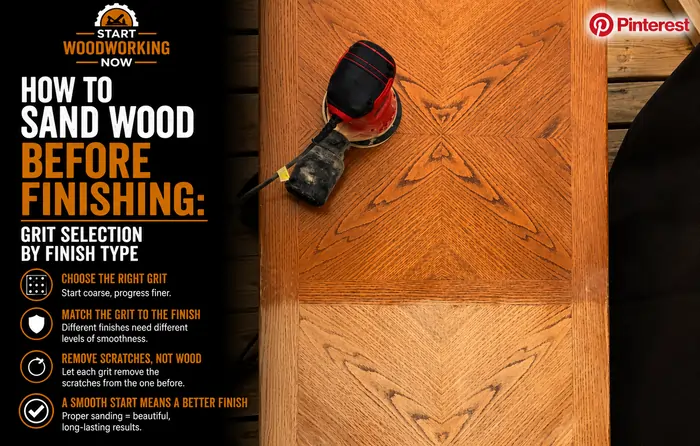
How to Sand Wood Before Finishing: Grit Selection by Finish Type
Part of Wood Finishing Guide → Surface preparation
Sand to 150-grit for penetrating stains and oils; 180–220-grit for film finishes like polyurethane — never finer. Sanding past these ceilings burnishes the surface, closing the pores that penetrating products need. Film finishes don’t penetrate, so a slightly textured surface actually helps them grip. The two categories need opposite treatment.
→ Staining specifically? The full 150-grit rule and species-by-species detail lives in how to apply wood stain. This guide covers grit selection across ALL finish types, plus the mechanisms that make the rule true.
What Grit Should You Sand to Before Finishing?
The correct final grit depends on whether the finish needs to penetrate the wood or just bond to its surface — two fundamentally different jobs that want opposite surface conditions. Penetrating products (oil-based and water-based stain, tung oil, danish oil, hardwax oil) need open, uncollapsed pores to soak into — sand past 150–180-grit and you start sealing those pores shut before any product touches the wood. Film-forming products (polyurethane, varnish, lacquer, shellac) don’t penetrate the same way — they need a surface with enough microscopic texture for the film to mechanically key into, so 180–220-grit is fine and a touch of texture is actually helpful, not harmful.
This is why the “sand to 220 for a smooth finish” instinct is right for film finishes and wrong for stains and oils — it’s not one universal rule, it’s two rules that happen to overlap in the low grits.
Why Sanding Too Fine Backfires — The Burnishing Mechanism
Sandpaper finer than the correct ceiling doesn’t just smooth the wood — it compresses and polishes the cell walls at the surface, physically closing the microscopic pores that a penetrating product needs to enter. The wood looks and feels smoother, but that smoothness comes at the cost of absorbency: burnished wood accepts 60–80% less stain or oil than correctly prepared wood, producing light, blotchy, resistant patches that no amount of extra product or application technique fixes afterward — because the problem isn’t on the surface, it’s that the pores underneath are already sealed. The full burnishing mechanism, species risk levels, and the fix if it’s already happened are covered in why is my wood stain blotchy.
Film Finishes Are the Exception
Burnishing is a problem for penetrating products because it blocks absorption — but film finishes don’t absorb, they bond to the surface. A finer, more polished surface doesn’t hurt a film finish’s adhesion much on bare wood; what film finishes actually need is a mechanical key, which is why the concern shifts entirely between coats (see below) rather than during initial prep.
Why Does Grain “Raise” After the First Coat?
Sanding cuts wood fibers rather than removing them cleanly — the cut ends stay compressed flat against the surface until they contact water or solvent, which swells the fibers and makes them stand up as a rough, fuzzy texture. This happens with the first coat of almost any finish that contains water or enough solvent to wet the fibers — water-based stain and polyurethane are the most dramatic, but even oil-based products can cause a milder version. The fibers were always going to stand up eventually; the only question is whether it happens in a controlled way before finishing or an uncontrolled way after.
The standard fix is to raise the grain deliberately, then sand it off, before applying the finish: wipe the bare, sanded wood with a clean, barely-damp rag (not soaking wet), let it dry completely (usually a few hours), then knock down the raised fuzz with a fine grit — 220 for stain-bound wood, matching your final prep grit for film-finish wood. This pre-raises and removes the fibers that would otherwise stand up unevenly once the actual finish goes on, giving a smoother result with no surprise texture after the first coat.
Sanding Between Coats vs Initial Prep — Two Different Jobs
Initial prep sanding controls porosity — how much product the bare wood absorbs. Between-coat sanding controls adhesion — how well the next coat grips the cured layer beneath it. These are opposite concerns, and confusing them leads to either over-cautious prep (worrying about “sanding too much” between coats, when the wood’s porosity is already irrelevant) or under-prepared recoats (skipping the scuff-sand because “it’s already smooth”).
Once the first coat of a film finish has cured, the wood’s original pore structure no longer matters — everything from that point happens on top of an already-sealed surface. What matters between coats is purely mechanical: a very light scuff with fine grit (320–400) or a fine synthetic abrasive pad creates microscopic scratches for the next coat to physically grip. Skip this step and a technically “smooth” surface can actually adhere worse, because there’s nothing for the new coat to key into — full detail on timing and technique in how to apply polyurethane.
Sanding a fully cured finish AFTER application — to level brush marks or dust nibs, or to prep for buffing — is a third, separate job with its own grit progression and wet-vs-dry technique, covered in wet sanding supplies and technique.
Quick Reference: Grit Ceiling by Finish Type
| Finish Type | Max Grit (Initial Prep) | Why |
|---|---|---|
| Oil-based stain | 150-grit | Needs open pores to absorb pigment |
| Water-based stain | 150-grit + raise grain | Same absorption need + fiber swelling |
| Penetrating oils (tung, danish, hardwax) | 150–180-grit | Needs open pores to soak in and cure within the wood |
| Polyurethane / varnish / lacquer | 180–220-grit | Bonds to surface — texture aids mechanical grip |
| Between any two coats of a film finish | 320–400-grit (scuff only) | Porosity irrelevant — pure mechanical adhesion key |
Sanding generates the exact contaminant the next step cannot tolerate, and wiping the surface does not remove what is still airborne. How long that dust takes to settle, and what changes with active filtration, is covered in dust control before finishing.
Absorption differences at end grain — which behaves differently from face grain regardless of prep grit — are covered in finishing end grain. If the wood was recently brought in from a different environment, confirm it’s acclimated before sanding — moisture content affects how the surface responds, detailed in does wood need to acclimate before finishing.
Sanding and finishing want opposite conditions in the same room, and the separation between them — physical, or by time — decides how much of the dust you just made ends up in the film. Covered in keeping sanding and finishing zones apart.
Frequently Asked Questions
Can I skip raising the grain and just sand extra fine instead?
Not reliably — sanding extra fine without wetting first burnishes the surface (see above) rather than removing the fibers that will later swell. The raise-then-sand sequence is the only method that removes the actual fibers responsible for the roughness, rather than just flattening them temporarily.
Does the grit ceiling change by wood species?
The mechanism is the same across species, but risk varies — dense, closed-grain woods like maple and cherry burnish faster and at lower grits than open-grain woods like oak and ash. Species-specific grit recommendations for staining are in the wood stain blotching guide.
Do I need to raise the grain before oil-based stain, not just water-based?
Less critical, but still worth doing — oil-based products swell fibers less dramatically than water, but a light pre-raise still produces a smoother final result, especially on softer or more porous species.
What grit should I use for the very first pass on rough-sawn lumber?
Start well below the finishing ceiling — typically 80 or 100-grit to remove mill marks and true the surface — then progress through the intermediate grits (120, 150) before stopping at the finish-appropriate ceiling above. Skipping grits leaves deeper scratches that the finer paper can’t remove in reasonable time.