
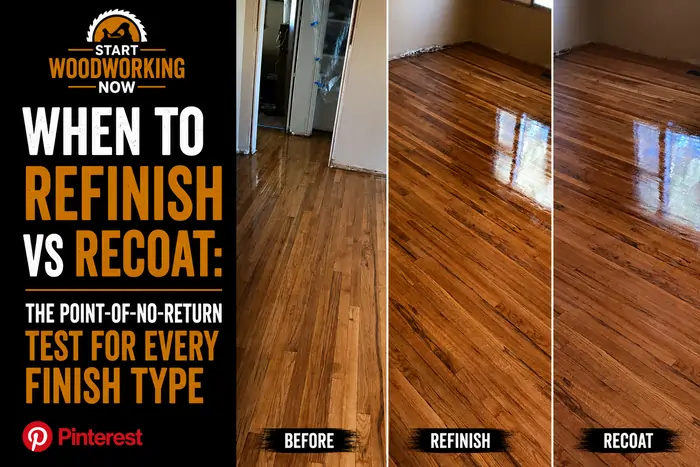
When to Refinish vs Recoat: The Point-of-No-Return Test for Every Finish Type
Recoating is faster, cheaper, and far less disruptive than full refinishing — but it only works before the existing finish crosses a specific, measurable threshold, and that threshold is different for every finish type but follows the same underlying logic in every case. The mistake that costs people the most money is not choosing the wrong option deliberately — it’s waiting too long to check, letting wear progress past the point where recoating was still viable, and ending up forced into a full refinish that proactive maintenance would have avoided entirely.
This article is part of the wood finishing guide — covering finish selection, application, troubleshooting, and finish behaviour over its full lifecycle.
Navigate to your question
→ What’s actually different between recoating and refinishing? → Two completely different scopes of work, not degrees of the same thing ↓
→ How do I know which one my furniture or floor needs? → The universal point-of-no-return test ↓
→ What are the real cost, time, and disruption differences? → A side-by-side comparison with realistic numbers ↓
→ What’s the specific threshold for my finish type? → Polyurethane, shellac, and oil — each with a different test ↓
→ When is refinishing unavoidable no matter what? → The signs that mean recoat will fail regardless of finish type ↓
What’s Actually Different Between Recoating and Refinishing
Recoating means adding new finish material on top of the existing, intact finish — with light surface preparation (a scuff sand, a cleaning pass, or in some cases nothing at all) but no removal of the existing film down to bare wood. Refinishing means removing the existing finish entirely — through sanding or chemical stripping — and starting the finish build from bare wood, exactly as in original application.
These are not two points on the same spectrum of “how much work” — they are categorically different scopes of work with different tools, different time requirements, and different prerequisites. Recoating depends entirely on the existing finish being in a condition that allows the new material to bond successfully to it. Refinishing has no such dependency, because it removes the variable entirely by starting from bare wood. This single distinction is why the diagnostic test below matters more than any other factor in the decision.
The judgment gets easier when the surface answers for itself. A cross-hatch adhesion test on an inconspicuous area tells you in ten minutes whether the existing film still holds, which is the variable most of this decision rests on — the strip or recoat tool works through that test and the four conditions around it.
The Universal Diagnostic — Finding the Point of No Return
Every finish category covered in this guide — polyurethane, shellac, oil — has its own specific test for whether recoating remains viable, detailed in the finish-specific section below. But all of these specific tests are variations on the same underlying question: does the existing finish still have the structural and chemical integrity needed for new material to bond to it successfully?
The Raking Light Inspection
Before any finish-specific testing, a simple visual inspection under raking light (a flashlight or work light held at a low angle to the surface, rather than overhead lighting) reveals the condition of the existing finish more reliably than overhead inspection alone. Raking light makes lifted, delaminated, or unevenly worn areas visible as shadows and highlights that are easy to miss under normal lighting — the same principle covered in the wood finish sheen guide regarding how lighting angle affects defect visibility.
Run this inspection across the entire surface, paying particular attention to high-traffic areas, edges, and any spots where previous spills or water exposure occurred. The presence and extent of visible delamination, cloudiness from beneath the surface, or bare-wood wear-through determines which path is available before any finish-specific chemical test is even needed.
The Cumulative Damage Threshold
Beyond the binary question of whether any failure exists, the extent of failure matters. A small area of isolated damage — a single scratch, one water ring, a corner with light wear-through — is well within the range where targeted spot repair or localized recoat is the efficient choice. As damage accumulates across the surface, there is a practical threshold, generally in the range of 15–20% of total surface area, beyond which the cumulative time and material cost of addressing each damaged area individually exceeds the cost of simply refinishing the whole piece. This threshold was established specifically for film-forming finishes in the film-forming vs penetrating finishes guide covering failure modes and repair scope, and the same practical logic applies across finish types even though the specific repair mechanism differs.
Recoat or Refinish — Decision Flow
① Inspect under raking light
Any delamination, cloudiness from beneath, or bare-wood wear-through across multiple areas?
NO failures →
Check the finish-specific recoat test. If it passes → RECOAT / REFRESH
YES failures →
Recoat will fail over compromised areas → FULL REFINISH
② Check cumulative damage extent
Under ~15-20% of surface damaged → spot repair / recoat. Over that → refinishing is more efficient than cumulative spot repairs.
Cost, Time, and Disruption — The Real Trade-Offs
The decision between recoating and refinishing is ultimately a resource allocation question, and the differences are substantial enough to justify proactive maintenance specifically to preserve the recoat option for as long as possible.
| Factor | Recoat / Refresh | Full Refinish |
|---|---|---|
| Time (typical floor, one room) | 1 day, often usable same day or next | 3–5 days including cure time |
| Dust and disruption | Minimal — light scuff sanding only | Significant — full sanding generates heavy dust |
| Material cost | Low — one topcoat application | Higher — full build-up of multiple coats |
| Labor cost (if hired) | Roughly 30–50% of full refinish cost | Full cost — sanding, stripping, multi-coat build |
| Furniture/room downtime | Hours to one day | Several days; room often unusable |
| Result if condition allows it | Visually equivalent to refinish in most cases | Equivalent, plus option to change colour/sheen |
The practical implication is straightforward: any maintenance practice that extends the window during which recoating remains viable — proactive cleaning, prompt spill response, felt pads, avoiding wax and silicone contamination — pays for itself directly in avoided refinishing cost and disruption. This is the core argument for the maintenance practices covered across this entire cluster, not maintenance for its own sake but maintenance specifically as a strategy to preserve the cheaper option for as long as possible.
The Specific Threshold for Each Finish Type
While the underlying logic is the same across finishes, the specific test for whether recoat remains viable differs by finish category because each polymer chemistry fails in a different way.
Polyurethane and Other Thermoset Film Finishes
For polyurethane, the threshold is adhesion integrity: screen-and-recoat works only if the existing film has no areas of delamination, no wax or silicone contamination, and sufficient remaining thickness that scuff-sanding does not cut through to bare wood. The detailed adhesion test, the screen-and-recoat process itself, and the specific damage that disqualifies the recoat option (UV oxidation depth, wax buildup history) are covered in the polyurethane maintenance guide covering the screen-and-recoat decision in detail. The repairability paradox that makes this threshold particularly unforgiving for thermoset finishes — no re-dissolution is possible once the crosslinked network is established — is the underlying chemistry explained in the thermoplastic vs thermoset finishes guide.
Shellac
For shellac, the threshold is almost always reversible because of re-amalgamation: fresh shellac dissolves and fuses with the existing film on contact, meaning the “point of no return” for shellac recoating is reached far less often than for thermoset finishes. The only common disqualifying condition is wax contamination from furniture polish, which blocks the alcohol-driven re-amalgamation that recoating depends on. The full detail on this threshold, including how to test for and remove wax contamination before attempting a recoat, is in the shellac maintenance guide.
Penetrating Oil Finishes
For oil finishes, the relevant threshold is less about whether recoating is possible — fresh oil bonds to existing cured oil through oxidative re-bonding almost universally — and more about whether the wood has reached its saturation point, where additional oil sits unabsorbed on the surface rather than penetrating and providing renewed protection. This is a different kind of limit than adhesion failure: it’s a capacity limit of the substrate rather than a failure of the existing finish. The full diagnostic for saturation and the correct response are in the oil finish refresh guide.
When Refinishing Is Unavoidable — Regardless of Finish Type
Functional Failure vs Aesthetic Preference
Before committing to a full refinish, it’s worth separating two distinct motivations that often get blended together in the decision: the finish has genuinely failed (functional refinish) versus the existing finish is intact and functioning but you simply want a different look (aesthetic refinish). These call for different decision logic entirely.
A functional refinish is justified by the diagnostic criteria throughout this guide — delamination, wear-through, contamination that blocks recoat options. An aesthetic refinish — wanting a different sheen, a different colour, or simply tired of the current look — has nothing to do with whether the existing finish has failed and is a purely discretionary decision. There is no wrong answer for an aesthetic refinish, but it’s worth recognising that if the only motivation is appearance and the existing finish is structurally sound, a recoat with a different sheen level (covered in the wood finish sheen guide) or a different colour topcoat compatible with the existing system can sometimes achieve the desired change without the full cost and disruption of complete refinishing.
Signs That Mean Refinishing Is Required, Not Optional
Several conditions reliably indicate that recoating — regardless of finish type — will not produce a satisfactory or lasting result, and proceeding directly to refinishing saves the time and material that would otherwise be spent on a recoat attempt likely to fail:
- Bare wood exposure across more than isolated spots. Once wear has progressed to expose raw wood across a meaningful portion of the surface — not just at one or two contact points — the substrate itself has been exposed to moisture, dirt, and UV in ways that uneven recoating cannot correct evenly.
- Structural moisture damage. Cupping, warping, or staining at board seams or panel joints from water penetration indicates damage to the wood itself, not just the finish. Recoating does nothing to address this — the wood requires drying, and in some cases board or panel replacement, before any new finish application makes sense.
- Multiple incompatible finish layers. Furniture with a history of mixed maintenance — wax over polyurethane over an older shellac layer, for example — often cannot be successfully recoated because no single new product will bond reliably across all the underlying layers. Full stripping to bare wood resets this complexity entirely.
- Desire to change finish type entirely. Switching from an oil finish to a film-forming finish, or from a dark stain to a natural look, generally requires full stripping and refinishing rather than recoating, since the existing finish type and colour cannot simply be coated over without addressing the underlying material first.
For scratches and minor damage that don’t meet any of these refinish-mandatory criteria, the targeted repair techniques covered in the polyurethane scratch repair guide remain the more efficient choice.
Both routes assume the surface is genuinely clean first. Incorrect cleaning is itself a common reason a finish looks worse than it is, and a surface that only needs washing does not need refinishing — see how to clean and maintain finished wood.
Frequently Asked Questions
Can I screen-and-recoat a floor that has some areas of bare wood wear-through?
Only if the bare-wood areas are small and isolated — they can sometimes be spot-treated with stain matching and a sealer before the overall scuff-and-recoat proceeds. If bare-wood wear-through covers a meaningful portion of the traffic pattern (more than a few isolated spots), the new topcoat will not adhere evenly across the mix of bare wood and existing finish, and full refinishing produces a far more even, durable result.
Is it cheaper in the long run to refinish proactively before damage accumulates?
No — proactive recoating (screen-and-recoat, oil refresh, shellac touch-up) before damage reaches the point-of-no-return threshold is consistently cheaper and less disruptive than either proactive full refinishing or reactive full refinishing after damage accumulates. The strategy that minimises lifetime cost is monitoring condition with the diagnostic tests in this guide and recoating at the right moment — neither too early (wasting a recoat cycle unnecessarily) nor too late (missing the window and being forced into a full refinish).
My furniture has multiple finish layers from past repairs — can I still recoat it?
It depends on what the layers are and how they were applied. If all layers are compatible (for example, multiple coats of the same polyurethane product applied correctly over time), recoating remains viable. If the history includes incompatible combinations — wax over film finish, or unknown mixed products from different repair attempts — the unpredictability of how a new coat will interact with this stack usually makes full stripping the more reliable choice, even though it requires more work upfront.
How do I decide if I just want a different look versus actually needing to refinish?
Run the diagnostic tests in this guide first — raking light inspection and the finish-specific test for your finish type. If the existing finish passes (no delamination, no wear-through, no contamination blocking recoat), then any urge to refinish is aesthetic rather than functional, and you have the option of a lower-cost recoat with a different sheen or compatible colour topcoat instead of a full strip-and-rebuild, if the desired change can be achieved that way.