
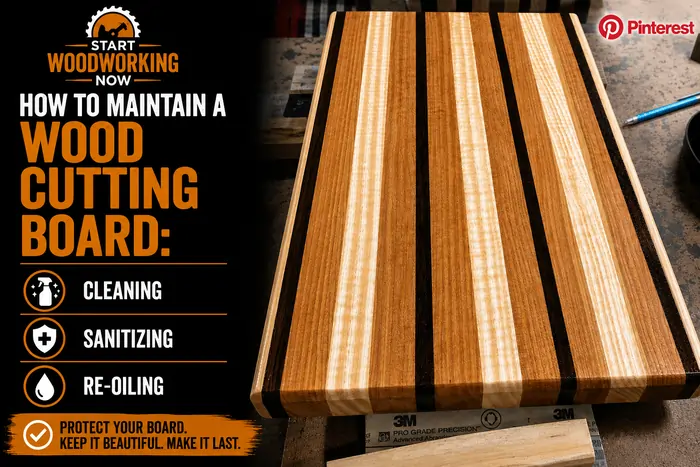
How to Maintain a Wood Cutting Board: Cleaning, Sanitizing, and Re-Oiling Without Ruining It
Wood cutting boards fail through two predictable mechanisms that have nothing to do with normal wear: mechanical damage from improper drying and cleaning methods, and a handful of widely repeated sanitizing myths that either don’t work or actively damage the board. A well-finished wood cutting board, maintained correctly, will outlast most plastic cutting boards by years — but the maintenance routine matters more for wood than for plastic, because wood responds to water and heat very differently than synthetic materials do.
This article is part of the wood finishing guide — covering finish selection, application, troubleshooting, and finish behaviour over time.
Navigate to your question
→ How should I wash and dry my cutting board day to day? → The correct routine and why drying position matters ↓
→ Why does the dishwasher ruin wood cutting boards? → The mechanical warping mechanism — not just “drying out” ↓
→ How do I actually sanitize a wood board safely? → What works, what’s a myth, and why wood resists bacteria naturally ↓
→ How often should I re-oil — and how do I know when? → Frequency by board type and grain orientation ↓
→ How do I deal with knife marks, odor, and stains? → Why knife cuts mostly self-seal, and the salt-and-lemon method ↓
How to Wash and Dry Your Cutting Board Day to Day
Daily cleaning for a wood cutting board is simple: wash with warm water and a small amount of mild dish soap, using a sponge or soft brush, immediately after use. The key difference from plastic cutting board care is what happens after washing — wood needs deliberate drying, not just air exposure.
Stand the board upright or on its edge to dry rather than laying it flat on a counter or in a drying rack horizontally. A board lying flat dries unevenly — the bottom surface, in contact with the counter or rack, retains moisture significantly longer than the exposed top surface. This uneven drying is a smaller-scale version of the same differential moisture mechanism that causes the more dramatic warping covered in the next section, and over months of repeated flat-drying, it contributes to a board developing a slight permanent cup or bow even without ever touching a dishwasher.
Never leave a wood cutting board submerged or sitting in standing water in the sink, even briefly while you finish other dishes. Prolonged direct water contact begins to compromise the oil finish’s surface protection well before any structural damage occurs, accelerating the depletion that eventually calls for a re-oiling refresh.
Why Dishwasher and Soaking Ruin Wood Cutting Boards
The common explanation — “the dishwasher dries out the wood” — is not technically accurate and misses the actual mechanism, which is mechanical rather than simply a loss of moisture.
The Differential Moisture Cycling Mechanism
Wood is hygroscopic — it absorbs and releases moisture in response to its environment, and it does so at different rates depending on grain orientation, exactly as covered in the context of seasonal wood movement under film finishes.
A dishwasher cycle exposes a cutting board to rapid, intense moisture absorption during the wash and rinse phases, followed by rapid, intense moisture loss during the heated dry cycle — a moisture swing far more extreme and far faster than anything the board experiences in normal hand-washing and air-drying.
Because different parts of the board’s grain structure absorb and release this moisture at different rates — end grain absorbs and releases moisture considerably faster than face or edge grain, due to its exposed cell openings — the board’s various surfaces expand and contract out of sync with each other during a single dishwasher cycle.
This differential movement, repeated across just a few dishwasher cycles, is what produces the visible warping, cupping, or in more severe and repeated cases, splitting along the grain that dishwasher-washed wood boards commonly develop. It is a mechanical stress failure from uneven dimensional change, not simply a case of the wood “drying out” in the sense of losing beneficial oils.
Why Soaking Has the Same Effect in Reverse
Soaking a board in a sink or letting it sit in standing water produces the same differential moisture problem from the opposite direction: rapid, uneven moisture absorption that swells different grain orientations at different rates. A board soaked on one side (resting in a sink with water pooling against its bottom face) while the top surface remains comparatively dry develops the same kind of internal stress that leads to warping, even without the added heat of a dishwasher’s dry cycle. This is precisely why the cleaning guidance above specifies prompt washing and immediate, deliberate drying rather than letting a board sit wet for any extended period.
How to Actually Sanitize a Wood Board Safely
Wood’s Natural Antibacterial Properties — Not a Myth
It is a commonly repeated but genuinely accurate fact that wood cutting boards are not the bacterial hazard that intuition suggests compared to plastic. Research on bacterial survival on cutting board materials has found that bacteria deposited on wood surfaces die off significantly faster than the same bacteria deposited on plastic surfaces, even when the wood surface is not scrubbed immediately. The mechanism is attributed partly to the natural antibacterial and antimicrobial compounds present in wood extractives — including some of the same tannin and phenolic compounds covered in the context of wood chemistry elsewhere in this guide — and partly to wood’s capillary structure, which draws moisture (and the bacteria suspended in it) down into the wood’s interior, away from the surface where contact transfer to food would occur.
This does not mean wood boards require no sanitizing — it means the baseline risk profile is better than commonly assumed, and aggressive sanitizing methods aimed at “sterilizing” the surface are addressing a smaller problem than people think while potentially causing more practical damage to the board than the bacterial risk they’re meant to solve.
What Actually Works
For routine sanitizing beyond normal soap-and-water washing — particularly after cutting raw meat or poultry — a light scrub with a paste of coarse salt and the cut side of a lemon is effective and safe for the finish.
The salt provides mild mechanical abrasion that lifts residue and bacteria from the wood’s surface pores without being aggressive enough to damage a properly cured oil finish, while the citric acid in the lemon provides mild antibacterial action and helps lift light staining at the same time. Rinse thoroughly and dry upright as described above.
A diluted hydrogen peroxide solution (3% concentration, applied and left for several minutes before rinsing) is another option specifically recommended after handling raw meat, providing genuine antibacterial action without the corrosive or moisture-stress problems of other methods.
Myths to Avoid
Soaking the board in a vinegar solution is widely recommended online but is not particularly effective as a sanitizing method against the bacteria of greatest concern (vinegar’s antibacterial action is real but limited against certain pathogens), and the soaking itself introduces the same differential moisture stress covered above — the sanitizing benefit, such as it is, is offset by mechanical risk to the board’s structural integrity.
A quick vinegar wipe-down (not a soak) avoids the moisture stress while providing what limited sanitizing benefit vinegar offers.
Bleach solutions, even diluted, should be avoided on oil-finished wood boards — bleach is far more aggressive than necessary given wood’s natural antibacterial properties, and repeated bleach exposure can degrade the cured oil finish and, over time, affect the wood’s natural colour and surface integrity in ways that are difficult to reverse.
How Often to Re-Oil — and How to Know When It’s Needed
Cutting boards experience faster oil depletion than almost any other oil-finished wood surface in normal household use, because the combination of frequent washing, knife contact, and direct food contact removes surface oil more aggressively than the light dusting and occasional cleaning that furniture experiences.
Frequency by Use and Grain Type
A cutting board used daily for food preparation typically needs re-oiling monthly, using the water-bead test covered in the general oil refresh guide as the practical signal — when water no longer beads on the surface and instead darkens the wood on contact, the board is due.
End grain cutting boards (where the wood fibres are oriented vertically, exposing the cut ends of the grain on the cutting surface) absorb and lose oil considerably faster than face grain or edge grain boards, because the exposed cell openings at the end grain surface provide a more direct pathway for both oil absorption during application and oil loss during use and washing. An end grain board in regular use may need re-oiling every 2–3 weeks, while an edge grain board under similar use can often go a full month or more between applications.
The Re-Oiling Process for Cutting Boards Specifically
The general process — flood the surface with food-grade mineral oil or pure tung oil, allow to penetrate, wipe off excess — follows exactly the protocol covered in the oil finish refresh guide covering the full refresh sequence, with one cutting-board-specific consideration: ensure the board is completely dry before applying oil, since residual water in the wood surface will block oil penetration at those spots.
Apply oil generously to all surfaces including the edges and underside, not just the top cutting surface, since the entire board is exposed to ambient humidity and occasional water contact even if only the top is used for cutting. Only food-grade mineral oil (USP grade specifically, not technical or industrial grade) or pure tung oil should be used — the food safety criteria and why common cooking oils are inappropriate for this purpose are covered in the food-safe wood finishes guide covering FDA criteria and product selection.
Rag disposal after oiling a board follows the same spontaneous combustion safety protocol as any oil finishing work, covered in the oil rag combustion safety guide.
For the underlying reason penetrating oil — rather than a film finish like polyurethane or varnish — is the correct choice for any cutting surface in the first place, the mechanical failure mode of film finishes under knife contact is explained in the film-forming vs penetrating finishes guide covering why knife scoring creates bacteria-harbouring channels in film finishes specifically.
Dealing with Knife Marks, Odor, and Stains
Knife Marks Mostly Self-Seal During Normal Re-Oiling
Light knife marks and scoring from normal cutting use do not require any special repair technique beyond the regular re-oiling routine. Fresh oil applied during a refresh penetrates into the wood fibres exposed by knife cuts through the same capillary absorption that drives oil penetration everywhere else on the board, effectively re-sealing minor cuts as part of routine maintenance rather than as a separate corrective step. This is one of the practical advantages of penetrating oil over film finishes for cutting surfaces — there is no film to be cut through and no separate repair process required for the wood’s normal response to knife contact.
Deeper gouges or heavily scored areas from years of heavy use can be sanded smooth (typically 120 then 220 grit, sanding with the grain) before the next oiling, which both improves the cutting surface and ensures more even oil absorption across the repaired area compared to the surrounding wood.
Odor
Lingering food odors — particularly from onion, garlic, or fish preparation — are addressed effectively with a baking soda paste (baking soda mixed with a small amount of water) rubbed into the surface, left for several minutes, then rinsed and dried. Baking soda’s mild alkalinity and absorptive properties neutralise many odor-causing compounds without the moisture stress of soaking or the aggressive chemical action of bleach.
Stains
The salt-and-lemon method covered above for sanitizing also addresses light surface staining from foods like beets or turmeric, through the same combination of mild mechanical abrasion and mild acid bleaching action. For more stubborn or set-in staining, a light sanding (220 grit) of just the stained area, followed by spot re-oiling to blend with the surrounding finish, resolves staining that surface treatments cannot fully remove.
A board needs food-appropriate cleaning rather than furniture products, which makes it the clearest exception to the general rules — set out in the standard cleaning routine for finished wood.
Frequently Asked Questions
Is it true that wood cutting boards are safer than plastic for raw meat?
Research on bacterial survival shows bacteria deposited on wood die off significantly faster than on plastic, attributed to wood’s natural antibacterial extractives and its capillary structure drawing moisture and bacteria below the surface. This doesn’t eliminate the need for proper cleaning after raw meat contact — wash promptly with soap and water, and consider a hydrogen peroxide or salt-and-lemon treatment for extra reassurance — but the underlying material is not the hazard that intuition often suggests.
My cutting board already warped slightly — can I fix it?
Mild warping can sometimes be corrected by evening out the board’s moisture content — dampen the concave (lower) side with a damp cloth and let the board sit flat with the convex side up, sometimes with light weight on top, for 24-48 hours, then dry and re-oil thoroughly on all surfaces. This works for mild warping caused by uneven moisture exposure but will not correct warping from actual wood movement due to grain orientation in a poorly constructed board, or splitting, which requires the board to be replaced.
Can I use olive oil to re-oil my cutting board if I’m out of mineral oil?
No — olive oil and other cooking oils have low iodine values and do not cure by oxidative polymerization the way drying oils do. They remain liquid within the wood indefinitely and eventually turn rancid, producing unpleasant odour and potentially supporting bacterial growth rather than providing the protective effect of a properly drying or non-drying food-safe oil. Use only food-grade mineral oil (USP grade) or pure tung oil, as covered in the food-safe wood finishes guide.
How do I know if my cutting board needs to be replaced rather than repaired?
Deep cracks or splits that go through the full thickness of the board, persistent warping that doesn’t respond to moisture-balancing correction, or extensive grooving from years of knife use that cannot be sanded out without removing most of the board’s working thickness are all signs that replacement is more practical than continued repair. Surface staining, odor, light scarring, and moderate warping are all addressable through the maintenance techniques in this guide and don’t warrant replacement on their own.