
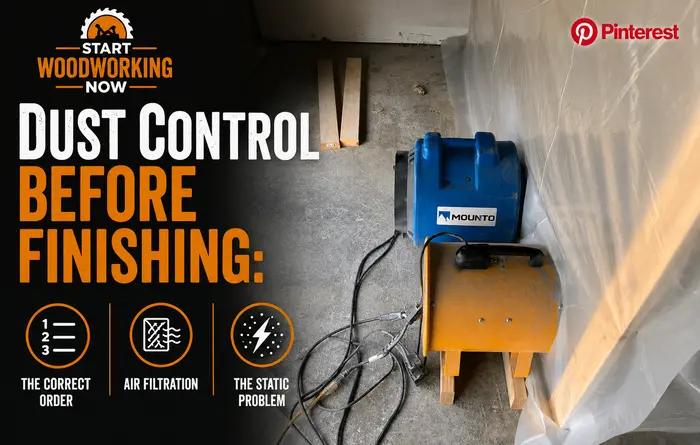
Dust Control Before Finishing: The Correct Order, Air Filtration, and the Static Problem
Dust nibs in a cured finish almost always trace back to one of three preventable causes — not enough settling time after sanding, cleaning in the wrong order, or air filtration too coarse to actually catch the fine particulate that causes nibs in the first place. Most dust control advice stops at “wipe the surface before finishing,” which misses the chemistry of why a tack cloth works, the airflow reason vacuum order matters, and the filtration math that makes a cheap box-fan air cleaner less effective than it appears.
This article is part of the wood finishing guide — covering finish selection, application, troubleshooting, and the workshop conditions that determine application quality.
Navigate to your question
→ Why does timing matter more than how hard I clean? → Settling time vs active removal — and why both are needed ↓
→ What’s the correct order — vacuum or tack cloth first? → Why skipping either step leaves dust behind ↓
→ What air filtration actually catches fine sanding dust? → MERV ratings explained — why a cheap box-fan filter often isn’t enough ↓
→ Humidity control isn’t stopping my static dust problem — what else can I do? → Antistatic tools for extreme dry conditions ↓
→ A dust nib already cured into my finish — how do I fix it without redoing everything? → Spot correction without a full re-sand ↓
Why Timing Matters More Than Effort?
Sawdust and sanding dust don’t settle instantly once airborne — and the settling rate varies dramatically by particle size, which is the detail most dust control advice skips. Coarse sawdust from sawing settles within a minute or two in still air. Fine sanding dust — particularly from 220-grit and finer work — remains suspended for considerably longer, often 30 minutes or more in a shop without active air movement, because smaller particles have proportionally more air resistance relative to their weight and fall correspondingly slower.
This means the same cleaning routine performed immediately after sanding versus 30 minutes later produces meaningfully different results, independent of how thoroughly the surface itself was wiped. A shop with good general housekeeping but no deliberate wait time after the last sanding pass will still see dust nibs, because the surface being prepared is clean while the air above it is not — and that suspended fine dust settles onto the wet finish during and after application regardless of how the surface was prepared beforehand.
The basic working rule: allow at least 30 minutes after the last sanding activity in a shop without air filtration, less with active filtration running (covered below), before beginning surface cleaning and finish application. This is the same settling principle covered at a general workshop level in the workshop setup guide covering shop layout and dust separation — this article goes deeper into the cleaning sequence and filtration specifics that determine whether that settling time is actually effective.
The Correct Order — Vacuum First, Tack Cloth After
Both vacuuming and tack-cloth wiping remove dust, but they remove different size fractions through different mechanisms, and using only one or using them in the wrong order leaves a predictable residue behind.
Vacuum Removes Bulk — But Not Everything
A vacuum with a brush attachment removes the bulk of loose sanding dust from a surface efficiently, but vacuum airflow has a practical limit on how fine a particle it reliably lifts from a surface versus simply stirring into the air near the nozzle.
A standard shop vacuum with a coarse paper or cloth bag (rather than a HEPA-rated filter bag) can also exhaust fine particulate back into the shop air through the vacuum’s own exhaust, effectively redistributing some of the fine dust it appears to be removing rather than fully containing it. A HEPA-filtered shop vacuum or a dedicated fine-filter bag meaningfully reduces this redistribution compared to a standard contractor-grade unit.
Tack Cloth Removes What Vacuum Leaves Behind
A tack cloth is not simply a damp rag — it’s a cheesecloth or similar open-weave fabric impregnated with a non-drying tackifier resin (typically a varnish-based or specialized petroleum resin formulated to stay permanently tacky rather than cure).
This resin coating catches fine dust particles through genuine adhesive contact as the cloth passes over the surface, picking up particles far smaller than a vacuum nozzle can reliably lift from a surface, including the residual fine dust a vacuum pass leaves behind even on an apparently clean surface.
A homemade substitute — a cloth dampened with water or mineral spirits — picks up some surface dust through simple physical contact but lacks the genuine tack of a manufactured tack cloth’s resin coating, and performs noticeably worse at capturing the finest particle fraction that causes the smallest, most numerous nibs in a finish. For surfaces about to receive a film-forming finish, a genuine tack cloth pass after vacuuming is worth the modest cost difference over a damp rag substitute.
Why the Order Matters
Vacuuming first removes the bulk of loose dust that would otherwise overload and quickly saturate a tack cloth’s adhesive capacity — a tack cloth wiped directly over heavy sanding dust without a prior vacuum pass picks up a load of coarse material that reduces its effectiveness at catching the fine residual particles it’s actually suited for. Tack-clothing first and vacuuming second, by contrast, risks the vacuum’s airflow disturbing and resettling some of the fine dust the tack cloth just removed, undoing part of the work. Vacuum, then tack cloth, in that order, each step doing the job it’s actually suited for.
Air Filtration — What MERV Rating Actually Catches?
A popular DIY shop air cleaner — a box fan with a furnace filter taped or clipped to the intake side — is inexpensive and genuinely helps with general shop dust, but the filter’s MERV (Minimum Efficiency Reporting Value) rating determines what size of particle it actually captures, and many shops use a filter rated too coarse for the fine sanding dust that causes finish nibs specifically.
What MERV Numbers Mean in Practice
MERV rating describes a filter’s efficiency at capturing particles across different size ranges, with higher numbers indicating capture of progressively smaller particles. A common, inexpensive MERV 8 furnace filter is effective at capturing larger dust and pollen-sized particles but has meaningfully lower capture efficiency for the sub-10-micron range that includes fine sanding dust from 180-grit and finer work — exactly the size fraction most likely to cause dust nibs in a finish.
A MERV 11 filter improves capture in this range noticeably; MERV 13 improves it further still, approaching the efficiency of filters used in respiratory protection contexts, though airflow resistance increases with filter rating, meaning a box fan may need to run at a higher setting or the filter may need more frequent replacement as it loads with finer material.
For a dedicated finishing area or for general shop air quality during heavy sanding, a MERV 11–13 filter on a box fan setup, or a purpose-built ambient air cleaner with an equivalent filter rating, meaningfully outperforms the commonly recommended MERV 8 for the specific particle size range that causes finish defects, even though MERV 8 remains adequate for general dust nuisance control.
Running Time Before Finishing
An air filtration unit running for 15–20 minutes after the last sanding pass, in addition to the passive settling time covered above, actively removes a meaningful fraction of the suspended fine particulate rather than waiting for it to settle on its own. This is particularly valuable in winter conditions or any shop without good natural air exchange, where passive settling alone takes considerably longer than the 30-minute baseline estimate.
Static Electricity — When Humidity Control Alone Isn’t Enough
The general workshop setup guide covers maintaining shop humidity around 40–50% to reduce static buildup, which is the single most effective and lowest-cost intervention for most shops. But in genuinely dry conditions — heated shops in cold winter climates, or shops in naturally arid regions — humidity control alone sometimes isn’t sufficient to eliminate the static attraction problem, and a few additional tools address the remaining static charge directly.
Ionizing Brushes and Antistatic Guns
An ionizing brush — a soft brush with a built-in static-neutralizing element, commonly used in photography and electronics work but equally applicable to finishing — neutralizes static charge on a surface by emitting ions that balance the charge as the brush passes over the workpiece immediately before finishing. A handheld antistatic gun (also called an ionizing air gun) achieves a similar effect through a stream of ionized air rather than physical brush contact, useful for surfaces with detail or texture that a brush might not reach evenly.
These tools address the charge on the workpiece itself rather than the ambient humidity that influences how readily charge builds up in the first place — they’re a targeted intervention for the specific surface about to be finished, used immediately before application, rather than a substitute for general shop humidity control.
For most home shop situations, humidity control alone resolves the bulk of the static dust problem, and these tools become worth the modest investment specifically when static-attracted dust nibs persist despite reasonable humidity management.
Grounding and Material Considerations
Plastic and synthetic materials used in the finishing area — plastic sheeting for dust barriers, synthetic drop cloths, certain synthetic brush handles — can themselves generate or hold static charge more readily than natural materials, contributing to the overall static environment around the workpiece. Where practical, natural fibre drop cloths and grounding metal equipment (spray gun bodies, metal stands) reduce one further contributing factor, though this is a secondary consideration behind humidity and direct workpiece treatment for most home shop setups.
Fixing a Dust Nib Already Cured Into the Finish
Despite good prevention practice, an occasional dust nib reaching the cured finish is common enough that knowing the correction doesn’t require redoing the whole job is worth covering directly. The fix differs meaningfully depending on whether the nib is an isolated point defect or part of a more general dusty texture across the surface.
Isolated Nibs — Local Correction
A single dust nib or a small scattered handful across an otherwise good surface is corrected with a light local pass of very fine abrasive — 600 grit or finer, used dry or with a small amount of mineral spirits as lubricant — just enough to level the raised point of the nib without cutting through the surrounding finish film. Buff lightly with a soft cloth afterward to restore sheen continuity at the corrected spot.
This is a much smaller-scale intervention than the full wet-sanding and polishing protocol used for overall surface levelling, detailed in the wet sanding polyurethane guide covering the grit progression for full-surface levelling — for a handful of isolated nibs, spot correction is faster and lower-risk than treating the entire surface.
Widespread Dusty Texture — A Broader Pattern
If the entire surface shows a fine, even dusty or gritty texture rather than isolated points, the cause is more likely systemic — inadequate settling time or filtration during the entire application session, rather than one or two stray particles. This calls for the fuller wet-sand and polish sequence rather than spot correction, and addressing the underlying dust control practices in this article before the next coat or next project, rather than treating each surface as an isolated repair case.
Differential Diagnosis — Not Every Surface Texture Issue Is Dust
A rough or textured cured finish isn’t automatically a dust problem — orange peel from spray application, blush from humidity during a water-based cure, and tip dry from incorrect spray setup all produce surface texture irregularities that can superficially resemble dust contamination.
The distinguishing factor is pattern: dust nibs are discrete, isolated raised points with a clear point-source origin under magnification or raking light, covered in the wood finish sheen guide covering raking light inspection technique, while orange peel and tip dry produce a more uniform, repeating texture across the whole surface rather than scattered discrete points. Confirming the actual cause before choosing a correction approach avoids treating a spray-setup issue as a dust issue or vice versa — the symptom in cured finish can look similar at a glance, covered for the cloudy/hazy variant specifically in the polyurethane cloudy guide covering moisture-blush versus other surface defects.
Frequently Asked Questions
Can I just use a damp cloth instead of buying a tack cloth?
A damp cloth removes some surface dust through physical contact but lacks the genuine adhesive tack of a manufactured tack cloth’s resin coating, and performs noticeably worse at capturing the finest particle fraction that causes the smallest, most numerous dust nibs. A damp cloth is better than nothing, and adequate for less critical surfaces, but for fine furniture or high-gloss work, a real tack cloth’s resin-based tack catches particles a damp cloth simply passes over.
Is a MERV 8 furnace filter on a box fan good enough for a woodworking shop?
MERV 8 is adequate for general dust nuisance control but has meaningfully lower capture efficiency for the sub-10-micron particle range that includes fine sanding dust most likely to cause finish nibs. For a dedicated finishing area, or during the cleanup period before finish application specifically, a MERV 11-13 filter captures this fine fraction considerably more effectively, at the cost of somewhat reduced airflow and more frequent filter changes.
How long should I wait after sanding before applying finish?
At least 30 minutes in a shop without active air filtration, to allow fine sanding dust to settle out of suspension. With a MERV 11+ filtration unit running, this can often be reduced to 15-20 minutes, since active filtration removes suspended particulate faster than passive settling alone. Fine sanding dust (220-grit and finer) settles considerably slower than coarse sawdust, so the wait matters most after fine sanding passes specifically.
I keep getting tiny bumps in my finish even though I vacuum and tack-cloth carefully — what am I missing?
Check whether you’re vacuuming and tack-clothing in the correct order (vacuum first to remove bulk dust, tack cloth after to catch fine residual) and whether enough settling time has passed since the last sanding activity in the shop — including sanding done by someone else at the other end of a shared space. Also confirm the bumps are genuinely dust nibs and not tip dry from spray application or another texture-producing defect, since the correction differs by cause.